Advertisement
Quick Links
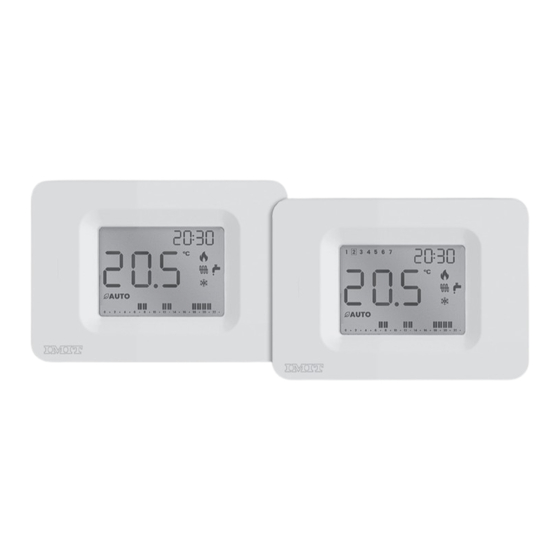
DAY/WEEK
DAY / WEEK
Wall Programable Thermostat
Daily/Weekly
IMIT CONTROL SYSTEM s.r.l.
Via Varallo Pombia,19 - Castelletto Sopra Ticino (NO)
Tel (+39)0331941600 - Fax (+39)0331973100
www.imit.it - info@controlsys.it
PRODUCT DESCRIPTION AND TECHNICAL SPECIFICATIONS
This product is manufactured according to the EN 60730-2-9, EN 60730-2-7 standards, in accordance
with the applicable EC directives and is entirely manufactured in Italy.
TECHNICAL SPECIFICATIONS
Power supply: Alkaline Batteries 2x1.5V LR6 (Type AAA)
Battery life > 1 year
ErP class = IV (-2%) in ON/OFF mode with TPI
ErP class = I (-1%) in traditional ON/OFF mode
Maximum contact capacity: 5A(1A) 250VAC
Programming: Daily/Weekly (second model)
Operation Mode: Manual / Automatic / Antifreeze
Minimum time slot programming: 0.5 h
Programming on two temperature levels
Temperature regulation range: 5.0÷35.0°C
Temperature display range: 0.0÷50.0°C
Temperature differential: adjustable from 0.1 to 2.0 K (standard 0.2 K)
Maximum ambient temperature: 50°C
Temperature probe: NTC 100KΩ@25°C
Degree of protection: IP20
Insulation class: Type II (double insulation)
Type of action: 1B
Pollution degree: 2
Software: class A
Resistance to heat and fire: Category D
Storage temperature: -25 ÷ 60°C
Type of system: Heating/Air Conditioning
Assembly: Wall-mounted
WARNING!
The installation of the programable thermostat must be performed by a qualified technician.
It is advisable to perform the installation strictly respecting the safety regulations and the
legal provisions in force. Before making any connections, ensure that the main switch is
turned off. The manufacturer is not responsible for improper use of the product.
INSTALLATION
Install the device away from heat sources and drafts, about 1.5m from the floor.
Open the device by pressing the tab on the LEFT side of the base (1), turn the front SLIGHTLY to the RIGHT (2) and
LIFT IT to release it.
1
2
Remove the inner cover over the clamps by unscrewing the retaining screw and turning the cover to the left. Fix the
base to the wall, using horizontal (A-B, A-D, A-A) or vertical (C-C) spacing.
C
A
B
D
A
C
Electrical connections
Insert the cables through the opening on the bottom and connect them to the terminal board respecting the diagram
shown on the label inside the appliance, then reposition the inner cover by screwing the relative screw back on.
Insert the batteries in the appropriate seat inside the front, respecting the correct polarity, as indicated in the figure.
TO CLOSE THE DEVICE, COUPLE THE TWO PARTS AND PRESS THE FRAME OF THE FRONT PART UNTIL THE TWO SIDE
HOOKS CLICK.
Battery replacement
When the FLASHING depleted batteries symbol appears
they must be replaced.
WHEN THE WORD "bAt " APPEARS, THE BATTERIES ARE DEPLETED AND THE SYSTEM IS LOCKED : THEY MUST BE
REPLACED IMMEDIATELY TO REACTIVATE IT.
Proceed as indicated in the installation instructions and reassemble the cover on the base before performing any
operation.
DESCRIPTION OF COMMANDS AND OPERATION
Key legend
min. 20 cm
__ __ __
MENÙ
SET
SETTINGS
AUTO/MAN/OFF OPERATION MODE
COMFORT/REDUCED TEMPERATURE SETTING
+
VALUE INCREASE
-
VALUE DECREASE
0-23
TIME PROGRAM KEYS
Day/Week DEVICE MODEL (Daily/Weekly)
Display legend
A-A=83,5mm
A-B=60mm
C-C=60mm
A-D=72mm
A CLOCK / TEMPERATURE SET
B DAY OF THE CURRENT WEEK (Week version only)
C DISPLAY BRIGHTNESS SETTING
D ROOM TEMPERATURE
E OPERATION MODE (Auto/man/OFF)
F TIME PROGRAM active
G PARAMETER SETTING
H SYSTEM IN OPERATION (Air conditioning)
I REDUCED TEMPERATURE ACTIVE
NC
L SUMMER Mode (Air conditioning)
C
M WINTER mode (Heating)
N BATTERIES DEPLETED
NO
O SYSTEM IN OPERATION (Heating)
FIRST IGNITION
When the batteries are inserted, the display momentarily displays all the segments and symbols
followed by the software version number, after which the clock setting is requested.
Clock setting
Set the format to 24H or 12H with <+ / ->, then <SET>.
• Set the time with <+/->, then <SET>.
• Set the minutes with <+/->, then <SET>.
• Set the day with <+/->, then <SET>. (only for the WEEK version)
The device is set to [OFF] mode.
Note: If the setting procedure is not correctly performed or completed within 10 minutes, the device
will be activated, displaying the flashing clock and room temperature value on the display. In this case,
for correct activation of the thermostat, the following are necessary:
• Set the time with <+/-> and confirm with<SET>.
• Set the minutes with <+/-> and confirm with<SET>.
• Set the day with <+/->, then <SET>. (only for the WEEK version)
__ __ __
+
SET
_
0
1
2
3
4
5
6
7
8
9
10
11
Week
12
13
14
15
16
17
18
19
20
21
23
24
B
A
°C
1 2 3 4 5 6 7
O
AM
C
PM
N
°C
° F
M
D
%
bar
L
E
I
F
H
0
•
2
• 4 •
6
• 8 • 10 • 12 • 14 • 16 • 18 • 20 • 22 •
G
Advertisement

Related Manuals for Imit orion DAY/WEEK


Summary of Contents for Imit orion DAY/WEEK
- Page 1 MENÙ SETTINGS AUTO/MAN/OFF OPERATION MODE COMFORT/REDUCED TEMPERATURE SETTING VALUE INCREASE VALUE DECREASE IMIT CONTROL SYSTEM s.r.l. Via Varallo Pombia,19 - Castelletto Sopra Ticino (NO) 0-23 TIME PROGRAM KEYS Tel (+39)0331941600 - Fax (+39)0331973100 Day/Week DEVICE MODEL (Daily/Weekly) www.imit.it - info@controlsys.it Display legend Remove the inner cover over the clamps by unscrewing the retaining screw and turning the cover to the left.
- Page 2 __ __ __ MODE [OFF]=ANTIFREEZE, WINTER WEEK model programming 1)Summer/Winter ( In the WEEK version it is possible to set a different time programming for each day of the week. Press to activate The snow flake (factory value) or sun icon flashes. the weekly programming function.