
Related Manuals for Cal Spas Platinum Series


Summary of Contents for Cal Spas Platinum Series
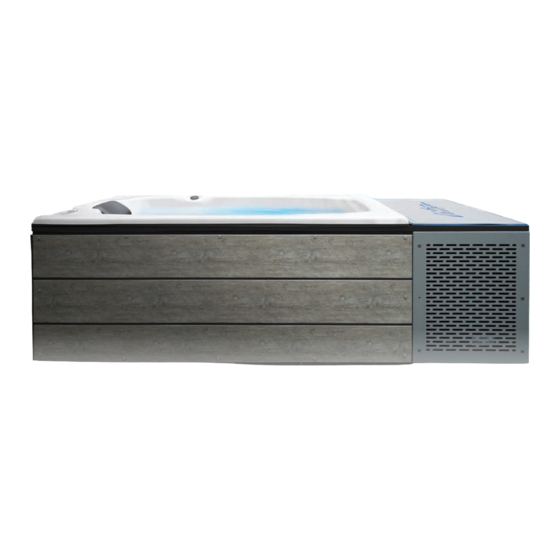
- Page 1 S I N C E 1 9 7 8 THE CHILL SPA Platinum™ Series 2024 Escape™ Series Owner’s Manual 34 1 www.calspas.com...
-
Page 2: Table Of Contents
Table of Contents Important Safety Instructions....Preparing for Your Spa......Planning the best location....Foundation Requirement...... Chill Spa Quick Start Guide....Control Panel........... Setting Temperature & Time....Additional Programming....... Wifi Pairing (option)........ Water Clarity..........Water Terminology........Water Testing & Adding Chemicals..Balancing Water Chemistry.... - Page 3 Congratulations! You are now the owner of the finest chill spa built. Now you will experience health benefits and relaxation as you never had before. We at Cal Spas focus on quality, design and comfort in order to create a truly luxurious experience like no other.
-
Page 4: Important Safety Instructions
IMPORTANT SAFETY INSTRUCTIONS READ AND FOLLOW ALL INSTRUCTIONS CAREFULLY! When using installing and using this spa, basic safety precautions should always be followed, including: KEEP UNIT UPRIGHT, DO NOT STORE OR MOVE UPSIDEDOWN OR ON ITS SIDE. DANGER: RISK OF SEVERE INJURY OR DROWNING! •... - Page 5 5.5 Hypothermia Hypothermia occurs when the body’s temperature drops below 95˚ F (35˚ C ). Signs of mild hypothermia (95˚ F to 89.6˚ F // 35˚ C to 32˚ C ) include: DO NOT USE THE CHILL SPA FOR EXTENDED PERIODS OF TIME Shivering and chattering teeth Exhaustion Extended use of the chill spa in...
-
Page 6: Preparing For Your Spa
Pre-Delivery Checklist � Most cities and counties require permits for Before Delivery □ exterior construction and electrical circuits. Plan your delivery route □ In addition, some communities have codes Choose a suitable location for the requiring residential barriers such as fencing □... -
Page 7: Chill Spa Quick Start Guide
Chill Spa Quick Start Guide 1. Remove Filter Skimmer. Remove the Skimmer from the filter housing by gently pulling upward, this must be reinstalled after the spa has been filled up and primed. 2. Remove The Filter . Once the skimmer is removed, the filter can be removed by holding the filter by the tab, turning counter-clockwise. - Page 8 Chill Spa Quick Start Guide 4. Water level Fill the spa up to 4’’ from the rim of the spa. Once the Chill Spa is filled reinstall the filter clockwise. DO NOT OVER TORQUE/TIGHTEN this can damage the damage the filter housing over time. once the filter is back in its place you can slide the skimmer back onto the filter housing.
-
Page 9: Control Panel
Control Panel TEMP : The temp button works to navigate and set the temperture of the Chill Spa. Hold the button for 2 seconds and it will flash the current set temperture. Once this appears on screen you can use the “Temp” and “Time” buttons to raise or lower the desired temperture. -
Page 10: Setting Temperature & Time
Setting Temperature and Time This Chill Spa is equipped with a SmarTouch Control System IN A HURRY - READ THIS SmarTouch Digital comes to you with a universal set of default settings. If you choose to keep these set- tings, then you only need to remember 2 things: how to set the spa temperature and to press the SET key SmarTouch Digital comes to you with a universal set of default settings. - Page 11 Setting Temperature and Time SETTING TIME-OF-DAY Setting Time-Of-Day Press and hold for 2 sec. the DOWN (Time) arrow key. Controller will display 12:00 noon. Use to set the correct time-of-day. ¡ *After every selection “Hours , Minutes” press SET key. Cool-Down Timer A 30-second timer keeps the low speed jets, ON, after the heater turns OFF, to remove all residual heat from the heater element.
-
Page 12: Additional Programming
�������� ���� Additional Programming Press and hold the ��� �utton for � seconds to start or to exit the vacation mode. �he messa�e ��i�r� short for �i�ernate is displayed indicatin� the start of the vacation mode. Upon exit the panel displays four dashes. FILTRATION �hile in vacation mode the controller shuts do�n for ��... - Page 13 Additional Programming FLIP SCREEN The display on the control panel of the chill spa can be flipped to be controled from the inside of the spa. To flip button and the “SET” button at the same time. To flip it back press the same two the display press the buttons together again.
-
Page 14: Wifi Pairing (Option)
WIFI - Connectivity Optional Chill Spa Wifi Module: The Chill Spa has the ability to connect to a residencial local wifi network. If the Chill Spa was purchased with a wifi module. This module allows you to adjust the spa temperture, activate the LED lights and check the current temperture of the water. - Page 15 WIFI - Connectivity 3. Once “waiting for device” appears, in about 1 minute the temperture of the spa will show on your display. 4. The screen will show two buttons for the Light and Set options. The device is currently communicating with your phone via bluetooth The next step is to connect it...
- Page 16 WIFI - Connectivity 7. Once a network is selected it will return to its pairing screen. this process can take up to 5 minutes. Time needed to finish pairing varies based on router signal strength, number of devices on the network, and available network bandwith.
-
Page 17: Water Clarity
www.calspas.com www.calspas.com... -
Page 18: Water Terminology
21 18 www.calspas.com www.calspas.com... -
Page 19: Water Testing & Adding Chemicals
www.calspas.com www.calspas.com... -
Page 20: Balancing Water Chemistry
TA too high Add an alkalinity pH will be too high decreaser to stabilize pH Ideal TA balance balance TA too low Add an alkalinity increaser wildly CH too high Dilute the spa Causes scale to with soft water deposit on spa and equipment Ideal CH balance balance... -
Page 21: Sanitation & Shock
pH too high Add a pH Too alkaline, causes decreaser scaling Ideal pH balance balance pH too low Add a pH increaser Too acidic, causes corrosion www.calspas.com www.calspas.com... - Page 22 21 22 www.calspas.com www.calspas.com...
-
Page 23: Filter Cleaning
CalSpas UV Filtration System The UV water sanitizer is an optional water purification system installed at the factory. It eradicates germs in the water that are resistant to chlorine-based chemicals using high intensity UV light. Although the water sanitizer works automatically with your spa, you will still need to test for chlorine or bromine and replenish it to return the sanitizer level to the baseline. -
Page 24: General Maintence Schedule
Each time you refill the spa Refill through the filter canister using a prefilter attached to the hose. www.calspas.com 21 24 www.calspas.com... -
Page 25: Spa Cover & Locking System
Cover and Locking System Important! Keep the Chill Spa covered when not in use! • Covering your spa helps prevent children from drowning in the spa. • Covered spas will use less electricity in maintaining your In addition, while the spa cover is rigid, it is not designed to set temperature. -
Page 26: Cleaning The Spa
Cleaning Your Chill Spa Spa Cover and Pillows Due to the constant punishment your spa cover and pillows receive, you should protect them by applying a vinyl and leather cleaner as part of your monthly maintenance plan. Use a product that is specifically designed to protect spa covers and pillows from chemical and ultraviolet light damage without leaving an oily residue behind that is normally associated with common automotive vinyl protectants. -
Page 27: Removing/Replacing Jets & Pillows
Removing and Reseating the Pillows You can remove the pillows for cleaning and maintenance quickly and easily. This method works for all types of pillows. Grab the lower edge of the pillow with both hands firmly and pull up. As you do this, the pillow inserts will pop out of the holes. -
Page 28: Winterization
Winterizing (Cold Climate Draining) In many areas of the country, the ambient temperature drops below 32˚F (0°C). We recommend that you always have your spa full of water and running at normal spa temperatures (80˚F to 100˚F, 26.7°C to 37.8°C). This will help reduce the risk of freezing in your spa and your spa’s equipment. -
Page 29: Preventing Freeze Damage
Preventing Freeze Damage Winter Weather Care: The chill spa is designed to operate year round, the insulated chill spa is able to resist changes in ambient temperature in most climates. As long as the unit is running during the cold months of the year the spas internal pump and heater will maintain a steady temperature. -
Page 30: Draining Your Chill Spa
Draining Your Chill Spa Your Chill Spa should be drained based on usage, a good rule of thumb is to drained and refilled when the spa water is Your Chill Spa should be drained every three to six months for cleaning and maintenance and refilled with fresh tap water. cloudy or emitting an odor, even with proper chemical balancing you should drain the spa water after three to six months. -
Page 31: Troubleshooting Q & A
Troubleshooting & Q and A The Chill Spa has not gone down in temperture in over an hour: The Chill Spa’s cooling system may require additonal programing. removal of the left side exhaust panel will be necessary to confirm the cooler is in the correct low temperture range. The use of a philips screwdriver or electric drill is needed. -
Page 32: Warranty Information
Performance To obtain service in the event of a defect covered by this Limited Warranty, notify your Cal Spa dealer or Cal Spas as soon as possible and use all reasonable means to protect the spa from further damage. Upon proof of purchase, a designated This warranty begins on the date of delivery of the spa, but in no event later than one year from the date of service representative will correct the defect subject to the terms and conditions contained in this Limited Warranty. - Page 33 Coverage under this limited warranty shall commence as of the original date of delivery and This limited warranty is void if Cal Spas or its designated This Limited Warranty is void if Cal Spas or its designated the duration of such coverage shall not extend for any...
-
Page 34: Spare Parts
Part Numbers 2’’ Jet Insert: Filter Assembley With Weir: PLUCS2441009S-CDCL FIL11700322 2’’ Jet Body/Housing: PLU21702560 Optional Item Main LED Light: Wifi Module: LIT16100333 ELE09000100 15 Sqft Filter: Calspas Carbon Fiber Finish Pillow: FIL11703155 ACC01401102 Chill Spa Control Panel: Optional Item ELE-LX1015P (Controller) ELE-LX1005-OL (Overlay) UV Sanitation System:... - Page 35 Notes _______________________________________ _______________________________________ _______________________________________ _______________________________________ _______________________________________ _______________________________________ _______________________________________ _______________________________________ _______________________________________ _______________________________________ _______________________________________ _______________________________________ _______________________________________ _______________________________________ _______________________________________ _______________________________________ _______________________________________ _______________________________________ _______________________________________ _______________________________________ www.calspas.com www.calspas.com...
- Page 36 Notes _______________________________________ _______________________________________ _______________________________________ _______________________________________ _______________________________________ _______________________________________ _______________________________________ _______________________________________ _______________________________________ _______________________________________ _______________________________________ _______________________________________ _______________________________________ _______________________________________ _______________________________________ _______________________________________ _______________________________________ _______________________________________ _______________________________________ _______________________________________ 21 36 www.calspas.com www.calspas.com...
- Page 37 Notes _______________________________________ _______________________________________ _______________________________________ _______________________________________ _______________________________________ _______________________________________ _______________________________________ _______________________________________ _______________________________________ _______________________________________ _______________________________________ _______________________________________ _______________________________________ _______________________________________ _______________________________________ _______________________________________ _______________________________________ _______________________________________ _______________________________________ _______________________________________ www.calspas.com www.calspas.com...
- Page 38 This Page is Intentionally Blank 21 38 www.calspas.com...
- Page 39 This Page is Intentionally Blank www.calspas.com...
- Page 40 S I N C E 1 9 7 8 LMS Customer Service Dept. 1462 East Ninth Street Pomona, CA 91766 LTR.2024.1170 21 40 www.calspas.com 262-23...
Need help?
Do you have a question about the Platinum Series and is the answer not in the manual?
Questions and answers