Table of Contents
Advertisement
Quick Links
Advertisement
Table of Contents

Related Manuals for BenQ Gaming X300G


Summary of Contents for BenQ Gaming X300G
- Page 1 Digital Projector User Manual Gaming Series | X300G V 1.00...
-
Page 2: Product Support
Available files vary by model. 1. Make sure your computer is connected to the Internet. 2. Visit the local website from Support.BenQ.com. The website layout and content may vary by region/country. Look for the following regularly to get the most up-to-date information. -
Page 3: Q&A Index
Q&A index Start with the topics you are interested in: Setup How do I set up the projector and turn it on? Choosing a location Powering on and initial setup Image adjustment How do I adjust the focus of the projected image? Adjusting the projection angle Fine-tuning the image clarity How to fit the projected image to the screen? -
Page 4: Table Of Contents
Table of Contents Product support ..................2 Servicing .......................2 Q&A index .....................3 Safety instructions ................... 8 Package contents ................... 13 Introduction ....................14 Projector overview ..................14 Overview ......................14 I/O ports ......................16 Keypad ......................17 Dimensions ....................18 Projector connections ................19 Wireless connection (via Android TV dongle) .......... - Page 5 Working with Auto Eye Protection ............34 Shutting down the projector ..............34 Upgrading your projector ..............36 Adjusting the projected image ............37 Optimizing the projected image automatically (Smart Auto Settings) ......................37 Adjusting the projection angle ..............37 Fine-tuning the image clarity ............... 38 Fitting the image to your screen ............
- Page 6 Playing music via a speaker with ARC ............53 Connect the projector to external Bluetooth Speaker / headphone ....................54 Playing multimedia files from a USB flash drive .......55 Supported File Formats ................55 Power delivery to a USB-C device ..........56 Menu navigation ..................
- Page 7 Removing the Android TV dongle ............89 Pairing with a new remote control ............90 Securing the projector ................91 Utilizing the password function ..............91 Copyright & disclaimer ...............93 Copyright ....................... 93 Disclaimer ...................... 94 Warranty......................94 Statement regarding hyperlinks and third-party websites ..95...
-
Page 8: Safety Instructions
Safety instructions Your projector is designed and tested to meet the latest standards for safety of information technology equipment. However, to ensure safe use of this product, it is important that you follow the instructions mentioned in this manual and marked on the product. 1. - Page 9 and darken the screen. • Locations near fire alarms. • Locations with an ambient temperature above 40°C /104°F. • Locations where the altitudes are higher than 2000 m (6562 feet). 2000 m (6562 feet) (0 feet) 5. Do not block the vents holes while the projector is on (even in power- saving mode).
- Page 10 8. Do not place liquids near or on the projector. Liquids spilled into the projector will void your warranty. If the projector does become wet, disconnect it from the power point and call BenQ to have the projector repaired. 9. Do not look straight into the projector lens during operation. It may harm your sight.
- Page 11 11. Do not attempt to disassemble this projector. There are dangerous high voltages inside which may cause death if you should come into contact with live parts. Under no circumstances should you ever undo or remove any other covers. Refer servicing only to suitably qualified professional service personnel.
- Page 12 Moisture condensation Never operate the projector immediately after moving it from a cold location to a hot location. When the projector is exposed to such a change in temperature, moisture may condense on the crucial internal parts. To prevent the projector from possible damage, do not use the projector for at least 2 hours when there is a sudden change in temperature.
-
Page 13: Package Contents
Package contents Carefully unpack and verify that you have all of the items shown below. Some of the items may not be available depending on your region of purchase. If any of these items are missing, please contact your place of purchase. -
Page 14: Introduction
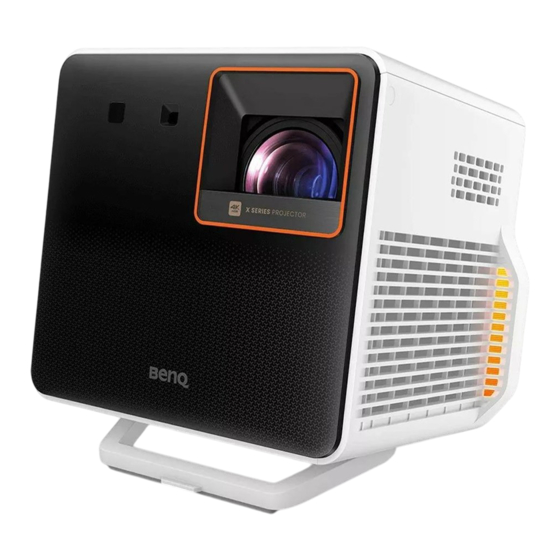
Introduction Projector overview Overview... - Page 15 Descriptions Keypad "Keypad" on page 17 for details. IR remote sensor Time of Flight (ToF) sensor For realtime auto focus, realtime 3D keystone, auto eye protection. Projection lens I/O ports "I/O ports" on page 16 for details. Speaker grill Power adaptor port Vent (air exhaust) Adjustable stand...
-
Page 16: I/O Ports
I/O ports 1 2 3 Descriptions USB-A port Media reader, firmware upgrade (via SettingXchange), and power supply up to 5V/0.5A. HDMI port (Version 2.0b) featuring eARC • See "Wired connection (HDMI port)" on page 19 for details. • See "Playing music via a speaker with ARC" on page 53 details. -
Page 17: Keypad
Keypad Descriptions Back key Joystick Menu navigation ( / / / and OK) Power key/LED indicator Menu key Input source key... -
Page 18: Dimensions
Dimensions 212 (W) x 180.9 (D) x 194.8 (H) mm 180.9... -
Page 19: Projector Connections
Projector connections You can connect your device to the projector in various ways to project video contents. Wireless connection (via Android TV dongle) • Smartphone, tablet, laptop/PC (See "Wireless projection" on page 50.) • Bluetooth devices (speakers, headphone, mouse, etc.) Before making any wireless connections, be sure to: •... - Page 20 Notebook or desktop computer A/V device Speaker with ARC USB flash drive Certified devices with USB-C DisplayPort QS02 Android TV Dongle Wireless AP Wireless connections Descriptions Descriptions USB flash drive for media c. Certified USB-C cable reader b. HDMI cable...
- Page 21 Note • In the connections above, some cables may not be included with the projector (see “Package con- tents” on page 13). They are commercially available from electronics stores. • The connection illustrations are for reference only. • If the selected video image is not displayed after the projector is turned on and the correct video source has been selected, check that the video source device is turned on and operating correctly.
-
Page 22: Remote Control (Projector Remote Control Only)
Remote control Descriptions (projector remote Back control only) Mute Rewind Zoom adjustment Focus 3D keystone adjustment Projector menu Voice Search Android TV home screen Android TV settings Volume up Volume down Fast forword Play/Pause Fast Settings "Customizing your Descriptions preferred settings (Fast Projector Setting)"... -
Page 23: Remote Control Effective Range
Remote control effective range The remote control must be held at an angle within 30 degrees perpendicular to the projector's IR remote control sensor(s) to function correctly. The distance between the remote control and the sensor(s) should not exceed 8 meters (~ 26 feet). You can point the remote control directly at the IR sensor(s) or at the screen to reflect the IR signal off a wall/screen. -
Page 24: Turning Remote Control Backlight On/Off
Turning remote control backlight on/ With the remote control backlight, you can see the buttons when they are pressed in the dark. Press and hold the Mute button and Volume up button on the remote control to turn the backlight function on/off. To save battery power, you can turn off the backlight. -
Page 25: Installation
Installation Choosing a location Before choosing an installation location for your projector, take the following factors into consideration: • Size and position of your screen • Electrical outlet location • Location and distance between the projector and the rest of your equipment •... - Page 26 • Rear Select this location with the projector placed near the floor behind the screen. Turn on the projector and select the following settings in the projector’s settings menu: the Advanced menu - Installation > Projector Position > Rear. Note A special rear projection screen is required.
-
Page 27: Obtaining A Preferred Image Size
Obtaining a preferred image size The distance from the projector lens to the screen, the zoom setting, and the video format each factors in the projected image size. Projection dimensions The screen aspect ratio is 16:9 and the projected picture is in a 16:9 aspect ratio. - Page 28 • The values in the grey cells are for reference only. Projector placed at that distance may result in blurred images. • BenQ recommends that if you intend to permanently install the projector, you should physically test the projection size and distance using the actual projector in situ before you permanently install it, so as to make allowance for this projector’s optical characteristics.
-
Page 29: Installing The Android Tv Dongle
Installing the Android TV dongle 1. Make sure the projector is turned off and the power cord is disconnected. 2. Find the provided Android TV dongle (QS02) and pick in the packaging. 3. Use the pick to pry the projector back cover open. To prevent the back cover from falling and causing damage, support the back cover while removing it from the projector. - Page 30 5. Re-install the back cover onto the projector.
-
Page 31: Getting Started
Getting started Powering on and initial setup 1. Choose a preferred location and image size as instructed in "Choosing a location" on page 25. Make sure the Android TV dongle has been installed. See "Installing the Android TV dongle" on page 29 for more details. -
Page 32: Power Led Indicator
When you're promted to set up your remote, select "Not now" to proceed. You can refer to QS02 user manual from Support.BenQ.com for more information. 5. Check if an updated firmware is available to your product. Refer to "Upgrading your projector"... -
Page 33: Gaming Led Light
LED indicator Status & Description Solid green Normal operation Flashing orange Powering off Gaming LED light The gaming LED light can be controlled from the the Advanced menu > System > Operation Settings > Gaming LED Light. When this function is turned on, the light behaves as below. -
Page 34: Working With Auto Eye Protection
Working with Auto Eye Protection Refer to "Menu navigation" on page 57. For how to switch to the Advanced OSD menu. Turning on Auto Eye Protection from the Advanced menu - System reduces the screen brightness when the projector detects objects/users within 0.1 - 1.3 meters in front of the projection lens . - Page 35 Item Description Power Off Sets to power off the projector. Sets to turns off the screen while the music playback continues. See "Turning the screen off Audio only mode during music playback" on page 52 for more information. Wait until the LED turns solid orange.
-
Page 36: Upgrading Your Projector
It is suggested that you update the projector with the latest version of the firmware to optimize the user experience. 1. Visit Support.BenQ.com and download SettingXchange. You should download its latest user manual for reference as well. 2. Keep stable power supply to the projector via power adapter. Do not power off the projector. -
Page 37: Adjusting The Projected Image
Adjusting the projected image Optimizing the projected image automatically (Smart Auto Settings) As the projector is portable/movable, you might want to move the projector to a desired place to meet your scenario. With Smart Auto Settings, you don't need to go through each picture setting manually for adjustment. 1. -
Page 38: Fine-Tuning The Image Clarity
Note • The maximum angle of adjustment is degrees. • If the screen and the projector are not perpendicular to each other, the projected image becomes trapezoidal. To correct this, see “Keystone” on page 39 for details. • When the projector is on, DO NOT place the projector with its vents facing down as this will block the vents. -
Page 39: Fitting The Image To Your Screen
Note Do not look into the lens while the light is on. The strong light from the lens may cause damage to your eyes. Fitting the image to your screen You are provided with several ways to adjust the image and ensure a clear fit on the screen. -
Page 40: Corner Fit
to the Advanced menu - Installation > 3D Keystone to display the 3D Keystone correction menu. Simply follow the on-screen instructions to make adjustments. To reset the settings, press for 2 seconds. When you are done making the adjustments, press to return to the previous menu. -
Page 41: Zooming An Image
Zooming an image To change the size of the display content: 1. Press the button on the remote control or go to the Advanced menu - Installation > Zoom Adjustment to display the zoom adjustment menu. 2. Press the / key to zoom in/out the image. •... - Page 42 settings. Applying a set of Fast Projector Setting 1. View the settings being made by entering the View & Apply page. Press / to go through the details. 2. To apply the settings to the current or other connected input source, highlight Apply and press OK.
-
Page 43: Changing The Input Source
Changing the input source The projector can be connected to multiple devices at the same time. However, it can only display one full screen at a time. When starting up, the projector automatically searches for the available signals. Be sure the Advanced menu - Display > Auto Source Search is On if you want the projector to automatically search for the signals. -
Page 44: Enhancing Gaming Experience
Enhancing gaming experience Setting to start a game quickly To enhance your gaming experience, you are provided with picture and sound modes that are suitable for gaming. 1. The Auto Game Mode function helps to switch to a connected gaming source (e.g., Nintendo Switch, PS5, Xbox Series S) and modes designed for gaming automatically. -
Page 45: Charging Your Console Easily During Gaming (Selected Devices Only)
Charging your console easily during gaming (selected devices only) Your projector features video/audio transfer and power delivery from the USB-C port. With this feature, you can charge your gaming console (with USB-C video output) directly during gaming without any other docking. For more information on USB-C power delivery, see "Power delivery to a USB-C device"... -
Page 46: Watching Streaming Videos
Note For the Android TV dongle (QS02) user manual, visit Support.BenQ.com. Android TV home screen Upon initial startup or when the input source is set to Android TV,... -
Page 47: Choosing A Proper Picture Mode For Video Streaming
Item Description Home Access to Android TV Home screen. Discover Access to personalized recommendations. Apps Access to all the installed apps and Google Play. • Access to the recommended apps or video Recommended on demand services. apps/My favorites • Access to the apps that have been added to favorites by the Bookmark key. -
Page 48: Customizing A Sound Mode
Customizing a sound mode 1. Press and select the Advanced menu - Audio > Sound Mode > User. 2. Press to select Sound EQ and press OK. 3. Select a frequency band and adjsut the level to your preference. The settings made here define the User mode. -
Page 49: Watching 3D Contents
Watching 3D contents This projector supports playing three-dimensional (3D) content transferred through your 3D-compatible video devices and contents, such as PlayStation consoles (with 3D game discs), 3D Blu-ray players (with 3D Blu-ray discs), and so on. After you have connected the 3D video devices to the projector, wear a pair of 3D glasses and make sure the power is on to view 3D contents. -
Page 50: Projection
(QS02) is installed, and the projector and your device are connected to the same wireless network. Refer to the QS02 user manual from Support. BenQ.com or scan the following QR code for instructions on how to perform wireless projection. How-to video... - Page 51 If no signal is detected or the signal is interrupted, a message will appear. Check cable connection again. 3. Use the source menu or press the home button to exit and go back to the Android TV home screen. 4. If the device remains connected and you want to project its video again, press the source button , and then select the corresponding port in the source menu.
-
Page 52: Playing Music By Your Projector
Playing music by your projector With the built-in speakers, you can enjoy music playback via the projector without a projection screen. The projector can work as an ordinary speaker. Turning the screen off during music playback You can enjoy music playback via the projector without a projection screen. -
Page 53: Playing Music Via A Speaker With Arc
Playing music via a speaker with ARC The HDMI port on the projector features Audio Return Channel (ARC) capabilities which allows it to output its audio to an ARC-compatible speaker/soundbar connected via an HDMI cable. 1. Connect the ARC-compatible speakers to the projector via an HDMI cable. -
Page 54: Connect The Projector To External Bluetooth Speaker / Headphone
Connect the projector to external Bluetooth Speaker / headphone Available only when the input source is Android TV 1. Make sure the Android TV dongle is installed properly (see "Installing the Android TV dongle" on page 29). 2. Power on the projector (see "Powering on and initial setup"... -
Page 55: Playing Multimedia Files From A Usb Flash Drive
5. Launch a media reader app to access the multimedia files stored on your USB flash drive. Supported file formats for playback may vary by app. Supported File Formats See QS02 user manual from Support.BenQ.com for the supported file formats. For details on the supported media formats, please visit: https://developer. -
Page 56: Power Delivery To A Usb-C Device
Power delivery to a USB-C device With the power delivery function, your projector is able to supply power to a connected USB-C device certified by USB-IF. Supported USB-C power delivery output: PD out 5V-2A / 9V-1.8A / 12V-1.3A / 15V-1.2A up to 18W USB-C power delivery notice •... -
Page 57: Menu Navigation
Menu navigation The projector is equipped with 2 types of On-Screen Display (OSD) menus for making various adjustments and settings. The Basic OSD menu provides primary menu functions while the Advanced OSD menu provides full menu functions. To access the menu, press the button on the remote control. -
Page 58: Advanced Menu
Advanced menu Game & Pic. Item Options and descriptions The projector is preset with several predefined picture modes so that you can choose one to suit your operating environment and input signal picture type. • Bright Maximizes the brightness of the projected image. This mode is suitable for environments where extra-high brightness is required, such as using the projector in well lit rooms. - Page 59 Item Options and descriptions • Cinema This mode is best for watching movies with accurate color and deepest contrast at lower brightness level in rooms with a bit of ambient light, as if in a commercial cinema. • 3D Appropriate for playing 3D images and 3D video clips.
- Page 60 To use this feature, visit Support.BenQ.com to download the SettingXchange software and its user guide. The higher the value, the brighter the image. Adjust this...
- Page 61 Options and descriptions • Gamma Selection Gamma refers to the relationship between input source and picture brightness. • 1.8/2.0/2.1/BenQ: Select these values according to your preference. • 2.2/2.3: Increases the average brightness of the picture. Best for a lit environment, meeting room or family room.
- Page 62 Item Options and descriptions Yellow GREEN Magenta Cyan BLUE • Saturation: Adjusts the values to your preference. Every adjustment made will reflect to the image immediately. For example, if you select Red and set its value at 0, only the saturation of pure red will be affected.
- Page 63 Item Options and descriptions • HDR Brightness You can manually select a brightness level to display better picture quality. When the value is higher, the Advanced Color image becomes brighter; when the value is lower, Settings the image becomes darker. •...
-
Page 64: Audio
Audio Item Options and descriptions This function utilizes treVolo and Bongiovi DPS (Digital Power Station) Technology, which incorporates its patented algorithms with 120 calibration points that optimizes any audio signal in real time to add depth, clarity, definition, presence and enhanced stereo field imaging for more immersive audio experience. -
Page 65: Display
Item Options and descriptions The following audio output formats are provided to achieve the audio performance you desire. • LPCM: supports 2 channel audio output. • RAW (Up to 7.1): supports up to 7.1 channel audio Audio Output output. Format •... - Page 66 Item Options and descriptions Auto Source Allows the projector to automatically search for a Search signal. Renames the input source to your desired name. See Source Rename "Renaming the input source" on page Sets the 3D Mode and uses the 3D Sync Invert feature to correct image distortion.
- Page 67 Item Options and descriptions • HDMI Device Control When you enable this function and connect an HDMI CEC-compatible device (e.g. QS02, a soundbar) to your projector, the projector keypad/remote control can control the device’s menu or volume during the projector power-on state. •...
-
Page 68: Installation
Installation Item Options and descriptions • Realtime Auto Focus Sharpens the image quality. Once enabled, when the projector is moved or the projection distance is changed, the function will be performed instantly. "Fine-tuning the image clarity" on page 38 more information. •... - Page 69 Item Options and descriptions Corrects image keystoning problem. You can adjsut the vertical and horizontal sides of the image within +/-40° or revolve the image within +/-30°. "Keystone" on 3D Keystone page 39 for more information. This image adjustment might impact latency. We suggest setting the values to 0 to enjoy low latency gaming.
-
Page 70: System
Item Options and descriptions We recommend you use the High Altitude Mode when your environment is between 1500 m - 3000 m above sea level, and ambient temperature is between 0°C to 30°C. Operation under High Altitude Mode may cause a higher decibel operating noise level because of increased fan speed necessary to improve overall system cooling and performance. - Page 71 • Sleep Mode Timer: Sets the timer to turn off the projector when the operating time is up. • BenQ HDMI Media Streaming (QS02) Enables or disables functions related to the Android TV dongle (QS02), including: •...
- Page 72 • This function resets your projector only. If you wish to reset your Android TV dongle (QS02), perform factory reset from the Android settings menu. • The following settings will still remain: Projector Position, 3D Keystone, High Altitude Mode, Light Source Information, BenQ HDMI Media Streaming (QS02), Security Settings.
-
Page 73: Information
Returns most of the settings in the System main menu to the factory default values. Reset System Note The following settings will still remain: Light Source Information, BenQ HDMI Media Streaming (QS02), Security Settings. Information Item Options and descriptions Detected Shows the timing of the input signal. -
Page 74: Basic Menu
Basic menu Item Item (Reference page) (Reference page) Game Settings Picture Mode ("Details Adjustment" on page 59, ("Picture Mode" on page "FPS Crosshair" on page 59, "SettingXchange" on page Sound Mode Fast Projector Setting ("Sound Mode" on page ("Fast Settings" on page Light Source Mode Information ("Light Source Mode"... -
Page 75: Maintenance
Maintenance Care of the projector Your projector needs little maintenance. The only thing you have to do on a regular basis is keep the lens clean. Never remove any parts of the projector. Contact your dealer or local customer service center if the projector fails to operate as expected. Cleaning the lens Clean the lens whenever you notice dirt or dust on the surface. -
Page 76: Transporting The Projector
Transporting the projector It is recommended that you ship the projector with its original packing or equivalent. Light source information When the projector is in operation, the duration (in hours) of light source usage is automatically calculated by the built-in timer. The method of calculating the equivalent light hour is as follows: 1. - Page 77 Go to the Advanced menu - Game & Pic. > Advanced Color Settings > Light Source Mode and press / , OK to select a suitable light source mode from among the provided modes. Set the projector to ECO or Dynamic mode to extend the LED life. Light source Description mode...
-
Page 78: Troubleshooting
Troubleshooting Power LED light information LED indicator Status & Description Flashing red Firmware downloading Flashing red/orange alternately Fan speed error Flashing orange/green alternately Temperature error Flashing purple/red alternately Light source error Solid purple Light source life exhaust Flashing blue TOF sensor error The projector does not turn on. - Page 79 Cause Remedy The projector is not correctly Check the connection. connected to the input signal device. The input signal has not been Select the correct input signal with correctly selected. key. Blurred image Cause Remedy The projection lens is not correctly Adjust the focus of the lens.
- Page 80 Screen brightness adjustment. Cause Remedy The screen is not as bright as • The screen brightness is expected. changed by the light source mode. Check the light source mode from the Advanced menu - Game & Pic. > Advanced Color Settings > Light Source Mode.
-
Page 81: Specifications
Storage altitude 30°C @ 0–12,200 m above sea level Repairing Please visit below website and choose your country to find your service contact window. http://www.benq.com/welcome Transporting Original packing or equivalent is recommended. Note All specifications are subject to change without notice. -
Page 82: Timing Chart
XGA_85 84.997 68.667 94.500 XGA_120 (Reduce 119.989 97.551 115.500 Blanking) 1152 x 864 1152 x 864_75 75.00 67.500 108.000 BenQ 1024 x 576 Notebook 60.00 35.820 46.996 Timing BenQ 1024 x 600 Notebook 64.995 41.467 51.419 Timing 1280 x 720 1280 x 720_60 45.000... - Page 83 WXGA_60 59.810 49.702 83.500 WXGA_75 74.934 62.795 106.500 1280 x 800 WXGA_85 84.880 71.554 122.500 WXGA_120 (Reduce 119.909 101.563 146.25 Blanking) SXGA_60 60.020 63.981 108.000 1280 x 1024 SXGA_75 75.025 79.976 135.000 SXGA_85 85.024 91.146 157.500 1280 x 960_60 60.000 60.000 1280 x 960 1280 x 960_85...
- Page 84 2560 x 1440_120 2560 x 1440 119.998 182.996 497.75 (Reduce Blanking) Note • : Supports auto-detecting and manually setting 3D format. • V : Supports manually setting 3D format. • The timings showing above may not be supported due to EDID file and VGA graphics card limita- tions.
-
Page 85: Supported Timing For Usb-C Input
84.997 68.667 94.500 XGA_120 119.989 97.551 115.500 (Reduce Blanking) 1152 x 864 1152 x 864_75 75.00 67.500 108.000 BenQ Notebook 1024 x 576 60.00 35.820 46.996 Timing BenQ Notebook 1024 x 600 64.995 41.467 51.419 Timing 1280 x 720 1280 x 720_60 45.000... - Page 86 SXGA_60 60.020 63.981 108.000 1280 x 1024 SXGA_75 75.025 79.976 135.000 SXGA_85 85.024 91.146 157.500 1280 x 960_60 60.000 60.000 1280 x 960 1280 x 960_85 85.002 85.938 148.500 1360 x 768 1360 x 768_60 60.015 47.712 85.500 1440 x 900 WXGA+_60 59.887 55.935...
- Page 87 Video timings Vertical Horizontal Dot Clock Timing Resolution frequency frequency frequency (Hz) (KHz) (MHz) 480i 720 (1440) x 480 59.94 15.73 480p 720 x 480 59.94 31.47 576i 720 (1440) x 576 15.63 576p 720 x 576 31.25 720/50p 1280 x 720 37.5 74.25 720/60p...
-
Page 88: Appendix
Appendix Working with a tripod (purchased separately) Use a tripod plate to mount the projector onto a tripod. 1. Install the tripod’s quick release plate to the projector’s tripod screw hole and tighten the plate’s screw. (Screew type: 1/4"-20) 2. Install the projector onto the tripod. Note The tripod screw hole on the bottom of your projector is not designed for ceiling mount installation. -
Page 89: Removing The Android Tv Dongle
Removing the Android TV dongle 1. Make sure the projector is turned off and the power cord is disconnected. 2. Use the provided pick to pry the projector back cover open. To prevent the back cover from falling and causing damage, support the back cover while removing it from the projector. -
Page 90: Pairing With A New Remote Control
Pairing with a new remote control Compatible BenQ remote control model: RCI074 In case you have received a new remote control from BenQ customer service, you need to pair it with your projector (with Android TV dongle QS02 installed) before use. -
Page 91: Securing The Projector
1. Press and hold OK for 3 seconds. The projector will display a coded number on the screen. 2. Write down the number and turn off your projector. 3. Seek help from the local BenQ service center to decode the number. - Page 92 You may be required to provide proof of purchase documentation to verify that you are an authorized user of the projector. Changing the password 1. Go to the Advanced menu - System > Security Settings. Press OK. The Security Settings page appears. 2.
-
Page 93: Copyright & Disclaimer
Android™ is a trademark of Google LLC. The Bluetooth® word mark and logos are registered trademarks owned by Bluetooth SIG, Inc. and any use of such marks by BenQ Corporation is under license. iOS is a trademark or registered trademark of Cisco in the U.S. and other countries and is used under license. -
Page 94: Disclaimer
Further, BenQ Corporation reserves the right to revise this publication and to make changes from time to time in the contents hereof without obligation of BenQ Corporation to notify any person of such revision or changes. This user manual aims to provide the most updated and accurate information to customers, and thus all contents may be modified from time to time without prior notice. -
Page 95: Statement Regarding Hyperlinks And Third-Party Websites
Any third party content or service preinstalled in this product is provided “as is”. BenQ does not, by expression or by implication, make any warrant to the content or to the services provided by third parties. BenQ does not warrant or guarantee that the content or services provided by third parties are accurate, effective, most up-to-date, legal, or complete. - Page 96 BenQ.com © 2023 BenQ Corporation. All rights reserved. Rights of modification reserved.
Need help?
Do you have a question about the Gaming X300G and is the answer not in the manual?
Questions and answers