Table of Contents
Advertisement
Quick Links
Advertisement
Table of Contents

Related Manuals for BenQ X500I


Summary of Contents for BenQ X500I
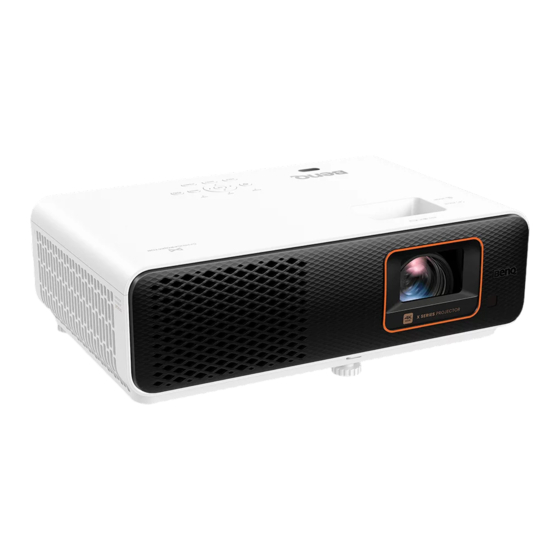
- Page 1 Digital Projector User Manual Console Gaming Projector I X500i V 1.00...
-
Page 2: Warranty And Copyright Information
For other information, please visit www.BenQ.com. Copyright Copyright 2023 by BenQ Corporation. All rights reserved. No part of this publication may be reproduced, transmitted, transcribed, stored in a retrieval system or translated into any language or computer language, in any form or by any means, electronic, mechanical, magnetic, optical, chemical, manual or otherwise, without the prior written permission of BenQ Corporation. -
Page 3: Table Of Contents
Table of Contents Warranty and Copyright information ................2 Important safety instructions ..................4 Introduction ........................7 Shipping contents ......................7 Installing the QS02 HDMI Media Streaming ..............9 Projector exterior view....................10 Terminals......................... 11 Controls and functions ....................12 Positioning your projector .................... 14 Choosing a location ...................... -
Page 4: Important Safety Instructions
Important safety instructions Your projector is designed and tested to meet the latest standards for safety of information technology equipment. However, to ensure safe use of this product, it is important that you follow the instructions mentioned in this manual and marked on the product. 1. - Page 5 Liquids spilled into the projector may cause it to fail. If the projector does become wet, disconnect it from the power supply's power outlet and call BenQ to have the projector serviced. If the ventilation holes are seriously obstructed, overheating inside the projector may result in a fire.
- Page 6 Risk Group 2 15. This product is capable of displaying inverted images for ceiling mount 1. According to the classification of installation. photobiological safety of light source and light source systems, this product is Risk Group 2, IEC 62471-5:2015. 2. Possibly hazardous optical radiation emitted from this product.
-
Page 7: Introduction
Introduction Shipping contents Carefully unpack and verify that you have all of the items shown below. If any of these items are missing, please contact your place of purchase. Standard accessories Remote control with Projector Power cord batteries QS02 HDMI Media Regulatory Quick start guide Warranty card*... - Page 8 • Avoid leaving the remote control and batteries in an excessive heat or humid environment like the kitchen, bathroom, sauna, sunroom or in a closed car. • Replace only with the same or equivalent type recommended by the battery manufacturer. •...
-
Page 9: Installing The Qs02 Hdmi Media Streaming
Installing the QS02 HDMI Media Streaming The supplied QS02 HDMI Media Streaming is an Android TV (ATV) dongle to be used with the projector. See the instructions below to install the dongle. With a successful installation, you can enjoy more entertainment programs through this projector. 1. -
Page 10: Projector Exterior View
Projector exterior view 1. QS02 HDMI Media Streaming port 9. Anti-theft security bar (Android TV dongle) 10. Vent (air inlet) Installing the QS02 HDMI Media Streaming on page 9 for how to remove 11. Adjuster button the cover. Push up to release the front adjuster 2. -
Page 11: Terminals
Terminals 1. Audio output jack 6. SPDIF audio output port 2. RS-232 control port 7. USB-C DP port 3. USB 2.0 Type-A port (Firmware upgrade, Media Reader) 4. HDMI input port (Version 2.0b, HDCP 2.2) 5. HDMI input port (Version 2.0b, HDCP 2.2, Audio Return+) Introduction... -
Page 12: Controls And Functions
Controls and functions Projector & Remote control All the key presses described in this document are available on the remote control or projector. 1. POWER/TEMP/LIGHT status indicator 4. OK Indicators on page • Confirms the selected Android TV or On-Screen Display (OSD) menu item. POWER •... - Page 13 Remote control effective range 8. ECO BLANK Used to hide the screen picture. The remote control must be held at an angle within 30 degrees perpendicular to Do not block the projection lens from projecting as this could cause the the projector's IR remote control sensor(s) blocking object to become heated and to function correctly.
-
Page 14: Positioning Your Projector
Select this location with the projector suspended upside-down from the ceiling suspended upside-down from the ceiling in front of the screen. Purchase the BenQ behind the screen. Note that a special rear Projector Ceiling Mount Kit from your projection screen and the BenQ Projector... -
Page 15: Obtaining A Preferred Projected Image Size
All measurements are approximate and may vary from the actual sizes. BenQ recommends that if you intend to permanently install the projector, you should physically test the projection size and distance using the actual projector in situ before you permanently install it, so as to make allowance for this projector's optical characteristics. -
Page 16: Mounting The Projector
BenQ projector mounting kit and that you ensure it is securely and safely installed. If you use a non-BenQ brand projector mounting kit, there is a safety risk that the projector may fall down due to an improper attachment through the use of the wrong gauge or length screws. -
Page 17: Adjusting The Projected Image
Adjusting the projected image Adjusting the projection angle If the projector is not placed on a flat surface or the screen and the projector are not perpendicular to each other, the projected image becomes trapezoidal. You can screw the adjuster feet to fine-tune the horizontal angle. - Page 18 Correcting keystone Keystoning refers to the situation where the projected image becomes a trapezoid due to angled projection. To correct the distorted image: 1. Display the 2D Keystone correction page from the following menus. • The setup wizard during the projector initial setup •...
-
Page 19: Connection
Connection When connecting a signal source to the projector, be sure to: 1. Turn all equipment off before making any connections. 2. Use the correct signal cables for each source. 3. Ensure the cables are firmly inserted. Audio device Notebook or desktop computer HDMI RS-232 USB Type-A... -
Page 20: Operation
• Use OK to confirm the selected menu item. Step 1: Specify Projector Position. For more information about projector position, Choosing a location on page Step 2: Reminder for using the supplied BenQ Android TV remote control 20 Operation... - Page 21 Step 5: Specify 2D Keystone, and choose to activate Auto Vertical Keystone. For more information about keystone, see Correcting keystone on page Step 6: Reminder for pairing BenQ Android TV remote control with QS02 HDMI Media Streaming Operation...
- Page 22 Welcome message appears. 4. If you are prompted for a password, press the arrow keys to enter a 6-digit password. See Utilizing the password function on page 5. Switch all of the connected equipment on. 6. The projector will search for input signals. The current input signal being scanned appears. If the projector does not detect a valid signal, the message “No Signal”...
-
Page 23: Setting Up The Qs02 Hdmi Media Streaming
Setting up the QS02 HDMI Media Streaming Before you start Check that you have: • A Wi-Fi Internet connection • A Google Account Set up your device There are 3 options to set up your device: • Quick Setup using an Android phone •... - Page 24 Display Android TV home screen • For more information, visit https://support.google.com/androidtv/. • Refer to the QS02 user documentations for further operating instructions. 24 Operation...
-
Page 25: Using The Menus
Using the menus The projector is equipped with 2 types of On-Screen Display (OSD) menus for making various adjustments and settings. The Basic OSD menu provides primary menu functions while the Advanced OSD menu provides full menu functions. To access the OSD menu, press on the projector or remote control. -
Page 26: Securing The Projector
Securing the projector Using a security cable lock The projector has to be installed in a safe place to prevent theft. Otherwise, purchase a security cable to secure the projector. A security bar is located on the right side of the projector. See item 9 on page 10. - Page 27 Recall Password display a coded number on the screen. 2. Write down the number and turn off your projector. 3. Seek help from the local BenQ service center to Please write down the recall code, and contact BenQ decode the number. You may be required to Customer Center.
-
Page 28: Switching Input Signal
Switching input signal The projector can be connected to multiple devices Source at the same time. However, it can only display one full screen at a time. When starting up, the projector HDMI-1 automatically searches for the available signals. HDMI-2 Be sure the Advanced menu - Display >... -
Page 29: Presenting From A Media Reader
Presenting from a Media Reader The USB Type-A port on the projector allows you to read/play the audio/video files stored on a USB flash drive connected to the projector. It can eliminate the need for a computer source. Supported file formats Audio Video •... -
Page 30: Shutting Down The Projector
Shutting down the projector 1. Press and a confirmation message will appear prompting you. If you don't respond in a few seconds, the message will disappear. 2. Press a second time. The power indicator flashes orange, the projection light source shuts down, and the fans will continue to run for approximately 15 seconds to cool down the projector. -
Page 31: Menu Operation
Menu operation Please note that the on-screen display (OSD) menus vary according to the signal type selected and the projector model you are using. The menu items are available when the projector detects at least one valid signal. If there is no equipment connected to the projector or no signal detected, limited menu items are accessible. -
Page 32: Advanced Menu
[100% - 80%] Auto Game Mode On/Off/Reset SettingXchange Brightness 0–100 Contrast 0–100 Sharpness 0–15 Gamma Selection 1.8/2.0/2.1/2.2/2.3/2.4/2.5/2.6/BenQ Native (for Bright picture mode) Color Temperature Normal/Cool/Warm (for the rest picture modes) R Gain/ Color Temperature G Gain/ 0–200 Tuning B Gain... - Page 33 Function descriptions Menu Descriptions The projector is preset with several predefined picture modes so that you can choose one to suit your operating environment and input signal picture type. • Bright Maximizes the brightness of the projected image. This mode is suitable for environments where extra-high brightness is required, such as using the projector in well lit rooms.
- Page 34 If you need to display a crosshair on the screen for aiming at targets, follow the instructions below. 1. Press OK to display the FPS Crosshair page. 2. Press OK repeatedly to select a preferred crosshair type. Selecting will not display a crosshair when you leave this page. 3.
- Page 35 • Gamma Selection Gamma refers to the relationship between input source and picture brightness. • 1.8/2.0/2.1/BenQ: Select these values according to your preference. • 2.2/2.3: Increases the average brightness of the picture. Best for a lit environment, meeting room or family room.
- Page 36 • Color Management The Color Management provides six sets (RGBCMY) of colors to be adjusted. When you select each color, you can independently adjust its range and saturation according to your preference. To make adjustments, press the / arrows to highlight an independent color from among Red (R), Green (G), Blue (B), Cyan (C), Magenta (M), or Yellow (Y), and press OK.
- Page 37 Returns all of the adjustments you’ve made for the selected Picture Mode (including the preset mode, User) to the factory preset values. 1. Press OK. The confirmation message is displayed. Reset Current 2. Use to select Reset and press OK. The current picture mode Picture Mode returns to the factory preset settings.
- Page 38 2. Main menu: Audio Structure Menu Options Sound Mode Cinema/Music/FPS/SPG/User 100Hz -10 – +10 300Hz -10 – +10 1kHz -10 – +10 Sound EQ 4kHz -10 – +10 10kHz -10 – +10 Reset Sound EQ Audio Output treVolo/S/PDIF/Audio Return+/3.5mm Jack Audio Output Auto/LPCM/RAW (Up to 7.1)/RAW+ (Object-Based) Format...
- Page 39 The following audio output formats are provided to achieve the audio performance you desire: LPCM supports 2 channel audio output, RAW (Up Audio Output to 7.1) supports up to 7.1 channel audio output, and RAW+ (Object-Based) Format supports Dolby Atmos audio output. The default setting Auto selects a suitable output format for the audio system.
- Page 40 3. Main menu: Display Structure Menu Options Aspect Ratio Auto/4:3/16:9 Auto Source Off/On Search Source Rename HDMI-1/HDMI-2/Type-C Auto/Frame Sequential/ 3D Mode Frame Packing/Top-Bottom/ Side by Side/Off 3D Sync Invert Disable/Invert Signal Format Auto/Limited/Full HDMI-1/HDMI-2/ Equalizer Auto/1/2/3/4/5 Android TV EDID HDMI-1/HDMI-2 Enhanced/Standard HDMI Settings HDMI Device...
- Page 41 PlayStation consoles (with 3D game discs), 3D Blu-ray players (with 3D Blu-ray discs), and so on. After you have connected the 3D video devices to the projector, wear the BenQ 3D glasses and make sure the power is on to view 3D contents.
- Page 42 • Signal Format Selects a suitable RGB color range to correct the color accuracy. • Auto: Automatically selects a suitable color range for the incoming HDMI signal. • Limited: Utilizes the Limited range RGB 16-235. • Full: Utilizes the Full range RGB 0-255. •...
- Page 43 4. Main menu: Installation Structure Menu Options Projector Position Auto/Front/Front Ceiling/Rear/Rear Ceiling H: -30 – +30 2D Keystone V: -30 – +30 LumiExpert Off/On LumiExpert Level -1 – 0 – 1 LumiExpert Manual Calibration Status Manual Calibration Calibrate Reset Manual Calibration Test Pattern Off/On High Altitude Mode...
- Page 44 Adjusts the image size and focus Test Pattern and check that the projected image is free from distortion. We recommend you use the High Altitude Mode when your environment is between 1500 m–3000 m above sea level, and ambient temperature is between 0°C–30°C.
- Page 45 Off/On Direct Power On Off/On Power On/Off Operation Settings Disable/3 min/10 min/15 min/ Settings Auto Power Off 20 min/25 min/30 min BenQ HDMI Media Off/On Streaming (QS02) Panel Key Lock Off/On Yes/No Security Settings Change Password Power On Lock Off/On...
- Page 46 Returns all settings to the factory preset values. Factory Default The following settings will still remain: SettingXchange, Projector Position, 2D Keystone, LumiExpert, Manual Calibration Status, High Altitude Mode, Baud Rate, Light Source Information, BenQ HDMI Media Streaming (QS02), Security Settings. 46 Menu operation...
- Page 47 Returns all the settings in the System main menu to the factory default values. Reset System The following settings will still remain: Light Source Information, BenQ HDMI Media Streaming (QS02), Security Settings. Menu operation...
- Page 48 6. Main menu: Information Structure Menu Options Detected Resolution Source Picture Mode Light Source Mode Sound Mode 3D Format Color System Dynamic Range Light Source Usage Time Firmware Version Service Code Function descriptions Menu Descriptions Detected Shows the native resolution of the input signal. Resolution Source Shows the current signal source.
-
Page 49: Maintenance
Maintenance Care of the projector Cleaning the lens Clean the lens whenever you notice dirt or dust on the surface. Please be sure to turn off the projector and let it cool down completely before cleaning the lens. • Use a canister of compressed air to remove dust. •... -
Page 50: Light Source Information
Light source information Getting to know the light hour When the projector is in operation, the duration (in hours) of light source usage is automatically calculated by the built-in timer. The method of calculating the equivalent light hour is as follows: 1. - Page 51 • Setting Auto Power Off This function allows the projector to turn off automatically if no input signal is detected after a set period of time to prevent unnecessary waste of light source life. To set Auto Power Off, go to Advanced Menu - System > Operation Settings > Power On/Off Settings >...
-
Page 52: Troubleshooting
Troubleshooting The projector does not turn on. Cause Remedy Plug the power cord into the AC power jack on the projector, and plug the power cord into the power There is no power from the power cord. outlet. If the power outlet has a switch, make sure that it is switched on. -
Page 53: Specifications
SPDIF x 1 HDMI-2 eARC x 1 Please visit below website and choose your country to Control find your service contact window. http://www.benq.com/welcome RS-232 serial control Transporting 9 pin x 1 IR receiver x 2 Original packing or equivalent is recommended. -
Page 54: Dimensions
Dimensions 366.0 mm (W) x 131.5 mm (H) x 264.1 mm (D) 366.0 264.1 131.5 Unit: mm 54 Specifications... -
Page 55: Timing Chart
84.997 68.667 94.500 XGA_120 119.989 97.551 115.500 (Reduce Blanking) 1152 x 864 1152 x 864_75 75.00 67.500 108.000 BenQ Notebook 1024 x 576 60.00 35.820 46.996 Timing BenQ Notebook 1024 x 600 64.995 41.467 51.419 Timing 1280 x 720 1280 x 720_60 45.000... - Page 56 1920 x 1920 x 1080_120 120.000 135.000 1080@120Hz 1920 x 1920 x 1200_120 119.909 152.404 317.00 1200@120Hz (Reduce Blanking) 1920 x 1920 x 1080_240 239.76 291.309 582.617 1080@240Hz 2560 x 1440 2560 x 1440_60 59.961 89.251 312.25 2560 x 1440_120 2560 x 1440 119.998 182.996...
- Page 57 Supported timing for USB-C input • PC timings Supported 3D format Refresh rate H-frequency Clock Resolution Mode Frame (Hz) (kHz) (MHz) Top-Bottom Side by Side Sequential VGA_60* 59.940 31.469 25.175 640 x 480 VGA_72 72.809 37.861 31.500 VGA_75 75.000 37.500 31.500 SVGA_60* 60.317...
- Page 58 • : Supports manually setting 3D format. • The timings showing above may not be supported due to EDID file and VGA graphics card limitations. It is possible that some timings cannot be chosen. • Video timings Supported 3D format Horizontal Vertical Dot Clock...
-
Page 59: Rs232 Command
RS232 command RS232 pin assignment Serial Serial RTSZ CTSZ Function Type Operation ASCII Write Power On <CR>*pow=on#<CR> Power Write Power Off <CR>*pow=off#<CR> Read Power Status <CR>*pow=?#<CR> Write HDMI(MHL) <CR>*sour=hdmi#<CR> Write HDMI 2(MHL2) <CR>*sour=hdmi2#<CR> Write HDMI 3 <CR>*sour=hdmi3#<CR> Source Selection Write USB Reader <CR>*sour=usbreader#<CR>... - Page 60 Write Color Temperature-Warm <CR>*ct=warm#<CR> Write Color Temperature-Normal <CR>*ct=normal#<CR> Write Color Temperature-Cool <CR>*ct=cool#<CR> Write Color Temperature-lamp native <CR>*ct=native#<CR> Read Color Temperature Status <CR>*ct=?#<CR> Write Aspect 4:3 <CR>*asp=4:3#<CR> Write Aspect 16:9 <CR>*asp=16:9#<CR> Write Aspect Auto <CR>*asp=AUTO#<CR> Read Aspect Status <CR>*asp=?#<CR> Write Vertical Keystone + <CR>*vkeystone=+#<CR>...
- Page 61 Write High Altitude mode on <CR>*highaltitude=on#<CR> Write High Altitude mode off <CR>*highaltitude=off#<CR> Read High Altitude mode status <CR>*highaltitude=?#<CR> Write Set BenQ gamma value <CR>*gamma=value#<CR> Read Gamma value status <CR>*gamma=?#<CR> Write Set HDR Brightness value <CR>*hdrbri=value#<CR> Read Get HDR Brightness value <CR>*hdibri=?#<CR>...
- Page 62 Write Set Blue Gain value <CR>*BGain=value#<CR> Read Get Blue Gain value <CR>*BGain=?#<CR> Write Red Offset + <CR>*ROffset=+#<CR> Write Red Offset - <CR>*ROffset=-#<CR> Write Set Red Offset value <CR>*ROffset=value#<CR> Read Get Red Offset value <CR>*ROffset=?#<CR> Write Green Offset + <CR>*GOffset=+#<CR> Write Green Offset - <CR>*GOffset=-#<CR>...
Need help?
Do you have a question about the X500I and is the answer not in the manual?
Questions and answers