Table of Contents
Advertisement
Quick Links
INSTALLATION AND OPERATION MANUAL
MANUAL DE INSTALACIÓN Y FUNCIONAMIENTO
INSTALLATIONS- UND BETRIEBSHANDBUCH
MANUEL D'INSTALLATION ET DE FONCTIONNEMENT
MANUALE D'INSTALLAZIONE E D'USO
CENTRIFUGAL VRF Series
RASC-HNPE
MANUAL DE INSTALAÇÃO E DE FUNCIONAMENTO
INSTALLATIONS- OG BETJENINGSVEJLEDNING
INSTALLATIE- EN BEDIENINGSHANDLEIDING
INSTALLATION- OCH DRIFTHANDBOK
Advertisement
Table of Contents
Troubleshooting

Related Manuals for Hitachi RASC-HNPE CENTRIFUGAL VRF Series


Summary of Contents for Hitachi RASC-HNPE CENTRIFUGAL VRF Series
- Page 1 MANUAL DE INSTALAÇÃO E DE FUNCIONAMENTO INSTALLATION AND OPERATION MANUAL MANUAL DE INSTALACIÓN Y FUNCIONAMIENTO INSTALLATIONS- OG BETJENINGSVEJLEDNING INSTALLATIE- EN BEDIENINGSHANDLEIDING INSTALLATIONS- UND BETRIEBSHANDBUCH INSTALLATION- OCH DRIFTHANDBOK MANUEL D’INSTALLATION ET DE FONCTIONNEMENT MANUALE D’INSTALLAZIONE E D’USO CENTRIFUGAL VRF Series RASC-HNPE...
- Page 3 English Español Deutsch Français Italiano Português Dansk Nederlands Svenska...
- Page 4 C A U T I O N This product shall not be mixed with general house waste at the end of its life and it shall be retired according to the appropriated local or national regulations in a environmentally correct way. Due to the refrigerant, oil and other components contained in Air Conditioner, its dismantling must be done by a professional installer according to the applicable regulations.
- Page 5 DANGER PELIGRO GEFAHR DANGER PERICOLO PERIGO FARE GEVAAR FARA KINAYNO CAUTION PRECAUCIÓN VORSICHT PRECAUTION ATTENZIONE CUIDADO FORSIGTIG LET OP VARSAMHET NOTE NOTA HINWEIS REMARQUE NOTA NOTA BEMÆRK OPMERKING...
- Page 6 English attached to the unit with the total amount of refrigerant charged on the installation. warming potential (GWP) R410A/R407C: = 1975/1652.5. Español potencial de calentamiento global (GWP): = 1975/1652.5. Deutsch sind. Sie besitzen folgendes treibhauspotential (GWP) R410A/R407C: = 1975/1652.5. Français le protocole de Kyoto avec un potentiel de rechauffement global (PRG) R410A/R407C: = 1975/1652.5.
- Page 7 English Español Deutsch Français Italiano Português Dansk Nederlands Svenska...
- Page 8 Important note: MODELS CODIFICATION Nota importante: CODIFICACIÓN DE MODELOS Wichtiger Hinweis: MODELLCODES Note importante : CODIFICATION DES MODÈLES Nota importante: CODIFICAZIONE DEI MODELLI Nota Importante: CODIFICAÇÃO DE MODELOS Vigtig information: MODELKODIFICERING Belangrijke opmerking: CODERING VAN DE MODELLEN Viktigt! MODELLER...
- Page 9 RASC-UNIT / UNIDAD RASC / RASC-GERÄT / GROUPE RASC / UNITÀ RASC INDOOR UNIT · UNIDAD INTERIOR · INNEINHEIT · UNITÉ INTERIEUR · UNITÀ INTERNA...
- Page 10 INDOOR UNIT · UNIDAD INTERIOR · INNEINHEIT · UNITÉ INTERIEUR · UNITÀ INTERNA...
- Page 11 RASC...
- Page 12 ENGLISH DEUTSCH ESPAÑOL FRANÇAIS...
- Page 13 ITALIANO DANSK NEDERLANDS PORTUGUÊS...
- Page 14 SVENSKA EN English Original version...
-
Page 15: Safety Summary
If this is not Temperature the case, contact your distributor. Maximum Minimum • HITACHI pursues a policy of continuing improvement in Indoor 32°C DB/23°C WB 21°C DB/15°C WB Cooling design and performance of products. The right is therefore... -
Page 16: Maintenance
Important notice Start-up and Operation: Maintenance: Maximum Allowable Pressure and High Pressure Cut-out Value: Unit Model Refrigerant Maximun Allowable Pressure (MPa) High Pressure Switch Cut-out Value (MPa) RASC-(4-10)HNPE R410A 4.15 4.00 ~ 4.10 N O T E RASC-(4-6)HNPE RASC-(8/10)HNPE Low pressure Discharge pressure High pressure Low pressure... -
Page 17: System Description
System description 3 SYSTEM DESCRIPTION RASC units are suitable for business premises and houses where the use of a conventional RASC unit is either prohibited or impossible. This air conditioner is designed to offer cooling, heating, dry and fan operation. The operation mode will be controlled by the remote control switch. -
Page 18: Basic Troubleshooting
Basic troubleshooting 7 BASIC TROUBLESHOOTING No operation C A U T I O N • Check whether the SET TEMPERATURE is set at the correct temperature. • Not cooling well or heating well This is not abnormal units. • Sound from deforming Part Check if too much heat source exists in the room. -
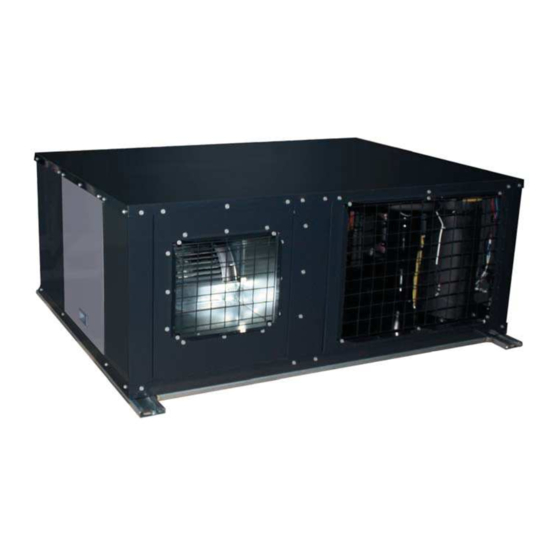
Page 19: Name Of Parts & Dimensional Data
Name of parts & dimensional data PART II-INSTALLATION 8 NAME OF PARTS & DIMENSIONAL DATA 8.1 RASC-(4-6)HNPE Nº Part name Remarks Air inlet Air outlet Electrical box cover Electrical box Fan service cover / Optional air outlet Stop valve protection Holes for wiring connections Ø25x2 Drain pipe connection... - Page 20 Name of parts & dimensional data 8.2 RASC-(8/10)HNPE Nº. Part name Remarks Air inlet Air outlet Electrical box cover Electrical box Fan service cover / Optional air outlet Stop valve protection Holes for wiring connections Ø25x2 Drain pipe connection Ø30x2 (Outer diameter) 4-Ø12x28 Refrigerant liquid pipe Flare nut: Ø9.52 (3/8”) (RASC-8HP)
-
Page 21: Refrigerant Cycle
Refrigerant cycle 9 REFRIGERANT CYCLE 9.1 RASC-(4-6)HNPE Field refrigerant piping Flare nut connection Brazing connection defrost Nº Part name Nº Part name Compressor High pressure switch for protection Heat exchanger High pressure sensor for refrigerant Accumulator Stop valve for gas line Liquid tank Stop valve for liquid line Electronic expansion valve... - Page 22 Refrigerant cycle 9.2 RASC-(8/10)HNPE Field refrigerant piping Flare nut connection Brazing connection defrost Nº Part name Nº Part name Compressor High pressure switch for protection Heat exchanger High pressure sensor for refrigerant Accumulator Stop valve for gas line Electronic expansion valve Stop valve for liquid line Reversing valve Check valve...
-
Page 23: Units Installation
Units installation 10 UNITS INSTALLATION 10.1 RASC UNITS INSTALLATION 10.1.1 Initial check 10.1.2 Transportation Hanging method C A U T I O N • When hanging the unit, ensure the balance of the unit, check safety and lift it up smoothly. Do not remove any packing •... -
Page 24: Factory-Supplied Components
Units installation Handling unit (centre of gravity) When the unit is lifted, pay attention to the following points: (mm) RASC-(4-6)HNPE RASC-(8/10)HNPE 3 Due to the high weight of these units, use the appropriate machinery for these works. Model Gross weight (kg) RASC-4HNPE RASC-5HNPE RASC-6HNPE... - Page 25 Units installation 10.1.4 Installation space Units in mm. RASC-(4-10)HNPE N O T E 10.1.5 Interchangeability of air inlet and outlet panels the air outlet panel with the fan service cover. With respect to the air outlet panel, the change of position entails the rotation of the fan motor as well. position: Air inlet panel (factory-supplied position) Air inlet panel (optional position)
- Page 26 Units installation c. Slide the air inlet panel upward. Then, pull backwards and remove it using the grill. 2 Remove the cycle service cover: Screws b. Slide the service cover upward. Then, pull backwards and remove it using the handle. 3 Finally, exchange both covers and tighten them with their respective screws.
- Page 27 Units installation Procedure to change the fan unit from factory-supplied position to the optional position When the air outlet panel position has to be changed, by following this procedure: 1 In order to access to the unit’s internal parts, remove the following covers and panels depending on access restrictions: a.
- Page 28 Units installation Clamps 5 Remove the wiring from the clamps before turning the fan to the optional position. Clamps 6 Lift the fan unit up slightly, turn it to the optional position, place both fan unit feet into their corresponding bolts for this C A U T I O N Bolts for the factory- supplied position...
- Page 29 8 Once the fan is placed to the optional position, proceed to the assembly of the fan duct accessory (provided separately). HITACHI accessory code: 7E590904 (for 4-6 HP) 7E590905 (for 8/10 HP) 9 The fan duct accessory consists of 4 plates: 2 long plates...
-
Page 30: Installation Place Provision
Units installation 11 Finally, install all the covers again screwing them. 10.1.6 Installation place provision Floor mounted Ceiling suspended 1 Suspend the unit as the drawing indicates. 2 Ensure that ceiling can resist the unit weight which is 2 Install a drainage around foundation for smooth drain. 3 Install the unit so that the drain outlet parts is slightly lower than the other side (>25mm / <30mm), in order to avoid 4 Use vibration-proof rubber (approx. -
Page 31: Fan Performance Curve
Units installation 10.2 FAN PERFORMANCE CURVE RASC unit can be installed with suction and/or discharge air ducts. Refer to the fan performance curves in order to ensure that the air volume is within the working range. In case of using suction and/or discharge air ducts, check the fan performance curve and decide which ducts are suitable according /min.). -
Page 32: Duct Connection
Units installation RASC-10HNPE N O T E • • Setting of the fan performance curves In some installations, it may be necessary to adjust the Fan motor current (A) fan operation settings of RASC-(6/8/10)NPE units in order Model Medium pressure setting High pressure setting to achieve an optimal performance of the fan unit. -
Page 33: Refrigerant Piping & Refrigerant Charge
Refrigerant piping & refrigerant charge 11 REFRIGERANT PIPING & REFRIGERANT CHARGE 11.1 PIPING WORK CONNECTION CONSIDERATIONS 11.1.1 Piping Materials 11.1.2 Suspension of Refrigerant Piping 1 Prepare locally-supplied copper pipes. Suspend the refrigerant piping at certain points and prevent the refrigerant piping from touching the weak part of the building 2 Select the piping size with the correct thickness and correct such as wall, ceiling, etc…... -
Page 34: Piping Connection For Rasc Unit
Refrigerant piping & refrigerant charge 11.2 PIPING CONNECTION FOR RASC UNIT The stop valves are located on the right side of unit cover. 6 Operation of stop valve should be performed according to Before connecting refrigerant piping, the stop valve protection cover shall be removed. -
Page 35: Refrigerant Piping Range
Refrigerant piping & refrigerant charge Do not apply two Gas pipe accessory (Only for RASC-(8/10)HNPE) spanners at this position. If applied, Stop valve The gas pipe accessory (factory-supplied silencer) shall be leakage will occur. (Spindle type) Flare nut valve as indicated in the drawing: Use two spanners Don not apply two here for pipe... -
Page 36: Piping System (Header Branch Installation)
Refrigerant piping & refrigerant charge 11.3.2 Piping system (Header branch installation) 1 indoor unit system 2 indoor units system 3 indoor units system L= A + the longest of B & C L=A + the longest of B, C & D 4 indoor units system Case a) Case b) Only for (8/10)HP... - Page 37 Refrigerant piping & refrigerant charge N O T E • • (4-10)HP 2 indoor units (B-C) 3 indoor units (B-C, B-D, C-D) (B+(D or E)) - (C+(F or G)) Case a) (D-E) 4 indoor units (F-G) Case b) (B-C, B-D, B-E, C-D, C-E, D-E) Only for (8/10)HP It is recommended to install all indoor units at the same height.
-
Page 38: Piping System (Line Branch Installation)
Refrigerant piping & refrigerant charge 11.3.3 Piping system (Line branch installation) RASC unit 4 HP 5 HP 6 HP 8 HP 10 HP Allowed quantity of indoor units 2 - 5 (*) 2 - 6 (*) Maximum refrigerant piping length (Line branch installation) Item 10HP Actual piping length (L1) - Page 39 Refrigerant piping & refrigerant charge 11.3.4 Combinations of piping size and piping length Refrigerant piping length between RASC unit and the farthest indoor unit (m) Liquid Ø6.35 Ø9.52 Ø12.70 Ø15.88 Ø15.88 Ø19.05 Ø12.70 Ø15.88 Ø19.05 Ø22.20 Ø25.40 Ø15.88 Ø19.05 Ø22.20 Ø25.40 Ø28.60 Ø22.20 Ø25.40 Ø28.60 (4-6) HP (3) (4) 8 HP...
- Page 40 Refrigerant piping & refrigerant charge 2 indoor units system (mm) Multi-kit (**) Pipe size (A) RASC unit Liquid TE option TW option 4 HP Ø15.88 Ø9.52 TE-04N1 TW-52AN (5/6) HP Ø15.88 Ø9.52 TE-56N1 TW-52AN 8 HP Ø25.4 Ø9.52 (*) TE-08N (***) TW-102AN (***) 10 HP Ø25.4...
- Page 41 Refrigerant piping & refrigerant charge 4 indoor units system • Case a) N O T E Multi-kit Multi-kit (mm) (mm) Pipe Size (A) Total indoor unit Pipe Size (B,C) RASC unit branch Liquid TE option TW option Liquid TE option option (1+2) or (3+4) 4 HP...
- Page 42 10.0 HP (*) Ø22.20 Ø9.52 11.3.6 Considerations when installing distributors 1 Install the Distributor supplied by HITACHI on request. 3 Correct position of twin distributor (available also for quad installation). A tee can not be installed instead of a branch pipe.
-
Page 43: Refrigerant Charge
Refrigerant piping & refrigerant charge 11.4 REFRIGERANT CHARGE 11.4.1 Refrigerant charge amount Although refrigerant has been charged into this unit, the adequate refrigerant charge depends on the piping length. • The adequate refrigerant quantity should be determined according to the following procedure. •... -
Page 44: Refrigerant Charge Procedure
Refrigerant piping & refrigerant charge Step 4: Total refrigerant charge of the system (W (kg)) In case of RASC-(8/10)HNPE units, the following formula must be used: The total refrigerant charge of this system is calculated by the following formula: W = W = W + W System example (W) = –... - Page 45 Refrigerant piping & refrigerant charge N O T E C A U T I O N • • • • • 11.4.3 Caution of the pressure by check joint below. At that time, connect the pressure gauge according to the following table because of high pressure side and low pressure side changes by operation mode.
-
Page 46: Drainage And Drain Pipe Installation
Drainage and drain pipe installation 12 DRAINAGE AND DRAIN PIPE INSTALLATION Provision regarding installation place Drain water sometimes turns to ice. Therefore, avoid draining in an area that people often use because it is slippery. Install the unit making sure that the drain outlet part is lower (>25mm / <30mm) than the opposite side in order to avoid incorrect drain discharge. -
Page 47: Electrical And Control Settings
Electrical and control settings 13 ELECTRICAL AND CONTROL SETTINGS 13.1 GENERAL CHECK C A U T I O N power switches, circuit breakers, wires, connectors and wire • terminals) have been properly selected according to the • electrical data indicated. Make sure that they comply with national and regional electrical codes. -
Page 48: System Wiring Diagram
Electrical and control settings 13.2 SYSTEM WIRING DIAGRAM Connect the units (outdoor and indoor unit) according to the following electric diagram: • Connect the operation wiring to the units in the same • Open a hole near the connection hole of power source refrigerant cycle (The refrigerant piping and the control wiring when multiple RASC units are connected from one wiring should be connected to the same indoor units). -
Page 49: Electrical Connection Of The Rasc Unit
Electrical and control settings 13.3 ELECTRICAL CONNECTION OF THE RASC UNIT C A U T I O N 13.3.1 Wiring size Power supply cable size Transmitting cable size Max. current Model Power supply EN60 335-1 EN60 335-1 RASC-4HNPE 14.1 4 x 4.0mm + GND RASC-5HNPE 14.1... -
Page 50: Setting And Function Of Dip And Rsw Switches For Rasc Units
Electrical and control settings 13.5 SETTING AND FUNCTION OF DIP AND RSW SWITCHES FOR RASC UNITS 13.5.1 Location of DIP switches and RSW DSW2: Pipe length setting (Setting is required) / switches Optional function setting (PCB layout) Setting before shipment (5-30m) Initial expansion valve opening Piping length... - Page 51 Electrical and control settings DSW5: Setting of end-terminal resistance DSW6: Setting of indoor unit control operation It is not necessary to set when the number of RASC units in the same H-LINK line is one. In case of more than one RASC unit in Individual control operation (Setting before shipment) the same H-LINK line, set as follows:...
-
Page 52: Jumper Lead Setting (Jp1~6)
Electrical and control settings 13.5.3 Jumper lead setting (JP1~6) Setting before shipment: System Three-phase (3N~) N O T E The function selection using the jumper lead setting is shown in the tables below: Setting Function Details Not used Not used 400V power source voltage When JP3 is set to “open”, current protection parameters are set for a 400 V power source voltage. -
Page 53: Checking Procedure Before The Test Run
Commissioning 14 COMMISSIONING 14.1 CHECKING PROCEDURE BEFORE THE TEST RUN When installation is completed, perform test run according to the following procedure, and hand over the system to the customer. correctly connected. Test run should be performed according to the on next page. - Page 54 Commissioning 14.2 TEST RUN PROCEDURE BY REMOTE CONTROL SWITCH (PC-ART EXAMPLE) Turn ON the power source of the Indoor unit and RASC unit Set the TEST RUN mode by remote control switch. Counting Operation lamp number of Depress the “MODE” and the “ OK”...
- Page 55 Commissioning Remote Control Inspection Points after Unit Condition Wrong Portions Switch Indication Power Source OFF Connecting Order of each Terminal Board. Screw fastening of each Terminal Boards. N O T E The power source of RASC Unit The operation lamp in not turned ON.
- Page 56 Commissioning 14.3 TEST RUN FROM RASC UNIT SIDE The procedure of test run from RASC unit side is indicated C A U T I O N below. Setting of this DIP switch is available with the power • source ON. Setting of Dip Switch (Before Shipment) •...
-
Page 57: Troubleshooting
Safety summary & control device setting 15 SAFETY SUMMARY & CONTROL DEVICE SETTING Compressor and fan motor protections The following devices and their combinations protect the compressor and fan motor. High-pressure switch This switch cuts out the operation of the compressor when the discharge pressure exceeds the setting. This band heater protects against the oil carry-over during the cold starting, as the band heater is energized Oil heater while the compressor is stopped. -
Page 58: Alarm Codes
Troubleshooting Abnormal operation can be produced due to the following Power supply failure reasons: All displays disappear. Malfunction If the unit stops due to a power shortage, it will not start again, even though the power comes back on. Carry out the start-up operations again. - Page 59 Troubleshooting Code Category Type of abnormality Main cause number Air inlet thermistor Air outlet thermistor Indoor unit sensor Freeze protection thermistor Failure of thermistor, sensor, connection. (Incorrect Wiring, Gas piping thermistor Disconnected Wiring, Wire Breaking, Short Circuit). Econofresh Thermistor of fresh outdoor air Remote thermistor Indoor unit sensor...
Need help?
Do you have a question about the RASC-HNPE CENTRIFUGAL VRF Series and is the answer not in the manual?
Questions and answers