TCS SuperSTAT Series Configuration Manual
Communicating thermostat
Hide thumbs
Also See for SuperSTAT Series:
- Installation manual (7 pages) ,
- Installation manual (7 pages)

Related Manuals for TCS SuperSTAT Series


Summary of Contents for TCS SuperSTAT Series
- Page 1 CONFIGURATION GUIDE Communicating Thermostat SuperSTAT SZ1041 2800 Laura Lane • Middleton, WI 53562 800.288.9383 www.tcsbasys.com 202308...
-
Page 2: Table Of Contents
Contents Introduction ............................3 Display Screen and Keypad ........................3 Locating the Programming Keypad .........................3 Programming Keypad Access .........................4 Navigating Via Keypad ..........................4 Programming Setup Mode ........................5 Basic Setup ..............................5 System Mode ..................................5 Occupancy Settings ................................ 6 Heating/Cooling Stages ..............................7 Economizer .................................. -
Page 3: Introduction
“Programming Keypad Access” on page If you have any questions regarding your SuperSTAT, do not hesitate to contact TCS Technical Support at 800.288.9383, ext. 2. Our Technical Support Department hours are Monday – Friday, 7:00 a.m. to 7:00 p.m. (CST). -
Page 4: Programming Keypad Access
R W/Y1 W/Y2 G A02 A01 Configuration – DI3 OVR T1 Programming Keypad Access The keypad can be configured to restrict access to the Programming Setup and Clock and Schedule functions. You can control the access to either function by configuring the keypad dip switches on the inside of the front cover as shown. Keypad Dip Switch Settings 1 2 3 4 5 The dip switch panel controls access to clock,... -
Page 5: Programming Setup Mode
Configuration Program Setup Mode Before entering PROGRAM SETUP Mode, ensure that the temperature sensor dip switch settings match your intended use (see SuperSTAT 1041 Installation Manual). If the dip switch settings do not match the configuration settings in this section, the SuperSTAT will not function properly. NOTE: PROGRAM SETUP Mode can be disabled via dip switch settings (see “Programming Keypad Access”... -
Page 6: Occupancy Settings
Configuration Occupancy Settings STEP 1 Occupied Fan Mode: Choose between ON (continuous), SET OCCUPIED FAN COOL (gas heat or no heat), or AUTO for fan run times during occupied periods MODE: AUTO STEP 2 Unoccupied Fan Mode: Choose between AUTO or COOL for SET UNOCCUPIED fan run times during unoccupied periods. -
Page 7: Heating/Cooling Stages
Configuration STEP 11 Occupied Cool Setpoint D: Set the cooling setpoint for this OCCUPIED COOL occupied period. SETPOINT D: STEP 12 Unoccupied Cool Setpoint: Set the Unoccupied Mode’s UNOCCUPIED COOL cooling setpoint. SETPOINT: STEP 13 User Setpoint Limit: Enter the amount a user is allowed the LIMIT SETPOINT to adjust the preset occupied setpoints ADJUST +/-... -
Page 8: Economizer
Configuration STEP 7 Cool Stage 1 Offset: Enter an offset value for cool stage 1. COOL STAGE 1 (Heat stage 1 is normally 0° offset). OFFSET: STEP 8 Cool Stage 1 Differential: Enter a differential value for cool COOL STAGE 1 stage 1. -
Page 9: Digital Inputs
Configuration STEP 3 Discharge Air Economizer: Select the discharge air setpoint. DSCHARGE AIR ECON SETPOINT: 055F STEP 4 Discharge Air Low Limit: Select the discharge air low limit DSCHARGE AIR ECON value. LOW LIMIT: 040F STEP 5 Economizer Proportional Band: Set the discharge air DSCHARGE AIR ECON proportional band or throttling range. -
Page 10: Energy Saving
Configuration Energy Saving STEP 1 Delay on Powerup: In the event of a power interruption, DELAY ON POWERUP entering a value (in seconds) that will delay the powerup of the SuperSTAT. 010 SECONDS STEP 2 Smart Recovery: Select whether to use Smart Recovery ENABLE SMART Mode. -
Page 11: Time And Date
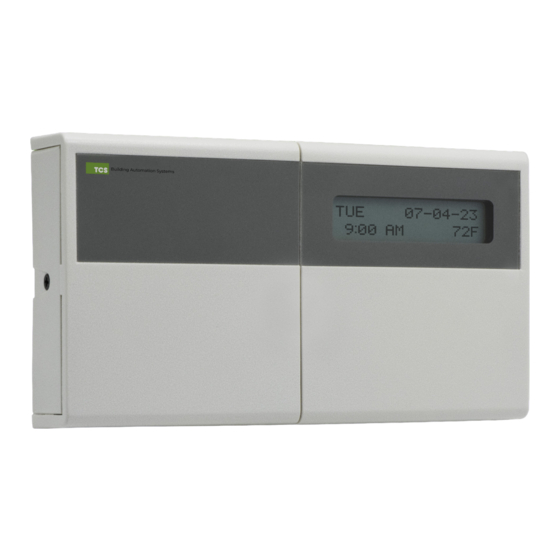
Configuration Time and Date STEP 1 Time and Day: Set the hour, minute, AM or PM, and day of the SET TIME & DAY: week. 12:00 AM STEP 2 Date: Set the month, date, and year. SET DATE: 08-08-18 Occupancy Schedules STEP 1 Set Occupancy Time Periods: This screen indicates that the SET OCCUPIED... -
Page 12: Holiday Occupancy Schedules
Configuration Holiday Occupancy Schedules The SuperSTAT has two separate holiday occupancy groups (Holiday #1 and Holiday #2). Within each occupancy group you can assign up to four occupancy time periods (A – D). After programming the occupancy time periods, you can then assign them to multiple holidays. -
Page 13: Daylight Saving
Configuration STEP 9 Holiday Group 2 Dates: In this screen, you can assign the HOL2 01=00=00 Holiday 1 occupancy time periods to as many as 12 holidays. Enter the two-digit month, date, and duration in days. To add DURATION=00 DAYS additional dates to this group, press the OVERRIDE button.
Need help?
Do you have a question about the SuperSTAT Series and is the answer not in the manual?
Questions and answers