Table of Contents
Advertisement
Quick Links
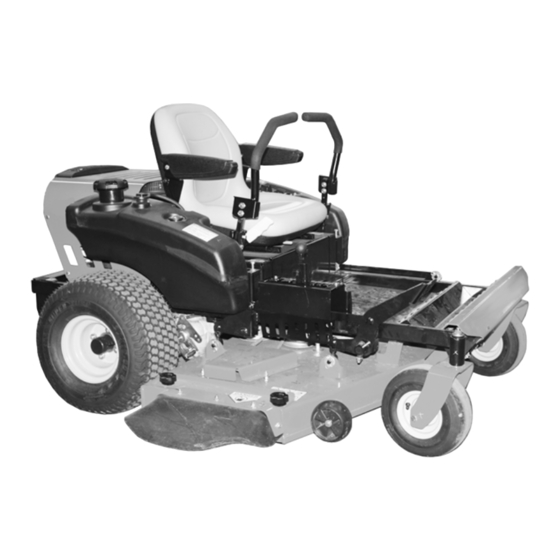
Zoom XL
Owner/Operator Manual
Manuel Du Propriétaire/Utilisateur
E10
®
The use of any gasoline exceeding 10% ethanol (E10) or
10% MTBE will void the product warranty.
L'utilisation d'une essence contenant plus de 10%
d'éthanol (E10) ou de 10% de MTBE annulent la garantie.
ENGLISH
FRANÇAIS
Models
915163 – Zoom XL 42
(SN 045000 +)
915165 – Zoom XL 48
(SN 045000 +)
915173 – Zoom XL 54
(SN 045000 +)
915195 Zoom XL 48 CARB
(SN 000101 +)
04829400 • 10/14
Printed in USA
Advertisement
Table of Contents

Subscribe to Our Youtube Channel
Related Manuals for Ariens Zoom XL 42 CARB


Summary of Contents for Ariens Zoom XL 42 CARB
- Page 1 ® Zoom XL Owner/Operator Manual Manuel Du Propriétaire/Utilisateur Models 915163 – Zoom XL 42 (SN 045000 +) 915165 – Zoom XL 48 (SN 045000 +) 915173 – Zoom XL 54 (SN 045000 +) 915195 Zoom XL 48 CARB (SN 000101 +) The use of any gasoline exceeding 10% ethanol (E10) or 10% MTBE will void the product warranty.
-
Page 2: Table Of Contents
PRODUCT REGISTRATION located on the frame of your unit. See Figure 1. The Ariens dealer must register the product at the time of purchase. Registering the product will help the company process warranty claims or contact you with the latest service information. - Page 3 4. Review recommended lubrication, maintenance and adjustments. 5. Review Limited Warranty Policy. 6. Fill out a product registration card and return the card to the Ariens Company or go to www.ariens.com. EN - 3...
-
Page 4: Safety
SAFETY CAUTION: POTENTIALLY WARNING: This cutting machine HAZARDOUS SITUATION! If not is capable of amputating hands avoided, MAY RESULT in minor and feet and throwing objects. or moderate injury. It may also be Failure to observe the safety used to alert against unsafe instructions in the manuals and on practices. - Page 5 07800401 KEEP HANDS and FEET AWAY TO AV 07800403 Figure 2 1. DANGER! Shut off engine, remove key, Discharge Hazard – and read manual before NEVER operate unit servicing or making without discharge chute in adjustments to unit. operating position. Thrown objects can cause injury or damage.
- Page 6 4.2 Discharge Hazard 3. DANGER! Discharge Hazard – NEVER Discharge Hazard – NEVER direct discharge toward operate unit without people, pets or property. discharge chute in operating Thrown objects can cause position. Thrown objects can injury or damage. cause injury or damage. Do not operate mower unless Keep children and others all guards are in operating...
- Page 7 If loss of traction is penalties. Emission controls and components experienced do the can only be adjusted by an Ariens Company following: dealer or an authorized engine manufacturer's service center. Contact your Ariens Company Equipment Retailer concerning emission controls and component questions.
- Page 8 ALWAYS check overhead and side Start and operate unit only when seated in clearances carefully before operation. operator’s position. Steering control levers ALWAYS be aware of traffic when crossing or must be in neutral, PTO disengaged and operating along streets or curbs. parking brake set when starting engine.
- Page 9 NEVER carry passengers – especially Keep unit free of grass clippings, leaves, and children – even with blades off. other debris. Clean up oil or fuel spills. Use extra care when approaching blind This product is equipped with an internal corners or objects that may obscure vision of combustion type engine.
- Page 10 Battery posts, terminals and related Clean grass and debris from unit, especially accessories contain lead and lead from around muffler and engine, to help compounds, chemicals known to the State of prevent fires. California to cause cancer and reproductive For extended storage, clean unit thoroughly. harm.
-
Page 11: Assembly
ASSEMBLY WARNING: AVOID INJURY. Read and understand the entire Safety section before proceeding. Tools Required • Adjustable wrench • 9/16" wrench • Petroleum jelly or dielectric grease. Unpack Unit Remove unit and all other components from the shipping container. Engage transmission bypass lever (see MOVING UNIT 1. - Page 12 Check Tire Pressure Transport Position CAUTION: Avoid injury! Explosive separation of tire and rim parts is possible when they are serviced incorrectly: • Do not attempt to mount a tire without the proper equipment and experience to perform the job. •...
-
Page 13: Controls And Features
CONTROLS AND FEATURES Figure 5 1. Ignition Switch 8. Mower Lift Pedal 2. PTO Switch 9. Mower Deck 3. Throttle Lever 10. Fuel Gauge 4. Seat 11. Choke Control 5. Steering Levers 12. Hour meter 6. Parking Brake 13. Discharge Chute 7. -
Page 14: Operation
If smoothly. the unit does not perform as stated contact NOTICE: Do not choke a warm engine. your Ariens dealer for repairs. Test Steering Parking Engine Parking Brake... - Page 15 Operation • Left (3) – Pull left steering lever back or push right steering lever forward or Press and release a combination of both. the toggle button • Right (4) – Pull right steering lever (2) to shift between back or push left steering lever forward different functions.
- Page 16 Press mower lift pedal and place height of cut inside the tank is not exceeded. Use a lever to desired adjustment notch. portable gasoline container with an appropriately sized dispensing spout when NOTICE: Adjusting the seat further forward filling the tank. Do not use a funnel or other will help increase the leverage in lifting the device that obstructs the view of the tank mower deck (see Adjusting Seat on page 16).
- Page 17 STOPPING IN AN EMERGENCY STARTING AND SHUTTING OFF ENGINE WARNING: Operating unit on Starting the Engine slopes may lead to loss of NOTICE: Disengage the PTO, engage the steering control. When operating parking brake, and place the steering levers on slopes be prepared to react to an emergency situation.
-
Page 18: Maintenance Schedule
Parking MOVING UNIT MANUALLY on page 17). Push unit. If unit rolls, Brake contact your Ariens Dealer. Clean Unit Clean engine, battery, seat, mower deck, etc. of all dirt and debris. Do not use solvents, hard cleaners, or abrasives. NOTICE: Protect painted surfaces with automotive type wax. - Page 19 Interval Task Action Check CAUTION: Check for worn or damaged mower blades. Mower Blades Follow Perform scheduled engine Engine maintenance. Refer to Engine Manual Manual for detailed instructions. Mainten- NOTICE: To drain the oil, use the oil Each Use ance drain hose (1) supplied with unit, not Schedule the drain plug that is shown in the...
-
Page 20: Service And Adjustments
SERVICE AND ADJUSTMENTS REPLACING MOWER BLADE WARNING: AVOID INJURY. Remove Read and understand the entire Safety section before proceeding. See Figure 11. CAUTION: Mower blades are TIPPING SEAT FORWARD sharp and can cut you. Wrap the Move steering levers to neutral position and blades or wear gloves, and use rotate handles outward. - Page 21 LEVELING AND ADJUSTING The Forward Pitch Of The Mower Blades PITCH OF MOWER DECK See Figure 13. NOTICE: Adjust on a level surface, with the tires inflated to the correct air pressure (see • Should be 0" – 1/4" (6.35 mm) pitched Specifications on page 31).
- Page 22 Adjusting The Mower Deck To Adjust Mower Blade Height And Pitch See Figures15 and 16. NOTICE: Adjusting the mower deck will adjust the height and pitch of the mower blades. 1. Adjust the trunnions first and re-take the three measurements required to level and adjust the pitch of the mower deck.
- Page 23 4. Remove battery bracket. 5. Remove and properly dispose of old battery. 1. Battery Bracket 2. Taptite Fastener 1. Battery Bracket 3. Negative (–) Cable 2. Taptite Fastener 4. Negative (–) Terminal Figure 17 5. Battery 6. Positive (+) Cable 7.
- Page 24 Jump-Starting 2. Install mounting hardware and tighten. Ariens does not recommend jump-starting your unit. Jump-starting can damage engine 2. Adjust Steering Lever Width and electrical system components. See your 1. Loosen hardware at the base of the engine manual for more detailed information.
- Page 25 The travel of the steering levers may need adjustment if: CAUTION: Use care when releasing idler spring tension. • The unit turns to the right or left when Keep body parts well away from both steering levers are pushed as far idler when performing this forward as possible.
- Page 26 75 hours of operation and then 3. Pulley every 400 hours. Use 15W-50 synthetic 4. Electric Clutch motor oil (Ariens p/n 00057100) or 5. Idler equivalent. 6. Idler Spring 1. Place container under oil filter to catch Figure 23 oil.
-
Page 27: Storage
MOVING UNIT MANUALLY on 7. Fill with 15W-50 synthetic motor oil page 17). (Ariens p/n 00057100) or equivalent until oil appears at the bottom of the drain 5. Start the engine and slowly move the plug (about 2 quarts per transaxle). -
Page 28: Troubleshooting
5. Connect spark plug wire(s) or replace loose or spark spark plug(s). Refer to Engine Manual plug(s) faulty. for detailed instructions. 6. Faulty electrical 6. Contact your Ariens Dealer. system. 7. Faulty engine. 7. Contact your Ariens Dealer. Engine runs 1. Air filter cartridge 1. - Page 29 2. Faulty operator 2. Contact your Ariens Dealer. presence switch. 3. Electric clutch 3. Connect the electric clutch connector. connector is loose or See REPLACING HYDROSTATIC disconnected.
-
Page 30: Service Parts
ACCESSORIES SERVICE PARTS See your authorized Ariens dealer to add Be sure to always use genuine Ariens parts these optional accessories to your unit. to keep your unit running like new. Part No. Description Part No. Description 71502900 Dump Cart 21541700 Spark Plug 71509000 42"... -
Page 31: Specifications
SPECIFICATIONS Model Number 915163 915165 915173 915195 Model Zoom XL 42 Zoom XL 48 Zoom XL 54 Zoom XL 48 CARB Engine Kohler 7000 44.2 (725) Displacement – in. (cc) Max Governed RPM (May be 3600 ± 0 / -100 different from maximum RPM) Speed Forward Max. -
Page 32: Warranty
Register the product immediately at the time of sale. If the dealer does not register the product, the customer must complete the product registration card in the literature package and return it to the Ariens Company, or register the unit online at www.ariens.com, www.gravely.com, www.countax.com. - Page 33 Exclusions – Items Not Covered by This Warranty • Parts that are not genuine Ariens, Gravely or Countax service parts are not covered by this warranty and may void the warranty. • Damages resulting from the installation or use of any part, accessory, or attachment which is not approved by the Ariens Company for use with product(s) identified herein are not covered by this war- ranty.
- Page 34 Ariens 655 West Ryan Street Brillion, WI 54110 920-756-4688 Fax 920-756-2407 www.ariens.com www.ariens.com.au...
Need help?
Do you have a question about the Zoom XL 42 CARB and is the answer not in the manual?
Questions and answers