Advertisement
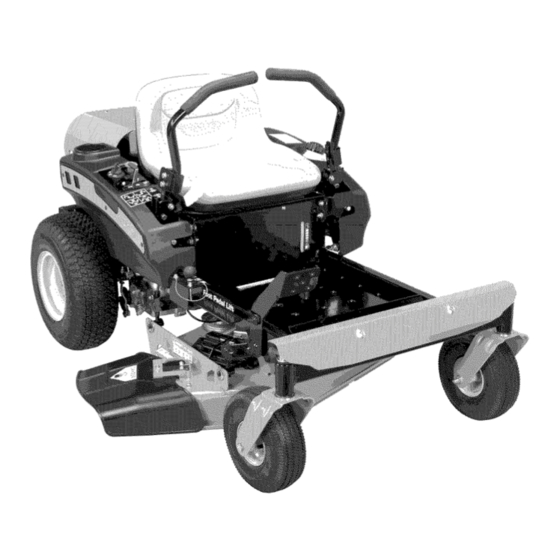
Zoom ®
Owner/Operator
Manual
Manuel Du Proprietaire/Utilisateur
Models
915157 - Zoom 34
915159 - Zoom 42
915161 - Zoom 50
915169 - Zoom 34 CARB
915171 - Zoom 42 CARB
Gasoline containing up to 10% ethanol (El0) or up to 10% MTBE (methyl tertiary butyl ether)is
acceptable for use in this machine.
The use of any gasoline exceeding
10% ethanol (El0) or 10% MTBE will void the product warranty.
II est possible d'utiliser de I'essence contenant jusqu'a 10% d'ethanol (El0) ou 10% de MTBE
(ether methyl-tertiobutylique)
sur cette machine.
L'utilisation d'une essence contenant plus de 10% d'ethanol (El0) ou de 10% de MTBE annulent la
garantie.
ENGLISH
,_
_
(_
FRAN(_AIS
03997700B1/11
Printed in USA
Advertisement

Related Manuals for Ariens 915157-Zoom 34


Summary of Contents for Ariens 915157-Zoom 34
- Page 1 Zoom ® Owner/Operator Manual Manuel Du Proprietaire/Utilisateur Models 915157 - Zoom 34 915159 - Zoom 42 915161 - Zoom 50 915169 - Zoom 34 CARB 915171 - Zoom 42 CARB Gasoline containing up to 10% ethanol (El0) or up to 10% MTBE (methyl tertiary butyl ether)is acceptable for use in this machine.
-
Page 2: Table Of Contents
Visite a su distribuidor If the engine manual is not available, contact o vaya a www.ariens.com para the engine manufacturer for a replacement obtener una lista de idiomas manual. - Page 3 Registering the 6. Fill out a product registration card and product will help the company process return the card to the Ariens Company or warranty claims or contact you with the latest go to www.ariens.com. service information.
-
Page 4: Safety
[,:'Y-'1 al=1i'I The safety alert symbol is used in decals and with this manual. Understand the safety WARNING: This cutting machine message. It contains important information is capable of amputating hands about personal safety. and feet and throwing objects. Failure to observe the safety instructions in the manuals and on decals could result in serious HAZARDOUS... - Page 5 Figure2 1.DANGER! &DANGER! Always keep feet and hands Avoid injury - Stay clear of 3L q. away from rotating parts. rotating parts. OL1816 OL1809 2.CAUTION Always stand clear of discharge area. Do not direct discharge toward other people. No smoking. while operating.
- Page 6 Emission controls and Check interlock system per manual components can only be adjusted by an before use. Ariens Company dealer or an authorized engine manufacturer's service center. Understand location and function of all controls. Contact your Ariens Company Equipment...
-
Page 7: Assembly
Read, understand, and follow a llsafety Start and operate unit o nly w hen s eated in practices inOwner/Operator Manual before operator's position. Steering control levers assembling, using o rworking onthis mower. must beinneutral, PTO disengaged parking brake set w hen s tarting engine. ALWAYS remove key from ignition and wire from spark plug before assembly,... - Page 8 Return steering levers toneutral Fuel is highly flammable and its vapors are position. explosive. Handle with care. Use only an Immediately setparking brake. approved gasoline container with an Turn o ff P TO and engine. appropriately sized dispensing spout. Mow upand down s lopes, not a cross them. NO smoking, NO sparks, NO flames.
- Page 9 A frozen battery can explode and result in Rotation of one blade may cause rotation of the other blades. death or serious injury. DO NOT charge or jump start a battery containing frozen fluid. Check brake operation frequently. Adjust and Thaw the battery before putting on a charger service as required.
- Page 10 Check Tire Pressure Level Mower Deck See LEVELLING AND ADJUSTING PITCH CAUTION: Avoid injury! OF MOWER DECK on page 18. Explosive separation of tire and Fill Fuel Tank rim parts is possible when they are serviced incorrectly: Fill fuel tank. DO NOT OVERFILL! See Do not attempt to mount a tire FILLING FUEL TANK on page 13.
- Page 11 [_o]_ij_o_ r-'_ _I m]I _ 1 _i uL_"] 915157,169 915159,161,171 Figure 4 7. Mower Lift Pedal 1. ignition Switch 2. PTO Switch 8. Mower Deck 3. Seat 9. Discharge Chute 4. Fuel Level 10. Parking Brake 5. Steering Levers 11. Choke (915159, 161, 171) 6.
-
Page 12: Controls And Features
See figure 4 for all controls and features properly. locations. Perform the following tests to ensure the safety interlock system is working properly. If the unit does not perform as stated contact your Ariens dealer for repairs. Test Steering Lever Parking Brake... - Page 13 1. Clean fuel caps and surrounding area to Power Take-Off (PTO) Switch prevent dust, dirt, and debris from Engages (2) entering fuel tanks. 2. Remove fuel caps. disengages IMPORTANT: Refer to Engine Manual for (1) mower correct type and grade of fuel. blades.
- Page 14 Fuel Stabilizer Stopping the Engine Gasoline left in the fuel system for extended 1. Stop unit. periods without a stabilizer will deteriorate, 2. Disengage PTO. resulting in gum deposits in the system. 3. Set throttle lever to slow. These deposits can damage the carburetor 4.
- Page 15 FOR BEST PERFORMANCE Cut grass when it is dry. Keep mower blades sharp. Keep mower deck properly leveled. Do not set height of cut too low. For very tall grass, mow twice. Do not travel too fast. Mow with the engine set at full throttle. When mulching, only remove one-third of grass length per cutting.
- Page 16 Parking MOVING UNIT MANUALLY on page 15). Push unit. If unit rolls, contact Brake your Ariens Dealer. Clean Unit Clean engine, battery, seat, mower deck, etc. of all dirt and debris. Do not use solvents, hard cleaners, or abrasives. NOTE: Protect painted surfaces with automotive type wax.
- Page 17 Interval Task _,ction Check Keep battery and battery terminals clean (see Cleaning Battery and Battery Battery Cables on page 21). 25 Hours or Every Season UnitLubricatefrontApplygreaset°zerk (1)on eachwheel 50 Hours Check Check mower blade mounting hardware and all other fasteners. or Every Fasteners Replace fasteners that are missing or damaged.
- Page 18 MOWER DECK REMOVAL AND Install INSTALLATION (Figure 7) 1. Slide mower deck under unit. Remove NOTE: Perform step 2 and 3 for the right and (Figure 7) left side of unit. 1. Remove PTO belt from the engine drive 2. Connect drag link to front deck bracket. pulley (see REPLACING PTO BELT on 3.
- Page 19 The Forward Pitch Of The Mower 1. Adjust the trunnions first and re-take the three measurements required to level Blades and adjust the pitch of the mower deck. (Figure 9) These measurements are: Should be 0.0 in. (0.0 mm) to 1/4 in. a.
- Page 20 REPLACING MOWER BLADE on terminals and related accessories page 19). WARNING: Battery posts, contain lead and lead Ariens recommends having mower blades compounds, chemicals known to sharpened by a professional. Contact your the State of California to cause Ariens dealer.
- Page 21 3. Clean battery cable ends, negative (-) Jump-Starting terminal, and positive (+) terminal with a wire brush and rinse with a weak baking Ariens does not recommend jump-starting soda solution. your unit. Jump-starting can damage engine 4. Connect positive (+) cable first, then and electrical system components.
- Page 22 ADJUSTING STEERING LEVERS Rotate this end away from the the operator (Figure 15) position to move the steering levers in. Adjustment Adjustment Rotate this end away from the operator position to move the steering levers out. Figure 16 3. Adjust Steering Lever Forward or Backward 1.
-
Page 23: Operation
915157,169 1. Forward Travel Adjustment Bolt 2. Lower Control Arm 1. Deck Spindle Figure 17 Engine Drive Pulley 3. Deck Idler PTO Belt REPLACING PTO BELT Remove Figure 18 (Figure 18) 1. Lower mower deck to the ground. 915159, 161,171 2. -
Page 24: Storage
3.Slowly release idler arm until idler pulley 2. Connect idler spring. rests f irmly a gainst PTO belt. 3. Install PTO belt (see REPLACING 4.Install belt c overs onmower deck. BELT on page 23). NOTE: Ensure that b elt i sstill p ositioned the groove ofthe sheave after belt c overs are installed. - Page 25 Spark plug wire(s) Connect spark plug wire(s) or replace spark loose or spark plug(s). Refer to Engine Manual for detailed instructions. plug(s) faulty. Faulty electrical Contact your Ariens Dealer. system. Faulty engine. Contact your Ariens Dealer. Engine runs Choke engaged. Disengage choke.
- Page 26 (see REPLACING MOWER BLADE on page 19). [.,,-._o,]:11 _7__I _ K,,,.-_ P_'T__o];_[_,,,,_ Be sure to always use genuine Ariens See your authorized Ariens dealer to add parts to kee your unit running like new. these optional accessories to your unit.
- Page 27 [,,,,___o]_,,,_ Model Number 915157 915159 915161 Model Zoom 34 Zoom 42 Zoom 50 Engine Type Briggs & Stratton Kohler Kohler 30.51 (500) 44 (725) 44 (725) Engine Displacement in.3 (cc) 3600 + 0 Governed RPM (May be different from maximum RPM) 3600 - 100 Drive Forward Max.
- Page 28 [,,,,___o]_,,,_ Model Number 915169 915171 Model Zoom 34 CARB Zoom 42 CARE} Engine Type Briggs & Stratton Kohler 30.51 (500) 44 (725) Engine Displacement in.3 (cc) 3600 + 0 Governed RPM (May be different from maximum RPM) 3600 - 100 Drive Forward Max.
-
Page 29: Warranty
For the next 12 months, Ariens Company will cover the prorated cost of replacing a battery pack and/or battery subassembly that fails due to defect in material or workmanship. - Page 30 90 days of the warranty period, a defective battery will be replaced free of charge. If the applicable warranty period is more than 90 days, Ariens Company will cover the prorated cost of any defective battery, for up to 12 months after the date of purchase.
- Page 31 (b)(2). If any such part fails during the period of warranty coverage, it must be repaired or replaced by the Ariens Company. Any such part repaired or replaced under the warranty must be warranted for a time not less than the remaining warranty period.
- Page 32 Gravely, orParker service representative. (7.)Throughout the e vaporative emission control system's warranty period set out insubsection (b)(2), the Ariens Company must maintain asupply ofwarranted parts sufficient tomeet the expected demand for s uch parts. (8.)Manufacturer-approved replacement parts must be used inthe performance...
- Page 33 Ariens Company 655 West Ryan Street Brillion, WI 54110-1072 920-756-4688 Fax 920-756-2407 www.ariens.com & WARNING & The engine exhaust from this product contains chemicals known to the State of California to cause cancer, birth defects or other reproductive harm. An _4_p_._...
- Page 34 Zoom @ Manual del propietario/operador Models 915157 - Zoom 34 915159 - Zoom 42 915161 - Zoom 50 915169 - Zoom 34 CARB 915171 - Zoom 42 CARB En esta maquina puede utilizarse gasolina con hasta un 10% de etanol (El0) o hasta un 10% de MTBE (eter de metil butil terciario).
- Page 35 Este manual se incluye en la documentaci6n entregada junto con la unidad. Consulte este idiomas diferentes del ingles en su distribuidor. Visite a su distribuidor manual cuando necesite recomendaciones o vaya a www.ariens.com para de mantenimiento del motor. Si no dispone obtener una lista de idiomas...
- Page 36 3. Revise las funciones de control y el registra el producto, rellene, firme y devuelva funcionamiento de la unidad. No ponga la tarjeta de registro del producto a Ariens la unidad en marcha a no ser que todos o acceda a www.ariens.com en Internet.
- Page 37 Las descripciones y especificaciones contenidas en este manual eran las vigentes en el momento DE RESPONSABILIDAD de su publicaci6n. Algunos equipamientos Ariens se reserva el derecho a interrumpir, descritos en este manual pueden realizar cambios y aSadir mejoras a los ser opcionales. Algunas ilustraciones productos en cualquier momento sin aviso ni pueden no aplicar a su unidad.
- Page 38 Figura 2 1. iPELIGRO! en exceso puede provocar graves iADVERTENCIA! iUn Ilenado daSos al sistema de evaporaci6n! Evite lesJones. Mantengase alejado de las piezas gJratorias. Nunca Ilene el dep6sito de combustible OL1816 cuando el motor este en marcha o caliente o la unidad este en un recinto 2.
- Page 39 Mantenga los dispositivos de seguridad (guardas, protectores, interruptores, alejados delaunidad durante etc.) en su lugar y en buen estado D'_L_t Mantener aterceros elfuncionamiento delamisma. de funcionamiento. Antes del uso, revise el sistema de interbloqueo de acuerdo al manual. Apagar el motor, quitar la Ilave Comprenda y conozca la ubicaci6n y leer el manual antes de ajustar...
- Page 40 Qnicamente por un distribuidor con cortacespedes. Estos operadores deberian de Ariens Company o por un centro de servicio evaluar su capacidad de hacer funcionar el cortacesped con seguridad para protegerse autorizado del fabricante del motor. P6ngase y proteger a los demas de lesiones graves.
- Page 41 NO coloque las manos oninguna parte El f uncionamiento enpendientes puede del c uerpo olas ropas enelinterior ocerca provocar lap@dida de control deladirecci6n. delas piezas enmovimiento durante Cuando avance en pendientes, este p reparado elfuncionamiento delaunidad. para r eaccionar ante una situaci6n No realice NUNCA una d escarga directa hacia...
- Page 42 Tenga especial cuidado alcargar odescargar Evite las descargas electricas. Los objetos en launidad desde ohacia unremolque ocamiSn. contacto con ambos terminales de la bateria Asegure launidad por e lchasis para al mismo tiempo pueden sufrir daSos y al transportarla. NU NCA l aasegure por v astagos mismo tiempo daSar la unidad.
- Page 43 Las c uchillas del c ortacesped estan afiladas y Cierre elpaso d e combustible (si c orresponde) podrian cortarle. Envuelva las cuchillas oIleve ydeje que elmotor seenfrie c ompletamente antes decubrir oalmacenar launidad guantes ytenga cuidado cuando lasrepare. No suelde nienderece NUNCA lascuchillas enunrecinto cerrado.
- Page 44 Compruebe el nivel de aceite Nivelacion de la plataforma de corte del motor Consulte NIVELACION YAJUSTE DE LA INCLINACION DE LA PLATAFORMA Consulte el manual del motor. CORTE en la pagina 20. Compruebe la presion de los neumaticos Llenado del deposito de combustible Llene el dep6sito de combustible.
- Page 45 915157,169 915159,161,171 Figure 4 1. Interruptor de encendido 7. Pedal de elevaci6n del cortacesped 8. Plataforma de corte 2. Interruptor de la TDF 3. Asiento 9. Tolva de descarga 4. Nivel de combustible 10. Freno de estacionamiento 5. Palancas de direcci6n 11.
- Page 46 Realice las pruebas siguientes para comprobar que el sistema de interbloqueo de seguridad funciona correctamente. Si la unidad no funcionara como debe, p6ngase en contacto con su concesionario Ariens para realizar reparaciones. Prueba Palanca de direcci6n Freno de Motor estacionamiento...
- Page 47 Freno de estacionamiento Pedal de elevacion del cortacesped (Figura 5) Sube y baja la plataforma de corte. el freno de estacionamiento. Presioneel pedalde elevaci6n del cortacesped e instale el pasador de ajuste en el orificio de ajuste deseado. _(_/ Activa (2) y desactiva (1) Interruptor de toma de fuerza (TDF) Activa (2) y desactiva (1) las cuchillas 1.
- Page 48 IMPORTANTE: iNO LO LLENE EN EXCESO! IMPORTANTE: Los combustibles Este e quipo y/o su motor pueden incluir oxigenados en exceso o reformulados componentes del s istema deemisiones (combustibles mezclados con alcoholes o evaporativas, necesarios para c umplir con eteres) pueden dafiar el sistema de lanormativa delaEPA y /o elCARB, que s61o combustible...
- Page 49 ARRANQUE Y APAGADO TRANSPORTE DE LA UNIDAD DEL MOTOR Apague SIEMPRE el motor, ponga el freno de estacionamiento, retire la Ilave y purgue Arranque del motor el dep6sito cuando transporte la unidad en NOTA: Antes de arrancar el motor, desactive un cami6n o un remolque.
- Page 50 MOVIMIENTO MANUAL DE LA UNIDAD iADVERTENCIA7 NO desactive o circunvale la transmisiSn y descender con el motor desembragado. Tire de la palanca de derivaciSn y bloqueela en posiciSn, y desactive el freno de estacionamiento para empujar a mano la unidad. Presione la palanca para conducir normalmente la unidad.
- Page 51 MANUAL DE LA UNIDAD en la estacionamie pagina 17). Empuje la unidad. Si la unidad rueda, p6ngase en contacto con el concesionario Ariens. Limpieza de Limpie toda la suciedad y los residuos del motor, la bateria, el la unidad asiento, la plataforma del cortacesped, etc.
- Page 52 Intervalo Tarea _,ccibn Revisar Mantenga limpios la bateria y sus bornes (Vease Limpieza de la la bateria baterfa y de sus cables en la pagina 24). Lubrique Aplique grasa al punto la unidad de engrase (1) en cada rueda delantera 25 horas o cada _=staci6n...
- Page 53 Instalacion AJUSTE DEL ASIENTO 1. Incline el asiento hacia delante. (Figura 7) 2. Afloje la tomilleria de montaje y deslice 1. Deslice la plataforma de corte debajo de hacia delante o hacia atras el asiento hasta la unidad. la posici6n deseada. Apriete la tomilleria NOTE: Realice las operaciones 3 y 4 en los de montaje (figura 6).
- Page 54 La inclinacion de las cuchillas Posici6n de corte m_s baja del cortacesped de lado a lado (Figura 10) Debe estar dentro de un limite de 6,35 mm (1/4 pulg.) segen Io medido a cada lado de la plataforma de corte. NOTA: Se debe Ilevar a cabo la medici6n cuando los extremos de las cuchillas del cortacesped...
- Page 55 (Vease RECOLOCACION DE LA CUCHILLA DE CORTE en la pagina 22). (Figura 12) Ariens recomienda que las cuchillas del 1. Monte las cuchillas de corte en los cortacesped sean afiladas por un profesional. vastagos con los tornillos de montaje.
- Page 56 3.Compruebe elequilibrio delas cuchillas Extraccion e instalacion de la bateria del c ortacesped deslizando lacuchilla enunperno s in rosca. Si l acuchilla esta Extraccion equilibrada, deberia mantenerse (Figura 14) posici6n horizontal. Si u no d elos extremos delacuchilla desciende, afile elextremo 1.
- Page 57 Limpieza de la bateria y de sus cables 3. Conecte el cable positivo (+) del cargador al borne positivo (+), y el cable negativo (Figura 14) (-) al borne negativo. 1. Incline el asiento hacia delante (Vease 4. Cargue la bateria de acuerdo INCLINACION DEL ASIENTO HACIA con las instrucciones...
- Page 58 El recorrido de las palancas de direcciSn 1. Ajuste la altura de las palancas de direccion puede necesitar un ajuste si la unidad gira a la derecha o a la izquierda cuando ambas 1. Quite los tornillos de montaje que conectan palancas de direcciSn esten presionadas la palanca de direcciSn al brazo de la hacia delante al maximo.
- Page 59 SUSTITUCION DE LA CORREA 915159, 161,171 DE LA TDF Extraccion (Figura 18) 1. Baje la plataforma de corte al suelo. 2. Quite las cubiertas de la correa de la plataforma de corte. PRECAUCION: Tenga cuidado al liberar la tensi6n del muelle de la polea tensora.
- Page 60 SUSTITUCION DE LA CORREA 3. Instale la correa de la TDF (Vease SUSTITUCION DE LA CORREA DE LA HIDROSTATICA TDF en la pagina 26). Extraccion (Figura 20) 1. Extraiga la correa de la TDF (Vease SUSTITUCION DE LA CORREA DE LA TDFen la pagina 26).
- Page 61 Consulte el manual del motor para obtener instrucciones detalladas. defectuosa(s). Sistema electrico P6ngase en contacto con el concesionario defectuoso. Ariens. Motor defectuoso. P6ngase en contacto con el concesionario Ariens. El motor Estrangulador Desactive el estrangulador. funciona activado. forzadamente. El cartucho...
- Page 62 Consulte de refrigeracion el manual del motor para obtener instrucciones detalladas. est& taponado. Motor defectuoso. Pongase en contacto con el concesionario Ariens. La unidad El freno de Pongase en contacto con el concesionario se mueve estacionamiento Ariens. cuando el motor...
- Page 63 I _ I _.,_.'] I m] _ I_];l'.,,] _ "]i_e] P_'_o];_][o_ Consulte al distribuidor autorizado Ariens AsegOrese de que se usan siempre piezas originales de Ariens para mantener esta para aSadir estos accesorios opcionales unidad funcionando como nueva. para su unidad.
- Page 64 Nt_mero de modelo 915161 Modelo Zoom 50 Motor Kohler Kohler Tipo Briggs & Stratton 30.51 (500) 44 (725) 44 (725) Cilindrada del motor pulg. 3 (cc) 3600 + 0 RPM regidas (pueden ser diferentes de las RPM maximas) 3600 - 100 Transmisi6n Velocidad maxima hacia delante: 6,0 (9,6)
- Page 65 915171 Zoom 42CARB Modelo Motor Tipo Briggs & Stratton Kohler Cilindrada del motor pulg. 3 (cc) 30,51 (500) 44 (725) RPM regidas (pueden ser diferentes de 3600 + O las RPM maximas) 3600- Transmisi6n Velocidad maxima hacia delante: mph (km/h) 6.0 (9.6) Velocidad Maxima hacia atras: \mph 3.0 (4.8)
- Page 66 Ariens sustituira, sin cargo alguno para el comprador original, cualquier bloque de baterias y/o subconjunto que presente algt3n fallo por defectos en materiales o fabricaci6n durante an aSo a contar desde la fecha de compra.
- Page 67 Durante los primeros 90 dias del periodo de garantia, se sustituira una bateria defectuosa sin cargo alguno. Si el periodo aplicable de garantia supera los 90 dias, Ariens aeumira el coste prorrateado de cualquier bateria defectuosa, hasta Ilegar a los 12 meses a partir de la fecha de la compra.
- Page 68 LA GARANTiA: • Como propietario de un equipo peque_o off-road, usted es responsable del mantenimiento requerido que se indica en su manual del usuario. Ariens Company le recomienda que conserve todos los recibos que cubran el mantenimiento de su equipo peque_o off-road, aunque Ariens...
- Page 69 Ariens, Gravely o Parker y sin cargo alguno para el propietario. (5.) Si perjuicio de Io dispuesto en la subsecci6n (4) anterior, los servicios o reparaciones...
- Page 70 Ariens Company 655 West Ryan Street Brillion, WI 54110 920-756-4688 Fax 920-756-2407 www.ariens.com & WARNING & The engine exhaust from this product contains chemicals known to the State of California to cause cancer, birth defects or other reproductive harm. An _4_p_._...
Need help?
Do you have a question about the 915157-Zoom 34 and is the answer not in the manual?
Questions and answers