Ariens 915163 Owner's/Operator's Manual
Zoom xl
Hide thumbs
Also See for 915163:
- Owner's/operator's manual (73 pages) ,
- Manual (36 pages) ,
- Owner's/operator's manual (34 pages)

Related Manuals for Ariens 915163


Summary of Contents for Ariens 915163
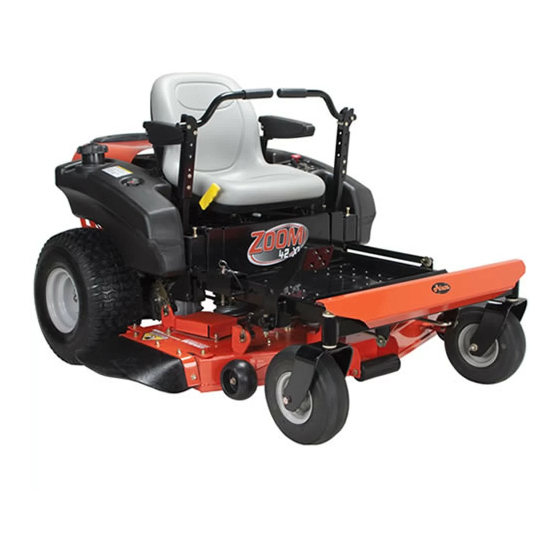
- Page 1 Zoom XL ® Owner/Operator Manual Manuel Du Propriétaire/Utilisateur Models 915163 – Zoom XL 42 915165 – Zoom XL 48 915167 – Zoom XL 54 ENGLISH 04043500 10/10 Printed in USA FRANÇAIS...
-
Page 2: Table Of Contents
English may be obtained from your completely read your manuals. The contents Dealer. Visit your dealer or will provide you with an understanding of www.ariens.com for a list of safety instructions and controls during normal languages available for your operation and maintenance. -
Page 3: Product Registration
6. Fill out a product registration card and service information. All claims meeting return the card to the Ariens Company or requirements during the limited warranty go to www.ariens.com. period will be honored, whether or not the DISCLAIMER product registration card is returned. -
Page 4: Safety
SAFETY WARNING: This cutting machine DANGER: IMMINENTLY is capable of amputating hands HAZARDOUS SITUATION! If not and feet and throwing objects. avoided, WILL RESULT in death or Failure to observe the safety serious injury. instructions in the manuals and on decals could result in serious injury or death. - Page 5 MAX. FILL 04237000 TO AVOID SERIOUS POUR EVITER LES BLESSURES PARA EVITAR DANOS SERIOS INJURY OR DEATH GRAVES OU LA MORT O LA MUERTE Read the operator’s manual. Keep Regardez derriere et sur les cotes lorsque Antes y durante retroceso mirar hacia abajo children and others away from unit while vous reculez.
- Page 6 5. Danger! To Avoid Serious Injury or 6. Hot Surfaces! Death DO NOT touch parts which are hot from operation. ALWAYS Read the operator’s manual. allow parts to cool. OL1801 OL1801 7. Caution! Keep children and others away from unit while operating. OL1802 No smoking.
-
Page 7: Emission Control System
Only trained adults may operate unit. Training components can only be adjusted by an includes being familiar with controls and Ariens Company dealer or an authorized actual operation. engine manufacturer's service center. NEVER operate unit after or during the use of Contact your Ariens Company Equipment medication, drugs or alcohol. - Page 8 DO NOT operate unit if safety interlock Use extra care while operating machines with system is damaged or disabled. Check safety grass catcher or other attachments. They can interlock before each use. affect stability of the machine. ALWAYS remove key to prevent unauthorized Avoid starting, stopping, or turning on a use.
- Page 9 Replace fuel cap securely and clean up DO NOT change engine governor settings or spilled fuel. over-speed engine. NEVER fill containers inside a vehicle or on a Fumes from engine exhaust can cause injury truck or trailer bed with a plastic liner. Always or death.
-
Page 10: Assembly
ASSEMBLY WARNING: AVOID INJURY. Read and understand the entire Safety section before proceeding. Tools Required • Adjustable wrench • 9/16" wrench • Petroleum jelly or dielectric grease. Unpack Unit Remove unit and all other components from the shipping container. Engage transmission bypass lever (see MOVING UNIT MANUALLY on page 16). - Page 11 Check Safety Interlock System Discharge Chute in Transport Position WARNING: Safety interlock failure and improper operation of unit can result in death or serious injury. Check system before each use to make sure it is functioning properly. See Safety Interlock System on page 13. Check function of all controls See OPERATION on page 13.
-
Page 12: Controls And Features
CONTROLS AND FEATURES Figure 5 1. Ignition Switch 8. Mower Lift Pedal 2. PTO Switch 9. Mower Deck 3. Throttle Lever 10. Discharge Chute 4. Seat 11. Fuel Gauge 5. Steering Levers 12. Choke Control 6. Parking Brake 13. Hour meter 7. -
Page 13: Operation
If operator position to start a cold the unit does not perform as stated contact engine. Pull the choke lever your Ariens dealer for repairs. toward the operator position when the engine starts to run Test Steering... - Page 14 Timer (TMR1): measures the time spent on individual jobs. Press and hold the toggle button to reset the timer to zero. TMR1 will then start measuring engine run time until it is reset to zero again. Service Alert (Chg Oil, Chg H Oil & Filter, SVC Airfilter): reminds operators of the maintenance interval for changing the engine oil, changing the hydraulic oil and filter and...
-
Page 15: Filling Fuel Tank
Adjusting Seat GASOLINE Lift adjustment lever and slide seat forward or IMPORTANT: ALWAYS use gasoline that backward to the desired position. meets the following guidelines: • Clean, fresh gasoline. • A minimum of 87 octane/87 AKI (91 RON). High altitude use may require a different octane. -
Page 16: Moving Unit Manually
MOVING UNIT MANUALLY 3. Turn ignition key to start position and release once the engine has started. 4. Pull the choke lever toward operator WARNING: DO NOT disengage position when the engine is warm. Wait or bypass transmission and coast until the engine is running smoothly downhill. -
Page 17: Maintenance Schedule
Parking MOVING UNIT MANUALLY on page 16). Push unit. If unit rolls, Brake contact your Ariens Dealer. Clean Unit Clean engine, battery, seat, mower deck, etc. of all dirt and debris. Do not use solvents, hard cleaners, or abrasives. NOTE: Protect painted surfaces with automotive type wax. -
Page 18: Service And Adjustments
Interval Task Action Follow Perform scheduled engine Engine maintenance. Refer to Engine Manual Manual for detailed instructions. Mainten- NOTE: To drain the oil, use the oil ance drain hose (1) supplied with unit, not Each Use Schedule the drain plug that is shown in the Engine Manual. -
Page 19: Replacing Mower Blade
OPENING AND CLOSING HOOD REPLACING MOWER BLADE To open, pull up on the back of the hood until Remove (Figure 12) hood hits the hood stop and push down on back of hood to close (figure 10). CAUTION: Mower blades are sharp and can cut you. - Page 20 LEVELLING AND ADJUSTING The Forward Pitch Of The Mower Blades (Figure 14): PITCH OF MOWER DECK • Should be 0.0 in. (0.0 mm) to 1/4 in. NOTE: Adjust on a level surface, with the tires inflated to the correct air pressure (see (6.35 mm) pitched forward.
- Page 21 Adjusting The Mower Deck To Adjust Mower Blade Height And Pitch (Figure 17): NOTE: Adjusting the mower deck will adjust the height and pitch of the mower blades. 1. Adjust the trunnions first and re-take the three measurements required to level and adjust the pitch of the mower deck.
-
Page 22: Servicing Battery
SERVICING BATTERY Install (Figure 19) 1. Install battery on the unit with battery NOTE: Unit comes equipped with a hold-down bracket. maintenance-free battery that requires no regular maintenance except cleaning the 2. Connect positive (+) cable first, then terminals and periodic charging. negative (–) cable. -
Page 23: Adjusting Steering Levers
NOTE: When adjusting steering levers for the first time it is recommended that you make Jump-Starting adjustments in the following order. Ariens does not recommend jump-starting 1. Adjust Steering Lever Height your unit. Jump-starting can damage engine 1. Remove mounting hardware that and electrical system components. -
Page 24: Replacing Pto Belt
• Turning adjustment bolt counter Rotate this end away from the the operator clockwise to increase steering lever position to move the steering levers in. travel. Rotate this end away from the operator position to move the steering levers out. Figure 21 3. -
Page 25: Replacing Hydrostatic Belt
Install (Figure 24) 1. Install hydrostatic belt on idler, electric clutch, pulley, and hydrostatic transmission pulleys. 2. Connect idler spring. 3. Install clutch stop. 4. Connect electric clutch connector. 5. Install PTO belt (see REPLACING PTO BELT on page 24). 1. - Page 26 The hydraulic fluid should be at the cold fill line of the expansion tank. 1. Drain Plug 2. Oil Filter 3. Filter Guard 4. Mounting Hardware Figure 26 Purging the Hydraulic System WARNING: This adjustment requires operating the engine. Figure 25 Use extreme care to avoid contact with moving parts and hot Change Hydraulic Fluid and Filter...
-
Page 27: Storage
5. Connect spark plug wire(s) or loose or spark replace spark plug(s). Refer to plug(s) faulty. Engine Manual for detailed instructions. 6. Faulty electrical 6. Contact your Ariens Dealer. system. 7. Faulty engine. 7. Contact your Ariens Dealer. GB - 27... - Page 28 2. Clean or replace air filter cartridge. plugged. Refer to Engine Manual for detailed instructions. 3. Faulty engine. 3. Contact your Ariens Dealer. Unit does not 1. The transmission 1. Disengage transmission bypass bypass lever is lever (see on page 17).
-
Page 29: Service Parts
(see REPLACING MOWER BLADE on page 19). SERVICE PARTS ACCESSORIES Be sure to always use genuine Ariens parts See your authorized Ariens dealer to add to keep your unit running like new. these optional accessories to your unit. -
Page 30: Specifications
SPECIFICATIONS Model Number 915163 915165 915167 Model Zoom XL 42 Zoom XL 48 Zoom XL 54 Engine Kawasaki Kawasaki FR691 FR651 45.5 (746) Displacement - in. (cc) Max Governed RPM 3600 + 0 (May be different from 3600 – 50... -
Page 31: Warranty Statement
Ariens Company cannot deny warranty solely for the lack of receipts. • As the small off-road equipment owner, you should however be aware that the Ariens Company may deny you warranty coverage if your evaporative emission control system part has failed due to abuse, neglect, or improper maintenance or unapproved modifications. - Page 32 (4.) Repair or replacement of any warranted part under the warranty provisions of this article must be performed at no charge to the owner at an authorized Ariens, Gravely, or Parker service representative. (5.) Notwithstanding the provisions of subsection (4) above, warranty services or repairs must be provided at authorized Ariens, Gravely, or Parker service representatives that are franchised to service the subject small off-road equipment.
-
Page 33: Warranty
If the product is put to any business use, agricultural, commercial, or industrial, then the duration of these warranties shall be 90 days after the date of purchase. For Ariens Max Zoom and Gravely ZT HD models put to commercial use, the duration of these warranties, except for service parts and accessories, is one year from the date of purchase. - Page 34 Disclaimer Ariens Company may from time to time change the design of its products. Nothing contained in this warranty shall be construed as obligating the Ariens Company to incorporate such design changes into previously manufactured products, nor shall such changes be construed as an admission that previous designs were defective.
- Page 36 Ariens Company 655 West Ryan Street Brillion, WI 54110-1072 920-756-4688 Fax 920-756-2407 www.ariens.com...
Need help?
Do you have a question about the 915163 and is the answer not in the manual?
Questions and answers