Table of Contents
Advertisement
Quick Links
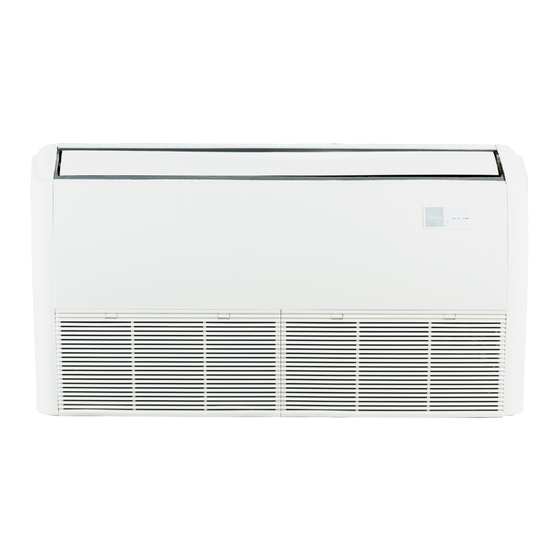
Fig. 1 - Size 12K
Fig. 2 - Sizes 18K - 58K
NOTES:
Read the entire instruction manual before starting the
installation.
Image for illustration purposes only. Actual models
may be slightly different.
DLFSFA and DLFLFA
INSTALLATION INSTRUCTIONS
Console Ductless System - Sizes 12 to 58
Specifications subject to change without notice.
TABLE OF CONTENTS
SAFETY CONSIDERATIONS........................................................2
PARTS LIST ....................................................................................3
SYSTEM REQUIREMENTS...........................................................4
WIRING ...........................................................................................4
DIMENSIONS..................................................................................5
CLEARANCES ................................................................................7
INSTALLATION LOCATION REQUIREMENTS........................8
ELECTRICAL DATA......................................................................12
CONNECTION DIAGRAMS ..........................................................12
WIRELESS REMOTE CONTROL INSTALLATION ...................13
WIRED REMOTE CONTROL INSTALLATION..........................13
START-UP .......................................................................................13
TROUBLESHOOTING ...................................................................14
PAGE
Advertisement
Table of Contents

Summary of Contents for Carrier DLFSFA
-
Page 1: Table Of Contents
DLFSFA and DLFLFA INSTALLATION INSTRUCTIONS Console Ductless System - Sizes 12 to 58 TABLE OF CONTENTS PAGE SAFETY CONSIDERATIONS............2 PARTS LIST ..................3 SYSTEM REQUIREMENTS............4 WIRING ...................4 DIMENSIONS..................5 CLEARANCES ................7 INSTALLATION LOCATION REQUIREMENTS......8 ELECTRICAL DATA..............12 CONNECTION DIAGRAMS ............12 WIRELESS REMOTE CONTROL INSTALLATION ....13 WIRED REMOTE CONTROL INSTALLATION......13... -
Page 2: Safety Considerations
DLFSFA and DLFLFA: Installation Instructions SAFETY CONSIDERATIONS Installing, starting up, and servicing air-conditioning equipment can be hazardous due to system pressures, electrical components, and equipment WARNING location (roofs, elevated structures, etc.). Only trained, qualified installers and service mechanics should install, start-up, and service this equipment. -
Page 3: Parts List
DLFSFA and DLFLFA: Installation Instructions PARTS LIST Air inlet louver Air flow louver (at air outlet) (air outlet) Display panel Display panel Air inlet (with air filter in it) Air flow louver Refrigerant (air outlet) D. Connecting point of connecting... -
Page 4: System Requirements
DLFSFA and DLFLFA: Installation Instructions SYSTEM REQUIREMENTS Allow sufficient space for airflow and servicing unit (See Fig. 7 — on page 7). Piping IMPORTANT: Both refrigerant lines must be insulated separately. • Minimum refrigerant line length between the indoor and outdoor units is 10 ft. (3 m). -
Page 5: Dimensions
DLFSFA and DLFLFA: Installation Instructions DIMENSIONS Fig. 5 — Dimensions Table 2 — Indoor Unit Console Dimensions UNIT SIZE HEIGHT in (mm) 23.62 (600) WIDTH in (mm) 27.56 (700) DEPTH in (mm) 8.27 (210) WEIGHT - NET lbs (kg) 32.41 (14.7) - Page 6 DLFSFA and DLFLFA: Installation Instructions DIMENSIONS (CONT) Refrigerant Pipe Hole 4.7in (120mm) DEPTH WIDTH Arm width Hanging arm Fig. 6 — Dimensions Table 3 — Indoor Unit Floor Ceiling Dimensions UNIT SIZE HEIGHT in (mm) 9.25 (235) 9.25 (235) 9.25 (235) 9.25 (235)
-
Page 7: Clearances
DLFSFA and DLFLFA: Installation Instructions CLEARANCES 210mm ≥100mm ≥1000mm 100mm 100mm 700mm Fig. 7 — Size 12K 1.37in (35mm) 39.4in (1000mm) Fig. 8 — Sizes 18K - 58K Manufacturer reserves the right to change, at any time, specifications and designs without notice and without obligations. -
Page 8: Installation Location Requirements
DLFSFA and DLFLFA: Installation Instructions INSTALLATION LOCATION REQUIREMENTS INDOOR UNIT PREPARATION • A location where there are no obstacles near inlet and outlet area. • A location which can bear the weight of indoor unit. 1. Open the front panel by sliding the two stoppers towards the middle of •... - Page 9 DLFSFA and DLFLFA: Installation Instructions INDOOR UNIT INSTALLATION CONSOLE SIZES 18K - 58K Capable to mount as a Floor Console and as an Underceiling unit 2. Remove the side boards and the grille (see Fig. 18). 1. Install 3/8 in. (Ø10) hanging screw bolts (4) (refer to Figures 15 and 16 for the correct hanging screw bolt distance).
- Page 10 DLFSFA and DLFLFA: Installation Instructions Handle Yoke Cone Copper pipe Clamp handle Red arrow mark Fig. 24 — Clamp Handle 5. Apply a small amount of refrigerant oil to the flare connection on the tubing. 6. Align the center of the pipes.
- Page 11 DLFSFA and DLFLFA: Installation Instructions ELECTRICAL CONNECTIONS CONDENSATE DRAIN CONNECTIONS The unit is supplied with a drain connection to connect the drain piping. 1. Remove the installation bearer of the sensing device (see Fig. 28). When installing condensate piping, follow these recommendations: •...
-
Page 12: Electrical Data
DLFSFA and DLFLFA: Installation Instructions ELECTRICAL DATA Table 6 — Electrical Data CONSOLE AND FLOOR CEILING SIZE (208/230V) (208/230V) (208/230V) (208/230V) (208/230V) (208/230V) 0.21 1.11 1.11 1.36 0.94 INPUT 66.6 RATED HP 0.027 0.075 0.075 0.156 0.122 0.218 LEGEND FLA - Full Load Amps CONNECTION DIAGRAMS Fig. -
Page 13: Wireless Remote Control Installation
DLFSFA and DLFLFA: Installation Instructions WIRELESS REMOTE CONTROL START-UP INSTALLATION Test Operation Mounting Bracket (if installed on the wall) Perform a test operation after completing a gas leak and electrical safety check. 1. Use the two screws supplied with the control to attach the mounting 1. -
Page 14: Troubleshooting
DLFSFA and DLFLFA: Installation Instructions TROUBLESHOOTING For ease of service, the systems are equipped with a diagnostic code If possible, always check the diagnostic codes displayed on the indoor display LEDs on both the indoor and outdoor units. unit first.


Need help?
Do you have a question about the DLFSFA and is the answer not in the manual?
Questions and answers