
Related Manuals for Paderno vida 910-05005


Summary of Contents for Paderno vida 910-05005
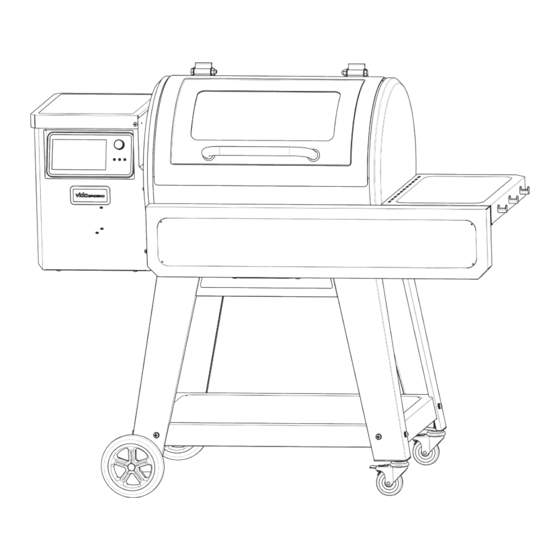
- Page 1 Wi-Fi Connected Smart Pellet Grill Model 910-05005 with Touch Screen 085-0219-0 User Manual 52301001-A...
-
Page 2: Table Of Contents
Table of Contents Safety Safety Warnings Assembly Package Parts List Assembly Instructions Setup Controller Guide App Guide Setup Instructions Use and Maintenance Lighting Instructions Operating Instructions Care and Maintenance Storage Troubleshooting Warranty Limited Warranty Service Electrical Diagram Parts List • This instruction manual contains important information necessary for the proper assembly and safe use of the appliance. -
Page 3: Safety Warnings
Safety Warnings WARNING! Follow these guidelines to prevent this colorless, odorless gas from poisoning you, your family or others: • Know the symptoms of carbon monoxide poisoning: headache, dizziness, weakness, nausea, vomiting, sleepiness, and confusion. Carbon monoxide reduces the blood’s ability to carry oxygen. - Page 4 Safety Warnings SAFETY PRACTICES TO AVOID INJURY When properly cared for, your grill will provide safe and • Do not use water to control flare ups or extinguish the fire. reliable service for many years. However, extreme care must Turn off the grill, unplug the power cord, and wait for the be used as the grill produces intense heat that has a potential grill to cool down.
-
Page 5: Package Parts List
Package Parts List VidabyPADERNO.com | 1-800-263-9768... - Page 6 Package Parts List...
- Page 7 Hardware List SOME PARTS COME WITH SCREWS PRE-INSTALLED. LOOSEN AND RE-TIGHTEN FOR FINAL ASSEMBLY. TOOLS NEEDED (NOT INCLUDED) #2 Cross-head Screwdriver NOTE: Some assembly steps require two people. Use a flat and level surface to assemble the grill. PREPARATION: Before beginning assembly, installation or operation of this product, make sure all parts are present and undamaged.
-
Page 8: Assembly Instructions
Assembly... - Page 9 Assembly VidabyPADERNO.com | 1-800-263-9768...
- Page 10 Assembly...
- Page 11 Assembly VidabyPADERNO.com | 1-800-263-9768...
- Page 12 Assembly...
- Page 13 Assembly TO CLOSE: VidabyPADERNO.com | 1-800-263-9768...
- Page 14 Assembly...
- Page 15 Assembly VidabyPADERNO.com | 1-800-263-9768...
- Page 16 Assembly...
- Page 17 Assembly VidabyPADERNO.com | 1-800-263-9768...
-
Page 18: Controller Guide
Controller Guide Lock Target Cooking Screen Temperature Preset Cooking Temperature Current Grill Cycle Graph Temperature Setting Smoke Mode Grill Mode Status Control Dial Action Meat Probe Timer (Play/Igniting/Pause) Power Press and hold the control dial for 3 seconds to turn on the controller. A short video will appear before displaying the home screen. - Page 19 Controller Guide Cooking Modes The current cooking mode is identified by the orange ring around the icon. Smoke Mode Smoke Mode uses a program to create more smoke while providing low temperature cooking. To smoke food, press the “Smoke” icon. The default target temperature is 225°F and includes a default timer for 6 hours.
- Page 20 Controller Guide Changing Default Temperature The default temperature, for Smoke and Grill modes, as well as the temperature scale, can be modified. To do so, tap the gear icon to open the “Settings” screen and then choose “Start Up”. Select the desired cooking mode of the temperature to adjusted. Using the arrows, adjust to a new default temperature.
- Page 21 Controller Guide Preset Cooking Cycle Choose Primary Meat Probe Preset Cooking Programs Custom Cooking Programs Toggle Step Touch to Toggle On/Off Info = On) On/Off Activate Step Screen Lock/Unlock For child safety and to prevent accidental changes, the screen can automatically lock. Access the default settings to review or change the screen lock time.
- Page 22 Controller Guide Error Codes If an error is detected, the controller will display an error code. Refer to the following table for descriptions and solutions: NOTE: To dismiss an error code, reboot the controller by turning it off for a few seconds.
-
Page 23: App Guide
Wi-Fi connection every time it is turned on. You are now ready to use the Vida™ by PADERNO app to control your grill! Keep in mind that you cannot ignite, or start, your grill from the app. The app allows remote viewing and setting of cooking temperature, meat probe temperature, and alarms. -
Page 24: Setup Instructions
Operating Instructions Initial Setup 1. Remove all packaging materials from the grill. 2. Open the grill to make sure the warming rack, cooking grids, diffuser and grease tray are properly installed. 3. Open the hopper lid and verify there are no foreign objects obstructing the auger. 4. -
Page 25: Lighting Instructions
Lighting Instructions Automatic Ignition Make sure your grill is properly set up and ready for use. 1. Open the grill lid and verify all the components are in place. 2. Ensure the hopper does not contain foreign objects and is filled with enough barbecue pellets. 3. -
Page 26: Operating Instructions
Operating Instructions Changing/Removing Pellets When you want to change the pellet flavor, clear the hopper for maintenance or long-term storage, follow these steps to empty the hopper and auger: 1. Locate the opening on the bottom of pellet hopper and place a large container underneath. -
Page 27: Care And Maintenance
Care and Maintenance CAUTION! MAKE SURE THE GRILL IS COOL AND DISCONNECTED FROM THE POWER SOURCE BEFORE PERFORMING ANY CLEANING OR MAINTENANCE. GRILL INTERIOR COOKING GRIDS • After the grill has cooled, scrub both sides of the cooking grates with a grill brush. •... -
Page 28: Troubleshooting
Troubleshooting ERROR CODES On a rare occasion, your controller may detect an issue and you may see an error code displayed on the screen. The following table offers descriptions and recommended solutions: ERROR CODE ERROR DESCRIPTION SOLUTION Grill Probe (RTD) Sensor Check wiring connection from RTD to the controller. -
Page 29: Limited Warranty
Limited Warranty The manufacturer warrants to the original consumer-purchaser only that this product (Model Number 910-05005/SKU 085-0219-0) shall be free from defects in workmanship and materials after correct assembly and under normal and reasonable home use for the periods indicated below beginning on the date of purchase. The manufacturer reserves the right to require photographic evidence of damage, or the return of defective parts, postage and or freight pre-paid by the consumer, for review and examination. -
Page 30: Service
3. Proof of purchase by the original owner. If your product is damaged do not return to the store for replacement of damaged or defective parts. Vida™ by PADERNO Customer Support will ensure that all in-stock replacement parts arrive at your home. -
Page 31: Electrical Diagram
Ordering Replacement Parts Refer to the replacement parts list on the following pages to ensure you order the correct part needed for your repair. Keep this assembly and operating instruction manual for convenient referral, and for replacement parts ordering. Contact our customer service at 1-800-263-9768 to order replacement parts. Electrical Circuit Diagram 120 V AC, 60 Hz, 230 W CONTROLLER...
Need help?
Do you have a question about the vida 910-05005 and is the answer not in the manual?
Questions and answers