Table of Contents
Advertisement
Advertisement
Table of Contents

Related Manuals for Daikin DGE601A52


Summary of Contents for Daikin DGE601A52
- Page 1 Installation Manual Model : DGE601A52 3P581074-2D...
- Page 3 Improper installation may result in an electric shock or fire. • Be sure to use only the specified accessories and parts for the installation work. Failure to use the specified parts may result in the DGE601A52 falling, an electric shock, or fire.
- Page 4 • Children should be supervised to ensure that they do not play with the unit. This equipment is not suitable for use in locations where children are likely to be present. Installation Manual 3P581074-2D English DGE601A52...
- Page 5 4. In places with high temperatures or where the unit is exposed to direct flames. Abnormal heat build-up or firing may be caused. 5. In moist areas or places that are exposed to water. Water entering the unit may cause electric shock and malfunction. English Installation Manual 3P581074-2D DGE601A52...
-
Page 6: Table Of Contents
1.4.2 Environmental conditions ..............10 1.4.3 Wiring of cables ..................11 1.4.4 Required space ..................14 Equipment which can be connected to the DGE601A52 ......... 14 Installation ........................15 DIN rail mounting ..................... 15 2.1.1 Installation procedure ................15 2.1.2 Removal from DIN rail ................ - Page 7 Steps for setting the outdoor unit Airnet address ......... 71 4.3.2 Setting the demand address and enabling demand setting ....71 4.3.3 Setting items LED (segment) display ........... 72 Quick Operation Guide ....................73 Restarting the unit .................... 73 English Installation Manual 3P581074-2D DGE601A52...
-
Page 8: Before Installation
Checking that all accessories are included Based on the following accessory list, check that all accessories for the DGE601A52 are included. If there is any missing or defective part, contact the DAIKIN dealer where you pur- chased the product. <Accessories included with DGE601A52>... -
Page 9: Understanding External Dimensions
For details including the cable type, terminal size, and precautions, refer to “3. Electrical Wiring”. 1.3.1 Rear face On the rear face of the DGE601A52 there is a DIN rail lock for use when installing on a DIN rail. <Rear face> A DIN rail lock... -
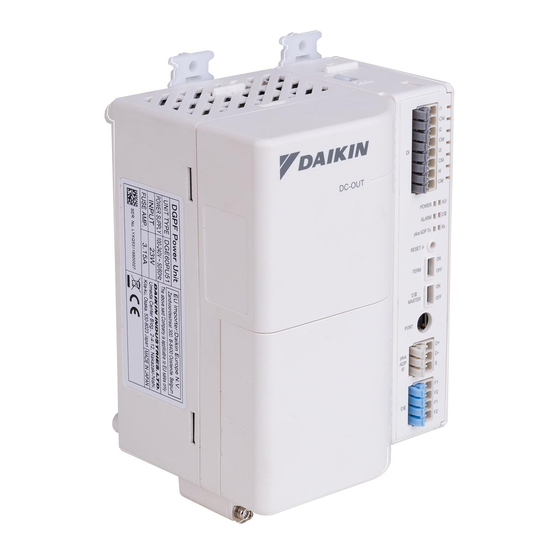
Page 10: Front Face
1.3.2 Front face All the terminals used during installation are located on the front face of the DGE601A52. The power supply terminals are covered with a terminal cover for safety. In addition to these terminals, several switches and LEDs are also located on the front face of the DGE601A52. - Page 11 LED is lit. [RESET//] switch Switch for restarting the DGE601A52. Switch for activating the termination resistor, in case you want to connect the DGE601A52 with [TERM] switch another DGE601A52, DGE601A51, iTM, iTM plus adaptor (using the plus ADP IF terminal).
-
Page 12: Determining Installation Place
Environmental conditions Check that the installation environment meets the following conditions. • Ambient temperature: -10 to 50°C • Ambient humidity: 85% RH or less (without condensation) • DGE601A52 operation is not affected by electromagnetic waves. Installation Manual 3P581074-2D English DGE601A52... -
Page 13: Wiring Of Cables
1.4.3 Wiring of cables For an example of DGE601A52 cable wiring, refer to the cable wiring diagram (exam- ple) shown below. <Cable wiring diagram (example)> A Cable duct English Installation Manual 3P581074-2D DGE601A52... - Page 14 (3) Move the opening knob forward and down and insert the cable. (4) Make sure that the connected cable has not come out. When using stranded cable, make sure that no strands are protruding. <How to wire to the terminal block> A Precision flat-head screwdriver Installation Manual 3P581074-2D English DGE601A52...
- Page 15 Refer to the [strip gauge] on the end cover. When peeling, be careful not to scratch the finish of the exposed part of the cable. <Cable peeling allowance> Good example 9 mm End cover Bad example Too long Bent Frayed Too short English Installation Manual 3P581074-2D DGE601A52...
-
Page 16: Required Space
A Top B Wall C Cable duct Do not install DIN rails vertically. Equipment which can be connected to the DGE601A52 The DGE601A52 can be connected to the following equipment. • DGE601A51 • iTM • iTM plus adaptor Installation Manual 3P581074-2D... -
Page 17: Installation
You can install the DGE601A52 in 2 ways. • DIN rail mounting • Screw-mounting to control enclosure In case of new installation, first add the DGE601A53 to the DGE601A52. After that, install both the DGE601A52 and DGE601A53. DIN rail mounting 2.1.1... - Page 18 (1) Set all upper and lower DIN rail locks to the “open” position. (2) Press the DGE601A52 against the DIN rail. (3) Set all upper and lower DIN rail locks to the “closed” position. <Steps for mounting to DIN rail>...
-
Page 19: Removal From Din Rail
2.1.2 Removal from DIN rail (1) While supporting the DGE601A52 with your hand, set all upper and lower DIN rail locks to the “open” position. (2) Remove the DGE601A52 from the DIN rail. <Steps for removal from DIN rail> NOTE... -
Page 20: Screw-Mounting To Control Enclosure
• Wood screw (3 mm diameter x 15 mm length) for securing the body, 4 pcs. 2.2.2 Installation procedure (1) Set all DIN rail locks to the “open” position. (2) Secure with screws through all DIN rail lock screw holes. <Steps for mounting to control enclosure> “open” “closed” “closed” “open” Installation Manual 3P581074-2D English DGE601A52... -
Page 21: Adding A Dge601A53
Preparation of the SLOT (1) Set the upper and lower DIN rail locks to “Open” position. (2) Set the upper and lower inter-unit locks of the DGE601A53 to the “UNLOCK” position. DIN rail lock Inter-unit lock “Open” “Open” English Installation Manual 3P581074-2D DGE601A52... - Page 22 (10) Set all the upper and lower DIN rail locks to the “Closed” position. Steps for adding the SLOT “UNLOCK” “LOCK” “Open” “Open” “UNLOCK” “LOCK” End cover “Closed” (10) “LOCK” (10) (10) “LOCK” (10) DGE601A53 “Closed” Installation Manual 3P581074-2D English DGE601A52...
- Page 23 • Turn OFF the [TERM] switch of the DGE601A53 which originally had the [TERM] switch set to ON. • Turn ON the [TERM] switch of the DGE601A53 which is furthest from the DGE601A51 or iTM. English Installation Manual 3P581074-2D DGE601A52...
-
Page 24: Electrical Wiring
This chapter describes the procedure for connecting the DGE601A52 to the DGE601A51, DAIKIN air conditioners, and other equipment. In addition to air condition- ers, the DGE601A52 can connect to a wide range of equipment. However, the required connection procedures vary depending on the equipment to be connected. -
Page 25: Terminals Location And Schematic Connection Diagram
3.1.1 Terminals location and schematic connection diagram Connect the terminals located in the [plus ADP IF] section of the DGE601A52 to the corresponding terminals located in the [plus ADP IF] section of your DGE601A51. Note that these terminals have polarity. - Page 26 (For details on iTM, refer to “intelligent Touch Manager Installation Manual (3P291714-1)”) B DGE601A52 C plus ADP IF (iTM) D plus ADP IF (DGE601A52) E DGE601A52/DGE601A53 on which termination resistor must be enabled (For details on DGE601A53, refer to “DGE601A53 Installation Manual (3P583694-4)”.) Installation Manual 3P581074-2D English DGE601A52...
- Page 27 When adding a DGE601A52 in another location In case a DGE601A53 has been added, wire from the last SLOT. In case a DGE601A53 has not been added, tighten the wires together. <Schematic connection diagram of adding a DGE601A52> In case a DGE601A53 has been added...
-
Page 28: Wiring Specifications
In case of connecting to the iTM, the DGE601A52 and the iTM plus adaptor can be used together. A iTM B iTM plus adaptor C DGE601A52 3.1.2 Wiring specifications • Cable type: CPEV or FCPEV cable • Core thickness: φ0.65 - 0.9 mm •... -
Page 29: Address Setup And Termination Resistor
In case of connecting to the iTM, set a number between “2” and “8”. Use the [PORT] switch located on the front face of each DGE601A52 to set an address. Moreover, the termination resistor needs to be set for the DGE601A52 which is the furthest DGE601A52 from the DGE601A51 or iTM. -
Page 30: Connecting Diii-Net Compatible Air Conditioners
NOTE The setting range of DIII address for the air conditioners controlled via the DGE601A52 is from “1-00” to “4-15”. The DGE601A51 or iTM adds a DIII-NET port number to each address for identifica- tion. - Page 31 D Indoor unit E A maximum of 16 indoor units can be connected to 1 remote controller group. A remote controller group can connect a maximum of 64 groups (64 indoor units) to each DIII-NET communication line. English Installation Manual 3P581074-2D DGE601A52...
- Page 32 • When connecting multiple wires to the termi- nal of DIII-NET Connecting multiple wires to 1 terminal on the DGE601A52 terminal block is not possi- ble. If you want to connect multiple wires, connect the mark (F1 or F2) you want to connect to the terminal with the same mark as shown in the figure on the right.
-
Page 33: Wiring Specifications
Precautions for using multiple centralised controllers “Centralised controller” refers to the equipment (e.g. the DGE601A51) that controls multiple air conditioners. Besides the DGE601A51, DAIKIN’s product portfolio includes a wide range of centralised controllers suitable for different applications or building sizes, which can be used in combination to construct an optimal air conditioning control system. - Page 34 Priority DGE601A52 (4) DGE601A51 (5) Central Remote Controller (6) ON/OFF Controller Centralised controllers that cannot be connected to the same network as the DGE601A52: • CALCULATE UNIT • intelligent Processing Unit • Parallel Interface • Intelligent Touch Controller • DIII-NET Plus Adapter •...
-
Page 35: Connecting An Emergency Stop Input Device Or Electric Energy Meters
Connecting an emergency stop input device or electric energy meters The DGE601A52 can perform operations such as an emergency stop of the air condi- tioners according to an external signal input device, and an electricity usage calculation for each air conditioner according to the pulse inputs from a power meter. -
Page 36: Wiring Specifications
200 ms or more. NOTE Once the emergency stop input signal is turned on, all air conditioners stop and do not restart until the emergency stop input is cleared. Installation Manual 3P581074-2D English DGE601A52... -
Page 37: Connecting The Power Supply
Connecting the power supply Connect the DGE601A52 to a power supply. WARNING Be sure to perform the operation during power-off conditions. Do not turn the power supply on until all connections are made. Not doing so may cause an electric shock. - Page 38 <Removing the power supply cable cover> (2) Remove the screw from the terminal block cover, and remove the cover. <Removing the power supply terminal block cover> Installation Manual 3P581074-2D English DGE601A52...
- Page 39 L wire and N wire into the terminal block. Continue to push up the knob until you feel it click. After insertion, push down the knob on the power supply terminal block securely and completely. <Power supply terminal block> English Installation Manual 3P581074-2D DGE601A52...
- Page 40 Good example 10 mm Bad example Too long Bent Frayed Too short (3) While engaging the tab in the area marked with a triangle, attach the terminal block cover and secure it with the screw. Installation Manual 3P581074-2D English DGE601A52...
- Page 41 Firmly tighten until the power wire does not move anymore. <Secure with clamps> (5) Hook the power supply cover onto the tab in the area marked with a triangle, close the cover, and secure it with the screw. English Installation Manual 3P581074-2D DGE601A52...
-
Page 42: Wiring Specifications
• The power supply requires earth leakage breaker installation and earth wire connection. After installing an earth leakage breaker, be sure to connect only the DGE601A52 to it. • To prevent accidents due to wire breakage or disconnection, secure the power supply cables with clamps. -
Page 43: Setting Addresses For Each Air Conditioner
MAIN”, “Remote controller group SUB”, “Indoor unit Airnet address”, “Outdoor unit Airnet address”. NOTE You cannot perform the following procedure when the display backlight is off. In this case, press any key to turn on the backlight before starting the procedure. English Installation Manual 3P581074-2D DGE601A52... - Page 44 2. Press and hold the buttons. The menu is displayed. <Step 2> 3. Using the buttons, move to the centre of the screen. <Step 3> 4. Press the button. The selected screen is displayed. <Step 4> Installation Manual 3P581074-2D English DGE601A52...
- Page 45 Check that the cables are connected correctly. 5. Using the buttons, move to <Step 5> 6. Press the button. The current address setting is displayed. <Step 6> 7. Using the buttons, move to Press the button. <Step 7> English Installation Manual 3P581074-2D DGE601A52...
- Page 46 (It is now possible to edit the DIII- NET address.) <Step 8> 9. Press the button. <Step 9> 10. Using the buttons, move to the DIII-NET address. <Step 10> 11. Press the button. <Step 11> Installation Manual 3P581074-2D English DGE601A52...
- Page 47 12. Using the buttons, select the address you want to set. <Step 12> 13. Press the button. <Step 13> 14. Using the buttons, move to Press the button. (The DIII-NET address is confirmed.) <Step 14-1> <Step 14-2> English Installation Manual 3P581074-2D DGE601A52...
- Page 48 Set them if necessary. 1. Press the button. <Step 1> 2. Using the buttons, move to Press the button. <Step 2> 3. Using the buttons, move to the <Step 3> 4. Press the button. <Step 4> Installation Manual 3P581074-2D English DGE601A52...
- Page 49 <Step 5> 6. Press the button. <Step 6> 7. Using the buttons, move to Press the button. (The unit No. is confirmed.) <Step 7> 8. Using the buttons, move to Press the button. <Step 8> English Installation Manual 3P581074-2D DGE601A52...
- Page 50 (It is now possible to change the DIII-NET address.) <Step 9> 10. Press the button. <Step 10> 11. Using the buttons, move to the DIII-NET address. <Step 11> 12. Press the button. <Step 12> Installation Manual 3P581074-2D English DGE601A52...
- Page 51 13. Using the buttons, select the address you want to set. <Step 13> 14. Press the button. <Step 14> 15. Using the buttons, move to Press the button. (The DIII-NET address is confirmed.) <Step 15-1> <Step 15-2> English Installation Manual 3P581074-2D DGE601A52...
- Page 52 This section describes how to set indoor unit Airnet addresses. 1. Press the button. <Step 1> 2. Using the buttons, move to Press the button. <Step 2> 3. Using the buttons, move to the <Step 3> 4. Press the button. <Step 4> Installation Manual 3P581074-2D English DGE601A52...
- Page 53 <Step 5> 6. Press the button. <Step 6> 7. Using the buttons, move to Press the button. (The unit No. is confirmed.) <Step 7> 8. Using the buttons, move to Press the button. <Step 8> English Installation Manual 3P581074-2D DGE601A52...
- Page 54 (It is now possible to change the Airnet address.) <Step 9> 10. Press the button. <Step 10> 11. Using the buttons, move to the Airnet address. <Step 11> 12. Press the button. <Step 12> Installation Manual 3P581074-2D English DGE601A52...
- Page 55 13. Using the buttons, select the address you want to set. <Step 13> 14. Press the button. <Step 14> 15. Using the buttons, move to Press the button. (The Airnet address is confirmed.) <Step 15-1> <Step 15-2> English Installation Manual 3P581074-2D DGE601A52...
- Page 56 • Multiple systems exist in 1 remote controller group. • is not displayed 1. Press the button. <Step 1> 2. Using the buttons, move to Press the button. <Step 2> 3. Using the buttons, move to Press the button. <Step 3> Installation Manual 3P581074-2D English DGE601A52...
- Page 57 (It is now possible to edit the Airnet address.) <Step 5> 6. Press the button. <Step 6> 7. Using the buttons, move to the Airnet address. <Step 7> English Installation Manual 3P581074-2D DGE601A52...
- Page 58 8. Press the button. <Step 8> 9. Using the buttons, change the Airnet address. <Step 9> 10. Press the button. <Step 10> Installation Manual 3P581074-2D English DGE601A52...
- Page 59 11. Using the buttons, move to Press the button. (The Airnet address is confirmed.) <Step 11-1> <Step 11-2> 12. Using the buttons, move to Press the button. <Step 12> English Installation Manual 3P581074-2D DGE601A52...
- Page 60 13. Using the buttons, move to Press the button. You will now return back to the homescreen. <Step 13-1> <Step 13-2> Installation Manual 3P581074-2D English DGE601A52...
-
Page 61: Setting Addresses With Navigation Remote Controller (Brc1E*)
MAIN”, “Remote controller group SUB”, “Indoor unit Airnet address”, “Outdoor unit Airnet address”. NOTE You cannot perform the following procedure when the display backlight is off. In this case, press any key to turn on the backlight before starting the procedure. English Installation Manual 3P581074-2D DGE601A52... - Page 62 Power on the DGE601A51 and wait for a while before trying to operate the remote controller. The [Group Address] menu is also not displayed when the DGE601A51 is not communicating with the indoor units normally. Check that the cables are con- nected correctly. Installation Manual 3P581074-2D English DGE601A52...
- Page 63 Gr Addr. Release 1-00 Retur n Change 6. Press the Menu/OK button. The indication changes from [Release] to [Set], and the DIII-NET address is set. <Step 6> Group Address (Group) Gr Addr. 1-03 Retur n Release English Installation Manual 3P581074-2D DGE601A52...
- Page 64 7. Press the Cancel button 1 time. You will now return back to the display shown in Step 7-2. <Step 7-1> Group Address (Group) Gr Addr. 1-03 Retur n Release <Step 7-2> Group Address Group Address (Group) Group Address (Unit) Retur n Setting Installation Manual 3P581074-2D English DGE601A52...
- Page 65 <Step 2> Group Address (Unit) Unit No. Gr Addr. 1-00 Retur n 3. Press the Right button and move to the [Gr Addr.]. <Step 3> Group Address (Unit) Unit No. Gr Addr. 1-00 Retur n Release English Installation Manual 3P581074-2D DGE601A52...
- Page 66 1-00 Retur n Change 6. Press the Menu/OK button. The indication changes from [Release] to [Set], and the DIII-NET address is set. <Step 6> Group Address (Unit) Unit No. Gr Addr. 1-05 Retur n Release Installation Manual 3P581074-2D English DGE601A52...
- Page 67 F i e l d S e t t i n g s M i n S e t p o i n t s D i f fe r e n t i a l Group Address Indoor Unit Air net Address Retur n Setting English Installation Manual 3P581074-2D DGE601A52...
- Page 68 Indoor Unit Air net Address Unit No. Address Release Retur n Change 5. Using the Up/Down buttons, select the Airnet address you want to set. <Step 5> Indoor Unit Air net Address Unit No. Address Release Retur n Change Installation Manual 3P581074-2D English DGE601A52...
- Page 69 F i e l d S e t t i n g s M i n S e t p o i n t s D i f fe r e n t i a l Group Address Indoor Unit Air net Address Retur n Setting English Installation Manual 3P581074-2D DGE601A52...
- Page 70 3. If an address is already [Set], press the Menu/OK button to release the current address setting. The mode indication changes from [Set] to [Release], and you are now ready to change the address. <Step 3> Outdoor Unit Air net Address Unit No. Address Release Retur n Change Installation Manual 3P581074-2D English DGE601A52...
- Page 71 6. Press the Cancel button 2 times. You will now return back to the display shown in Step 6-2. <Step 6-1> Outdoor Unit Air net Address Unit No. Address Retur n Release <Step 6-2> Cool Set to English Installation Manual 3P581074-2D DGE601A52...
-
Page 72: Setting Address On The Outdoor Unit
For details, refer to the service manual of the air conditioner. <LEDs (segment) and setting switches for each mode> Outdoor unit with LED display Outdoor unit with segment display Unlit Display of each mode (LED/Segment) Display of each mode setting switch Installation Manual 3P581074-2D English DGE601A52... -
Page 73: Steps For Setting The Outdoor Unit Airnet Address
You can now find out the current demand address setting by the LED (segment). 4. Press the BS2 button to change to any demand address. (Set the demand address number within the range of 0 to 31.) English Installation Manual 3P581074-2D DGE601A52... -
Page 74: Setting Items Led (Segment) Display
H1P H2P H3P H4P H5P H6P H7P SEG1 SEG2 SEG3 Outdoor unit AIRNET address setting demand address setting demand setting Enabled/Disabled The address setting of the outdoor unit is complete. The installation work of DGE601A52 is complete. Installation Manual 3P581074-2D English DGE601A52... -
Page 75: Quick Operation Guide
Quick Operation Guide Restarting the unit The DGE601A52 can be restarted by pressing the [RESET//] button. Operate the [RESET//] button using a thin rod or similar item. Only the slot whose [RESET//] button has been pressed will restart. <RESET> CAUTION Do not perform the operation with a pointed item. - Page 76 3P581074-2D EM18A019B (2107) HT...
Need help?
Do you have a question about the DGE601A52 and is the answer not in the manual?
Questions and answers