dji Mavic 3 Classic User Manual
Hide thumbs
Also See for Mavic 3 Classic:
- Quick start manual (118 pages) ,
- User manual (64 pages) ,
- Quick and easy to use (30 pages)

Related Manuals for dji Mavic 3 Classic


Summary of Contents for dji Mavic 3 Classic
- Page 1 User Manual of Product 1: DJI Mavic 3 Classic (DJI RC), Drone with 4/3 CMOS Hasselblad Camera for Professionals, 5.1K HD Video, 46 Mins Flight Time, Omnidirectional Obstacle Sensing, 15km Transmission Range, Smart Return to Home...
- Page 2 User Manual v1.2 2022.12...
- Page 3 View a complete list of topics in the table of contents. Click on a topic to navigate to that section. Printing this Document This document supports high resolution printing. Revision Log Version Date Revisions v1.2 2022.12 Added Waypoint Flight © 2022 DJI All Rights Reserved.
-
Page 4: Using This Manual
Video Tutorials Go to the address below or scan the QR code to watch the DJI Mavic 3 Classic tutorial videos, which demonstrate how to use the Mavic 3 Classic safely: Mavic 3 Classic... -
Page 5: Download Dji Assistant 2 (Consumer Drones Series)
DJI Mavic 3 Classic User Manual Download DJI Assistant 2 (Consumer Drones Series) Download DJI ASSISTANT 2 (Consumer Drones Series) at http://www.dji.com/mavic-3-classic/downloads. • The operating temperature of this product is -10° to 40° C. It does not meet the standard operating temperature for military grade application (-55°... -
Page 6: Table Of Contents
Contents Using this Manual Legend Read Before the First Flight Video Tutorials Download the DJI Fly App Download DJI Assistant 2 (Consumer Drones Series) Product Profile Introduction Feature Highlights Using for the First Time Preparing the Aircraft Preparing the Remote Controller... - Page 7 Optimal Transmission Zone Linking the Remote Controller Operating the Touchscreen Advanced Features DJI RC-N1 Using the Remote Controller Remote Controller Alert Optimal Transmission Zone Linking the Remote Controller DJI Fly App Home Camera View © 2022 DJI All Rights Reserved.
- Page 8 Stopping the Motors Mid-Flight Flight Test Takeoff/Landing Procedures Video Suggestions and Tips Appendix Specifications Firmware Update Using DJI Fly Using DJI Assistant 2 (Consumer Drones Series) Maintenance Instructions Troubleshooting Procedures Risk and Warnings Disposal C1 Certification MTOM Statement Direct Remote ID...
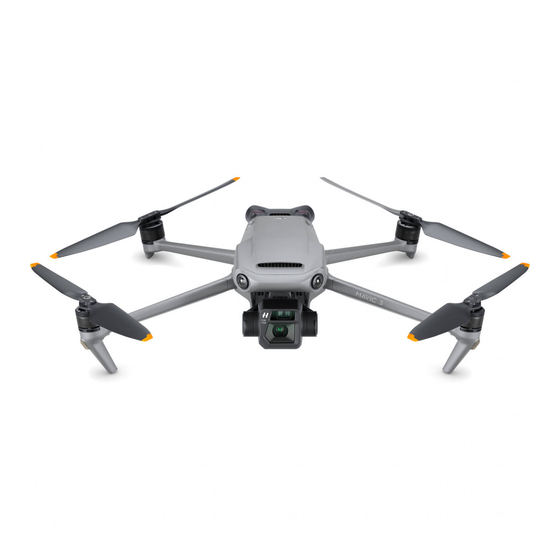
- Page 9 Product Profile This section introduces DJI Mavic 3 Classic and lists the components of the aircraft and remote controller. © 2022 DJI All Rights Reserved.
-
Page 10: Product Profile
DJI Mavic 3 Classic offers a maximum transmission range of 15 km and video quality at up to 1080p 60fps from the aircraft to the DJI Fly app. The remote controller works at both 2.4 and 5.8 GHz, and is capable of selecting the best transmission channel automatically. -
Page 11: Using For The First Time
• Attach the storage cover when the aircraft is not in use. • DJI 65W charger is not included in Mavic 3 Classic (Drone Only). It is recommended to use a PD 65W charger to charge the Intelligent Flight Battery. -
Page 12: Preparing The Remote Controller
DJI Mavic 3 Classic User Manual Preparing the Remote Controller Follow the steps below to prepare to use the DJI RC remote controller. 1. Remove the control sticks from the storage slots and mount them on the remote controller. 2. The remote controller needs to be activated before first use and an internet connection is required for activation. -
Page 13: Activating Dji Mavic 3 Classic Aircraft
Activating DJI Mavic 3 Classic Aircraft DJI Mavic 3 Classic requires activation before using for the first time. After powering on the aircraft and remote controller, follow the on-screen prompts to activate DJI Mavic 3 Classic using DJI Fly. An internet connection is required for activation. -
Page 14: Dji Rc Remote Controller
DJI Mavic 3 Classic User Manual initiate RTH. Press again to cancel RTH. DJI RC Remote Controller 5. Flight Mode Switch Switch between Cine, Normal, and Sport mode. 6. Power Button Press once to check the current battery level. Press, and then press and hold to power the remote controller on or off. -
Page 15: Rc-N1 Remote Controller
Systems are available). Press and hold the gimbal downward (default settings). Press button to initiate RTH. Press again to twice to turn the Auxiliary Bottom Light on or cancel RTH. off. The button can be set in DJI Fly. © 2022 DJI All Rights Reserved. - Page 16 DJI Mavic 3 Classic User Manual 7. Photo/Video Toggle 11. USB-C Port Press once to switch between photo and For charging and connecting the remote video mode. controller to the computer. 8. Remote Controller Cable 12. Control Sticks Storage Slot Connect to a mobile device for video linking For storing the control sticks.
- Page 17 Aircraft DJI Mavic 3 Classic contains a flight controller, video downlink system, vision systems, infrared sensing system, propulsion system, and an Intelligent Flight Battery. © 2022 DJI All Rights Reserved.
-
Page 18: Aircraft
Intelligent Flight Battery. Flight Modes DJI Mavic 3 Classic has three flight modes, plus a fourth flight mode that the aircraft switches to in certain scenarios. Flight modes can be switched via the Flight Mode switch on the remote controller. -
Page 19: Aircraft Status Indicators
The green lights indicate the aircraft is a UAV and the red lights indicate the heading and position of the aircraft. • If the front LEDs are set to auto in DJI Fly, the front LEDs turn off automatically when shooting to obtain better footage. Lighting requirements vary depending on the region. -
Page 20: Return To Home
Smart RTH is triggered. The aircraft will automatically plan the best RTH path, which will be displayed in DJI Fly and will adjust according to the environment. RTH Settings RTH settings are available for Advanced RTH. Go to the camera view in DJI Fly and tap > Safety > RTH. - Page 21 DJI Mavic 3 Classic User Manual Advanced RTH Procedure 1. The Home Point is recorded. 2. Advanced RTH is triggered. 3. The aircraft brakes and hover in place. a. The aircraft lands immediately if it is less than 5 m from the Home Point when RTH begins.
- Page 22 Pay extra attention to the battery power and warning prompts in DJI Fly. • Advanced RTH will not be available if the lighting condition and environment were not suitable for vision systems during takeoff or RTH.
-
Page 23: Low Battery Rth
Home Point according to the current position, environment, and flight speed. A warning prompt will appear in DJI Fly when the battery level is low and the aircraft can only support Low Battery RTH. -
Page 24: Landing Protection
DJI Mavic 3 Classic User Manual • If the RTH is triggered through DJI Fly and the aircraft is farther than 5 m from the Home Point, a prompt will appear in the app to select a landing option. • The aircraft may not be able to return to the Home Point normally if the GNSS signal is weak or unavailable. - Page 25 DJI Mavic 3 Classic User Manual • The following actions are available during Precision Landing: a. Press the throttle stick down to accelerate landing. b. Move the control sticks in any direction apart from the throttle direction to stop Precision Landing.
-
Page 26: Vision Systems And Infrared Sensing System
DJI Mavic 3 Classic User Manual Vision Systems and Infrared Sensing System DJI Mavic 3 Classic is equipped with both an Infrared Sensing System and Forward, Backward, Lateral, Upward, and Downward Vision Systems. The Upward and Downward Vision Systems consist of two cameras each, and the Forward, Backward, and Lateral Vision Systems consist of four cameras in total. -
Page 27: Using The Vision Systems
30 m as the Vision Systems may be affected. • The Auxiliary Bottom Light can be set in DJI Fly. If set to Auto, it is automatically enabled when the environment light is too weak. Note that the Vision System cameras performance may be affected when the Auxiliary Bottom Light is enabled. - Page 28 If there is any dirt, dust, or water on the Infrared Sensing and Vision Systems, clean it with a soft cloth. Do not use any cleanser that contains alcohol. c. Contact DJI Support if there is any damage to the glass of the Infrared Sensing and Vision Systems.
-
Page 29: Intelligent Flight Mode
In Spotlight mode, the aircraft will hover in place when there is an obstacle detected when the vision systems are working normally, no matter the behavior is set to Bypass or Brake in DJI Fly. Note that the vision systems are disabled in Sport mode. - Page 30 2. Drag a box around the subject in the camera view or enable Subject Scanning under Control settings in DJI Fly and tap the recognized subject to enable FocusTrack. The default mode is Spotlight. Tap the icon to switch between Spotlight, ActiveTrack, and POI. FocusTrack supports 3x zoom.
-
Page 31: Mastershots
DJI Mavic 3 Classic User Manual Exiting FocusTrack Tap Stop in DJI Fly or press the Flight Pause button once on the remote controller to exit FocusTrack. • DO NOT use FocusTrack in areas with people and animals running or vehicles moving. -
Page 32: Quickshots
DJI Mavic 3 Classic User Manual 2. In DJI Fly, tap the shooting mode icon to select MasterShots and follow the prompts. Make sure that you understand how to use the shooting mode and that there are no obstacles in the surrounding area. - Page 33 1. Take off and hover at least 2 m above the ground. 2. In DJI Fly, tap the shooting mode icon to select QuickShots and follow the prompts. Make sure that you understand how to use the shooting mode and that there are no obstacles in the surrounding area.
-
Page 34: Hyperlapse
DJI Mavic 3 Classic User Manual Exiting QuickShots Press the Flight Pause button once or tap in DJI Fly to exit QuickShots. The aircraft will hover in place. • Use QuickShots at locations that are clear of buildings and other obstacles. Make sure that there are no humans, animals, or other obstacles on the flight path. - Page 35 The aircraft will generate a timelapse video automatically, which is viewable in playback. Users can select Output Quality and Photo Type in System Settings-Camera page in DJI Fly. Mavic 3 Classic supports the fast compositing function of Hyperlapse. Select "Preview" in the output quality. Mavic 3 Classic will not perform stabilization and brightness smoothing but will only synthesize the effect preview film, which can save the compositing time.
- Page 36 DJI Mavic 3 Classic User Manual • For optimal performance, it is recommended to use Hyperlapse at an altitude higher than 50 m and to set a difference of at least two seconds between the interval time and shutter. • It is recommended to select a static subject (e.g., high-rise buildings, mountainous terrain) at a safe distance from the aircraft (farther than 15 m).
-
Page 37: Waypoint Flight
POI during flight. A waypoint flight route can be saved and repeated. Using Waypoint Flight 1. Enable Waypoint Flight Tap the Waypoint Flight icon on the left of the camera view in DJI Fly to enable Waypoint Flight. 2. Waypoint Settings Pin Waypoint Waypoints can be pinned via the map before take off. - Page 38 DJI Mavic 3 Classic User Manual Settings Tap the waypoint number for settings such as camera action, altitude, speed, heading, gimbal tilt, zoom, and hovering time. Camera Action Choose between Non, Take Photo, Start or Stop Recording. Altitude Set the altitude from the take-off point. Ensure to take off at the same altitude to obtain better performance when a Waypoint Flight is repeated.
- Page 39 Flight, On Signal Lost, and Start Point. The settings apply to all waypoints. 5. Perform a Waypoint Flight • Check the Obstacle Avoidance settings in the Safety section of DJI Fly before performing the Waypoint Flight. When set to Bypass or Brake, the aircraft will brake and hover in place if an obstacle is detected during the Waypoint Flight.
- Page 40 DJI Mavic 3 Classic User Manual • Tap the list icon to check the saved tasks, and tap to open a task. • Tap the icon to edit the name of the task. • Slide left to delete a task.
-
Page 41: Cruise Control
1. Set the Cruise Control Button Go to DJI Fly, select System Settings, Control, and then set the C1 or C2 button of the DJI RC remote controller or the Fn button of the RC-N1 remote controller to Cruise Control. -
Page 42: Advanced Pilot Assistance Systems 5.0 (Apas 5.0)
When APAS is enabled, the aircraft can be stopped by pressing the Flight Pause button on the remote controller or tapping the screen in DJI Fly. The aircraft hovers for three seconds and awaits further pilot commands. -
Page 43: Flight Recorder
2. Enable Bluetooth and Wi-Fi on the mobile device. 3. Launch DJI Fly, enter playback, and tap in the upper right corner to access the files on the aircraft to download at high speed. • The maximum download speed can only be achieved in countries and regions where the 5.8 GHz frequency is permitted by laws and regulations, when using devices that support... -
Page 44: Propellers
DJI Mavic 3 Classic User Manual Propellers There are two types of DJI Mavic 3 Classic Low-Noise Quick Release Propellers, which are designed to spin in different directions. Marks are used to indicate which propellers should be attached to which motors. Make sure to match the propeller and motor following the instructions. -
Page 45: Intelligent Flight Battery
DJI Mavic 3 Classic User Manual Intelligent Flight Battery The DJI Mavic 3 Classic Intelligent Flight Battery is a 15.4 V, 5000 mAh battery with smart charging and discharging functionality. Battery Features Battery Level Display: The LED indicators display the current battery level. -
Page 46: Using The Battery
Make sure to fully charge the battery before takeoff. 2. Batteries cannot be used in extremely low-temperature environments of lower than -10° C (14° 3. When in low-temperature environments, end the flight as soon as DJI Fly displays the low battery level warning. -
Page 47: Charging The Battery
Fully charge the Intelligent Flight Battery before every flight Using DJI 65W Portable Charger 1. Connect the DJI 65W Portable Charger to an AC power supply (100-240 V, 50/60 Hz). 2. Attach the aircraft to the charger using the battery charging cable with the battery powered off. -
Page 48: Inserting The Intelligent Flight Battery
DJI Mavic 3 Classic User Manual Battery Protection Mechanisms LED1 LED2 LED3 LED4 Blinking Pattern Status LED2 blinks twice per second Overcurrent detected LED2 blinks three times per second Short circuit detected LED3 blinks twice per second Overcharge detected LED3 blinks three times per second... -
Page 49: Gimbal And Camera
Use the gimbal dial on the remote controller to control the tilt of the camera. Alternatively, enter the camera view in DJI Fly. Press the screen until the camera adjustment bar appears. Drag the bar up or down to control the tilt and left or right to control the pan. -
Page 50: Camera Profile
Storing Photos and Videos DJI Mavic 3 Classic has 8 GB of built-in storage and supports the use of a microSD card to store photos and videos. A SDXC or UHS-I microSD card is required due to the fast read and write speeds necessary for high-resolution video data. - Page 51 Remote Controller This section describes the features of the remote controller and includes instructions for controlling the aircraft and the camera. © 2022 DJI All Rights Reserved.
-
Page 52: Remote Controller
The built-in 5200 mAh battery with a power of 18.72 Wh provides the remote controller with a maximum operating time of four hours. The DJI RC comes with many other functions such as Wi-Fi connection, built-in GNSS (GPS+BeiDou+Galileo), Bluetooth, built-in speakers, detachable control sticks, and microSD storage. - Page 53 DJI Mavic 3 Classic User Manual Controlling the Aircraft Three preprogrammed modes (Mode 1, Mode 2, and Mode 3) are available and custom modes can be configured in DJI Fly. The default mode is Mode 2. Mode 1 Left Stick...
- Page 54 DJI Mavic 3 Classic User Manual Remote Aircraft Controller ( Indicates Nose Direction) Remarks (Mode 2) Moving the left stick up or down (throttle stick) changes the aircraft’s altitude. Push the stick up to ascend and down to descend. The more the stick is pushed away from the center position, the faster the aircraft will change altitude.
-
Page 55: Status Led And Battery Level Leds Description
The remote controller beeps when there is an error or warning. Pay attention when prompts appear on the touch screen or in DJI Fly. Slide down from the top and select Mute to disable all alerts, or slide the volume bar to 0 to disable some alerts. -
Page 56: Optimal Transmission Zone
Otherwise, the remote controller will experience interference. • A prompt will be received in DJI Fly if the transmission signal is weak during flight. Adjust the antennas to make sure that the aircraft is in the optimal transmission range. -
Page 57: Linking The Remote Controller
DJI Mavic 3 Classic User Manual Linking the Remote Controller The remote controller is already linked to the aircraft when purchased together as a combo. Otherwise, follow the steps below to link the remote controller and the aircraft after activation. - Page 58 Slide down from the top of the screen to Slide down twice from the top of the screen to open Quick open the status bar when in DJI Fly. Settings when in DJI Fly. The status bar displays the time, Wi-Fi signal, and battery level of the remote controller, etc.
- Page 59 DJI Mavic 3 Classic User Manual Quick Settings 1. Notifications Tap to check system notifications. 2. System Settings Tap to access system settings and configure settings such as Bluetooth, volume, and network. You can also view the Guide to learn more about the controls and status LEDs.
-
Page 60: Advanced Features
DJI Mavic 3 Classic User Manual Advanced Features Calibrating the Compass The compass may need to be calibrated after the remote controller is used in an area with electromagnetic interference. A warning prompt will appear if the compass of the remote controller requires calibration. -
Page 61: Dji Rc-N1
Built into the remote controller is DJI's long-range tranmission technology, offering a maximum transmission range of 15 km and displaying video from the aircraft to DJI Fly on a mobile device at up to 1080p 60fps (depending on mobile device). The aircraft and camera are easy to control using the onboard buttons and the detachable control sticks make the remote controller easier to store. - Page 62 (throttle), and left/right movement (roll). The control stick mode determines the function of each control stick movement. Three preprogrammed modes (Mode 1, Mode 2, and Mode 3) are available and custom modes can be configured in DJI Fly. The default mode is Mode 2. Mode 1...
- Page 63 DJI Mavic 3 Classic User Manual Remote Aircraft Controller ( Indicates Nose Direction) Remarks (Mode 2) Moving the left stick up or down (throttle stick) changes the aircraft’s altitude. Push the stick up to ascend and down to descend. The...
-
Page 64: Remote Controller Alert
RTH and regain control of the aircraft. Refer to the Return to Home section for more information about RTH. Customizable Button Go to System Settings in DJI Fly and select Control to customize the function of the button. Functions include recentering the gimbal, switching the auxiliary LED, and enabling Cruise Control. Remote Controller Alert The remote controller sounds an alert during RTH or when the battery level is low (6% to 15%). -
Page 65: Linking The Remote Controller
DJI Mavic 3 Classic User Manual Linking the Remote Controller The aircraft and remote controller must be linked before use. Follow these steps to link a new remote controller: 1. Power on the remote controller and the aircraft. 2. Launch DJI Fly. - Page 66 DJI Fly App This section introduces the main functions of the DJI Fly app. © 2022 DJI All Rights Reserved.
-
Page 67: Dji Fly App
Album Allows you to view photos and videos from DJI Fly and mobile device. Create contains Templates and Pro. Templates provides auto edit feature for imported footage. Pro allows you to edit the footage manually. -
Page 68: Camera View
DJI Mavic 3 Classic User Manual Camera View N Mode In-Flight 12 26 1.0x 3m/s 4.6m/s Storage RES&FPS EV H 150 m D 80 m 06:21 4K 60 +0.7 1. Flight Mode N: Displays the current flight mode. 2. System Status Bar In-Flight : Indicates aircraft flight status and displays various warning messages. - Page 69 (CSC). Stopping the motors in mid-flight will cause the aircraft to crash. AirSense An alert will appear in DJI Fly when a manned aircraft is detected if AirSense is enabled. Read the disclaimer in the DJI Fly prompt before using AirSense.
- Page 70 Storage: Footage can be stored in the aircraft or on a microSD card. Internal storage and microSD cards can be formatted. The cache when recording settings and camera reset settings can also be adjusted. Transmission Live Stream Platform (not supported when using DJI RC), Frequency, and Channel Mode settings. © 2022 DJI All Rights Reserved.
- Page 71 Tap Clear All Data to reset all settings to default, and delete all the data stored in internal storage and microSD card, including flight log. It is recommended to provide proof (flight log) when claiming compensation. Contact DJI support before clearing the flight log if an accident occurs during flight.
- Page 72 • Make sure to fully charge your device before launching DJI Fly. • Mobile cellular data is required when using DJI Fly. Contact your wireless carrier for data charges.
- Page 73 • The app is designed to assist your operation. Use your sound discretion and DO NOT rely on the app to control your aircraft. Your use of the app is subject to DJI Fly Terms of Use and DJI Privacy Policy. Read them carefully in the app.
- Page 74 Flight This section describes safe flight practices and flight restrictions. © 2022 DJI All Rights Reserved.
-
Page 75: Flight
Once pre-flight preparation is complete, it is recommended to hone your flight skills and practice flying safely. Make sure that all flights are carried out in an open area. Refer to the Remote Controller and DJI Fly sections for information about using the remote controller and the app to control the aircraft. -
Page 76: Flight Limits And Geo Zones
GNSS is available. Only altitude can be limited when GNSS is unavailable. Flight Altitude and Distance Limits The flight altitude and distance limits can be changed in DJI Fly. Based on these settings, the aircraft will fly in a restricted cylinder, as shown below: Max Flight Altitude... -
Page 77: Geo Zones
There will be prompts in the DJI Fly app to fly in GEO zones. Pre-Flight Checklist 1. -
Page 78: Auto Takeoff/Landing
DJI Mavic 3 Classic User Manual 8. Use only genuine DJI parts or parts certified by DJI. Unauthorized parts or parts from non-DJI certified manufacturers may cause system malfunctions and compromise safety. 9. Check if the Remote ID is up to date and working. -
Page 79: Starting/Stopping The Motors
DJI Mavic 3 Classic User Manual Starting/Stopping the Motors Starting the Motors A Combination Stick Command (CSC) is used to start the motors. Push both sticks to the bottom inner or outer corners to start the motors. Once the motors have started spinning, release both sticks simultaneously. -
Page 80: Flight Test
3. Launch DJI Fly and enter the camera view. 4. Wait until the self-check is finished, it is safe to fly if there is no abnormal warning in DJI Fly. 5. Gently push the throttle stick to take off or use auto-takeoff. - Page 81 Appendix © 2022 DJI All Rights Reserved.
-
Page 82: Appendix
Shooting Range: 1 m to ∞ (with auto focus) ISO Range Video Normal and Slow Motion; 100-6400 (Normal) 400-1600 (D-Log) 100-1600 (HLG) Night: 800-12800 (Normal) Photo: 100-6400 Electronic Shutter Speed 1/8000-8 s 5280 × 3956 Max Image Size © 2022 DJI All Rights Reserved. - Page 83 DJI Mavic 3 Classic User Manual Still Photography Single: 20 MP Automatic Exposure Bracketing (AEB): 20 MP, 3/5 Frames at 0.7EV Step Timed: 20 MP 2/3/5/7/10/15/20/30/60 seconds Video Resolution H.264/H.265 5.1K: 5120×2700@24/25/30/48/50fps DCI 4K: 4096×2160@24/25/30/48/50/60/120*fps 4K: 3840×2160@24/25/30/48/50/60/120*fps FHD:1920×1080@24/25/30/48/50/60/120*/200*fps * Recorded frame rate, corresponding video plays as slow motion...
- Page 84 It only refers to the maximum, one-way flight distance without considering Return to Home. Please pay attention to RTH prompts in the DJI Fly app during actual flight. Max Download Speed O3+: 5.5 MB/s (with DJI RC/RC-N1 remote controller)
- Page 85 DJI Mini 2/ DJI Mavic Air 2: O2 b. DJI Air 2S: O3 c. DJI Mavic 3 Classic/DJI Mavic 3/DJI Mavic 3 Cine: O3+ Operating Time 6 hours (without charging the mobile device) 4 hours (with charging the mobile device)
- Page 86 DJI Mavic 3 Classic User Manual Wi-Fi Protocol 802.11a/b/g/n Operating Frequency 2.4000-2.4835 GHz; 5.150-5.250 GHz; 5.725-5.850 GHz Transmitter Power (EIRP) 2.4 GHz: <23 dBm (FCC); <20 dBm (CE/SRRC/MIC) 5.1 GHz: <23 dBm (FCC/CE/SRRC/MIC) 5.8 GHz: <23 dBm (FCC/SRRC), <14 dBm (CE)
-
Page 87: Firmware Update
Use DJI Fly or DJI Assistant 2 (Consumer Drones Series) to update the aircraft firmware. Using DJI Fly When you connect the aircraft or remote controller to DJI Fly, you will be notified if a new firmware update is available. To start updating, connect your remote controller or mobile device to the internet and follow the onscreen instructions. -
Page 88: Maintenance Instructions
DJI Mavic 3 Classic User Manual Maintenance Instructions To avoid serious injury to children and animals, observe the following rule: 1. Small parts, such as cables and straps, are dangerous if swallowed. Keep all parts out of reach of children and animals. -
Page 89: Troubleshooting Procedures
Contact DJI support. Risk and Warnings When the aircraft detects a risk after powering on, there will be a warning prompt on DJI Fly. Pay attention to the list of situations below. 1. If the location is not suitable for takeoff. -
Page 90: Disposal
Maximum Propeller Speed 7500 RPM MTOM Statement The MTOM of Mavic 3 Classic (Model L2C), including the SD card, is 895 g to comply with C1 requirements. Users must follow the instructions below to comply with the MTOM C1 requirements. -
Page 91: Direct Remote Id
GEO Awareness Map Drawing: after the latest UGZ data is updated, a flight map with a restricted zone will be displayed in the DJI Fly app. Name, effective time, height limit, etc., can be viewed by tapping the area. - Page 92 Height error Restricted Zones Appear red in the DJI app. Users will be prompted with a warning, and flight is prevented. UA cannot fly or takeoff in these zones. Restricted Zones may be unlocked, to unlock contact flysafe@dji.com or go to Unlock A Zone at dji.com/flysafe.
- Page 93 A warning message will prompt users when the drone reaches the edge of the zone. • When the aircraft and DJI Fly app cannot obtain a GPS signal, the GEO awareness function will be inoperative. Interference of the aircraft antenna or disabling the GPS authorization in DJI Fly will cause the GPS signal fails to be obtained.
-
Page 94: Far Remote Id Compliance Information
. The results of the PFST of the Remote ID system can be viewed in either a DJI flight control app such as DJI Fly or DJI goggles. The aircraft monitors the Remote ID system functionality from pre-flight to shut down. If the Remote ID system malfunctions or has a failure, an alarm will be displayed in either a DJI flight control app such as DJI Fly or DJI goggles. - Page 95 Contact DJI SUPPORT This content is subject to change. https://www.dji.com/mavic-3-classic/downloads If you have any questions about this document, please contact DJI by sending a message to DocSupport@dji.com. and MAVIC are trademarks of DJI. Copyright © 2022 DJI All Rights Reserved.
Need help?
Do you have a question about the Mavic 3 Classic and is the answer not in the manual?
Questions and answers