Bromic Heating Waterboy Series Instruction Manual
Submersible pump
Hide thumbs
Also See for Waterboy Series:
- Instruction manual (4 pages) ,
- Instruction and service manual (11 pages) ,
- Manual (16 pages)
Table of Contents

Subscribe to Our Youtube Channel
Related Manuals for Bromic Heating Waterboy Series


Summary of Contents for Bromic Heating Waterboy Series
- Page 1 Bromic Waterboy™ Submersible Pump Range Instruction Manual V3.8 - 12/2022 Submersible-Range-Instruction-Manual-2022-V3.7.indd 1 Submersible-Range-Instruction-Manual-2022-V3.7.indd 1 21/12/2022 3:15:06 PM 21/12/2022 3:15:06 PM...
- Page 2 Dear Customer, We thank you for the trust you’ve placed in our products! Your new appliance was designed and manufactured with state of the art pumping technology. Read these instructions for use carefully before using the appliance for the first time. These instructions contain all information necessary to safely use this appliance in a manner that will maximise its lifespan.
-
Page 3: Table Of Contents
Table of Contents Electrical Safety ............. 3 General Safety . -
Page 4: Electrical Safety
Electrical Safety WARNING! When using mains-powered tools, basic safety precautions, including the following, should always be followed to reduce risk of fire, electric short circuit, personal injury and material damage. Read and understand the manual prior to operating this pump. Save these instructions and other documents supplied with this pump for future reference. -
Page 5: Additional Safety
Additional Safety Instructions for Pumps WARNING! This product is intended for pumping water in domestic and commercial applications. Do not use it for corrosive, abrasive, explosive or dangerous liquids. Fluids other than water will damage the water pump and/or create a fire hazard. Failure to follow all instructions listed below may result in electric short circuit, fire and/or serious injury. -
Page 6: Your Appliance At A Glance
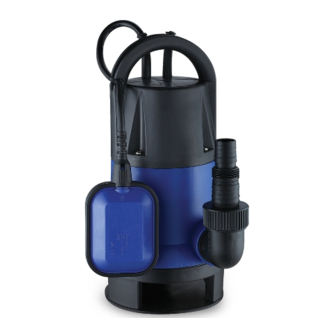
Your Appliance At A Glance 1. Carrying handle 2. Float switch height adjustment 3. Hose adapter for pressure connection 4. Float switch 5. Pump casing 6. Mains cable and plug Clean Water Pump Dirty Water Pumps (50L) (400W & 900W) Accessories 7. -
Page 7: Setup & Preparation - Universal Adaptor
Setup & Preparation 1. Universal Adaptor Ensure the pump is disconnected from the power supply before performing any of the following operations. The universal adaptor is designed to fit various sizes of pipes and fittings. To fit a 25mm (1’’) rigid pipe or flexible tubing (temporary or permanent application). -
Page 8: Setup & Preparation - L-Shape Connector
Setup & Preparation 2. L-Shape Connector 1. Screw the L-shape connector into the pump housing by rotating in a clockwise direction 2. Make sure the L-shape connector is firmly tightened so that the O-ring is compressed between the pump housing and the L-shape connector. This ensures no leakage will occur at this point. -
Page 9: Setup & Preparation - Float Switch
Setup & Preparation 3. Float Switch The pump is fitted with a float switch, which controls how the pump switches on and switches off. 1. When the float switch cable is able to move freely, the pump will function down to a water depth of 50mm and automatically shut off 2. -
Page 10: Setup
4. Setup CAUTION: Never carry, lift or pull up the pump by the power cord. This will damage the unit. 1. Ensure the distance from the lowest point to the highest point that you wish to distribute the water does not exceed the below graphs as per model. MAX. -
Page 11: Installation & Operation
5. Installation & Operation IMPORTANT: Before submerging the pump in water, unwrap the power cable and ensure the plug is clear of any damp locations. Power Cable: Water Level Float Switch Water Pump Container The pump must be used with a residual current device with rated residual current of 30mA or less. -
Page 12: Operation, Cleaning & Maintenance
Operation, Cleaning And Maintenance Risk of damage to the appliance! Do not lift the pump with the cable or pressure hose as these are not designed with the tensile strength required to lift the pump’s weight. – Submerge the pump at an angle into the liquid to be delivered so that no air pocket forms on the underside of the appliance. -
Page 13: Malfunctions & Troubleshooting
Cleaning And Maintenance After Every Use What? How? Clean the appliance. As described in the instructions below Cleaning the appliance externally Rinse with clean water. Remove stubborn contamination with a brush and detergent. Submerge the pump in a container with clean water and switch on for a short time to rinse the inside of the pump. Cleaning the suction area –... -
Page 14: Technical Data
Malfunctions and troubleshooting Minor faults will often cause a malfunction. In most cases, you will be able to correct these faults easily yourself. Please start by referring to the following table before contacting a technical support representative. For simple faults, this will save you both the effort of organising a technician and the expense associated with such a visit. Fault/malfunction Cause Remedy... - Page 15 Notes AU 1300 276 642 NZ 0508 276 642 | W BROMICPLUMBING.COM | E PLUMBING@BROMIC.COM Submersible-Range-Instruction-Manual-2022-V3.7.indd 15 Submersible-Range-Instruction-Manual-2022-V3.7.indd 15 21/12/2022 3:15:10 PM 21/12/2022 3:15:10 PM...
- Page 16 Technical data If you are unable to correct a fault yourself, please contact our technical support directly. Please note that improperly conducted repairs will void your warranty and may result in additional expenses. CLEAN WATER DIRTY WATER 400W 900W Item number 7575127 7575125 7575126...
Need help?
Do you have a question about the Waterboy Series and is the answer not in the manual?
Questions and answers