Table of Contents
Advertisement
Quick Links
Advertisement
Table of Contents

Subscribe to Our Youtube Channel
Summary of Contents for VARSITY Scoreboards 2240 PPF5
- Page 1 MODEL 2240 PPF5 Installation Manual...
- Page 2 MODEL 2240 PPF5 INSTALLATION WARRANTY This product is warrantied against defects in materials and workmanship for the period specified in the warranty from the date of invoice. SERVICE Technical support is available 24 hours a day, 7 days a week.
- Page 3 A NOTE TO INSTALLERS If you are installing this scoreboard for a client, please return the manual to the individual in charge of the scoreboard upon completion of installation. SCOREBOARD DIMENSION 16’ wide x 7’ tall x 8” depth...
-
Page 4: Table Of Contents
TABLE OF CONTENTS MODEL 2240 PPF5 INSTALLATION INSTALLATION OVERVIEW PRODUCT SPECIFICATIONS JOINING THE TWO PANELS TOGETHER JOINING THE TWO PPF5 PANELS TO THE SCOREBOARD 10-11 MOUNTING THE SCOREBOARD ON A WALL HANGING THE SCOREBOARD FROM THE CEILING RUNNING & CONNECTING THE ELECTRIC SERVICE... -
Page 5: Model 2240 Ppf5 Installation
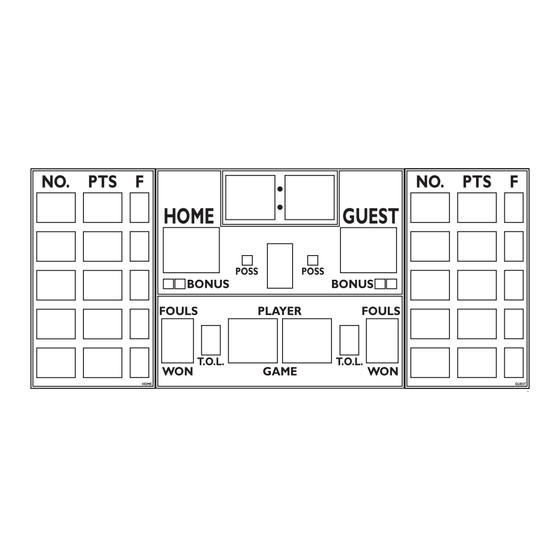
MODEL 2240 PPF5 INSTALLATION Please inspect all shipping containers upon arrival for damage and ensure that you have all the parts listed below: (1) 16’ x 7’ Basketball Scoreboard Shipped in four (4) sections... - Page 6 Ask the delivery driver to call the local terminal and report immediately. Contact Varsity Scoreboards immediately while the delivery driver is still present to report the damage. A. Phone number B.
-
Page 7: Installation Overview
INSTALLATION OVERVIEW This manual will walk you through the installation of the scoreboard. While care has been taken to consider the many scenarios for installation, some general infromation applies to all. Follow this guide as closely as possible to ensure proper installation. Review the product specifications below to determine your specific installation hardware. -
Page 8: Product Specifications
PRODUCT SPECIFICATIONS OVERALL DIMENSIONS WEIGHT 16’ L x 7’ W x 8” D - shipped in four (4) Hanging weight = approximately 560 lbs sections Shipping weight = approximately 625 lbs CONSTRUCTION 22-gauge galvanneal steel cabinet with powder coat finish for strength, durability, and lasting appearance. -
Page 9: Joining The Two Panels Together
JOINING THE TWO PANELS TOGETHER Carefully remove the scoreboard from its packaging, making sure not to pry against or cut into the cabinet. Inspect each unit for shpping damage according to the instructions on page 6. Lay both sections down, face up, with the cabinets aligned. Connect the sections with the supplied plates, one on the top, and one on the bottom as pictured. -
Page 10: Joining The Two Ppf5 Panels To The Scoreboard
JOINING THE TWO PPF5 PANELS TO THE SCOREBOARD Carefully remove the player-point-foul panels from their packaging, making sure not to pry against or cut into the cabinet. Inspect each unit for shpping damage according to the instructions on page 6. Lay the assembled scoreboard and both player-point-foul sections down, face up, with the cabinets aligned. - Page 11 Connect a lifting device to the 6 outside hanging brackets on the top of the scoreboard and lift enough to acquire access to the back of the panels. Cardboard or foam packaging can be used as a pad between the lift and scoreboard to protect the scoreboard face. Open both access doors on the back and connect the wiring.
-
Page 12: Mounting The Scoreboard On A Wall
MOUNTING THE SCOREBOARD ON A WALL Carefully remove the scoreboard from its packaging, making sure not to pry against or cut into the cabinet. Inspect each unit for shipping damage according to the instructions on page 6. Connect a lift device to the two hanging backets on top of the scoreboard and lift the scoreboard into place. -
Page 13: Hanging The Scoreboard From The Ceiling
HANGING THE SCOREBOARD FROM THE CEILING Carefully remove the scoreboard from its packaging, making sure not to pry against or cut into the cabinet. Inspect each unit for shipping damage according to the instructions on page 6. If the scoreboard will be against the lift during lifting, place card- If eye bolts, cables, or chains are to be used to suspend the board or foam between the lift and scoreboard to protect the face scoreboard, unsure that they are capable of supporting the... -
Page 14: Running & Connecting The Electric Service
RUNNING & CONNECTING THE ELECTRIC SERVICE NOTE: THIS PORTION OF THE INSTALLATION REQUIRES A LICENSED ELECTRICIAN. IDEALLY, THE SCOREBOARD WILL BE POWERED FROM A DEDICATED 120V/20A CIRCUIT. ADDITIONALLY, SINCE THE SCOREBOARD’S POWER SHOULD BE TURNED OFF AFTER EACH USE, THERE SHOULD BE EASY ACCESS TO THE POWER SWITCH OR CIRCUIT BREAKER. -
Page 15: Installing Sponsor Panels
INSTALLING SPONSOR PANELS NOTE: DETERMINE NUMBER OF SPONSOR PANELS BEING INSTALLED AND THEIR LOCATION. (2) 21” x 8’ Panel (6) 3/8-16 x 3/4” Bolts (6) 3/8-16 Hex Nuts (18) #8 x 1/2” Self Tap Screws (6) Mounting Brackets (6) M3/8” Flat Washers... - Page 16 Before the sponsor panels Lift the sponsor panels into Secure the mounting Install self tap screws through are lifted into place, attach place with the panels resting brackets to the wall, the scoreboard’s front flange the mounting brackets to the on top of the scoreboard for using mounting hardware and into the sponsor panel faces,...
-
Page 17: Testing The Installed System
0-9. controller. Congratulations! You’ve successfully installed your Varsity Scoreboard! If any problems arise, please have the installer call Varsity Scoreboards Customer Service at 1-800-411-3136 while the installer is still present at the scoreboard.


Need help?
Do you have a question about the 2240 PPF5 and is the answer not in the manual?
Questions and answers