
Related Manuals for Create THERA MATT PRO


Summary of Contents for Create THERA MATT PRO
- Page 1 THER A MAT T P RO E SP R E S SO CO FFE E MACHINE CAFE TE R A E SP RE S SO USER MANUAL...
-
Page 4: Table Of Contents
THER A MAT T PRO IND E X ENGLISH ESPAÑOL Safety warnings Advertencias de seguridad Parts list Lista de partes Control panel Panel de control Before First use Antes del primer uso Select the right cup Seleccione la taza adecuada Select the right coffee Seleccione el café... - Page 5 T HE R A MAT T P RO I NDE X ITALIANO DEUTSCH Avvisi di sicurezza Sicherheitswarnungen Elenco delle parti Liste der Einzelteile Pannello di controllo Schalttafel Prima del primo utilizzo Vor dem ersten Gebrauch Seleziona la tazza giusta Wählen Sie die richtige Tasse Scegli il caffè...
-
Page 6: English
ENGL ISH Thank you for choosing our coffee machine. Before using the appliance, and to ensure the best use, carefully read these instructions. The safety precautions enclosed herein reduce the risk of death, injury and electrical shock when correctly adhered to. Keep the manual in a safe place for future reference, along with the completed warranty card, purchase receipt and package. - Page 7 • This appliance is not intended to be operated by means of an external timer or separate remote-control system. • The appliance can be used by children aged from 8 years and above and persons with reduced physical, sensory or mental capabilities or lack of experience and knowledge if they have been given supervision or in- struction concerning use of the appliance in a safe way and understand the hazards involved.
-
Page 8: Parts List
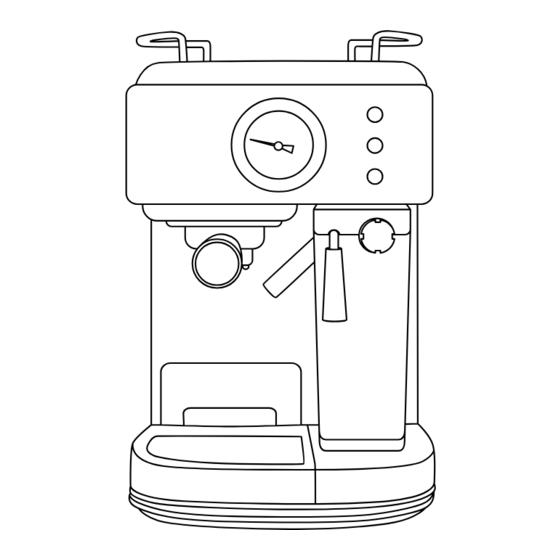
PARTS LIST 1. Water tank lid 9. Support for small cups 2. Water tank 10. Switch 3. Milk tank lid 11. Drip plate 4. Control knob 12. Drip tray 5. Steam nozzle 13. 1-cup filter 6. Milk tank 14. 2-cups filter 7. -
Page 9: Control Panel
CONTROL PANEL Espresso Cappuccino Latte 1. Small coffee cup and manual coffee 5. Milk foam button light 6. Large cup of cappuccino and milk foam 2. Manual brew button light 3. Large cup of coffee and manual coffee 7. Small cup of latte and cleaning light light 8. -
Page 10: Select The Right Cup
1. Fill the water tank between the MIN and MAX levels. 2. Fill the milk tank with water between the MIN and MAX levels. 3. Select one of the filters and place it on the filter holder. Place the filter holder in the unit ensuring it is properly locked and place a cup under it. -
Page 11: Coffee Drinks
COFFEE DRINKS • Espresso: A unique method of coffee brewing in which hot water is forced through finely ground coffee. Popular in Europe, it is a far richer and more full-bodied brew than regular drip coffee. Because of its richness, espresso is usually served in 44 to 59 ml (1.5 to 2 oz.) cups. •... - Page 12 Note: The ground coffee amount can’t exceed the MAX mark. 2. Tamp and compress firmly and evenly the ground coffee. 3. Clean any excess of coffee from the rim to ensure proper fit under brew head. • Place the filter holder: 1.
-
Page 13: Select The Function
• Turn the unit on: 4. Make sure the unit is plugged in. 5. Turn the unit on “I” position. The six control panel lights will start blinking during heating and until the water reaches the perfect temperature. Once the six lights become solid, the unit is ready to use. -
Page 14: Cleaning And Maintenance
• Frothed milk: The unit also allows you to prepare frothed milk only. 1. Press and hold the Cappuccino Button for 3 seconds if you wish to add more foam to your beverage or to prepare frothed milk for any other beverage, e.g. macchiatto, hot chocolate, tea , etc. - Page 15 C LEAN I N G TH E MI LK TANK AND F RO T H ING T UB E Even though you can store the milk tank with leftover milk in the refrigerator, it is impor- tant to clean the tank and frothing tube regularly to avoid clogging and building residues. In order to clean the milk tank, please follow the instructions listed below: 1.
- Page 16 C LEANI N G THE WAT E R TANK Discard the remaining water by removing the tank and turning it upside down over the sink. It is recommended to empty the water tank between uses. Wash the water tank with soapy water, rinse it well and wipe it dry.
- Page 17 • Manual descaling mode: After the unit has been working for 500 cycles, it will enter descaling alarming. Cappuccino and latte indicator blink in turn. If you don’t descale in time, waterway system may block. Note: If you want to descale before 500 cycles, you can descale manually as following steps: 1.
-
Page 18: Troubleshooting
TROUBLESHOOTING PROBLEM CAUSE SOLUTION 1. No water in tank. 1. Add water 2. Coffee grind is too fine. 2. Grind medium ground coffee. 3. Too much coffee in the 3. Fill filter with less coffee. Coffee does not come filter. 4. -
Page 19: Advertencias De Seguridad
E SPAÑOL Gracias por elegir nuestra cafetera. Antes de utilizar este electrodoméstico y para asegurar su mejor uso, por favor, lea detenidamente las instrucciones. Las medidas de seguridad aquí indicadas reducen el riesgo de incendio, descarga eléctrica y lesiones cuando se siguen correctamente. Guarde el manual en un lugar seguro para futuras referencias, así... - Page 20 • Este aparato no está diseñado para ser utilizado por medio de un tempo- rizador externo o un sistema de control remoto separado. • El aparato puede ser utilizado por niños a partir de 8 años y personas con capacidades físicas, sensoriales o mentales reducidas o falta de experi- encia y conocimiento si han recibido supervisión o instrucciones sobre el uso del aparato de forma segura y comprenden los peligros involucrados.
-
Page 21: Lista De Partes
LISTA DE PARTES 1. Tapa del depósito de agua 9. Soporte para tazas pequeñas 2. Depósito de agua 10. Interruptor 3. Tapa del depósito de leche 11. Placa recogegoteo 4. Perilla de control 12. Bandeja de goteo 5. Boquilla de vapor 13. -
Page 22: Panel De Control
PANEL DE CONTROL Espresso Cappuccino Latte 1. Taza de café pequeña y luz de café 6. Taza grande de capuchino y luz de manual espuma de leche 2. Botón de preparación de café manual 7. Taza pequeña de café con leche y luz de limpieza 3. -
Page 23: Seleccione La Taza Adecuada
Para preparar la cafetera de manera correcta, ejecute el ciclo de vapor durante 90 segundos siguiendo los pasos a continuación: 1. Llene el depósito de agua entre los niveles "MIN" y "MAX". 2. Llene el depósito de leche con agua entre los niveles "MIN" y "MAX". 3. -
Page 24: Bebidas De Café
BEBIDAS DE CAFÉ • Café expreso: Un método único de preparación de café en el que el agua caliente pasa a través del café finamente molido. Popular en Europa, es una bebida mucho más rica y con más cuerpo que el café... - Page 25 • Llenar el filtro con café: Coloque el filtro seleccionado en el portafiltros de la siguiente manera: 1. Llene el filtro con café expreso recién molido fino (no lo llene en exceso). Nota: La cantidad de café molido no puede exceder la marca "MAX". 2.
-
Page 26: Seleccionar La Función
• Encender la unidad: 4. Asegúrese de que la unidad esté enchufada. 5. Encienda la unidad en la posición "I". Las seis luces del panel de control comenzarán a parpadear durante el calentamiento y hasta que el agua alcance la temperatura perfecta. Una vez que las seis luces se quedan encendidas fijas, la unidad está... -
Page 27: Limpieza Y Mantenimiento
1. Mantenga presionado el botón para capuchino durante 3 segundos si desea agregar más espuma a su bebida o preparar espuma de leche para cualquier otra bebida, por ejemplo, café macchiatto, chocolate caliente, té con leche, etc. 2. Cuando termine, presione el botón de capuchino una vez más para detenerlo. •... - Page 28 LIMPIE Z A D E L DE P ÓSI TO DE LECH E Y D E L A BOQU IL L A DE VA P OR Aunque puede almacenar el depósito de leche con la leche sobrante en el refrigerador, es importante limpiar el depósito y la boquilla de vapor con regularidad para evitar obstrucciones y formación de residuos.
- Page 29 LIM PIEZ A DE L DE P ÓSI TO DE AGUA Deseche el agua restante quitando el depósito y dándole la vuelta sobre el fregadero. Se recomienda vaciar el depósito de agua entre usos. Lave el depósito de agua con agua jabonosa, enjuáguelo bien y séquelo.
- Page 30 7. Repita los pasos del 1 al 6 según sea necesario usando solo agua del grifo para enjuagar cualquier resto de vinagre restante de la máquina. • Modo de descalcificación manual: Después de que la unidad haya estado funcionando durante 500 ciclos, entrará en estado de recordatorio de descalcificación.
-
Page 31: Solución De Problemas
SOLUCIÓN DE PROBLEMAS PROBLEMA CAUSE SOLUCIÓN 1. No hay agua en el depósito. 1. Agregar agua 2. El café molido es demasia- 2. Moler café molido mediano. do fino. 3. Llene el filtro con menos 3. Demasiado café en el filtro. café. -
Page 32: Português
PORT U G UÊ S Obrigado por escolher nossa máquina de café. Antes de usar o aparelho, e para garantir o mel- hor uso, leia atentamente estas instruções. As precauções de segurança aqui contidas reduzem o risco de morte, ferimentos e choque elétrico quando observadas corretamente. - Page 33 • Este aparelho não se destina a ser operado por meio de um temporizador externo ou sistema de controle remoto separado. • O aparelho pode ser utilizado por crianças a partir dos 8 anos de idade e por pessoas com capacidades físicas, sensoriais ou mentais reduzidas ou com falta de experiência e conhecimento, caso tenham recebido supervisão ou instruções sobre a utilização do aparelho de forma segura e compreen- dam os perigos envolvidos.
-
Page 34: Lista De Peças
LISTA DE PEÇAS 1. Tampa do tanque de água 9. Suporte para copos pequenos 2. Tanque de água 10. Botão 3. Tampa do tanque de leite 11. Placa de gotejamento 4. Interruptor 12. Bandeja coletora 5. Bocal de espuma 13. Filtro de 1 xícara 6. -
Page 35: Painel De Controle
PAINEL DE CONTROLE Espresso Cappuccino Latte 1. Xícara de café pequena e luz de café 6. Copo grande de cappuccino e luz de manual espuma de leite 2. Botão de preparação manual 7. Pequeno copo de café com leite e luz de limpeza 3. -
Page 36: Selecione O Copo Certo
1 Encha o tanque de água entre os níveis “Min” e “Max”. 2 Encha o tanque de leite com água entre os níveis “Min” e “Max”. 3 Selecione um dos filtros e coloque-o no suporte de filtro. Coloque o suporte de filtro na unidade, garantindo que esteja devidamente travado, e coloque um copo sob ele. -
Page 37: Bebidas De Café
BEBIDAS DE CAFÉ • Espresso: Um método único de preparação de café em que a água quente é forçada através do café finamente moído. Popular na Europa, é uma bebida muito mais rica e encorpada do que o café de gotejamento regular. Por causa de sua riqueza, o expresso é normalmente servido em xícaras de 44 a 59 ml. - Page 38 • Preencher com café: Coloque o filtro selecionado no suporte de filtro da seguinte forma: 1. Encha o filtro com café expresso fresco e moído (não encha demais). Nota: A quantidade de café moído não pode ultrapassar a marca MAX. 2.
-
Page 39: Selecione A Função
• Ligue a unidade: 1. Certifique-se de que a unidade esteja conectada. 2. Ligue a unidade na posição “I”. As seis luzes do painel de controle começarão a piscar du- rante o aquecimento e até que a água atinja a temperatura ideal. Assim que as seis luzes ficarem sólidas, a unidade estará... -
Page 40: Limpeza E Manutenção
1. Pressione e segure o botão Cappuccino por 3 segundos se desejar adicionar mais espuma à sua bebida ou preparar espuma de leite para qualquer outra bebida, por exemplo, mac- chiatto, chocolate quente, chá com leite, etc. 2. Quando terminar, pressione o botão Cappuccino mais uma vez para interromper. •... - Page 41 LIM PE Z A DO R E SE RVATÓ RI O D E LE I T E E T U BO D E E SP U M AÇÃO Mesmo que você possa armazenar o reservatório de leite com as sobras de leite na gela- deira, é...
- Page 42 LIM PE Z A D O R E SE RVATÓ RIO DE ÁGUA Descarte a água restante removendo o reservatório e virando-o de cabeça para baixo sobre a pia. Recomenda-se esvaziar o reservatório de água entre os usos. Lave o reservatório de água com água e sabão, enxágue bem e seque-o.
- Page 43 7. Repita as etapas 1 a 6 conforme necessário, usando apenas água da torneira para enxa- guar todos os vestígios de vinagre restantes da máquina. • Modo de descalcificação manual: Depois que a unidade estiver trabalhando por 500 ciclos, ela entrará em alarme de descalci- ficação.
-
Page 44: Solução De Problemas
SOLUÇÃO DE PROBLEMAS PROBLEMA CAUSA SOLUÇÃO 1 Sem água no reservatório. 1 Adicione água 2 A moagem do café é muito 2 Moa o café em pó médio. fina. 3 Encha o filtro com menos 3 Muito café no filtro. café. -
Page 45: Français
F R A NÇ AIS Merci d'avoir choisi notre machine à café. Avant d'utiliser l'appareil, et pour garantir une utili- sation optimale, lisez attentivement ces instructions. Les mesures de sécurité ci-jointes réduisent le risque de mort, de blessure et d'électrocution lorsqu'elles sont correctement respectées. - Page 46 du filtre pour éliminer le marc. Des précautions doivent être prises lors du déplacement de l'unité avec des liquides chauds. • Ne retirez pas le réservoir d'eau tant que l'appareil n'est pas éteint. • Cet appareil n'est pas conçu pour être utilisé au moyen d'une minuterie externe ou d'un système de télécommande séparé.
-
Page 47: Liste Des Pièces
mousse. Assurez-vous que les trois voyants sont allumés avant de pouvoir retirer le porte-filtre pour préparer des tasses de café supplémentaires. Si vous avez besoin d'ajouter plus d'eau ou de lait dans les réservoirs, veuillez vous assurer que les trois voyants sont allumés et assurez-vous d'éteindre l'appareil en appuyant sur le bouton rouge sur le côté... -
Page 48: Panneau De Configuration
PANNEAU DE CONFIGURATION Espresso Cappuccino Latte 1. Petite tasse à café et lampe à café 6. Grande tasse de cappuccino et mousse de manuelle lait légère 2. Bouton d'infusion manuelle 7. Petite tasse de café avec du lait et de la lumière de nettoyage 3. -
Page 49: Sélectionnez La Bonne Tasse
1. Remplissez le réservoir d’eau entre les niveaux «Min» et «Max». 2. Remplissez le réservoir de lait avec de l’eau entre les niveaux «Min» et «Max». 3. Sélectionnez l’un des filtres et placez-le sur le porte-filtre. Placez le bras d’entonnoir sous pression dans l’unité... -
Page 50: Boissons Au Café
BOISSONS AU CAFÉ • Expresso: Une méthode unique de préparation du café dans laquelle l'eau chaude est forcée à travers du café finement moulu. Populaire en Europe, c'est une infusion beaucoup plus riche et cor- sée que le café goutte à goutte ordinaire. En raison de sa richesse, l'espresso est générale- ment servi dans des tasses de 44 à... - Page 51 • Tasse de café: Placez le filtre sélectionné sur le porte-filtre comme suit: 1. Remplissez le filtre de café expresso frais et finement moulu (ne pas trop remplir). Remarque: La quantité de café moulu ne peut pas dépasser la marque MAX. 2.
-
Page 52: Sélectionnez La Fonction
• Allumez l’appareil: 4. Assurez-vous que l’appareil est branché. 5. Mettez l’appareil en position «I». Les six voyants du panneau de commande commenceront à clignoter pendant le chauffage et jusqu’à ce que l’eau atteigne la température parfaite. Une fois que les six voyants deviennent solides, l’appareil est prêt à être utilisé. Remarque: Le tube à... -
Page 53: Nettoyage Et Entretien
• Lait moussé: L’appareil vous permet également de préparer uniquement de la mousse de lait. 1. Appuyez sur le bouton Cappuccino et maintenez-le enfoncé pendant 3 secondes si vous souhaitez ajouter plus de mousse à votre boisson ou préparer une mousse de lait pour toute autre boisson, par exemple macchiatto, chocolat chaud, thé... - Page 54 NE T TOYAG E DU RÉ SE RVO I R DE L AI T E T D U T U B E DE M OU S SAG E Même si vous pouvez stocker le réservoir de lait avec les restes de lait dans le réfrigérateur, il est important de nettoyer le réservoir et le tube de moussage régulièrement pour éviter le colmatage et la formation de résidus.
- Page 55 NE T TOYAGE D U RÉ SE RVO I R D 'EAU Jetez l'eau restante en retirant le réservoir et en le retournant au-dessus de l'évier. Il est recom- mandé de vider le réservoir d'eau entre les utilisations. Lavez le réservoir d'eau avec de l'eau savon- neuse, rincez-le bien et essuyez-le.
- Page 56 7. Répétez les étapes 1 à 6 si nécessaire en utilisant uniquement de l’eau du robinet pour rincer toute trace de vinaigre restante hors de la machine. • Mode détartrage manuel: Une fois que l’unité a fonctionné pendant 500 cycles, elle entre en alarme de détartrage. Les voyants Cappuccino et Latte clignotent tour à...
-
Page 57: Dépannage
DÉPANNAGE PROBLÈME CAUSE SOLUTION 1. Ajoutez de l'eau 2. Moudre du café moulu moy- 1. Pas d'eau dans le réservoir. 2. La mouture du café est trop 3. Remplissez le filtre avec fine. moins de café. 3. Trop de café dans le filtre. Le café... -
Page 58: Italiano
I TA LIA NO Grazie per aver scelto la nostra macchina da caffè. Prima di utilizzare l'elettrodomestico e per garantire il miglior utilizzo, leggere attentamente queste istruzioni. Le precauzioni di sicurezza qui accluse riducono il rischio di morte, lesioni e scosse elettriche se rispettate correttamente. - Page 59 filtro poiché le parti metalliche saranno calde. Assicurati di tenerlo per la maniglia e di utilizzare la clip di ritenzione del filtro per smaltire i motivi. Prestare attenzione quando si sposta l'unità con liquidi caldi. • Non rimuovere il serbatoio dell'acqua finché l'unità non è spenta. •...
-
Page 60: Elenco Delle Parti
• Pressione: Per evitare possibili ustioni a parti del corpo e / o altre lesioni dovute a vapore caldo e acqua o danni all'unità, non rimuovere mai il ser- batoio dell'acqua o il portafiltro mentre il tuo espresso / cappuccino sta preparando caffè... -
Page 61: Pannello Di Controllo
PANNELLO DI CONTROLLO Espresso Cappuccino Latte 1. Tazza da caffè piccola e luce caffè 6. Tazza grande di cappuccino e schiuma di manuale latte leggera 2. Pulsante erogazione manuale 7. Piccola tazza di caffè con latte e luce di pulizia 3. -
Page 62: Seleziona La Tazza Giusta
1. Riempire il serbatoio dell’acqua tra i livelli “Min” e “Max”. 2. Riempire il serbatoio del latte con acqua tra i livelli “Min” e “Max”. 3. Seleziona uno dei filtri e posizionalo sul portafiltro. Posizionare il portafiltro nell’unità assicurandosi che sia bloccato correttamente e posizionare una tazza sotto di esso. Inoltre, assicurarsi che la punta del tubo di erogazione del latte schiumato sia all’interno della tazza. -
Page 63: Bevande Al Caffè
BEVANDE AL CAFFÈ • Caffè espresso: Un metodo unico di preparazione del caffè in cui l'acqua calda viene forzata attraverso il caffè macinato finemente. Popolare in Europa, è una bevanda molto più ricca e corposa del normale caffè a goccia. A causa della sua ricchezza, l'espresso viene solitamente servito in tazze da 44 a 59 ml (da 1,5 a 2 once). - Page 64 Nota: La quantità di caffè macinato non può superare il segno MAX. 2. Tamponare e comprimere in modo deciso e uniforme il caffè macinato. 3. Pulire il caffè in eccesso dal bordo per garantire un corretto adattamento sotto la testa di infusione.
-
Page 65: Seleziona La Funzione
• Accendi l’unità: 4. Assicurati che l’unità sia collegata. 5. Accendere l’unità in posizione “I”. Le sei spie del pannello di controllo inizieranno a lampeg- giare durante il riscaldamento e fino a quando l’acqua non raggiunge la temperatura perfet- ta. Quando le sei spie diventano fisse, l’unità è pronta per l’uso. Nota: Il tubo per schiumare è... -
Page 66: Pulizia E Manutenzione
1. Tenere premuto il pulsante Cappuccino per 3 secondi se si desidera aggiungere altra schiuma alla bevanda o preparare la schiuma di latte per qualsiasi altra bevanda, ad esem- pio macchiatto, cioccolata calda, tea latte, ecc 2. Al termine, premere nuovamente il pulsante Cappuccino per interromperlo. •... - Page 67 PU LIZI A DE L SE RBATO I O D E L L AT T E E DE L T U BO P E R SCHIU M A RE Anche se è possibile conservare il serbatoio del latte con il latte avanzato nel frigorifero, è importante pulire regolarmente il serbatoio e il tubo di schiumatura per evitare ostruzioni e residui di costruzione.
- Page 68 PU LIZ IA D E L SE RBATOI O DE LL'ACQUA Gettare l'acqua rimanente rimuovendo il serbatoio e capovolgendolo sopra il lavandino. Si consiglia di svuotare il serbatoio dell'acqua tra un utilizzo e l'altro. Lavare il serbatoio dell'ac- qua con acqua saponosa, sciacquarlo bene e asciugarlo. Il serbatoio dell'acqua è anche la- vabile in lavastoviglie.
- Page 69 7. Ripetere i passaggi da 1 a 6, se necessario, utilizzando solo acqua di rubinetto per sciac- quare eventuali tracce di aceto rimanenti dalla macchina. • Modalità di decalcificazione manuale: Dopo che l’unità ha funzionato per 500 cicli, entrerà in allarme per la rimozione del calcare. Le spie Cappuccino e Latte lampeggiano a turno.
-
Page 70: Risoluzione Dei Problemi
RISOLUZIONE DEI PROBLEMI PROBLEMA CAUSA SOLUZIONE 1. Aggiungere acqua 1. Niente acqua nel serbatoio. 2. Macina caffè macinato medio. 2. La macinatura del caffè è 3. Riempi il filtro con meno troppo fine. caffè. 3. Troppo caffè nel filtro. Il caffè non esce. 4. -
Page 71: Sicherheitswarnungen
D EU TSC H Vielen Dank, dass Sie sich für unsere Kaffeemaschine entschieden haben. Lesen Sie diese An- weisungen sorgfältig durch, bevor Sie das Gerät verwenden und die bestmögliche Verwend- ung sicherstellen. Die hierin enthaltenen Sicherheitsvorkehrungen verringern das Risiko von Tod, Verletzung und Stromschlag, wenn sie ordnungsgemäß... - Page 72 Sie sicher, dass Sie es am Griff halten und den Filter mit dem Filterhalte- clip entsorgen. Beim Bewegen des Geräts mit heißen Flüssigkeiten ist Vorsicht geboten. • Entfernen Sie den Wasserbehälter erst, wenn das Gerät ausgeschaltet ist. • Dieses Gerät darf nicht mit einem externen Timer oder einer separaten Fernbedienung betrieben werden.
-
Page 73: Liste Der Einzelteile
ta-Filter, während Ihre Espresso / Cappuccino-Maschine Kaffee kocht oder aufschäumt. Stellen Sie sicher, dass die drei Lichter an sind, bev- or Sie den Porta-Filter entfernen können, um zusätzliche Tassen Kaffee zuzubereiten. Wenn Sie mehr Wasser oder Milch in die Vorratsbehälter geben müssen, stellen Sie bitte sicher, dass die drei Lichter an sind und schalten Sie das Gerät aus, indem Sie den roten Knopf an der Seite des Geräts in die Aus-Position „O“... -
Page 74: Schalttafel
SCHALTTAFEL Espresso Cappuccino Latte 1. Kleine Kaffeetasse und manuelles 5. Milchschaumknopf Kaffeelicht 6. Große Tasse Cappuccino und 2. Manueller Brühknopf Milchschaum leicht 3. Große Tasse Kaffee und manuelles 7. Kleine Tasse Kaffee mit Milch und Kaffeelicht Reinigungslicht 4. Kleine Tasse Cappuccino und 8. -
Page 75: Wählen Sie Die Richtige Tasse
1. Füllen Sie den Wassertank zwischen den Füllständen „Min“ und „Max“. 2. Füllen Sie den Milchtank mit Wasser zwischen den Füllständen „Min“ und „Max“. 3. Wählen Sie einen der Filter aus und setzen Sie ihn auf den unter Filterhalter. Stellen Sie den unter Filterhalter in das Gerät, stellen Sie sicher, dass er ordnungsgemäß... -
Page 76: Kaffeegetränke
KAFFEEGETRÄNKE • Espresso: Eine einzigartige Methode der Kaffeezubereitung, bei der heißes Wasser durch fein gemah- lenen Kaffee gepresst wird. In Europa beliebt, ist es ein weitaus reichhaltigeres und voll- mundigeres Gebräu als normaler Filterkaffee. Aufgrund seines Reichtums wird Espresso normalerweise in Tassen von 44 bis 59 ml serviert. •... - Page 77 • Mit Kaffee füllen: Setzen Sie den ausgewählten Filter wie folgt auf den unter Filterhalter: 1. Füllen Sie den Filter mit frischem, fein gemahlenem Espresso (nicht überfüllen). Hinweis:: Die gemahlene Kaffeemenge darf die MAX-Marke nicht überschreiten. 2. Den gemahlenen Kaffee fest und gleichmäßig eindrücken und zusammendrücken. 3.
-
Page 78: Wählen Sie Die Funktion
• Schalten Sie das Gerät ein: 4. Stellen Sie sicher, dass das Gerät angeschlossen ist. 5. Schalten Sie das Gerät in die Position „I“. Die sechs Bedienfeldleuchten beginnen während des Erhitzens zu blinken und bis das Wasser die perfekte Temperatur erreicht hat. Sobald die sechs Lichter durchgehend leuchten, ist das Gerät betriebsbereit. -
Page 79: Reinigung Und Instandhaltung
• Schaummilch: Mit dem Gerät können Sie auch nur Schaummilch zubereiten. 1. Halten Sie die Cappuccino-Taste 3 Sekunden lang gedrückt, wenn Sie Ihrem Getränk mehr Schaum hinzufügen oder Schaummilch für ein anderes Getränk wie Macchiatto, hei- ße Schokolade, Tee Latte usw. zubereiten möchten. 2. - Page 80 M ILC H B E HÄLT E R U ND SCH AUMSCH L AU CH RE IN IG E N Obwohl Sie den Milchbehälter mit Milchresten im Kühlschrank aufbewahren können, ist es wichtig, den Behälter und den Schaumschlauch regelmäßig zu reinigen, um Verstopfungen und Rückstände zu vermeiden.
- Page 81 WAS SE R B E H ÄLT E R RE INI GE N Entsorgen Sie das restliche Wasser, indem Sie den Behälter entfernen und ihn über der Spü- le auf den Kopf stellen. Es wird empfohlen, den Wasserbehälter zwischen den Einsätzen zu leeren.
- Page 82 7. Wiederholen Sie die Schritte 1 bis 6 nach Bedarf, indem Sie nur Leitungswasser verwen- den, um alle verbleibenden Essigspuren aus der Maschine zu entfernen. • Manueller Entkalkungsmodus: Nachdem das Gerät 500 Zyklen lang gearbeitet hat, wird ein Alarm zur Entkalkung ausge- löst.
-
Page 83: Fehlerbehebung
FEHLERBEHEBUNG PROBLEM URSACHE LÖSUNG 1. Wasser hinzufügen 1. Kein Wasser im Reservoir. 2. Mahlen Sie mittel gemahle- 2. Kaffeemühle ist zu fein. nen Kaffee. 3. Zu viel Kaffee im Filter. 3. Füllen Sie den Filter mit Kaffee kommt nicht weniger Kaffee. 4. -
Page 84: Nederlands
N E DE R L A ND S Bedankt voor het kiezen van ons koffiezetapparaat. Lees de instructies aandachtig door voordat u dit apparaat gebruikt en om er zeker van te zijn dat het optimaal gebruikt wordt. De veiligheidsmaatregelen die hier worden vermeld, verminderen het risico op brand, elek- trische schokken en letsel als ze correct worden opgevolgd. - Page 85 meer koffie te zetten. Wees ook voorzichtig bij het verwijderen van de filterhouder, aangezien de metalen onderdelen heet zullen zijn. Houd het bij het handvat vast en gebruik de filterklem om het koffiedik te verwi- jderen. Wees voorzichtig bij het verplaatsen van het apparaat met hete vloeistoffen.
-
Page 86: Lijst Met Onderdelen
• Druk: Om mogelijke brandwonden aan lichaamsdelen of ander letsel door stoom en heet water of schade aan het apparaat te voorkomen, mag u het waterreservoir of de filterhouder nooit verwijderen terwijl uw koffiezetapparaat koffie zet of melk opschuimt. Zorg ervoor dat alle drie de lampjes branden voordat u de filterhouder verwijdert om extra kopjes koffie te zetten. -
Page 87: Controlepaneel
CONTROLEPANEEL Espresso Cappuccino Latte 1. Klein koffiekopje en handmatig 5. Melkschuimknop koffielicht 6. Grote kop cappuccino en melkschuim 2. Handmatige koffiezetknop licht 3. Grote kop koffie en handmatig 7. Klein kopje koffie met melk en koffielicht schoonmaaklampje 4. Klein kopje cappuccino en 8. -
Page 88: Kies De Juiste Mok
NOTITIE: Om ervoor te zorgen dat uw koffiezetapparaat steeds weer goed blijft werken, moet u het na elk gebruik schoonmaken. Om het koffiezetapparaat goed voor te bereiden, voert u de stoomcyclus 90 seconden uit door de onderstaande stappen te volgen: 1. -
Page 89: Koffie Drankjes
KOFFIE DRANKJES • Koffie Express: Een unieke koffiemethode waarbij heet water door de fijngemalen koffie stroomt. Populair in Europa, het is een veel rijkere en vollere drank dan gewone dripkoffie. Vanwege zijn rijkdom wordt espresso over het algemeen geserveerd in kopjes van 44-59 ml. •... - Page 90 WAARSCHUWING: Zorg ervoor dat het filter is afgekoeld voordat u het probeert te verwijderen. • Vul het filter met koffie: Plaats het geselecteerde filter als volgt in de filterhouder: 1. Vul het filter met versgemalen fijne espresso (niet te vol). Notitie: De hoeveelheid gemalen koffie mag de markering "MAX"...
-
Page 91: Selecteer Functie
• Schakel het apparaat in: 4. Zorg ervoor dat het apparaat is aangesloten. 5. Zet het apparaat aan in de "I" -stand. Alle zes lampjes op het bedieningspaneel beginnen te knipperen tijdens het verwarmen en totdat het water de perfecte temperatuur heeft bereikt. -
Page 92: Reiniging En Onderhoud
• Melkschuim: Met het apparaat kunt u ook alleen melkschuim bereiden. 1. Houd de knop voor cappuccino 3 seconden ingedrukt als je meer schuim aan je drankje wilt toevoegen of melkschuim wilt maken voor een andere drank, bijvoorbeeld koffie macchiatto, warme chocolademelk, thee met melk, etc. 2. - Page 93 • Het ontkalkingsproces kan op elk moment worden gestopt door op een willekeurige knop te drukken, waarna het apparaat de gebruiker eraan blijft herinneren om te ontkalken. Het koffiezetapparaat gaat pas in de normale stand-bymodus nadat het volledige ontkalkingsproces is voltooid. R E INIG I N G VAN DE M E LK TANK E N H E T STOOM P IJPJE Hoewel u het melkreservoir met de overgebleven melk in de koelkast kunt bewaren, is het belangrijk om het melkreservoir en het stoompijpje regelmatig schoon te maken om...
- Page 94 HE T WATE R R E SE RVOI R SCH OO NMAKE N Gooi het resterende water weg door het reservoir te verwijderen en boven de gootsteen te draaien. Het wordt aanbevolen om de watertank tussendoor te legen. Was het waterreservoir met zeepachtig water, spoel het goed af en droog het af.
- Page 95 • Handmatige ontkalkingsmodus: Nadat het apparaat 500 cycli heeft gedraaid, gaat het in een ontkalkingsalarm. De indicatielampjes cappuccino en latte knipperen achtereenvolgens. Als het niet op tijd wordt ontkalkt, kan het interne voorbereidingssysteem verstopt raken. Notitie: Als u wilt ontkalken vóór 500 cycli, kunt u handmatig ontkalken door de onderstaande stappen te volgen: 1.
-
Page 96: Probleemoplossing
PROBLEEMOPLOSSING KWESTIE OORZAAK OPLOSSING 1. Er zit geen water in de tank. 1. Voeg water toe 2. De gemalen koffie is te fijn. 2. Maal halfgemalen koffie. 3. Te veel koffie in het filter. 3. Vul het filter met minder koffie. 4. -
Page 97: Polski
POLSKI Dziękujemy za wybranie naszego ekspresu do kawy. Przed rozpoczęciem korzystania z tego urządzenia i aby zapewnić jego najlepsze wykorzystanie, należy uważnie przeczytać instrukcję. Wymienione tutaj środki bezpieczeństwa zmniejszają ryzyko pożaru, porażenia prądem elektrycznym i obrażeń, jeśli są właściwie przestrzegane. Instrukcję należy przechowywać w bezpiecznym miejscu do wykorzystania w przyszłości, jak również... - Page 98 uchwyt i użyć zacisku mocującego filtr, aby usunąć fusy. Należy zachować ostrożność podczas przenoszenia urządzenia z gorącymi płynami. • Nie wyjmuj zbiornika na wodę, dopóki urządzenie nie zostanie wyłączone. • To urządzenie nie jest przeznaczone do korzystania z zewnętrznego tim- era lub oddzielnego systemu zdalnego sterowania.
-
Page 99: Lista Części
LISTA CZĘŚCI 1. Korek zbiornika wody 8. Podstawka pod małe filiżanki 2. Zbiornik wodny 9. Uchwyt na tackę ociekową 3. Korek zbiornika na mleko 10. przełącznik 4. Pokrętło sterujące 11. Płyta ściekowa 5. Dysza parowa 12. Taca ociekowa 6. Zbiornik na mleko 13. -
Page 100: Panel Sterowania
PANEL STEROWANIA Espresso Cappuccino Latte 1. Mała filiżanka i ręczna lampka do kawy 6. Duży kubek cappuccino i lekka pianka mleczna 2. Przycisk parzenia ręcznego 7. Mała filiżanka kawy z mlekiem i lampką 3. Duży kubek kawy i ręczna lampka do kawy do czyszczenia 4. -
Page 101: Wybierz Odpowiedni Kubek
1. Napełnij zbiornik na wodę między poziomami „MIN” i „MAKS”. 2. Napełnij pojemnik na mleko wodą między poziomami „MIN” i „MAKS”. 3. Wybierz jeden z filtrów i umieść go w uchwycie filtra. Umieść uchwyt filtra w urządzeniu, upewniając się, że jest prawidłowo zablokowany i umieść pod nim kubek. Upewnij się również, że końcówka dyszy pary znajduje się... -
Page 102: Napoje Kawowe
NAPOJE KAWOWE • Ekspres do kawy: Unikalna metoda parzenia kawy, w której gorąca woda przepływa przez drobno zmieloną kawę. Popularna w Europie, jest dużo bogatszym i bardziej treściwym napojem niż zwykła kawa kroplowa. Ze względu na swoje bogactwo espresso zazwyczaj podaje się w filiżankach 44-59ml. - Page 103 1. Napełnij filtr świeżo zmielonym drobnym espresso (nie przepełniaj). Uwaga: Ilość mielonej kawy nie może przekroczyć znaku „MAX”. 2. Mocno i równomiernie docisnąć zmieloną kawę. 3. Zetrzyj nadmiar kawy z krawędzi, aby zapewnić prawidłowe dopasowanie do głowicy zaparzającej. • Montaż uchwytu filtra: 1.
-
Page 104: Wybierz Funkcję
• Włącz urządzenie: 4. Upewnij się, że urządzenie jest podłączone. 5. Włącz urządzenie do pozycji „I”. Wszystkie sześć lampek na panelu sterowania zacznie migać podczas podgrzewania, aż woda osiągnie idealną temperaturę. Gdy wszystkie sześć lampek zaświeci się, urządzenie jest gotowe do użycia. Uwaga: Dysza parowa jest bardzo gorąca, uważaj. -
Page 105: Czyszczenie I Konserwacja
• Pianka mleczna: Urządzenie umożliwia również przygotowanie samej pianki mlecznej. 1. Naciśnij i przytrzymaj przycisk cappuccino przez 3 sekundy, jeśli chcesz dodać więcej piany do swojego napoju lub przygotować mleczną piankę do dowolnego innego napoju, na przykład kawy macchiatto, gorącej czekolady, herbaty z mlekiem itp. 2. - Page 106 CZ YSZ CZ E N I E P OJE MNIK A NA MLE KO I DYSZ Y PA RY Chociaż możesz przechowywać pojemnik na mleko z resztkami mleka w lodówce, ważne jest, aby regularnie czyścić pojemnik na mleko i dyszę parową, aby uniknąć zatykania i tworzenia się...
- Page 107 CZ YSZ CZ E N I E ZB I ORNI K A NA WO D Ę Pozbądź się pozostałej wody, wyjmując zbiornik i obracając go nad zlewem. Zaleca się opróżnianie zbiornika na wodę między użyciami. Umyj zbiornik na wodę wodą z mydłem, dobrze wypłucz i wysusz.
- Page 108 7. W razie potrzeby powtórz kroki od 1 do 6, używając tylko wody z kranu do wypłukania pozostałego octu z urządzenia. • Ręczny tryb odkamieniania: Gdy urządzenie działało przez 500 cykli, włączy się alarm usuwania kamienia. Wskaźniki cappuccino i latte migają po kolei. Jeśli nie zostanie na czas odkamieniany, wewnętrzny system przygotowania może zostać...
-
Page 109: Rozwiązywanie Problemów
ROZWIĄZYWANIE PROBLEMÓW KWESTIA PRZYCZYNA ROZWIĄZANIE 1. W zbiorniku nie ma wody. 1. Dodaj wodę 2. Mielona kawa jest zbyt 2. Zmiel średnio mieloną kawę. drobna. 3. Napełnij filtr mniejszą ilością 3. Za dużo kawy w filtrze. kawy. Kawa nie wypływa. 4. - Page 112 Made in P.R.C.
Need help?
Do you have a question about the THERA MATT PRO and is the answer not in the manual?
Questions and answers
Bonjour seul le voyant de l'expresso s'allume, que faire? Svp
If only the light on the Create THERA MATT PRO espresso machine turns on, ensure the unit is plugged into an electrical outlet and switched on. If the issue persists, check if there is water in the tank, use medium ground coffee, and avoid overfilling or over-tamping the coffee in the filter.
This answer is automatically generated