Table of Contents
Advertisement
Quick Links
Advertisement
Table of Contents

Related Manuals for ASPERA R10


Summary of Contents for ASPERA R10
- Page 1 User Manual...
- Page 3 ASPERA User Manual...
-
Page 4: Table Of Contents
ASPERA Technical specifications ...................6 Answering a call ...................22 General and Safety Information ..............7 Call Options ....................23 Getting to know your Aspera R10 ..............11 Call History ....................24 What’s in the Box ..................12 Caller ID .......................25 Getting Started ....................13 Blocking Numbers ..................25 Introduction to Aspera R10 ................14... - Page 5 Email Access and Setup ................35 Audio ......................44 Internet Access ....................35 Calculator .....................45 Installing and Updating Applications ..............36 Maintenance of your device .................45 “Do Not Disturb” Feature ................37 Expandable Storage ..................37 USB Tethering and Computer Connection ............38 Application Functions ..................39 Camera and Gallery ..................39 Maps and GPS/Location ................41 Clock and Alarm .....................41 Calendar ......................42...
-
Page 6: Technical Specifications
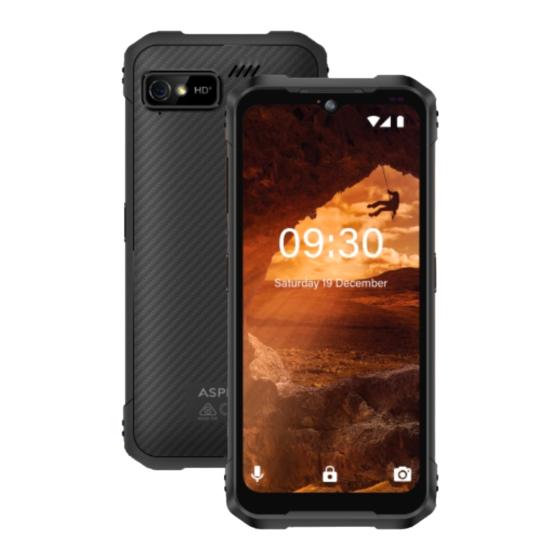
Technical specifications IP68 rated for waterproof/dustproof Octa-Core Processor – 8 x 2GHz 6.517” HD + IPS Display Powered by Android™ 13 3G 850/900/2100Mhz 4G Bands 1/3/5/7/8/28 a+b 13MPrear + 8MP front Camera Face ID unlock 4GB RAM & 128GB ROM (114GB available pace after operating system) 5100mAh Li-ion battery Dimensions: 175.6*80.7*13.3mm Micro SD card slot, expands storage capacity up to 256GB (Not included) -
Page 7: General And Safety Information
Profile Please read this manual carefully to help you make the most of your phone. Aspera Mobile may change features of this mobile phone without prior written notice and reserves the final right to interpret the performance of this mobile phone. Due to different software and network operators, display on your phone may be different, please refer to your phone for details. - Page 8 Switch off in aircraft Wireless devices can cause interference in aircraft. Please make sure to only use your phone when switched to Aeroplane mode when in an aircraft. Go to Settings > Network Settings and tap on Aeroplane mode to switch on/off. Switch off...
- Page 9 Accessories and batteries The Aspera R10 box will come with an Aspera charger. The recommended charging time for the Aspera R10 is three to four hours when the battery is low or depleted. We recommend to not leave it charging overnight, as this may damage or deteriorate the battery over time.
- Page 10 Utilising the wireless and mobile data functionalities for a multitude of purposes, including but not limited to video streaming, video recording, accessing the internet, tethering, and more. Using the GPS function for navigation or location services Using the device in areas with weaker and/or no reception If the device becomes warm, we recommend closing applications that are not in use, and to let the phone cool down naturally.
-
Page 11: Getting To Know Your Aspera R10
Salt water is corrosive. If the phone is exposed to salt water be sure to wash the phone down after firmly closing all seals on the phone. Getting to know your Aspera R10 1. The sim tray is placed above the On/Off button on the right of the phone. Remove the sim tray by inserting your finger nail into the slot below the tray, then simply lever the tray out. -
Page 12: What's In The Box
The Aspera R10 comes with the handset, earphones, USB-C cable, charging adapter, user guide, and warranty information. Earphones – R10 uses the USB-C port for earphone usage, allowing for audio functions including music, videos and calls. The earphones also have a built-in microphone. -
Page 13: Getting Started
If you do connect to a wireless network, the phone will need to check for necessary updates, and this may take some time. If you do decide to connect to a wireless network, you will have the option of Copying Apps & Data over to the Aspera R10. -
Page 14: Introduction To Aspera R10
Please ensure that you follow the on-screen prompts if you do decide to back-up from either a different device or previous copy, as the instructions will change. Please note that you cannot restore a backup from a higher Android version into a lower Android version. The Aspera R10 runs on Android 13. - Page 15 fingers or your hands interfering with input if they are close to the edge of the device. Lock Screen – When your phone is on standby and/or idle mode and the screen has switched off, you can wake the screen to land into the Lock Screen by pressing the power button once.
- Page 16 Notification and Quick Access Panel – Used to quickly access key settings, such as Wi-Fi, Bluetooth, Do not disturb and Torch Can be accessed by swiping one finger in a downwards motion from the top of the screen when the phone is unlocked and on the Home Screen.
- Page 17 The advanced panel allows you to see what the icons are and allow you to adjust brightness and further additional settings. To access additional settings, swipe one finger from the right side of the screen to the left. Screenshot – You can quickly take a photo of what is currently on your device screen by holding the power and volume down buttons together for three seconds.
- Page 18 You can close all applications running in the background by tapping the “Clear all” icon located at the bottom of the screen. Applications Menu – All the applications can be accessed in the applications menu. When on the home screen, swipe your finger upwards from the middle of the screen, taking care to not press any application shortcuts.
-
Page 19: Basic Functionality
To unlock the device: Press the lock button on the right side of the Aspera R10 once to wake up the screen. Upon waking up the screen, swipe up from the bottom of the screen. If you have placed a PIN/password/swipe pattern as a lock, you will need to input the PIN/password/swipe pattern set to unlock the device and access the Home Screen. -
Page 20: Applications
Applications Your Aspera R10 will come with many applications installed, many of them critical for the functionality of the phone. We ask that you do not disable or uninstall them, as they may be critical for the device to perform as expected. -
Page 21: Application Shortcuts
Application Shortcuts You may find you use certain applications more than others and would like to access them directly from the Home Screen. To do this: Unlock the phone and open the Applications menu. Find the application you wish to create a shortcut for. Tap and hold one finger on the application. Extra options will appear. While you are still holding the application, move your finger, and the screen will change, allowing you to place the application shortcut on a respective position and page on the home screen. -
Page 22: Calling And Using The Phone Application
Calling and using the Phone Application When on the Home screen, select the Phone application. If you would like to call to a number that is not on your contact list: Select the keypad icon in the bottom right-hand corner of the screen. Type the number you wish to dial with the keypad on the screen. -
Page 23: Call Options
When you are on a call with someone, you will see a screen with multiple options on it. Please note that the Aspera R10 has a proximity sensor. This means the screen will turn off when it senses your face is close to it, and the screen will turn on when it fails to detect the presence of a face. -
Page 24: Call History
Call History On the Home screen, select the Phone application. To look at recent calls both incoming and outgoing: Tap on the “Recent” Icon located at the bottom of the screen. To change between all calls received and calls missed: Tap on the three dots located at the top right-hand corner of the screen. -
Page 25: Caller Id
Caller ID You can choose to show your contact number when calling out to different numbers. To change this setting: When on the Home screen, select the Phone application. Tap the three dots located in the top right-hand corner of the screen and select “Settings”. Select “Calling Accounts”. - Page 26 When on the Home screen, select the Phone application. Select the “Recent” tab. Find the number you wish to block. Tap and hold your finger over this number until additional options pop up. A confirmation screen will appear asking if you wish to block this number. You will also have the option of reporting this call as a spam/nuisance call, if you wish to do so.
- Page 27 Contacts Unlock the phone and open the Applications menu. Select the Contacts application. In the bottom right-hand corner of the screen, tap the “Plus” Icon. This will bring up a screen with fields and forms to fill out. You can select to save to your Google Account or to the Device. Input all relevant information for the contact you wish to save (Name, Email, Phone Number, etc.) Tap “SAVE”...
-
Page 28: Messages
You can now make changes to the relevant fields or change their picture by tapping on the camera icon if applicable (the contact will need to be saved onto the phone for you to change their picture). Tap the “SAVE” icon located at the top right-hand corner of the screen to ensure all the changes are saved. Messages Unlock the phone and select the Message application. -
Page 29: Display And Screen Options
Display and Screen Options On the Aspera R10, you can change the display brightness, wallpaper, when the screen turns off, orientation, and further settings to a configuration you prefer. Brightness level determines how bright the screen is. To change this: Open the Applications Menu and select the Settings applications Select Display. - Page 30 Select Brightness Level. Once this option has been tapped, a bar will appear. You can hold your finger to this slider. While holding the slider, move your finger left and right to change the brightness levels. After you are happy with the brightness level, tap away from the bar, and it will return you to the previous screen. Screen timeout determines the period of inactivity on the device before the screen is darkened and the phone is locked.
-
Page 31: Ringtones And Volumes
Ringtones and Volumes There are multiple methods to change your ringtone and volume settings through the Aspera R10. The first method is to go through the Settings application. Open the Applications Menu and select the Settings applications Select Sound. From here, you can change different volume options – media, call, ring, and alarm volume. - Page 32 You can also choose whether your phone vibrates when receiving a call by switching on or off this option below the volume bars. Underneath these settings, you will find “Do Not Disturb”. You can find more information about this feature in the section below. “Shortcut to prevent ringing”...
-
Page 33: Wi-Fi
Cellular/Mobile Data The Aspera R10 can use the 4G network to connect to cellular data. Please note that you will need a valid mobile data plan to access cellular data, and that data restrictions may apply depending on the phone plan. -
Page 34: Roaming
Roaming If your carrier supports it, your Aspera R10 can be used for roaming services. Please note that you will need a valid mobile data plan for roaming services, and there may be significant costs attached with a valid roaming service. Please check with your telephone service provider regarding these conditions. -
Page 35: Email Access And Setup
Email Access and Setup As the Aspera R10 is an Android-based operating system, it comes with Gmail as the default email application for the phone. This application can be used with different service providers, such as Google, Outlook, Hotmail, Live, Yahoo, Exchange, and Office 365. -
Page 36: Installing And Updating Applications
To access a website directly, you will need to enter the full URL before pressing the arrow button. Installing and Updating Applications Aspera R10 runs on Android . This means all applications that require updates will need to be done through the Google Play Store. Open the Applications Menu and select the Play Store application. -
Page 37: Do Not Disturb" Feature
Expandable Storage The Aspera R10 comes with the ability to insert a micro-SD card up to the size of 256GB to expand the storage space on the device. This micro-SD card can be used in two different ways and will need configuration before it can be used. -
Page 38: Usb Tethering And Computer Connection
Tap on the required selection, follow the prompts, and the SD card will be ready for use. USB Tethering and Computer Connection You can use the USB connection to transfer files and internet tether with the Aspera R10. To transfer files to and from your Aspera R10: Connect your Aspera R10 to a Windows-based computer with the USB cable. -
Page 39: Application Functions
Camera and Gallery The Aspera R10 comes with a rear facing and front facing camera which can be used to take photos and videos. You can open the camera by tapping on the Camera application. Once inside, you can manipulate multiple settings by tapping the icon at top right of the display. - Page 40 To view photos and videos on your device: Open up the Applications menu Select Photos This will bring you into a gallery of the images and/or videos that are saved onto your phone, whether they are downloaded or taken with the camera. To go into an image or video, simply tap once on the preview image.
-
Page 41: Maps And Gps/Location
Maps and GPS/Location The Aspera R10 has location-based services available to assist with navigation and other tasks. If you would like to disable or enable GPS/location services: Go to the Settings application Select “Location” You will see the “Use Location” button located at the top of the screen. To enable/disable it, tap the button. -
Page 42: Calendar
You can also delete the alarm by tapping the delete button and icon located to the left of the arrow. Calendar The Aspera R10 uses the Google Calendar, which can synchronise events to your phone and computer if you have an applicable Account to use with them. You can also use the calendar offline. -
Page 43: Fm Radio
FM Radio When using earphones through the headphone jack as an antenna, the Aspera R10 can connect to FM radio. Open up the Application menu and select FM Radio. To scan for stations, tap on the three horizontal lines in the top right-hand corner of the screen to enter “Radio Stations”. From here, tap on the three dots, and... -
Page 44: Audio
Audio You can transfer music onto the Aspera R10 by connecting it to a computer and copying the files over into the Internal Shared Storage folder called “Audio” on the phone. For instructions on how to copy files over, please see section “USB Tethering and Computer Connection” above. -
Page 45: Calculator
Maintenance of your device The Aspera R10 uses a lithium-polymer battery, where the capacity may diminish over a period of time. To ensure longevity of the battery lifespan: Attempt to only charge the phone when the battery life is nearly depleted if possible Charge until the battery is full, then take it off... - Page 46 Multiple applications running in the background (can be closed through Task Manager) Applications updating in the background We recommend to close applications in the background when not in use by using the Task Manager (square button on the device) to maintain stability of the system.
- Page 48 www.asperamobile.com...
Need help?
Do you have a question about the R10 and is the answer not in the manual?
Questions and answers