Table of Contents
Advertisement
Advertisement
Table of Contents

Related Manuals for ASPERA F42


Summary of Contents for ASPERA F42
- Page 3 ASPERA User Manual...
-
Page 4: Table Of Contents
Contents Precautions............11 1.Tech Specs............5 3. What’s in the Box........12 2. General Information........6 4. Getting to know your Aspera F42..13 Lost Device.............6 5. Getting Started...........15 Safety Warning Removing back of the phone....15 - Road safety comes first! ..Switch off in aircraft...........7 Removing the battery........16... - Page 5 Writing Messages ......... 33 Screens and Menus......... 21 Reading Messages......... 34 Quick Settings and Notifications....22 Deleting Messages......... 35 Input Methods............. 23 10. Call Logs/History........36 7. Calling ..............24 Missed Calls/Dialled Calls/Answered Calls 37 Dialling a number..........24 Clearing All Call Logs/History....37 Receiving a call...........
- Page 6 12. Internet............47 13. Settings............48 Wi-Fi................48 Mobile Data............49 Sound and Audio..........50 Hotspot and Tethering........52 Bluetooth..............54 Display..............56 14. Security............57 15. Basic Troubleshooting......60...
-
Page 8: Tech Specs
1.Tech Specs 2.8” FWVGA Display Quad core 1.1 GHz processor 3G 850/900/2100Mhz 4G Bands 1/3/5/7/28 a+b 2MP rear camera + 0.3MP front camera. 512MB RAM & 4GB ROM Wi-Fi, Wi-Fi Hotspot Battery 1350mAh Li-ion Dimensions: 105 x 56 x 19mm (when closed) Micro SD card slot expandable to 64GB (Not included) -
Page 9: General Information
2. General Information ०Profile Please read this manual carefully to help you make the most of your phone. Aspera Mobile may change features of this mobile phone without prior written notice and reserves the final right to inter- pret the performance of this mobile phone. Due to different software and network operators, display on your phone may be different, please refer to your phone for details. -
Page 10: Safety Warning - Road Safety Comes First
०Safety Warning - Road safety comes first! Do not use the mobile phone in hand-held mode while driving. Use hands-free fittings when calls are unavoidable while driving. In some countries/states, dialling or receiving calls while driving is illegal, regardless of hands-free status. You will need to ensure you are obeying road safety laws by checking the laws of the state/country you are driving in. -
Page 11: Observe All Special Regulations
०Qualified service Only qualified Aspera personnel or approved agents may install and/or repair phone Aspera equip- ment. Installing or repairing the mobile phone and/or parts by yourself may be dangerous and lead to... -
Page 12: Accessories And Batteries
The Aspera F42 box will come with an Aspera charger and battery. The recommended charging time for the Aspera F42 is three to four hours when the battery is low or depleted. We recommend to not leave it charging overnight, as this may damage or deteriorate the battery over time. -
Page 13: Emergency Calls
• Utilising the wireless and mobile data functionalities for a multitude of purposes, including but not limited to video streaming, video recording, accessing the internet, tethering, and more. • Using the device for phone calls • Using the GPS function for navigation or location services •... -
Page 14: Precautions
०Precautions This mobile phone has an intricate design, so please exercise special care when using it. The following suggestions will help your mobile phone survive the warranty period and extend its service life: • Keep the mobile phone and all its fittings beyond young children’s reach. •... -
Page 15: What's In The Box
3. What’s in the Box The Aspera F42 comes with the handset, battery, earphones, USB cable, wall plug, user guide, and warranty information. Earphones – Our Aspera F42 has a standard 3.5mm head jack, allowing for audio functions including music, videos and calls. -
Page 16: Getting To Know Your Aspera F42
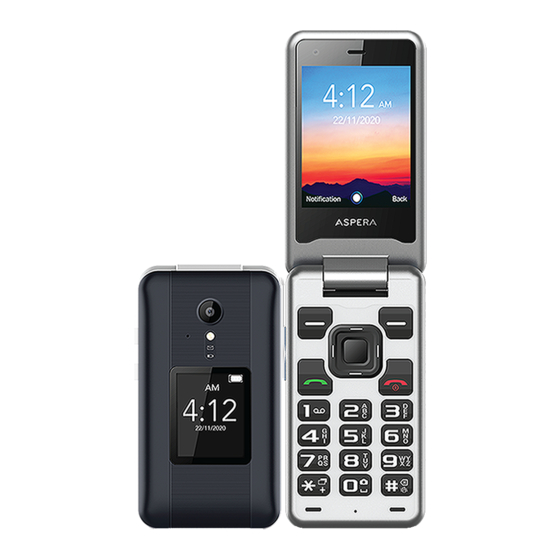
4. Getting to know your Aspera F42 1. External microphone 11. Directional arrow keys/ 2. Camera buttons (around Select key) 3. Flashlight/torch 12. Red “Hang up” key/Power 4. External display on-off button 5. Internal camera 13. Green “Dial/Answer” key/ 6. Speaker button 7. - Page 17 Profile view 1. Volume up/down keys 2. Headphone port 3. Micro-USB charging port Back (closed) 1. Back speaker 2. Back indent...
-
Page 18: Getting Started
5. Getting Started Removing back of the phone The indent to remove the back cover can be found in the bottom left-hand corner of the back cover, as indicated in the diagram to the left. 1. Apply firm but gentle pressure to the corner and begin to lift from the indent. -
Page 19: Removing The Battery
2. As the battery releases, continue to lift until it is completely detached from the phone as seen in (3). Inserting SIM card The Aspera F42 takes a nano-SIM, please see the diagram below for sizing information. This is the smallest sim card. -
Page 20: Inserting Sd Card
Angle the micro-SD card and insert into slot (2), please ensure the card is positioned correctly. The Aspera F42 can take a micro-SD card up to 64GB. Inserting Battery Match the pins at the top of the phone (3) with the metal contact points on the... -
Page 21: Basic Operations
Powering the device Hold the red hang-up/power button for five seconds. Once the screen lights up with the Aspera logo, let go of the button. The phone may take some time to initialise. This is normal and you may need to wait for a while. -
Page 22: Pin/Sim/Puk Codes
PIN/SIM/PUK Codes If enabled, the system will require a PIN code before anything can be accessed. This is a security code placed on the SIM card and may have been transferred from a previous device. If you enter the incorrect PIN code three times, it will lock the SIM and ask for a PUK code. This PUK code can be retrieved from your telecom provider. - Page 23 • Right Context key: This is the “back” key to return to a previous page • Left Context key: This is an “options” key and will open advanced options/settings when pressed in most applications The Select key is primarily used to enter into selections highlighted by the arrow keys. Please be aware of where you are pressing when using the arrow keys, as you can accidentally hit the Select key and unintentionally enter a different menu/screen.
-
Page 24: Screens And Menus
Screens and Menus When opening the phone, the Aspera F42 will open to the Home page. Here you will see the wallpaper and three commands across the bottom of the screen which are set to the three main command buttons on the keypad (see Keypad Functionality). The bottom left command reads “Notification”... -
Page 25: Quick Settings And Notifications
Quick Settings and Notifications You can quickly access common settings such as Wi-Fi, Bluetooth, Flashlight, and Mobile Data by pressing the top left-hand context key labelled “Notification”. In this screen there is a “Quick settings” task bar across the top of the page as well as your notifications which can be opened from this screen by scrolling and selecting the alert. -
Page 26: Input Methods
Input Methods The Aspera F42 comes with three different forms of input through the keypad: Numbers (indicated by 123), letters (indicated by ABC, Abc or abc), or predictive text (indicated by T9). When you are in a field where you can type, you will see the selected input method appear as an icon on the bar located on the very top right-hand side of the screen. -
Page 27: Calling
7. Calling Dialling a number To dial a number that is not on your contact list: • Open the phone to the home screen • Enter the number you wish to dial with the numbers on the keypad • Once this number is correct, press the green “Dial” button To dial a number that is on your contact list: •... -
Page 28: Receiving A Call
• Once the selected contact page has opened, click on the “down” arrow key until the phone number is highlighted in green • Press either the green “Dial” button or Select key to make a phone call To disconnect from a call, you can either close the lid or press the red “Hang-up” button. Receiving a call If the phone lid is closed: •... -
Page 29: Ringtone Volume
If the phone lid is open and you are using the phone: • The screen will change, showing the caller’s name (if on contacts) or phone number. • Press the green “Dial” key to pick up the call or press the top left-hand key which shows “Answer”. •You also have the option to reject the phone call by pressing the red “hang-up”... -
Page 30: Call Volume
The other way is through the settings. To do so: • Open the phone to the menu screen • Use the keypad to scroll to and select “Settings” • Use the keypad to scroll down to and select “Sound” • You will see three different volumes for Media, Alarms and Ringtones. Use the down arrow to high- light and select “Ringtones”. -
Page 31: Importing/Exporting Contacts
8.Contacts Opening the Contacts application: • Open the phone to the home page • Press the green “Dial” button, this will launch the shortcut to your contacts • There will be a search bar at the top which can be used to find a contact. Below the bar there are three icons;... - Page 32 • Scroll down and select “Import” From here, you can choose whether to import from the Phone, SD card or SIM card (USIM). • Highlight the option you wish to choose and press the Select key. This will mark your selection, as indicated by the circle on the right side of the name.
-
Page 33: Adding Contacts
Adding Contacts • Ensure you have opened the Contacts application as per instructions above. • From the contacts screen, use the arrow keys to highlight and select “Create New Contact” • From here, you can enter in the information by using the letters on the keypad and move between the different fields by using the arrow keys. - Page 34 In the top right-hand side of the screen there is a pencil-shaped icon which is the “Edit” function. • You can change the information fields now. Once you have finished editing the contact details, use your arrow keys to highlight the top right-hand button labelled “Save”. Other functions you can access from your contacts are: •...
-
Page 35: Removing Contacts
Removing Contacts • Ensure you have opened the Contacts application as per instructions above. • Use the arrow keys to highlight and select the contact you wish to delete. • Press the top-left context key, this will bring up further options •... -
Page 36: Writing Messages
Writing Messages Please note that you may need to change between different input methods in this section. To do so, use the hash (#) key to cycle between input methods when on a field which you can type in. • Ensure you have opened the Messaging application as per instructions above. •... -
Page 37: Reading Messages
Once this is done, the contact will be added to the message and the cursor will automatically be placed in the text message field. Once you are in the text message field: • Type in your message using the input method you prefer. (See Input Methods). •... -
Page 38: Deleting Messages
• Ensure you have opened the Messaging application as per instructions above. • Use the arrow keys to select the thread you wish to read in full detail and press the Select key to open. • Once you are in the message, you will have the option to respond or read the entire conversation thread. -
Page 39: Call Logs/History
To delete all messages in a particular folder: • Ensure you have opened the Messaging application as per instructions above. • Press the Options key and select the Delete All Threads option • Confirm with the Select key. 10. Call Logs/History The call log can show a record of all calls sent and received. -
Page 40: Missed Calls/Dialled Calls/Answered Calls
Missed Calls/Dialled Calls/Answered Calls Ensure you have opened the Phone application as per instructions above. • Use the arrow key to move to the middle page, the icon of the clock should be highlighted, this is your call log. • You can use the arrow keys to select between logged calls and use the Options key to interact with the particular number. -
Page 41: Applications And Tools
option and pressing the Select key again. 11. Applications and Tools Clock To open application: • Open the menu • Use the arrow keys to scroll to “Clock” • Press the select key to open The Clock application has four main functions which are displayed across the top of the screen once the application is launched. - Page 42 You can use the arrow keys to switch between the function pages, the icon on the top bar will be highlighted to reflect which function you are viewing. To add a new alarm: • When in the alarm screen, scroll down to the bottom of the screen and select the plus button in the middle (select key) to add a new alarm.
- Page 43 • Using the select key, the toggle will switch either to right and turn red (enable) or to the left and turn grey (disable). • Once enabled, there will be a pop-up display on the bottom of the screen indicating the alarm has been enabled for the set time in advance.
-
Page 44: Calendar
Calendar The calendar can be used to add events and reminders to your phone. To use this functionality: • Open the main menu • Use the arrow keys and select key to move to and select “Calendar”. To create a new event: •... -
Page 45: Camera
To view events in the calendar: • When in the Calendar application, scroll to the date of the event and select to view the event details. • Alternatively, when in the calendar application press the left-hand context key to open more options. From here you can scroll down to “Search”... -
Page 46: Viewing Pictures And Videos
• Use the arrow keys and Select key to select and confirm which setting you want. Viewing Pictures and Videos You can use the Aspera F42 to view certain photos and videos. This includes downloads, media trans- ferred from the computer, and any media captured on the Camera application. You will need to access them through separate applications. -
Page 47: Music Player
• Use the arrow keys and select key to move to and select “Videos” Music Player You can transfer music files to the Aspera F42 through the computer or SD card. To access and play these music files: • Open the phone to the menu... -
Page 48: Fm Radio
FM Radio To connect and use the FM radio on the Aspera F42, you will need to connect a pair of earphones to work as an antenna. Once your earphones are connected through the audio jack on the phone, you can launch the FM Radio. -
Page 49: Torch
• Once launched, there will be a control bar with five icons to allow you to scan through the frequencies. Use the arrows and select keys to tune to your preferred station. The single arrow icons (</>) can be used to change the frequency manually, the outer icons can be used to automatically tune the sta- tions. -
Page 50: Internet
12. Internet The Aspera F42 features an internet browser which can use either Wi-Fi or Mobile Data to access numerous websites across the internet. To enter into the Browser: • Open the menu • Use the arrow keys and select key to open “Browser”. -
Page 51: Settings
13. Settings You can make multiple configuration changes with the device within this application. To access the Settings application: • Open the menu • Use the arrow keys and select key to move to and select “Settings”. Wi-Fi • When inside settings, select “Network & Internet” •... -
Page 52: Mobile Data
Mobile Data Mobile data can be enabled so you can access internet services when out of wireless network connectivity. Please note that you will need a valid mobile plan to access mobile data, and that charges may occur when utilising mobile data services. To enable Mobile Data usage: •... -
Page 53: Sound And Audio
Sound and Audio You can make changes to ringtones, volumes and other associated settings from this option. • When inside settings, select “Sound”. Your first three options are Media, Alarm, and Ring volume. • Media is for the volume of videos and music that would be playing through your device. •... - Page 54 “Phone ringtone” is the tone that plays when you receive a call, this can be changed to something different. To do so: • Highlight the Phone ringtone option, and press the Select key • A new window will appear showing a variety of different ringtones. Use the up and down arrow keys to select a different ringtone.
-
Page 55: Hotspot And Tethering
Hotspot and Tethering The Aspera F42 can be used as a portable hotspot to connect other devices to the internet, using the mobile data on the SIM card you currently have in the F42. Please note that when other devices connect to your hotspot, this will consume mobile data on your SIM plan so charges may occur when utilising mobile data services. - Page 56 • You will need to select “Cancel” or “Save” before exiting this screen. To enable the hotspot to allow devices to connect to the Aspera F42: • When inside “Wi-Fi hotspot”, highlight the “Off” option, and use the Select key to enable.
-
Page 57: Bluetooth
• Using the select key, press “USB tethering” to enable this connection Bluetooth • When inside “Hotspot & Tethering”, scroll down to “Bluetooth tethering” • Using your select key, press to activate Bluetooth tethering Ensure that Bluetooth is turned on so you can access more options and pair devices. To access Bluetooth: •... - Page 58 “Received files” is the history of files that have been transferred through Bluetooth and can be viewed by selecting that function. To connect to a device: • Using the arrow keys, scroll down to “Pair New Device” and press the Select key. •...
-
Page 59: Display
Display The display settings has multiple options which can be customised or adjusted for the user. These settings allow changes to display features including menu layout, Wallpaper, shortcuts, sleep mode and font size. To access Display settings: • When inside settings, use the arrow key and select “Display” From here you can choose which feature or functionality you would like to make changes to by using your arrow keys and pressing the select key to access the settings. -
Page 60: Security
14. Security The Aspera F42 has the ability to set a phone lock and a SIM card lock on system start-up. There is no functionality for a password for when the phone lid is closed. - Page 61 NOTE: If you lose this PIN code you may lose access to the phone, and consequently all data. Please ensure that if you do set a PIN code that it is remembered or stored safely somewhere. Aspera Mobile take no responsibility for any locked devices due to PIN codes being lost.
- Page 62 SIM card can be blocked, and you will require a PUK code to be able to unlock the SIM. To retrieve the PUK code, you will need to contact your SIM provider as Aspera Mobile do not carry these PUK...
-
Page 63: Basic Troubleshooting
15. Basic Troubleshooting My phone is not charging: • Please ensure that you are using the wall plug and USB charger cable provided with the device, as we are unable to certify whether other plugs will work correctly. • Please ensure the wall plug and cable are connected properly, and that the power has been switched •... - Page 64 time for the device to power on. • If the battery has not been charged in some time or is flat, please connect and charge for at least ten minutes as it may take some time for the battery to regain sufficient charge to power the device. My phone is not connecting to the network, even though a SIM card has been inserted: •...
- Page 65 My battery is not lasting very long: • The expected battery life on a full charge of the Aspera F42 is three days standby, or a day with moderate usage of the phone. Heavy use may mean you need to charge the battery in the same day.
Need help?
Do you have a question about the F42 and is the answer not in the manual?
Questions and answers