Table of Contents
Advertisement
Quick Links
Advertisement
Table of Contents

Related Manuals for ASPERA F48


Summary of Contents for ASPERA F48
-
Page 3: Table Of Contents
User Manual 1 Aspera F48 handset layout…………………………………………………….7 2 General Information …………………………………………………………..8 2.1 Profile…………………………………………………………..... 8 2.2 Safety Information…………………………………………………………..8 2.3 Safety warning and Attentions………………………………………………8 3 Getting started……………………………………………………....12 3.1 Installing SIM Cards and the Battery……………………………………..12 3.2 Installing SD Card…………………………………….........16 3.3 Charging the Battery……………………………………......17 3.4 Powering On/Off the Mobile Phone……………………………………..21... - Page 4 4.1 Selecting Input Methods…………………………………………………….25 4.2 To Change Entry Methods……………………………………………….….26 4.3 Numeric Input……………………………………………………....26 4.4 English input and numeric input:………………………………………...….27 4.5 Inserting a Symbol……………………………………………………..28 5 Using the Menus……………………………………………………....28 5.1 Messages……………………………………………………......28 Write message…………………………………………………….......29 Conversations……………………………………………………......29 Drafts……………………………………………………........30 Sent messages…………………………………………………….......31 Delete messages……………………………………………………....31 Broadcast messages……………………………………………………....31 Message settings……………………………………………………....32 5.2 Phonebook……………………………………………………......32 5.3 Setting up Speed dial……………………………………………………..34 5.4 Call Logs…………………………………………………….......
- Page 5 Go to menu – scroll to the phone icon “Call logs” click on it………………..35 Missed Calls……………………………………………………....... 35 Dialed Calls……………………………………………………......35 Received Calls……………………………………………………....35 Delete call logs……………………………………………………....35 Call timers ……………………………………………………......35 5.5 Multimedia……………………………………………………....36 Camera……………………………………………………....... 36 Gallery……………………………………………………........36 Video camera……………………………………………………......36 Audio player…………………………………………………….......36 Video……………………………………………………........37 5.6 Settings………………………………………………..………..…..38 Audio profiles…………………………………………..……..……..38 Changing the ringtone …………………….......……..……...38 Turning the phone to silent………………………………..……....38...
- Page 6 Call settings…………………………………………...........39 Phone Settings – go to Settings – Phone settings…………………..... 41 Security Settings…………………………………………........42 Display settings…………………………………………........42 Connections…………………………………………...........43 5.7 My files and Micro SD card…………………………………………....43 5.8 Tools…………………………………………..........44 Calendar…………………………………………..........44 Calculator…………………………………………..........44 Bluetooth…………………………………………..........44 Alarm…………………………………………............ 44...
-
Page 7: Aspera F48 Handset Layout
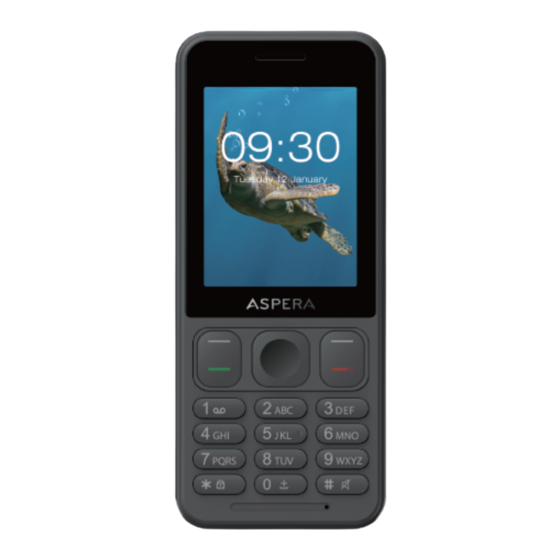
1 Aspera F48 handset layout... -
Page 8: General Information
Please read this user guide carefully for advice on keeping your phone in the best condition. Aspera Mobile may change this phone without prior written notice and reserves the final right to interpret the performance of this mobile phone. Due to different software and network operators, the display on your phone may be different, refer to your phone for details. - Page 9 -Switch off in aircraft Wireless devices can cause interference in aircraft. Please make sure to only use your phone when switched to Airplane mode when in an aircraft. -Switch off before entering risk areas Strictly observe the relevant laws, codes, and regulations on the use of mobile phones in risk areas.
- Page 10 -Qualified service Only qualified Aspera personnel or approved agent may install or repair phone equipment. Installing or repairing the Aspera phone yourself or by unauthorised technician may void the warranty.
- Page 11 Precautions This mobile phone has an intricate design. Please exercise special care when using it. The following suggestions will help your mobile phone survive the warranty period and extend its service life: -Keep the mobile phone and all its fittings beyond young children's reach. -Keep the mobile phone dry.
-
Page 12: Getting Started
-Do not throw, knock or shock the mobile phone, as that may cause damage to the internal circuits and high-precision components of the mobile phone. 3 Getting started 3.1 Installing SIM Cards and the Battery A SIM card carries useful information, including your mobile phone number, PIN (Personal Identification Number), PIN2, PUK (PIN Unlocking Key), PUK2 (PIN2 Unlocking Key), IMSI (International Mobile Subscriber Identity), network information, contacts data, and short messages data. - Page 13 Installation -Hold the red hang up button for a few seconds to power off the mobile phone. -Lift the back cover from the bottom left corner and remove it. Opening the back cover of the phone: 1)Hold the phone in your left hand with your fingers touching the back of the phone.
- Page 14 Installing battery and sim: 4)Pull the battery up from the top left and then lift the battery away. 5)Insert sim into the SIM slot, do this by sliding the sim to the left under the silver bar with the angled corner first. 6)With the metallic contacts of the battery facing the metallic contacts in the battery slot, press the battery down until...
- Page 15 -Using code The mobile phone and the SIM cards support passwords, to prevent the phone and the SIM cards from unauthorized usage. When you are prompted to input any of the codes mentioned below, just input the correct code and then press the ok key. If you input a wrong code, press the Right soft key to clear it and then input the correct code.
-
Page 16: Installing Sd Card
Unlocking methods as follows: -Input the correct PUK per the screen tips to unlock the SIM card. -Then input the new PIN and press the ok key. -Input the new PIN again and then press the ok key. -If the input PUK is correct, the SIM card will be unlocked and the PIN will be reset. Note: The SIM card will be locked if you input the wrong PIN code three times. -
Page 17: Charging The Battery
Note: 1. The mobile phone cannot automatically identify the SD card being inserted when the mobile phone is powered on. You must power off the mobile phone and then power it on, so that the phone can identify the SD card. 2. - Page 18 -A charging animation appears when the battery is being charged. The battery light will also appear on the front screen and will turn off when fully charged. When the charging is complete, the animation on the main display disappears. -Using the approved adapter: -Install the battery into the mobile phone before charging the battery.
- Page 19 To guarantee the optimal performance of your battery, please stick to the following rules: -Use only the battery provided by Aspera. Otherwise, damage or even injuries could be caused during charging. You may also void the warranty. -Power off the mobile phone before removing the battery.
- Page 20 Note: To guarantee your personal safety and protect the environment, be careful if disposing of the battery. Return the old battery to Aspera or place it in specified battery reclamation areas. Do not dispose of the battery with normal household waste.
-
Page 21: Powering On/Off The Mobile Phone
3.4 Powering On/Off the Mobile Phone Hold the red End call key for a few seconds to power on the mobile phone. The end-call key has a power symbol on it. A power-on animation appears on the display screen. Input the phone lock code and press the ok key if the mobile phone prompts you to input the phone lock code. -
Page 22: Dialing Calls
3.6 Dialing Calls In the standby interface, press number keys to input the area code and the telephone number, and then press the green Dial key to dial a call. To end the call, press the red End key. -Dialing an international call Hold the “0”... - Page 23 -Redialing the last number In the standby interface, press the dial key to show the dialed calls. Press the up or down direction keys to select a number you want to dial and then press the Dial key. -Answering incoming calls Press the red End key to end the current conversation.
-
Page 24: Using The Headset
3.7 Using the Headset The phone will enter headset mode automatically when you insert headset to the port. A headset icon will appear at the top left of the display. Make sure you insert the headset tip to the bottom of the headphone jack so you can listen to audio files clearly. -
Page 25: Input Method
Turning on loudspeaker during a call To turn on the loudspeaker during a call, press the key directly under Hands Free which displays on the screen at bottom right. Similarly, to turn off loudspeaker press the same key again. 4 Input method This mobile phone provides multiple input methods and languages, including English, French and Spanish input and numeric input. -
Page 26: To Change Entry Methods
4.2 To Change Entry Methods Press the # key to switch between input methods and scroll to select the option you desire. 4.3 Numeric Input You can input numbers with the numeric input method. Press a number key to input the corresponding number. -
Page 27: English Input And Numeric Input
4.4 English input and numeric input: The keyboards for English input and numeric input are defined in the following table:... -
Page 28: Inserting A Symbol
English input: -Each key is used to represent multiple characters. Quickly and continuously press a key until the character you want appears. Input the next character after the cursor moves. -Press the # key to switch between input methods. -To clear wrong inputs, press the Right soft key, top right of Keypad. 4.5 Inserting a Symbol Press the * key to enter the Select symbol interface, use direction keys to select a symbol you want. -
Page 29: Write Message
In the message, select the option to see options for that message. Messages can only be viewed and created when the sim card is inserted. Write message -New SMS: In this menu, you can edit and send new messages. The characters for every message can be up to 160. -
Page 30: Drafts
-Delete: Delete the short message. -Call sender: Call the number in the short message. -Mark: Mark the current message or mark all. You cannot receive new messages if the memory for messages is full. Delete unnecessary messages. Drafts Choose the Draft Messages, press the up key and the down key to select and press the left soft key to enter the Options. -
Page 31: Sent Messages
Sent messages Set to save short messages to the SIM card or to the phone, by selecting Messag- es-Options- Settings. Select to save and send in sending messages and the sent messages will be saved in the Outbox. This is to preserve once the message has been sent. Delete messages Delete the short message. -
Page 32: Message Settings
Message settings -Text message settings Memory status: Display SIM card status. Message validity period: Show the validity of messages saved. Preferred storage: Set to save short messages to the SIM card or to the phone. Please refer to Inbox for other operations. Save sent message: After sending messages, ask to store. - Page 33 Adding a contact: Go to Contacts, click New, then select Phone or Sim to store the contact. Click on the option. You can choose whether to save the contact to phone or to sim. Once selected add in the correct name and number of your contact. Moving contact(s) from sim to phone and vice versa: Select the preferred contact.
-
Page 34: Setting Up Speed Dial
5.3 Setting up Speed dial Speed dial allows you to call a regular contact with the push of just one button for 3 seconds. Select menu 1.Go to Contacts 2.Select Options 3.Scroll to “Others” 4.Select Speed dial. 5.Scroll down to the key number you wish to allocate and click on it. Input number or press top left key for Contacts. -
Page 35: Call Logs
5.4 Call Logs Go to menu – scroll to the phone icon “Call logs” click on it. Missed Calls You can view a list of the latest missed calls. Note: When the mobile phone indicates that some calls are missed, you can scroll to a missed call and then press the Dial key to dial the number that originated that call. -
Page 36: Multimedia
5.5 Multimedia Camera The phone comes with a camera, which supports the photography functions. Point the phone to align the camera to the picture and then press OK key to capture photos. Pictures will be saved in the file system of the phone or the memory card. Gallery You can view the pictures or images through this function. -
Page 37: Video
Video Use this function to play video files. By pressing the direction key you can control the playing process of video player: play/pause (OK key), fast forward (press and hold right direction key) and rewind (press and hold left direction key). In the video player interface, you can press (UP) or (Down) key to tune volume. -
Page 38: Settings
5.6 Settings Audio profiles The mobile phone provides multiple Audio Profiles, so that you can customize some settings to adapt to specific events and environments. Customize the Sound profiles per your preference (in the phone settings) and then activate the Audio profiles. The user profiles fall into five scenarios: General, Silent, Meeting, Outdoor and My style. -
Page 39: Call Settings
Call settings -Call settings Hide ID: You can choose to send or hide your own number when making a call. Select Hide ID then click Hide ID or Display ID then click OK to save the change. Call waiting: After you choose Activate, the mobile phone will contact the network. A moment later, the network will make a response and send a message to acknowl- edge your operation. - Page 40 -Advanced settings Blacklist: Blacklist is used to block certain numbers from calling your phone. Note: blacklisted numbers will still be able to message you. To add a person onto your blacklist. Go to phonebook and select a contact. Press the left soft key to bring up options.
-
Page 41: Phone Settings - Go To Settings - Phone Settings
Phone Settings – go to Settings – Phone settings -Time and date: set the date format, and the time format. Note: If you remove the battery from the mobile phone or if the battery energy was exhausted a long time ago, you may need to reset the date and time when re-inserting the battery or powering on the mobile phone after recharging. -
Page 42: Security Settings
Security Settings This function provides you with related settings about security of your phone. Such as setting a PIN code. -Phone security Phone lock: To activate Phone lock, you need to input the correct PIN code, the default code is 0000. If you set Phone lock to On, you need to input the PIN code each time you power on the mobile phone. -
Page 43: Connections
Connections -Network data settings: You can select the desired network account, roaming service and other options. VoLTE relates to voice calls transmitted over the 4G network. 5.7 My files and Micro SD card The phone provides a certain space for users to manage files and support the Memory card. -
Page 44: Tools
Turn Bluetooth on and off, a symbol will appear at top of the display when turned on. You can select to make your device visible. Your device name is Aspera F48. You can select to store received Bluetooth files on the phone or on your Micro SD card. - Page 45 -Torchlight Simply switch on and off by clicking the OK button. -World clock Shows world time and time zones. You can scroll through different cities and time zones and select the one relevant to your location.
Need help?
Do you have a question about the F48 and is the answer not in the manual?
Questions and answers