Advertisement
Quick Links
ASSEMBLY INSTRUCTIONS
INSTRUCCIONES DE MONTAJE
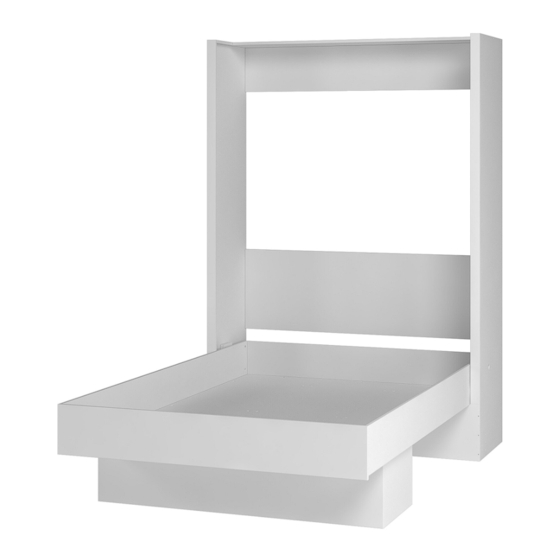
LILA MURPHY BED - TWIN SIZE
Thank you for your purchase!
Missing pieces, need help with assembly or have broken parts?
Please reach out to our customer service team directly via email or phone
between
9:00
am - : 0pm Monday through Friday (EST)
5 3
Email - patioservices@gmail.com
Phone - 248-652-1404
1
Advertisement

Related Manuals for LOWES LILA MURPHY BED


Summary of Contents for LOWES LILA MURPHY BED
- Page 1 ASSEMBLY INSTRUCTIONS INSTRUCCIONES DE MONTAJE LILA MURPHY BED - TWIN SIZE Thank you for your purchase! Missing pieces, need help with assembly or have broken parts? Please reach out to our customer service team directly via email or phone between...
- Page 2 WARNING: WARNING FOR YOUNG CHILDREN i -This product contains small components, please ensure that they are kept away from small children ii. Children under the age of 6, small infants and babies must not sleep on this bed for safety reasons. To prevent injury and damage to this unit, PROHIBIT jumping on it.
-
Page 3: Table Of Contents
Summary Resumen Introduction Introducción Before starting Antes de comenzar Avoid accidents Evitar accidentes Dimensions and tools Dimensiones y herramientas Identifying parts Identificación de las piezas Hardware included in box Accesorios incluidos en la caja Furniture assembly Montaje del mueble Troubleshooting Solución de problemas Introduction Introducción... -
Page 4: Before Starting Antes De Comenzar
Before starting Antes de comenzar Prepare the room before starting the assembly, leaving it completely clean and the area in good condition to start the work. Antes de comenzar el montaje prepare el ambiente, dejándolo completamente limpio y con buen espacio para comenzar el trabajo. Use the cardboard from the packaging to Cover the assembly area with a blanket or separate and support the parts once they... -
Page 5: Avoid Accidents
Dimensions and tools Dimensiones y herramientas Dimensions: 43.50 H: 85.43 D: 79.33 inches Dimensiones: L: 1105 A: 2170 P: 2015 mm Avoid accidents Prevenir accidentes You are requested to carefully observe and follow assembly instructions in the correct order. Operating the up and down function without first securing the bed to a wall and installing a mattress could lead to risk of injury. - Page 6 PART DESCRIPTION QTY. PIEZA DESCRIPCIÓN CANTIDAD BASE BASE TAPA LEFT SIDE LATERAL IZQUIERDA RIGHT SIDE LATERAL DERECHA TRAVERSE TRAVESAÑO BACK REVÉS LEFT DETAIL DETALLE IZQUIERDO UPPER DETAIL DETALLE SUPERIOR TOP BED TAPA CAMA BASE BED BASE CAMA LEFT SIDE BED LATERAL IZQUIERDA CAMA RIGHT SIDE BED LATERAL DERECHA CAMA...
- Page 7 HARDWARE INCLUDED IN BOX 01 - ACCESORIOS INCLUÍDOS EN LA CAJA 01 EF 000129 x 8 EF 000033 x 66 EF 000094 X 52 EF 000858 X 58 4X35 CC 8x30 EF 000132 x 18 EF 000724 X 2 EF 000855 X 8 EF 000751 X 3 8x40 4x50 CC...
- Page 8 = 180 KG - 396.83 LB = 10 KG - 22.04 LB Bed Mattress/Tamaño Cama = 960mm X 1900mm = 6-14 inches thick, 38 X 75 inches, no futons...
- Page 9 B- x20 Place cam lock screws on the smaller holes. Coloque los tornillos de minifix en los agujeros mas pequeños. A- x28 Cola Glue Pegamento AA- x1 Make sure to place wooden dowels in correct space. Can add glue to fix. Colocar los tarugos en los espacios correctos.
- Page 10 Make sure to place wooden dowels in correct space. Can add glue to fix. Colocar los tarugos en los espacios correctos. A- x26 Puede colocar pegamento para fijar las piezas. B- x32 Cola Glue Pegamento AA- x1 Place cam lock screws on the smaller holes.
- Page 11 D- x8 Screw in parts #16 onto #04 Atornille las partes #16 sobre las #04. A- x12 Cola Glue Pegamento AA- x1 Make sure to place wooden dowels in correct space. Can add glue to fix. Colocar los tarugos en los espacios correctos. Puede colocar pegamento para fijar las piezas.
- Page 12 C- x6 F- x3 G- x2 Cola Glue Pegamento AA- x1 Use double sided cam Place cam locks. Make sure arrow is screws to attach parts 13 facing outwards. Once parts are attached, Coloque los tornillos dobles turn cam lock to the right using screwdriver. para unir las partes 13 Coloque los tambores de minifix.
- Page 13 C- x12 Cola Glue Pegamento AA- x1 Place cam locks. Make sure arrow is facing outwards. Once parts are attached, turn cam lock to the right using screwdriver. Coloque los tambores de minifix. Asegurese que las flechas indiquen hacia afuera. Una vez que las piezas se unan, gire el tambor hacia la derecha.
- Page 14 C- x8 Cola Glue Pegamento AA- x1 Join parts #14 and #15 to assemble the shelf. Una las partes #14 y #15 para montar el estante. E- x12 Cola Glue Pegamento AA- x1 Screw shelf into bed with E screws and glue to fix. Atornille el estante a la base de la cama con los tornillos E y fijando con...
- Page 15 Pay attention to the each part front and back. Preste atención al frente y dorso C- x14 de cada parte. Cola Glue Pegamento AA- x1 Do not attach part 02 now. No coloque la parte 02 ahora. K- x2 Place “K” insert from outside. Colocar pieza “K”...
- Page 16 ATTENTION T- x12 ATENCIÓN Very important to fix the bed to the wall in this step. U- x6 Following next steps without first securing the bed can lead to risk of injury. Muy importante fijar la cama a la pared en este paso. V- x6 Continuar con los proximos pasos sin asegurar la cama puede ocasionar riesgo de lesion.
- Page 17 ATTENTION ATENCIÓN From here forward steps must be followed in order for a successfull installation. De aqui en adelante deben seguirse los pasos en orden para asegurar una correcta instalacion del producto. 15 A N1- x2 N2- x2 N3- x2 Attach parts N1 and N3 by placing N2 in between.
- Page 18 Align bed with bed frame and attach both by placing “L” insert and “O” screw on each side L- x2 Alinear la cama y el marco para poder conectarlos al colocar el inserto “L” y el tornillo “O” de cada lado. O- x2 allen Gas spring is still fully extended.
- Page 19 Pull bed open slowly. Guide it safely down. Because there is no mattress inside, gas pistons will make it tougher to pull. Gas piston will compress for the first time when the bed is opened. Abra la cama despacio. Guíe la misma de forma segura hasta abajo. Como aún no está...
- Page 20 E- x6 Cola Glue Pegamento AA- x1 C- x10 Cola Glue Pegamento AA- x1 C- x2 Hold the bed ajar to adjust the camlock nut (C). Sostenga la cama entreabierta para ajustar el minifix (C).
- Page 21 P- x2 Pull bed open slowly. Guide it safely down. Abra la cama despacio, de forma segura hasta abajo. Q- x1 Install mattress securing straps. Place mattress inside and secure properly. S- x4 Instale la cinta de seguridad para el colchón. Coloque el colchón dentro y asegure correctamente.
-
Page 22: Troubleshooting Solución De Problemas
Troubleshooting Solución de problemas If you experience trouble with your product assembly, try the following solutions: Si encuentra dificultades con el montaje de su producto, pruebe una de las siguientes soluciones: Parts or hardware are missing. Before starting the assembly process, please verify that all parts and hardware shown in this manual have arrived. - Page 23 Troubleshooting Solución de problemas Plastic ball joint on gas strut broke when pulling bed opened for the first time. The plastic ball joint at the end of the gas strut can break or come apart if it is not correctly installed on to the pin.
Need help?
Do you have a question about the LILA MURPHY BED and is the answer not in the manual?
Questions and answers