Toshiba IK-WB70A Quick Start Manual
Toshiba ik-wb70a: quick start
Hide thumbs
Also See for IK-WB70A:
- User manual (83 pages) ,
- User manual (83 pages) ,
- Quick start manual (20 pages)
Table of Contents
Advertisement
Quick Links
Download this manual
See also:
User Manual
NETWORK CAMERA
Model:
Quick Start Guide and Important Safeguards
This guide describes the hardware installation.
Refer the user's manual (PDF file) contained in the CD-ROM for settings,
operations and other information.
The application Adobe Reader is needed to see PDF fi les. If you do not have
this application, download it from the Website of Adobe Systems Incorporated.
For information on our latest products and peripheral devices, refer to the
following Website:
■ http://www.toshibasecurity.com
The above URL is subject to change without prior notice.
If the URL changes, refer to the Toshiba website (http://www.toshiba.com).
IK-WB70A
Advertisement
Table of Contents

Subscribe to Our Youtube Channel
Related Manuals for Toshiba IK-WB70A


Summary of Contents for Toshiba IK-WB70A
-
Page 1: Network Camera
Website of Adobe Systems Incorporated. For information on our latest products and peripheral devices, refer to the following Website: ■ http://www.toshibasecurity.com The above URL is subject to change without prior notice. If the URL changes, refer to the Toshiba website (http://www.toshiba.com). -
Page 2: Introduction
Introduction FCC (USA)-INFORMATION NOTE: This equipment has been tested and found to comply with the limits for a Class A digital device, pursuant to Part 15 of the FCC Rules. These limits are designed to provide reasonable protection against harmful interference when the equipment is operated in a commercial environment. -
Page 3: Terms And Trademarks
Thank you for purchasing the IK-WB70A Network Camera. Before you start using the camera, read this quick start guide carefully to ensure correct usage. Once you have fi nished reading this quick start guide, keep it in a convenient place for future reference. -
Page 4: Table Of Contents
Table of Contents ● Introduction ... 2 Terms and Trademarks ... 3 ● ● Table of Contents ... 4 ● IMPORTANT SAFEGUARDS ... 5 ● NOTES ON USE AND INSTALLATION ... 9 ● Setting Network Camera Environment... 10 Items needed for network camera monitoring system ...10 ●... -
Page 5: Important Safeguards
IMPORTANT SAFEGUARDS 1. Read Instructions Read all the safety and operating instructions before operating the product. 2. Retain Instructions Retain the safety instructions and user's manual for future reference. 3. Warnings Comply with all warnings on the product and in the user's manual. 4. - Page 6 IMPORTANT SAFEGUARDS (Cont.) 10. Power-Cord Protection Power cords should be routed so that they are not likely to be walked on or pinched by items placed upon or against them. Pay particular attention to cords at plugs, screws and the point where they exit the product.
- Page 7 16. Damage Requiring service Disconnect this video product from the power supply and refer servicing to qualifi ed service personnel under the following conditions. a. When the power-supply cord or plug is damaged. b. If liquid has been spilled, or objects have fallen into the video product.
- Page 8 IMPORTANT SAFEGUARDS (Cont.) CAUTION TO REDUCE THE RISK OF ELECTRIC SHOCK. DO NOT REMOVE COVER. NO USER SERVICEABLE PARTS INSIDE. REFER SERVICING TO QUALIFIED SERVICE PERSONNEL. The lightning fl ash with arrowhead symbol, within an equilateral triangle, is intended to alert the user to the presence of uninsulated "dangerous voltage"...
-
Page 9: Notes On Use And Installation
NOTES ON USE AND INSTALLATION ・ Do not aim the camera at the sun Never aim the camera at the sun even with the camera power off . ・ Do not shoot intense light Intense light such as a spotlight may cause a bloom or smear. A vertical stripe may appear on the screen. -
Page 10: Setting Network Camera Environment
Setting Network Camera Environment Items needed for network camera monitoring system ● Administrator's personal computer The personal computer that is given all authorities for setting, operating, monitoring and other functions with the network camera is called the "administrator's personal computer" in this guide. * The personal computer for viewing monitored images is called the "user's personal computer"... -
Page 11: Quick Start Guide
Website of Adobe Systems Incorporated. For information on our latest products and peripheral devices, refer to the following Website: ■ http://www.toshibasecurity.com The above URL is subject to change without prior notice. If the URL changes, refer to the Toshiba website (http://www.toshiba.com). ● CD-ROM IK-WB70A... -
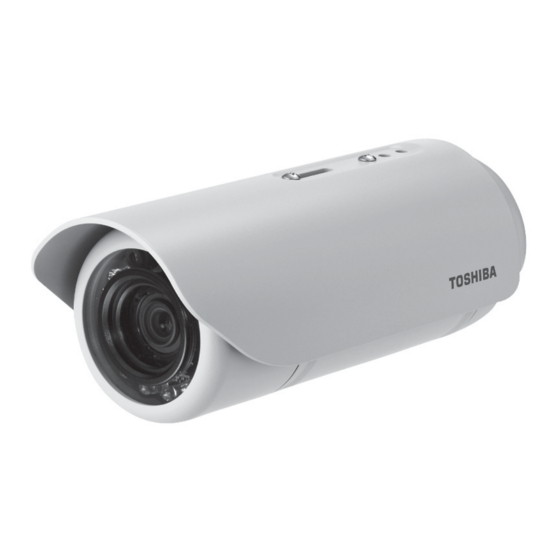
Page 12: Physical Description
Physical Description ● Front panel Illuminance sensor Lens IR LED ● Connectors Cable length: approx. 39 inches (1000mm) Reset button Status LED General I/O terminal block Ethernet 10/100 RJ45 plug Audio output (green) mini-jack Microphone input (pink) mini-jack Power cord socket (black) -
Page 13: Hardware Installation(1)
Hardware Installation(1) Follow the steps below to mount the Network Camera: 1. Drill four pilot holes (Φ0.31 inch X 1.5 inches(D)(Φ8 mm X 38 mm (D))) to fi t in the holes of the Mounting Bracket. Hammer the supplied plastic anchors into the holes. ●... -
Page 14: Network Deployment
Network Deployment General Connection (without PoE) 1. If you have external devices such as sensors and alarms, make connections from general I/O terminal block by the supplied I/O connectors. Insert the external sensor's cables to the connector and fasten the supplied screws. - Page 15 Power over Ethernet (PoE) ● When using a PoE hub The Network Camera is PoE-compliant, allowing transmission of power and data to both run in a single Ethernet cable. See the following illustration to connect the Network Camera to a PoE hub via Ethernet cable. ●...
-
Page 16: Assigning Ip Address
Assigning IP Address 1. Install the "Installation Wizard" under the Software Utility directory from CD-ROM. 2. The program will conduct analyses on your network environment. After your network is analyzed, please click on the "Next" button to continue the program. Installation Wizard 3. -
Page 17: Retrieving Images
Retrieving Images 1. Access to the Network Camera from the LAN. 2. Retrieve live video through Internet Explorer For more information on camera confi guration, please refer to user's manual on the CD-ROM. ®... -
Page 18: Adjusting The Lens
Adjusting the Lens Use the live image retrieved from the Network Camera to make the lens adjustments. To adjust the zoom factor and focus range 1. Position the camera pan and tilt to the desired direction. 2. To adjust the zoom factor loosen the zoom controller screw by turning it counterclockwise to unlock the zoom ring, rotate the zoom ring clockwise or counterclockwise to the desired position. -
Page 19: Hardware Installation(2)
Hardware Installation(2) 1. Remove the silica gel from the aluminum foil bag. Attach the silica gel package to the inside of Network Camera. Refer to image 1. 2. Reinstall the Network Camera lens by rotating it clockwise on the camera. Tighten the lens onto the camera to seat the seal. Refer to image 2. - Page 20 TOSHIBA AMERICA INFORMATION SYSTEMS, INC. Surveillance & IP Video Products 9740 Irvine Boulevard, Irvine, CA 92618-1697 Phone Number: (877) 855-1349...
Need help?
Do you have a question about the IK-WB70A and is the answer not in the manual?
Questions and answers