Table of Contents
Advertisement
Quick Links
Advertisement
Table of Contents

Related Manuals for Azure Biosystems chemiSOLO


Summary of Contents for Azure Biosystems chemiSOLO
- Page 1 User Manual Part Number CS1000...
- Page 2 If any defect occurs in the instrument during this warranty period, Azure Biosystems, Inc. will repair or replace the defective parts at its discretion without charge. The following defects, however, are specifically excluded: •...
- Page 3 Voltage Setting Information The chemiSOLO has a power supply that automatically chooses the correct voltage for your country or region. CE Conformity The chemiSOLO is in conformity with the provisions of the following EC Directives and the following harmonized standards have been applied: •...
-
Page 4: Table Of Contents
Turning the System On/Off Software Access External Wi-Fi Setup (optional) Image Capture Overview Home Screen Overview Chemiluminescent Imaging Visible Imaging Custom Imaging Auto-Save Image Gallery Overview Gallery Image Adjustment Settings Overview General Software Create Darkmasters, Create Flats chemiSOLO User Manual Page 4... -
Page 5: Introduction
• Ethernet Port – There is one ethernet port on the back of the instrument, which enables direct computer connection with the use of an ethernet cord [CS1007]. • USB Memory Stick – The Azure Biosystems memory stick contains calibration files relevant to your chemiSOLO system. -
Page 6: Installation And Setup
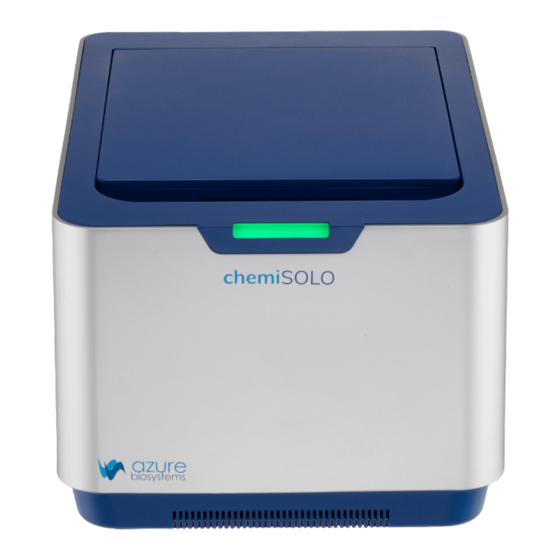
The main power switch is located on the back panel, just above the power entry module. 1. First, flip the power switch to On (I). 2. The light on the front of the chemiSOLO will turn blue and white while loading, then green once the instrument is ready for use. -
Page 7: Software Access
Then, connect the other side of the ethernet cord to an external computer. Power on the chemiSOLO and wait until the light on the front turns green. From there there, open a web browser on the computer (Google Chrome recommended) and input the chemiSOLO’s ethernet IP address “192.168.40.1”... - Page 8 3. Once the Mac is properly connected to the chemiSOLO’s Wi-Fi, open a web browser and input the chemiSOLO’s Wi-Fi IP address “192.168.12.1” to access the control software. Connecting an Android Phone to the chemiSOLO • Android Phone System Requirements: •...
-
Page 9: External Wi-Fi Setup (Optional)
For reference, each unit’s serial number can be located on the back of the instrument. 4. Once the Android tablet is connected to the chemiSOLO’s Wi-Fi, open a web browser and input the chemiSOLO’s Wi-Fi IP address “192.168.12.1” to access the control software or alternatively, scan the QR code on the inner lid of the unit to quickly access the same address. - Page 10 2. Connect the ethernet side of the cord to the desired external internet modem. 3. Turn the chemiSOLO off, then connect the USB side of the cord to one of the two USB ports on the back of the chemiSOLO unit.
-
Page 11: Image Capture Overview
Image Capture Overview The chemiSOLO captures high quality images with an intuitive user interface. The Home Screen expedites the imaging process by providing quick access to the most commonly-used functions. For users that require more specific settings, the Custom Imaging menu also allows for a comprehensive breakdown of the chemiSOLO’s functionalities. -
Page 12: Chemiluminescent Imaging
2. Fully close the chemiSOLO lid. 3. From the Home Screen, select the desired quick access option(s) in the Chemiluminescent Imaging section. If none of the following options are selected, the chemiSOLO will take a single chemi image with no marker when START is selected: a. -
Page 13: Custom Imaging
Color Imaging – The chemiSOLO will merge a composite image using individual red, blue, and green images for a full color image. b. Grayscale Imaging – The chemiSOLO will take a single image using white light for a black-and- white image. -
Page 14: Auto-Save
1. Place sample face-down on the imaging stage. 2. Fully close the chemiSOLO lid. 3. From the Home Screen, select the “Select Custom Options” button to access the Custom Imaging menu. 4. Specify the desired settings in each of the following fields: a. -
Page 15: Image Gallery Overview
Reach the Gallery by clicking the Gallery icon. 1. The following options are available within the File dropdown menu: a. Open from chemiSOLO – Open an image stored on the chemiSOLO’s internal memory. b. Close – Close the image that you’re currently viewing. -
Page 16: Image Adjustment
Press SAVE to save the currently-selected image in the specified formats or press SAVE ALL to save all images open in the chemiSOLO Gallery in the specified formats. 5. Select the Eject USB button to safely eject the connected USB memory drive from the chemiSOLO. 4.2—Image Adjustment Functions 1. - Page 17 4. Resize – Customize width, height, and dots per inch (DPI). 5. Info – Gives detailed information about the active image. Displays the parameters for image acquisition including date & time, capture type, bin level, software version, and comments. chemiSOLO User Manual Page 17...
-
Page 18: Settings Overview
Settings Overview The Settings menu allows for specific customization of the chemiSOLO imaging and operation settings. It can be reached by clicking the Settings option on the top ribbon. 5.1—General 1. File Saving – These settings allow you to enable the automatic saving of publication images. -
Page 19: Software
2. External Network Connection – Connect the chemiSOLO’s Wi-Fi to an external network through the Wi-Fi dongle accessory. a. Note: The chemiSOLO’s Wi-Fi can only be connected to an external network through this menu if the Wi-Fi dongle accessory is plugged in. -
Page 20: Create Darkmasters, Create Flats
Following the restart, reconnect to the chemiSOLO, open the page, and perform a hard refresh on the web browser by pressing Ctrl+F5 on PC or Command+R on Mac. Following this, the update will be fully implemented.
Need help?
Do you have a question about the chemiSOLO and is the answer not in the manual?
Questions and answers