Table of Contents
Advertisement
Quick Links
Advertisement
Table of Contents

Related Manuals for Azure Biosystems Cielo AIQ030


Summary of Contents for Azure Biosystems Cielo AIQ030
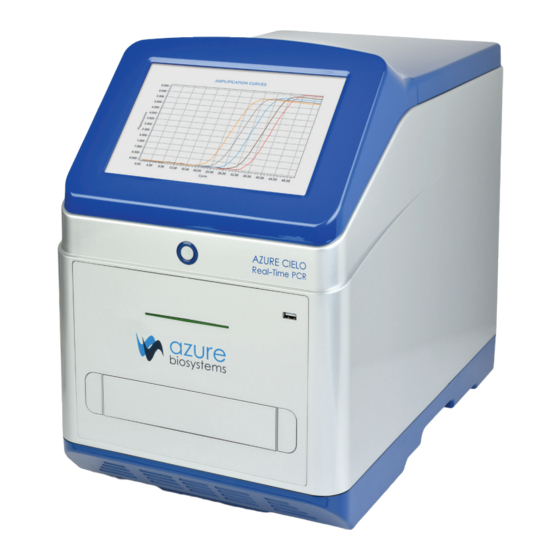
- Page 1 Azure Cielo Real-Time PCR Systems ™ User Manual Part Numbers AIQ030 and AIQ060...
- Page 2 Safety and Regulatory Compliance Important Safety Information Please read these instructions before operating the Azure Cielo system. Electrical Safety Precautions Be sure to take proper precautions when handling any electrical equipment. NEVER work on any live circuit, fixture, receptacle, or switch. Safety rules you should follow whenever working with any electrical appliance include: •...
- Page 3 If any defect occurs in the instrument during this warranty period, Azure Biosystems, Inc. will repair or replace the defective parts at its discretion without charge. The following defects, however, are specifically excluded: • Defects caused by improper operation.
- Page 4 . Var god kontakta en auktoriserad tillverkarrepresentant för information angående avyttring av utrustningen. Contact Azure Biosystems, Inc. 6747 Sierra Court, Suite A-B • Dublin, CA 94568 • USA info@azurebiosystems.com • (925) 307-7127 • Fax (925) 905-1816 Azure Cielo Real-Time PCR Systems User Manual...
-
Page 5: Table Of Contents
Table of Contents Introduction Azure Cielo Specifications Plates and Tube Compatibility Contacting Technical Support Installation and Setup System Placement System Overview Connect Azure Cielo Real-Time PCR system to Internet Network Connect Azure Cielo Real-Time PCR system to PC via Azure Cielo Manager software Device Software Overview The Home Screen... -
Page 6: Introduction
Introduction The Azure Cielo Real-Time PCR instrument is a high-performance tool compatible with a wide variety of reagents for quantitative PCR. The family of instruments includes the Azure Cielo 3 and the Azure Cielo 6. 1.1—Azure Cielo Specifications The Azure Cielo instruments have the following specifications. Azure Cielo 3 Azure Cielo 6 Specifications... -
Page 7: Plates And Tube Compatibility
1.2—Plates and Tube Compatibility Azure Cielo Real-Time PCR system is compatible with: A. Low-profile 96-well Plates • Low-profile plates have wells of approximate height 15.5 mm (depending on manufacturer). These modern designs reduce condensate formation and allow for accurate light detection in fluorescence assays, low-volume reactions, and fast PCR. - Page 8 B. Low-profile Tubes • Tubes are an ideal choice for qPCR experiments of low to medium throughputs. Individual and tube strips are two most common formats available. Tube strips are available in 8 or 12 well type. Cielo systems are compatible with 0.1mL and 0.2mL tubes. •...
-
Page 9: Contacting Technical Support
Figure 2. Filled orange circles show locations of samples across the 96-well format. There are a total of six samples in tubes. Panel A shows an uneven distribution which may result in deformed or altered tubes at the completion of the run. Panel B shows a more even and recommended distribution of the same six samples using two blanks (blue filled circles). -
Page 10: Installation And Setup
Installation and Setup 2.1—System Placement WARNING: Excessive Weight Hazard – Please use two or more people to lift the system. Failure to do so can result in system damage and personal injury. As with all electrical instruments, the Azure Cielo should be located away from water, solvents, or corrosive materials, on a flat and stable surface with adequate clearance on all sides. -
Page 11: Connect Azure Cielo Real-Time Pcr System To Internet Network
2.3—Connect Azure Cielo Real-Time PCR system to Internet Network A. Wi-Fi 1. Go to the DEVICE SETTINGS > NETWORK > WIFI on the left edge of the screen. 2. Make sure that the Wi-Fi is on with a strong, available signal. 3. - Page 12 Figure 6. By hovering over the flash drive from “This PC” screen and right clicking, a menu box will appear, providing numerous options. Selecting Properties will provide information on the type of file system in place on the USB. Format will also provide that information and allow reformatting to proceed if FAT or FAT32 is not the file system in place.
- Page 13 • The Cielo instrument will now begin updating. Do not leave the instrument unattended during this process, which will only take approximately one minute. Figure 8. As the Instrument Software Update proceeds, updates to each module will show progress with a moving bar. •...
-
Page 14: Device Software Overview
Device Software Overview The Azure Cielo Icon based software allows you to program and run protocols with a simple user interface. Protocols and run parameters may be entered using a PC connected via Wi-Fi, USB or ethernet. No PC is required however, as the Home Screen on the instrument will allow the user this same ability. -
Page 15: Protocol Manager
3.2.1—Protocol Manager From the Protocol Manager screen, simply select a listed protocol. While selected, a preview of the conditions set under that protocol will appear in a separate window to the right of the protocol manager window. Figure 11. PROTOCOL MANAGER screen under Figure 12. - Page 16 A. Use the UP button next to Users or Protocol and Date created to sort users and/or experiments in ascending or descending order. B. Add New User: • button to add a new user. • Tap on ‘Add User’ to add a new user. Enter the new user name using the system keyboard.
-
Page 17: Change Protocol Properties
D. Delete existing user or protocol. • Select the User or Protocol to be deleted. • While the User or Protocol remains highlighted, use the trash icon to delete the selected User or Protocol. Note: Deleting user will delete all existing protocols and data stored under that user. •... - Page 18 Button Button Name Function Home Back to Home Screen Connection Bar Status and strength of internet connection Tap the rectangular text box to assign a name (or rename) Protocol Name the selected protocol • Select reaction volume (default is 20 µL) Reaction Volume •...
-
Page 19: Well Selection Screen
3.2.3—Well Selection Screen • In the WELL SELECTION menu, a 96-well plate layout will be visible. The Azure Cielo Real-Time PCR Instrument detects 16 wells or two columns at a time. The default setting is to collect data from all wells across the entire plate which takes about 9 seconds. If the experimental plate is not 96-wells, but only a few columns, the overall run time can be reduced by opting out of detection for unused wells on the plate. -
Page 20: Run Setup
Email server is successfully setup. To set up email server, please refer Section 3.4.3 (Email Server Setup) • A pop-up screen with an empty box will appear and will allow user to input an email address. • Once the email address is entered, hit OK to continue. •... - Page 21 Button Button Name Function Temperature Tap to customize reaction temperature Time Tap to customize time in the step Tap to assign total cycle number and the step number Cycle Setting to repeat every time after the last step of the cycle (see also Go To Module) Add a step This will insert a step after the highlighted step...
- Page 22 Time settings: • Tap on the time display button for each cycle to alter the time spent at that step. Time can be entered in either minutes or seconds. Enter the time using the key pad on the screen. Example: To set the time to 2 minutes, select Min on the screen and enter the number 2 using the key pad on the screen.
- Page 23 Add a step: • In the CYCLING display, highlight the step after which a step needs to be inserted. • Tap the ADD menu button (located below the cycling display) to insert a new step. The default step will be 95ºC for 10 seconds but can be adjusted as described in the previous section.
- Page 24 • Once the Advanced Settings menu appears, select which channel to adjust, and enter a value in msec (from 5–500). Once a value has been entered, click on DONE. Be sure to complete the change by clicking the MODIFY button to retain the new exposure setting or CANCEL to abort it.
- Page 25 B. Setting and using the Gradient option: • A gradient can be an extremely useful option, allowing the user to test several different temperature conditions within a single run. The Cielo Real-Time PCR system uses a gradient option that offers different temperatures by columns across the 96-well plate.
- Page 26 Example: In the following image, gradient is ON for Step 2 and 3 (and OFF for Step 1 and 4). The upper oval shows a range of temperatures, with a series of stacked lines underneath. Gradient can be turned on for all steps individually. C.
- Page 27 • This will open a new window where an alternate ramp rate between 0.1 and 6.0º C per second can be entered. Once the desired value has been entered, hit DONE to return to the Advanced Settings Screen. Finally, hit MODIFY to retain the entered ramp rate or CANCEL to abort the new setting.
-
Page 28: Run Protocol
Save Run Setup Settings: • Save any changes to the protocol by selecting the SAVE icon. This will save all changes made to the protocol, enabling the user to repeat the same experiment at a later time. Run Experiment: • To run the experiment, simply select the RUN button once a prepared plate has been added to the instrument. - Page 29 Button Button Name Function Pause Pause the run Start the run or continue the run after pause View curves View amplification and temperature curves of the run Export Export data file to USB drive Go back one screen. Selection of this button will return user Back to the RUN screen.
-
Page 30: Data Manager
3.3—Data Manager In the data manager screen you can access your run data for export to a USB. Figure 34. DATA MANAGER screen. Button Button Name Function Home Back to Home Screen Connection Bar Status and strength of internet connection Sort Sort in ascending or descending order •... - Page 31 A. Access run data (Amplification Curve and Temperature Curve) • By selecting the user, protocol and the data file name, the corresponding Amplification Curve and Temperature Curve will appear to the right in a PREVIEW window. Figure 35. The Amplification Curve and Temperature Curve are accessible on DATA MANAGER screen upon selecting the data name.
- Page 32 2. Temperature Curve • The temperature curve data can also be examined by clicking on the preview version of that data from the DATA MANAGER screen. By selecting that data window, a new Temperature Curve window will open as shown in Figure 37. •...
- Page 33 D. Delete Experiment • From the DATA NAME list, select the experiment to be deleted. • Use the TRASH button to delete the selected experiment. • Select OK to confirm the deletion or CANCEL to abort. E. Export Data • Data can be exported to a USB drive using one of the two ports on the instrument.
-
Page 34: Device Settings
3.4—Device Settings Within the Device Settings, the user can customize various information on the instrument. The user can also access important information from this menu such as the serial number and when the instrument was last used. 3.4.1—General • Device Info – Under this heading, the user can find the following information related to their Cielo Real Time PCR system: •... -
Page 35: Network
3.4.2—Network Within the network setting, the user can connect to the instrument with either Wi-Fi or ethernet. Current connection information is also shown on this page. Figure 41. Wi-Fi and Ethernet under NETWORK within DEVICE SETTINGS. 3.4.3—Email Server Setup Important: Make sure that the Cielo is successfully connected to the Internet. To connect the Cielo Device to the internet, please refer Section 2.3 (Connect Azure Cielo Real-Time PCR system to internet network). - Page 36 Enter the email settings based on email provider. These settings can be obtained from your IT Administration. Some examples of common server settings are listed in the table below: Email Provider IMAP Settings POP Settings SMTP Settings Server: imap.aol.com Server: pop.aol.com Server: smtp.aol.com AOL (including Port: 993...
-
Page 37: Technical Support
If you do not receive the test email: a. Confirm the Cielo Device internet settings. Confirm there is a strong and active internet signal. b. Check your Email SMTP settings. Verify information has been entered correctly. Restart the device and try again. It is important follow these instructions in the order provided to enable the Email feature in the Protocol Setup and Data Manager. -
Page 38: Frequently Asked Questions
Frequently Asked Questions General questions How is qPCR different than regular PCR? Quantitative PCR, using fluorescent detection chemistry, can determine starting quantities of materials if performed correctly with all necessary controls. It can be monitored as the run progresses with the fluorescent signal measured and recorded during the exponential phase of PCR, when the reaction is at its highest efficiency. - Page 39 How do I know how many replicates I need to run? Technical replicates are necessary to show how small differences in pipetting or template quantities may impact analysis of the data. If replicates are consistent and show low variation from one replicate to the next, fewer replicates will be needed.
- Page 40 What is a primer dimer? A primer dimer is the term used when primers within a reaction interact with each other. This may be instead of or in addition to the specific target. Many times, within the no template control samples run with SYBR Green, it is evident that any signal recorded was due to very small products made when the primers combined to make a nonspecific artifact-the melt curve will show a broad peak (not sharp) with a low melting temperature (usually 78-79ºC).
- Page 41 Can I compare data that I have obtained from a different instrument to that which I have run on the Cielo? And if so, how do I do that? It is generally not permissible to directly compare data generated from two different instruments even if the assay run is the same.
- Page 42 • info@azurebiosystems.com Copyright © 2022 Azure Biosystems. All rights reserved. The Azure Biosystems logo, Azure Biosystems , and Cielo are trademarks ® ™ of the Company. All other trademarks, service marks and trade names appearing in this brochure are the property of their respective owners.
Need help?
Do you have a question about the Cielo AIQ030 and is the answer not in the manual?
Questions and answers