Table of Contents
Advertisement
Quick Links
Advertisement
Table of Contents

Related Manuals for Nuna lytl bassinet + stand


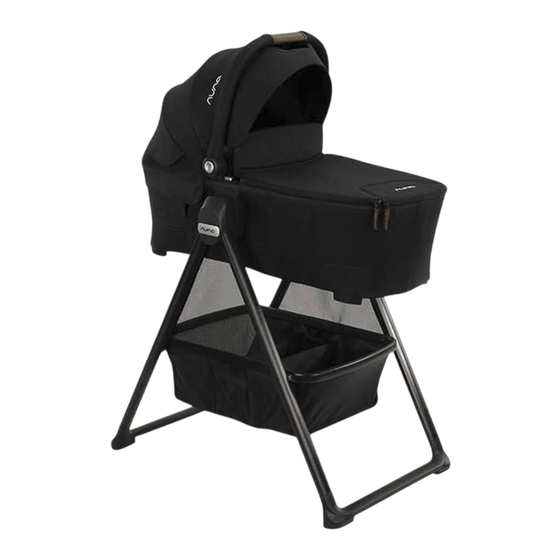
Summary of Contents for Nuna lytl bassinet + stand
- Page 2 Whatever made you fall in love with Nuna, rest assured your adventures with your little one will be easier from now on, freeing you to enjoy more happy family moments together.
-
Page 3: Table Of Contents
Contents Product Information IMPORTANT! Product Registration KEEP THESE Warranty INSTRUCTIONS FOR Contact FUTURE REFERENCE: Child Usage Requirements READ ALL INSTRUCTIONS Warnings Parts List CAREFULLY BEFORE Bassinet Setup ASSEMBLY AND USE Stand Setup OF THE BASSINET. Stand Use Bassinet Use on a Stroller Cleaning and Maintenance LYTL bassinet + stand instructions... -
Page 4: Product Information
Fill out the prepaid registration postcard attached to on hands and knees. the product and mail it today. Stand Usage To register your product please visit: Only use the Nuna LYTL bassinet on this stand. ™ www.nunababy.com Click on the “Register Gear” link on the homepage. -
Page 5: Warnings
Do not suspend strings over a bassinet or cradle or attach strings to toys. by Nuna. • Do not use if any part of the LYTL bassinet + stand is broken, torn, • Always place baby on back or missing. - Page 6 Only use the Nuna LYTL bassinet on this stand. Do not Do not use the bassinet if it is damaged or broken. attempt to attach any other items to this stand.
-
Page 7: Parts List
Parts List No tools are required for assembly. Handle Canopy Visor Bassinet Release Button Removable Liner Accessory Pocket Support Mount Release Button Support Mount (under Bassinet Liner) Canopy Canopy Window 10 Handle Adjustment Button Bassinet Rear Panel 12 Attachment Mount 13 Sky Drape ™... -
Page 8: Bassinet Setup
Bassinet Setup Unfold Bassinet 1 - Push out the support mounts on both ends and both sides of the bassinet until they lock into place. A “click” sound means the support mount is locked. Push down click on the bassinet to check. Unfold Canopy 2 - To unfold the canopy, rotate the handle up. - Page 9 Remove Canopy 1 - To remove the canopy, unzip the canopy zipper located on the inside of the canopy handle. 2 - Unzip the bottom panel of the canopy. Fold Bassinet 3 - Press the support mount release button on both ends (1) and both sides (2) of the bassinet and push down on the bassinet (3).
- Page 10 Canopy Ventilation 1 - Unfold the canopy window and unzip the bassinet rear panel for more ventilation. Bassinet Cover 2 - Attach the bassinet cover to the bassinet with the zippers on either side. DO NOT use the Sky drape with the top panel of the bassinet cover flipped up.
- Page 11 Mattress WARNING To avoid serious injury, always use the mattress when using the bassinet. 1 - Insert the mattress into the bassinet so that the opening seam on the mattress is on the bottom. 2 - Mattress should be completely flush with the bottom of the bassinet.
-
Page 12: Stand Setup
Stand Setup 1 - Pull the ends of the storage basket frame away from each other. 2 - The storage basket frame joints should lie flat before attaching the bassinet. Be certain the stand is fully opened before placing the bassinet on the stand. -
Page 13: Stand Use
Stand Use Only use the Nuna LYTL bassinet on this stand. Basket 1 - The storage basket has 3 compartments for use. Do not place more than 10 lb (4.5 kg) in storage basket. Fold 2 - To fold the stand, lift the storage basket frame joints up. -
Page 14: Bassinet Use On A Stroller
Bassinet Use on a Stroller Visit nunababy.com to check stroller compatibility with the LYTL bassinet. Bassinet Attachment on Stroller Frame ALWAYS remove the stroller seat before using the bassinet. click The bassinet can be attached in a rear-facing or forward- facing mode when on the stroller frame. -
Page 15: Cleaning And Maintenance
It is normal for fabric to color from sunlight and to show wear and tear after a long period of use, even when used normally. For reasons of safety, only use original Nuna parts. Nuna Baby Essentials, Inc. Nuna and all associated logos are trademarks. LYTL bassinet + stand instructions...
Need help?
Do you have a question about the lytl bassinet + stand and is the answer not in the manual?
Questions and answers