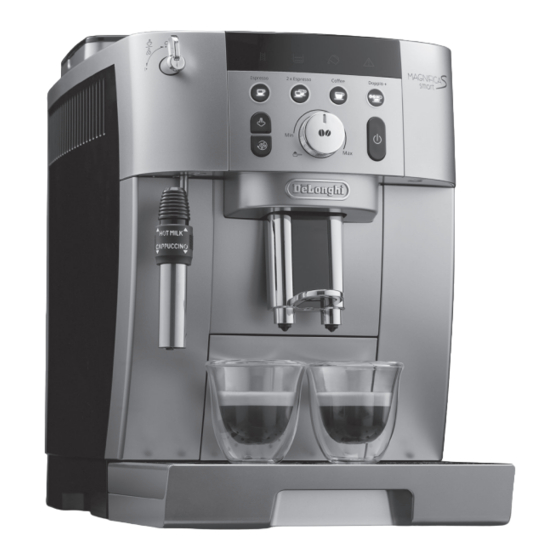
Summary of Contents for DeLonghi ECAM23X.13
- Page 1 ECAM23X.13 - 25X.23 - 25X.31 - 25X.33 - 25X.41 BEAN TO CUP ESPRESSO AND CAPPUCCINO MACHINE Instructions for Use...
- Page 2 page 6...
- Page 3 A15*...
- Page 4 0,5 L...
- Page 5 HOT MILK 1,8l...
-
Page 6: Table Of Contents
CONTENTS 16.7 Cleaning the coffee spouts ......13 16.8 Cleaning the pre-ground coffee funnel ..14 1. INTRODUCTION ..........7 16.9 Cleaning the infuser ........14 1.1 Letters in brackets .........7 17. DESCALING ..........14 1.2 Troubleshooting and repairs ......7 18. SETTING WATER HARDNESS ...... 15 2. -
Page 7: Introduction
2.2 Description of the control panel Before using the appliance, always read the safety warnings. (page 2 - B ) 1. INTRODUCTION B1. Lights Thank you for choosing this bean to cup espresso and cappuc- : “Espresso” coffee (1 cup) button with light cino machine. -
Page 8: Installing The Appliance
3.2 Installing the appliance 6. When delivery stops automatically, turn the steam dial back to the "O" position. Important! The appliance goes off. When you install the appliance, you should respect the follow- To use it, press the button (B7) (fig. 7). ing safety warnings: •... -
Page 9: Setting Water Hardness
• if provided, the appliance performs a rinse cycle then goes 4. Press the button (B9) to confirm. The light off (stand-by). goes off. The energy saving setting is now programmed. Please note! If you will not be using the appliance for some time, unplug Please note! from the mains socket: •... -
Page 10: Removal And Replacement Of The Water Softener Filter
12. MAKING COFFEE USING COFFEE BEANS 8. Close the tank with the lid (fig. 12), then replace the tank in the machine; 12.1 Selecting the coffee taste 9. Position a container with a minimum capacity of 500ml Turn the coffee taste selection dial (B6) to set the required taste. under the cappuccino maker/hot water spout (A18). -
Page 11: Coffee Delivery
• increase the coffee temperature (see section “9. Setting the • If the coffee is delivered a drop at a time, too weak and not temperature”). creamy enough or too cold, read the tips in section “21. Troubleshooting”. 12.4 Coffee delivery 13. -
Page 12: Making Cappuccino
1. Place a sufficiently large cup or glass under the coffee Please note! spouts (A11); If “Energy saving” is active, you may have to wait a few seconds 2. Press the button corresponding to the quantity to be mod- before steam is delivered. ified and hold it down until the light flashes and the appli- 14.1 Cleaning the cappuccino maker after use ance starts delivering coffee, then release;... -
Page 13: Cleaning The Internal Circuit
16.4 Cleaning the drip tray and condensate tray water tank (A7); coffee spouts (A11); Important! cappuccino maker (A18) (“16. Cleaning”); The drip tray (A14) is fitted with a level indicator (A16) (red) pre-ground coffee funnel (A4); showing the amount of water it contains (fig. 24). Before the infuser (A9), accessible after opening the infuser door (A8);... -
Page 14: Cleaning The Pre-Ground Coffee Funnel
2. Check the holes in the coffee spouts are not blocked. If nec- • It is important to use De’Longhi descaler only. Using un- suitable descaler and/or performing descaling incorrectly essary, remove coffee deposits with a toothpick (fig. 26B). may result in faults not covered by the manufacturer's 16.8 Cleaning the pre-ground coffee funnel guarantee. -
Page 15: Setting Water Hardness
11. Empty the container used to collect the rinsing water. Re- high move the water tank, replace the water softener filter (if removed previously), fill the tank up to the MAX level with cold water and insert in the appliance. The steam m a x i - light flashes. -
Page 16: Explanation Of Lights
20. EXPLANATION OF LIGHTS LIGHTS DISPLAYED POSSIBLE CAUSE REMEDY The steam/hot water dial must be turned Turn the steam/hot water dial (A21) FLASHING Insufficient water in the tank (A7) Fill the tank with water and/or insert it correctly, pushing it as far as it will go until it clicks into place. -
Page 17: Troubleshooting
LIGHTS DISPLAYED POSSIBLE CAUSE REMEDY The pre-ground coffee function has been Place pre-ground coffee in the funnel (fig. 17) or selected without placing any pre-ground deselect the "pre-ground" function. coffee in the funnel (A4) FLASHING The pre-ground coffee funnel (A4) is Empty the funnel with the help of a brush as de- clogged scribed in section “16.8 Cleaning the pre-ground... - Page 18 PROBLEM POSSIBLE CAUSE REMEDY The coffee is weak or not creamy enough. The coffee is ground too coarsely. Turn the grinding adjustment dial (A5) one click anticlockwise towards 1 while the coffee mill is in operation (fig. 13). Continue one click at a time until the coffee is made satisfactorily.


Need help?
Do you have a question about the ECAM23X.13 and is the answer not in the manual?
Questions and answers
Lights show that the coffee collecter needs to be in and the infused needs to be cleaned and inserted. I cleaned the infuser and reinstated it but the lights are still on. I have tried taking the infused out but it is stuck. Help!
If the lights still indicate that the coffee collector needs to be in and the infuser needs to be cleaned after cleaning and reinstalling the infuser on the DeLonghi ECAM23X.13, possible reasons include:
1. Incorrect Reinstallation: Ensure the infuser (A9) is properly inserted and locked into place.
2. Residue or Blockage: Check for coffee deposits or blockages in the infuser or surrounding areas.
3. Sensor Issues: The machine may not be detecting the infuser. Try reinserting it and ensuring all components are correctly positioned.
4. Reset Required: Turn off the machine, unplug it for a few minutes, then restart to reset any sensor errors.
If the issue persists, consult the troubleshooting section or contact customer service.
This answer is automatically generated