Table of Contents
Advertisement
CONTENTS
1. INTRODUCTION ..........................................7
1.1 Letters in brackets .........................................7
1.2 Troubleshooting and repairs ..........................7
2. DESCRIPTION.............................................7
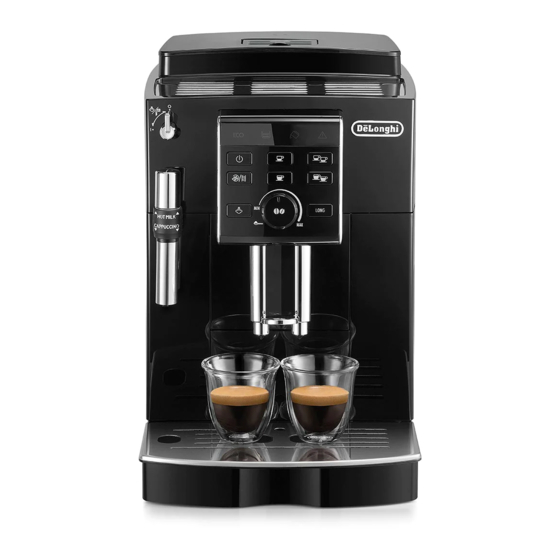
2.1 Description of the appliance .........................7
2.2 Description of lights ......................................7
2.3 Description of the control panel ....................7
2.4 Description of the accessories ........................7
2.5 Description of the milk container ..................7
3. SETTING UP THE APPLIANCE .......................8
4. TURNING THE APPLIANCE ON......................8
5. TURNING THE APPLIANCE OFF ....................8
6. SETTING WATER HARDNESS ........................8
6.1 Measuring water hardness ............................8
6.2 Setting water hardness .................................8
6.3 Default values (reset) ....................................9
7. MAKING COFFEE .........................................9
7.1 Selecting the coffee taste ..............................9
7.3 Adjusting the coffee mill ...............................9
7.4 Tips for a hotter coffee...................................9
7.5 Making coffee using coffee beans ...............10
COFFEES .................................................. 10
8.2 Adjusting the amount of froth .....................10
automatically ..............................................10
8.4
Cleaning the milk container after use .......11
9. HEATING WATER ...................................... 11
9.1 Delivering hot water ...................................11
BEVERAGES IN THE CUP ............................ 11
11. CLEANING ............................................... 11
11.1 Cleaning the machine .................................11
11.2 Cleaning the internal circuit ........................11
11.3 Cleaning the coffee grounds container ........12
11.5 Cleaning the inside of the machine .............12
11.6 Cleaning the water tank ..............................12
11.7 Cleaning the coffee spouts ..........................12
11.9 Cleaning the infuser ....................................12
11.10 Cleaning the milk container ........................13
11.11 Cleaning the hot water/steam nozzle ..........13
12. DESCALING .............................................. 13
13.1 Installing the filter ......................................14
14. TECHNICAL DATA ...................................... 15
14.1 Tips for Energy Saving .................................15
15. TROUBLESHOOTING ................................. 16
16. EXPLANATION OF LIGHTS .......................... 17
6
Advertisement
Table of Contents
Troubleshooting

Related Manuals for DeLonghi ECAM23.120.B


Summary of Contents for DeLonghi ECAM23.120.B
-
Page 1: Table Of Contents
CONTENTS 11.9 Cleaning the infuser ........12 11.10 Cleaning the milk container ......13 1. INTRODUCTION ..........7 11.11 Cleaning the hot water/steam nozzle ..13 1.1 Letters in brackets .........7 12. DESCALING ..........13 1.2 Troubleshooting and repairs ......7 13. WATER SOFTENER FILTER (D4, IF PRESENT) 14 2. -
Page 2: Introduction
1. INTRODUCTION : "Cappuccino" 1.1 Letters in brackets B10. : "Hot milk" The letters in brackets refer to the legend in the description of B11. : "Hot water" the appliance on pages 2-3. B12. : "See Instruction for Use" B13. : On: "Empty grounds container"... -
Page 3: Setting Up The Appliance
3. SETTING UP THE APPLIANCE is heating up and performing an automatic rinse cycle. By circulating hot water, the appliance heats both the boiler Please note! and the internal circuits. • The first time you use the appliance, rinse with hot water The appliance is ready when the main screen appears. -
Page 4: Default Values (Reset)
Correspondence Coffee selected Quantity in cup 2 cups or Turn dial Selected level indicator paper (ml) double quantity Soft water 40ml ESPRESSO Press Slightly hard 120ml E S P R E S S O water LUNGO Hard water 160ml LONG To deliver 2 cups of coffee or a double quantity of coffee, press Very hard water button (C4). -
Page 5: Making Coffee Using Coffee Beans
7.5 Making coffee using coffee beans 8. MAKING CAPPUCCINOS AND MILK-BASED COFFEES Important! Do not use caramelised or candied coffee beans as they could Please note! stick to the coffee mill and make it unusable. • To avoid milk with poor froth or large bubbles, always clean 1. -
Page 6: Cleaning The Milk Container After Use
10. PROGRAMMING THE QUANTITY OF ALL Please note! • If you want to interrupt preparation during delivery, press BEVERAGES IN THE CUP button. The appliance is programmed to deliver set quantities. To chan- • Do not leave the milk container out of the refrigerator for ge this quantity, proceed as follows: long periods. -
Page 7: Cleaning The Coffee Grounds Container
11.5 Cleaning the inside of the machine Please note: • After cleaning, it is normal for water to have collected in Danger of electric shock! the coffee grounds container (A15). Before cleaning internal parts, the machine must be turned off 11.3 Cleaning the coffee grounds container (see section “5. -
Page 8: Cleaning The Milk Container
Important! 5. Rinse inside the froth RINSE WITH WATER ONLY adjustment dial seat with NO WASHING UP LIQUID - NO DISHWASHER running water (fig. 34). Clean the infuser without using washing up liquid as it 6. Check that the intake tube could be damaged. -
Page 9: Water Softener Filter (D4, If Present)
3. Press the button (C6) to confirm. (To cancel, press 8. Place the container used to collect the descaler solution button corresponding to empty under the coffee spouts and hot water spout (fig. 38); 4. Empty the water tank (A11) completely and remove the 9. -
Page 10: Technical Data
0,5 L Please note Weight: 9.7 kg The filter lasts about two months if the appliance is used nor- Max. beans container capacity: 250 g max. mally. If the coffee machine is left unused with the filter instal- De'Longhi reserves the right to modify the technical specifica- led, it will last a maximum of 3 weeks. -
Page 11: Troubleshooting
15. TROUBLESHOOTING Below is a list of some of the possible malfunctions. If the problem cannot be resolved as described, contact customer services. PROBLEM POSSIBLE CAUSE SOLUTION The coffee is not hot. The cups were not preheated. Warm the cups by rinsing them with hot water (Ple- ase note: you can use the hot water function). -
Page 12: Explanation Of Lights
16. EXPLANATION OF LIGHTS LIGHT POSSIBLE CAUSE REMEDY The appliance is heating up or cooling Wait down. The grounds container (A15) is full. Empty the grounds container and drip tray (A12), clean and replace. Important: when removing the drip tray, the grounds container MUST be emptied, even if it contains few grounds. - Page 13 LIGHT POSSIBLE CAUSE REMEDY The infuser (A9) has not been re- Insert the infuser as described in section “11.9 placed after cleaning Cleaning the infuser” The grinding is too fine and the Repeat coffee delivery and turn the grin- coffee is delivered too slowly or ding adjustment dial (A1) (fig.
Need help?
Do you have a question about the ECAM23.120.B and is the answer not in the manual?
Questions and answers