Advertisement
Quick Links
1. Maintenance
1.1 General
Please follow the maintenance instructions.
1.2 Installation
Before installing the filter into the system, check
that the operating pressure of the system does
not exceed the permitted operating pressure of
the filter.
Refer to the type code label on the filter.
1.3 Commissioning
Check that the correct filter element is installed.
Install lid, screw in cover plate bolts alternately
(except RF 30 cover plate).
1.4 Maintenance Tools
Torque Value
Size
Nm [ft-lb]
30
Hand-tight
60/110
20 [15]
Hex 6.36 (1/4")
160/240
20 [15]
Hex 6.36 (1/4")
330
40 [29]
450/580
30 [22]
Torque Value
Size
Nm [ft-lb]
660
150 [110]
950/1300
200 [147]
2500/4000
150 [110]
5200
250 [184]
6500/15000
250 [184]
1.5 Torque Values
Type
Max. Torque Nm[ft-lb]
VR-clog ind
30 [22]
VM-clog ind
30 [22]
Oil Drain Plug
N/A
(RF30-1300)
Oil Drain Plug-G1
200 [148]
(RF2500-7800)
Do not Torque
Lid or end cover
(See 1.3 and 2.2)
FIL1610-1844 / 04.19
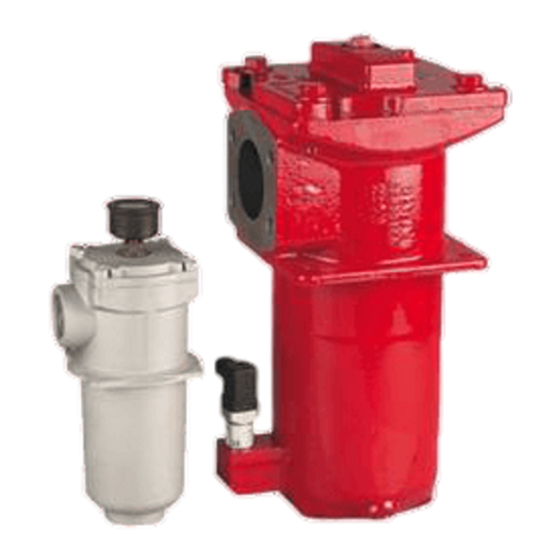
Filters
RF Series
Service and Parts
up to 3962 gpm (15000 l/min), up to 360 psi (25 bar)
1.6 Torque Values for Reservoir
Mounting Bolts
Size
RF 30
RF 60/110
RF 160/240
RF 330
RF 660
RF 950/1300
2. Element Replacement
2.1 Element Removal
1. Switch off hydraulic system and release filter
pressure.
Int. hex.
Caution: when installed inline
Allen key
before opening the filter, slowly open the
vent screw and release pressure (release
pressure in the tank, if any).
2. Size 30:
Unscrew cover plate manually
Hex 8 (5/16")
Size 60-330 & 2500-15000:
Hex 8
Loosen cover plate bolts and lift off the cover
plate.
Size 450 and 580:
Ext. hex.
Loosen cover plate bolts. Screw two of the
bolts into the tapped extraction holes in
Hex 24
the cover plate, so that the cover plate is
Hex 30
released from its seat.
Hex 24
Lift off the cover plate, with the filter element
Hex 30
attached, from the housing.
Hex 36
Size 660-1300:
Unscrew cover plate bolts by approx. 2 turns
(do not need to remove completely). Turn
cover plate clockwise until it can be lifted off
by holding near the bolts (bayonet fitting).
3. Pull out filter element (with contamination
retainer, if present) by the handle.
Size 450 and 580:
Remove filter element from cover plate by
turning (bayonet fitting).
Then unscrew bolts from extraction holes in
cover plate.
4. Examine element surface for dirt residues
and larger particles since these can be an
indication of damage to components.
5. Remove contamination retainer (if present)
by turning counter-clockwise – bayonet
fitting.
6. Replace or clean filter element(s) (only W/HC
7. Clean housing, cover plate and
Torque Nm
Bolt
[ft-lb]
Size
8. Examine filter, especially sealing surfaces,
M4
1.5 [1.1]
9. Check O-rings – and replace if necessary
M5
5 [3.7]
M6
8 [6]
2.2 Element Installation
M8
20 [15]
1. Lubricate the sealing surfaces on the filter
20 [15]
M12
M16
25 [19]
2. When installing a new filter element, check that
3. If present, install the contamination retainer
4. Place filter element(s) carefully on to the
5. Size 30:
6. Switch on hydraulic system and vent filter at a
7. Check filter for leakage.
NOTE:
Contamination or incomplete pressure release
on disassembly can lead to seizing of the bowl
thread.
Filter elements which cannot be cleaned
must be disposed of in accordance with
environmental protection regulations.
and V elements can be cleaned).
contamination retainer.
for mechanical damage.
housing and cover plate, as well as the O-ring,
with clean operating fluid.
the designation corresponds to that of the old
element.
onto the new or cleaned filter element by
turning clockwise.
element nozzle in the housing.
Size 450 and 580:
Push filter element onto the cover plate and
turn to secure (bayonet fitting).
Place cover plate with filter element into the
housing. In so doing, the filter element will
locate automatically in the element nozzle in
the housing.
Replace cover plate and screw in manually.
Size 60-330 and 2500-15000:
Replace cover plate and screw in cover plate
bolts by hand; then tighten bolts alternately.
Size 450 and 580:
Screw in cover plate bolts by hand; then
tighten bolts alternately.
Size 660-1300:
Replace cover plate in correct position (dowel
pin in the housing must line up with groove
in cover plate) and turn counter-clockwise
as far as it will go. Tighten cover plate bolts
alternately.
suitable point in the system.
Advertisement

Related Manuals for HYDAC International RF Series


Summary of Contents for HYDAC International RF Series
- Page 1 Filters RF Series Service and Parts up to 3962 gpm (15000 l/min), up to 360 psi (25 bar) 1. Maintenance 1.6 Torque Values for Reservoir 6. Replace or clean filter element(s) (only W/HC and V elements can be cleaned). Mounting Bolts 7.
-
Page 2: Filter Maintenance
FILTER MAINTENANCE 3. Spare Parts 3.1 RF 30-1300 2.2 / 3.3 1.2 / 3.1 Item Consists Designation RF 30 B B RF 60 D C RF 110 D C RF 160 D E RF 240 D E Filter element see Point 4. Replacement elements Filter element 0030 R... - Page 3 FILTER MAINTENANCE 3.2 RF 450-580 2.2 / 3.3 2.3 / 3.4 1.2 / 3.1 Item Consists Designation RF 450 C L RF 580 C L Filter element see Point 4. Replacement elements Qty. and type of element 0450 R... 0580 R... O-ring 48 x 3 48 x 3...
- Page 4 FILTER MAINTENANCE 3.3 RF 2500-15000 2.2 / 3.3 1.2 / 3.1 Item Con- Designation RF 2500 B R RF 2500 B U RF 4000 B U RF 4000 B V RF 5200 B U RF 5200 B V sists Filter element see Point 4.
- Page 5 FILTER MAINTENANCE 4. Replacement Element Model Code 0330 R 010 ON / V B6 Size 0030, 0060, 0110, 0160, 0240, 0330, 0660, 0950, 1300 Filtration Rating (micron) 3, 5, 10, 15, 20 = ON 10 = BN4AM 3, 5, 10, = ECON2 40 = AM 100,...
-
Page 6: Maintenance Instructions
FILTER MAINTENANCE 6. Maintenance Instructions 6.2 Maintenance, General This section describes maintenance work which must be carried out periodically. The operational safety and life expectancy of the filter, and 6.1 User Instructions for Filters whether it is ready for use, depend to a large extent on regular and careful maintenance. - Page 7 FILTER MAINTENANCE Notes FIL1610-1844 / 04.19...
- Page 8 Montreal, Québec, Canada J2M 1K9 Edmonton, Alberta, Canada T6E 6W2 +1.905.714.9322 +1.877.539.3388 +1.780.484.4228 Mexico www.HYDACmex.com HYDAC INTERNATIONAL SA de CV Calle Alfredo A Nobel No 35 Col Puente de Vigas Tlalnepantla, Edo Mexico CP 54090 Mexico +011.52.55.4777.1262 © Copyright 2019 HYDAC TECHNOLOGY CORPORATION • Brochure - Service RF...