Table of Contents
Advertisement
Quick Links
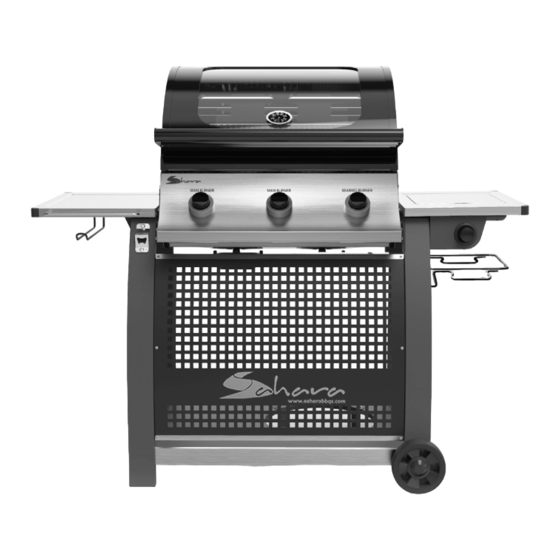
Photograph is not to scale. Specification
subject to change without prior notice.
FOR YOUR SAFETY
IF YOU SMELL GAS:
1. Shut off gas to the appliance.
2. Extinguish any open flame.
3. Open barbecue lid or hood.
4. If odour continues, discontinue use and contact your local dealer.
S375 Barbecue
• Use outdoors only.
• Read the instructions before using the appliance. Failure to follow
instructions could result in death, serious bodily injury, and/or
property loss.
• WARNING: accessible parts may be very hot. Keep young children
away.
• Do not move the appliance during use.
• Turn off the gas supply at the gas cylinder after use.
• Do not modify the appliance. Misuse or failure to follow the instructions
may be dangerous and will invalidate your warranty. This does not
affect your statutory rights.
• Retain these instructions for future reference.
• Leak test your barbecue annually. Check the hose connections are
tight and leak test each time you reconnect the gas bottle.
FOR YOUR SAFETY
1. Do not store or use petrol or other flammable vapours or
liquids in the vicinity of this or any other appliance.
2. A gas bottle not connected for use shall not be stored in the
vicinity of this or any other appliance.
681A
Advertisement
Table of Contents

Related Manuals for Sahara S375


Summary of Contents for Sahara S375
- Page 1 S375 Barbecue 681A Photograph is not to scale. Specification subject to change without prior notice. • Use outdoors only. • Read the instructions before using the appliance. Failure to follow instructions could result in death, serious bodily injury, and/or property loss.
-
Page 3: Parts Supplied
Parts Supplied Ref Description Illustration Ref Description Illustration Large Left Wheel Side Tray Right Side Left Side Tray Frame Handle Right Side Frame Gas Hose and Regulator Base Panel Front Panel Brackets Base Trim Front Panel Cylinder Large Brackets Drip Tray Grease Cup Bracket Sink... -
Page 4: Tools Required For Assembly
Fixings Supplied Ref Description Illustration Ref Description Illustration M6x12mm M4x10mm Hex Bolt Bolt M6x80mm M6x45mm Bolt Bolt M8x23mm Spacer Bolt NOTE: Fixings not shown to actual size. Tools Required For Assembly • Philips Head Screwdriver (provided) • Ball head hexagon wrench (provided) •... -
Page 5: Assembly Step
Assembly Step 1 Base Trim M6 x 12 Hex Bolt Left Side Right Side Large Wheel x2 Base Panel (ref:A) x6 Frame x1 Frame x1 Assemble barbecue frame as shown below, using 6 of the M6 x 12 Hex Bolts (ref:A) to attach the side frames and base trim to the base panel. - Page 6 Assembly Step 2 Cylinder Brackets x2 M6 x 12 Hex Bolt (ref:A) x5 Fit the two cylinder brackets using 5 of the M6 x 12 Hex Bolts (ref:A). Page 6...
- Page 7 Assembly Step 3 M6 x 80mm Bolt Spacer Sink (ref:C) x4 (ref:B) x4 Lay the assembled frame on a clean surface on the ground and fit the barbecue sink to the frame as shown using 4 of the M6 x 80 Bolts (ref:B) and 4 spacers (ref:C).
- Page 8 Assembly Step 4 Searing Grill x1 Vapourising Bars x2 Cooking Grill x1 1. Place the vapourising bars into the barbecue sink as shown below. 2. Place the searing grill and cooking grill into the barbecue sink as shown. Note: Ensure that the cooking grill is positioned directly above the vapourising bars.
- Page 9 Assembly Step 5 Barbecue Lid x1 Warming Rack x1 1. Position the barbecue lid onto the barbecue sink and align the brackets. 2. Secure on either side of the hood using the pre-fitted bolts (M6x12mm Hex Bolt). 3. Place the warming rack into position as shown below. Warming Rack Page 9...
- Page 10 Assembly Step 6 Left Side Tray x1 Secure left side tray onto the side frame using the 2 pre-fitted M6 wing bolts and nuts like below. Note: side tray can be folded down for easy storage. Page 10...
- Page 11 Assembly Step 7 Right Side Handle M6 x 45 Bolt M6 x 12 Hex Bolt Tray x1 (ref:E) x4 (ref:A) x4 Fit the right side tray to the frame with 4 x M6 x 45 bolts (ref:E), screwing in from the underside of the frame as shown in Fig. 2. Fit the handle to the hood using 4 of the M6 x 12 Hex Bolts.
- Page 12 Assembly Step 8 Gas Hose and Regulator On the underside of the side shelf, locate the flex tube and bend it down to connect it to the BBQ sink. Tighten the nut with the 19mm head of the 19-22mm spanner (provided) and leak test at both connections.
- Page 13 Assembly Step 9 Grease Cup Bracket Grease Cup M6 x 12 Hex Bolt (ref:A) x1 Front Panel x1 Front Panel Large Drip Tray x1 M4x10 Bolt Brackets x2 (ref:D) x12 1. Secure the front panel brackets to the side frames using 6 of the M4x10 Bolts (ref:D).
- Page 14 Assembly Step 10 M4x10 Bolt M8x23 Bolt Towel rail x1 Bin Bag Wire x1 (ref:D) x1 (ref:F) x2 1. Position the towel rail as shown on the left side tray and secure with one M4x10 Bolt (ref:D). 2. Fit the bin bag wire as shown using two of the M8x23 bolts (ref: F).
-
Page 15: Leak Testing
Leak Testing • IMPORTANT – PERFORM LEAK TEST BEFORE USE • NEVER use an open flame to test for leaks at anytime, DO NOT IGNITE THE BARBECUE DURING THE LEAK TESTING. • To be performed in a well ventilated area. •... -
Page 16: Use Instructions
Connecting to the Cylinder • Confirm all barbecue control knobs are in the off position. • Connect the regulator to the gas bottle according to your regulator and bottle dealer’s instructions. Use Instructions Before proceeding, make certain that you understand the WARNINGS section of this manual. •... - Page 17 Care and Maintenance • Regularly clean your barbecue between uses and especially after extended periods of storage. • Ensure the barbecue and it’s components are sufficiently cool before cleaning. • Do not leave the barbecue exposed to outside weather conditions or stored in damp, moist areas. •...
- Page 18 Warnings This product is for OUTDOOR USE ONLY. • Important – Ensure the barbecue is positioned on flat level ground to aid with fat/grease run off. • Important – LEAK TEST THE BARBECUE WHEN FULLY ASSEMBLED BEFORE FIRST USE. In addition, always leak test the unit –...
- Page 19 Food Cooking Information Please read and follow this advice when cooking on your barbecue. • ALWAYS wash your hands before or after handling uncooked meat and before eating. • ALWAYS keep raw meat away from cooked meat and other foods. •...
-
Page 20: Troubleshooting
BARBECUE GUARANTEE This barbecue is made by Universal Innovations. It is made to an exacting quality standard and is covered by the following guarantee. The product has a 10 year limited warranty, regarding proper use. Sink + Hood: 10 years (no rust through/burn through/excludes fading/colour change) Cooking grill: 10 years (no rust through/burn through/excludes fading/colour change) Burner/Vaporising bar/Warming rack: 2 years (no rust through/burn through) All other parts: 2 years...
Need help?
Do you have a question about the S375 and is the answer not in the manual?
Questions and answers
The brass cap for which the side burner to connect won't come off.. Is it meant to pop off or be screwed off with the spanner?