Advertisement
Quick Links
Advertisement

Related Manuals for Belling BRHCP9BLB


Summary of Contents for Belling BRHCP9BLB
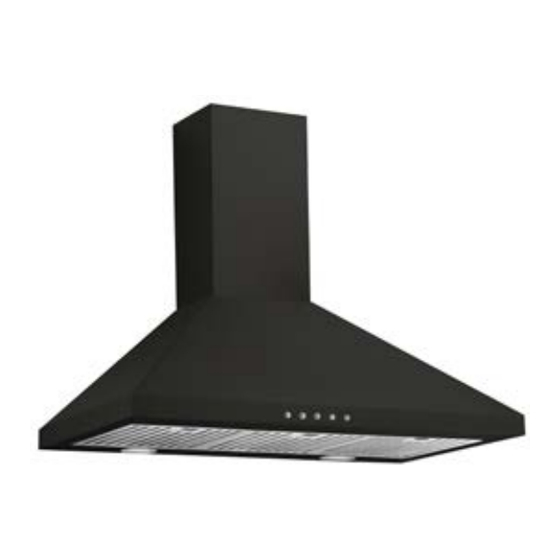
- Page 1 Cooker Hood Instruction Manual BRHCP9BLB BRHCP6BLB...
-
Page 2: Table Of Contents
Content Safety instructions Installation Start using your cooker hood Troubleshooting Maintenance and cleaning Environment protection... -
Page 3: Safety Instructions
SAFETY INSTRUCTIONS his manual explains the proper installation and use of your cooker hood, please read it carefully before using even if you are familiar with the product. The manual should be kept in a safe place for future reference. These instructions shall also be available in an alternative format, e.g. - Page 4 ● Always to do: ll installation work must be carried out by a competent person or qualified ● lways put lids on pots and pans when electrician. cooking on a gas cooker. ● lease dispose of the packing material ● hen in extraction mode, air in the room carefully.
- Page 5 ● lean your appliance periodically by following the method given in the chapter MAINTENANCE. ● or safety reason, please use only the same size of fixing or mounting screw ● arning: Before obtaining access to which are recommended in this terminals, all supply circuits must be instruction manual.
-
Page 6: Installation
INSTALLATION (VENT OUTSIDE) MOUNTING OF THE V-FLAP If the cooker hood does not have an assembled V-flap 1, you should mount the half-parts to its body.The images only show an example of how to mount the V-flap,the outlet may be various according to different models and configuration. - Page 7 1. Before installation, turn the unit off and unplug it from the outlet. 2. The cooker hood should be placed at a distance of 65~75cm above the cooking surface for best effect. 3. Install the hook and inside chimney bracket once the installation height is fixed, and keep it in line.
- Page 8 5. Install the expansion pipe onto the hood body and fix it with cable tie.See pic 3. 6. Fix the outside chimney bracket on the outside chimney, and be sure that the inside chimney can be adjusted freely.See pic 4. 7.
- Page 9 8. Adjust the height of the inside chimney to the position of the inside chimney bracket and fix it on with screws. See pic 6. 9. Before usage, read all the instructions and make sure that the power rating of the cooker hood matches the power rating of the supply.
- Page 10 •Ensure the expansion pipe selected for installation complies with relevant standards and is fire retardant. For safety reason, please use only the same size of fixing or mounting screw which are recommended in this instruction manual. Failure to install the screws or fixing device in accordance with WARNING: these instructions may result in electrical hazards.
-
Page 11: Start Using Your Cooker Hood
Start Using Your Cooker Hood Electronic button 1. Power on: Press power button one time, its indicator light will be lit, the hood works at low speed, indicator light of low speed will be bright Power off: Press power button again to close it, indicator light will off. All the function operation of the hood will be closed, the hood enters into standby mode. -
Page 12: Troubleshooting
TROUBLESHOOTING Fault Possible Cause Solution Fan switch turned off Select a fan switch position. Light on, but motor Fan switch failed Contact service center. does not work Motor failed Contact service center. House fuses blown Reset/Replace fuses. Light does not work, Refit cord to power outlet. -
Page 13: Maintenance And Cleaning
MAINTENANCE AND CLEANING Caution • Before maintenance or cleaning is carried out, the cooker hood should be disconnected from the main power supply. Ensure that the cooker hood is switched off at the wall socket and the plug removed. • External surfaces are susceptible to scratches and abrasions, so please follow the cleaning instructions to ensure the best possible result is achieved without damage. - Page 14 potentially remove any printing of artwork on the control panel and will void manufactures warrantee. GREASE MESH FILTERS The mesh filters can be cleaned by hand. Soak them for about 3 minute in water with a grease-loosening detergent then brush it gently with a soft brush. Please do not apply too much pressure, avoid to damage it .
- Page 15 3. Turn the carbon filter on both side of the motor anti-clockwise. Replace the carbon filters with the new carbon filters. 4. Place the mesh filter. 5. Connect the power supply to the wall socket. NOTE Make sure the filter is securely locked. ...
- Page 16 4. Replace with same type of bulb (LED 1.5W Max) Note: Light replacement should carried out by qualified service personnel only. • ILCOS D code for this lamp is: DSR-1.5/65-S-64 – LED modules –round lamp – Max wattage: 1.5 W –...
-
Page 17: Environment Protection
ENVIRONMENTAL PROTECTION This product is marked with the symbol on the selective sorting of waste electronic equipment. This means that this product must not be disposed of with household waste. It should be recycled or dismantled to minimize impacts on the environment, electrical and electronic products are potentially dangerous for the environment and human health due to the presence of hazardous substances.
Need help?
Do you have a question about the BRHCP9BLB and is the answer not in the manual?
Questions and answers