Table of Contents
Advertisement
Quick Links
Advertisement
Table of Contents

Related Manuals for BluDot Garden Party


Summary of Contents for BluDot Garden Party
- Page 1 A S S E M B LY N O T E S | R E V 0 3 N E E D A H A N D ? @ B L U D O T Contact us at service@bludot.com or We design all our pieces in our Minneapolis studio. Follow 844.425.8368 for assistance.
-
Page 2: Table Of Contents
Contents PA G E Garden Party Garment Rack Parts & Hardware Step 01 AT TA C H T H E B A S E T O T H E G A R M E N T R A C K U P R I G H T S . -
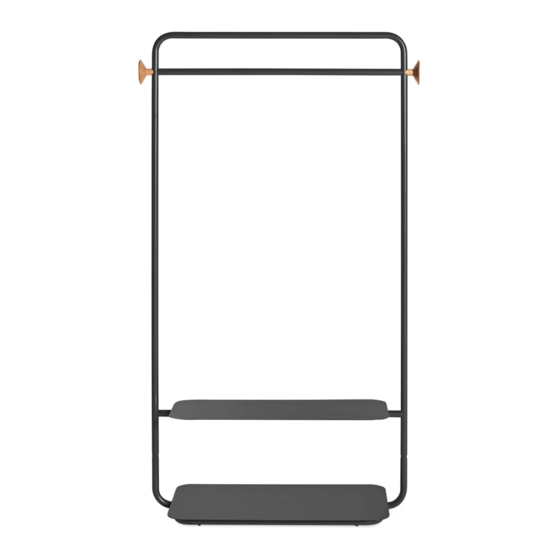
Page 3: Garden Party Garment Rack
Garden Party Garment Rack D E S I G N E D I N 2 0 2 1 A S S E M B LY N O T E S | R E V 0 3 N E E D A H A N D ? @ B L U D O T Contact us at service@bludot.com or... -
Page 4: Parts & Hardware 5 Step
Parts & Hardware Pt. 1042b Pt. 1051 Pt. 1021 Pt. 2025 Pt. 4024 Pt. 9030 Pt. 9026 Wood Hook Top Tube Hang Tube Base Shelf Garment Upright * Only two of Pt. 1021 and no Pt. 2025 will be used for this configuration. 4 | 8 4 4 . -
Page 5: At Ta C H T H E B A S E T O T H E G A R M E N T R A C K U P R I G H T S
Step 01 AT TA C H T H E B A S E T O T H E G A R M E N T R A C K U P R I G H T S . Be sure to rest unit on a soft surface such as a rug or carpet. -
Page 6: At Ta C H T H E W O O D H O O K S
Step 02 AT TA C H T H E W O O D H O O K S . Use the provided hardware to attach the wood hooks to the uprights as shown. Woo d H oo k x 2 PT. -
Page 7: At Ta C H T H E T O P A N D H A N G I N G T U B E
Step 03 AT TA C H T H E T O P A N D H A N G I N G T U B E . Please have two people perform this step. A) Slot both tubes into the fixed upright and attach one of the bolts. -
Page 8: At Ta C H T H E S H E L F
Step 04 AT TA C H T H E S H E L F. Attach the shelf as shown using the provided hardware. PT. 10 5 1 x 2 PT. 9 03 0 x 1 8 | 8 4 4 . 4 2 5 . 8 3 6 8 G A R D E N P A R T Y G A R M E N T R A C K... -
Page 9: L E V E L T H E G A R M E N T R A C K
Step 05 L E V E L T H E G A R M E N T R A C K . If necessary, level the base by twisting the adjustable glides underneath. A S S E M B LY N O T E S S E R V I C E @ B L U D O T. -
Page 10: Garden Party Shelving
A S S E M B LY N O T E S | R E V 0 3 N E E D A H A N D ? @ B L U D O T Contact us at service@bludot.com or We design all our pieces in our Minneapolis studio. Follow 844.425.8368 for assistance. -
Page 11: Parts & Hardware 12 Step
Parts & Hardware Pt. 1042b Pt. 1051 Pt. 1021 Pt. 2025 Pt. 4024 Pt. 9030 Pt. 9026 Wood Hook Narrow Top Tube Narrow Base Narrow Shelf Shelf Upright * Only two of Pt. 1021 and no Pt. 2025 will be used for this configuration. A S S E M B LY N O T E S S E R V I C E @ B L U D O T. -
Page 12: At Ta C H N A R R O W B A S E T O S H E L F U P R I G H T S
Step 01 AT TA C H N A R R O W B A S E T O S H E L F U P R I G H T S . Be sure to rest unit on a soft surface such as a rug or carpet. -
Page 13: At Ta C H T H E U P P E R B A R A N D S H E L F
Step 02 AT TA C H T H E U P P E R B A R A N D S H E L F. A) Slide the upper bar into the top of each upright. PT. 10 5 1 x 2 PT. -
Page 14: At Ta C H T H E R E M A I N I N G S H E Lv E S
Step 03 AT TA C H T H E R E M A I N I N G S H E LV E S . Using the provided hardware, attach the three remaining shelves as shown. P T. 1 0 51 X 6 P T. -
Page 15: At Ta C H T H E W O O D H O O K S
Step 04 AT TA C H T H E W O O D H O O K S . Use the provided hardware to attach the wood hooks to the outer uprights as shown. Wo o d Ho o k x 2 P T. -
Page 16: L E V E L T H E B A S E
Step 05 L E V E L T H E B A S E . If necessary, level the bases by twisting the adjustable glides on the bottom of the base. 1 6 | 8 4 4 . 4 2 5 . 8 3 6 8 G A R D E N P A R T Y S H E L V I N G... -
Page 17: Garden Party Wardrobe System
Garden Party Wardrobe System D E S I G N E D I N 2 0 2 1 A S S E M B LY N O T E S | R E V 0 3 N E E D A H A N D ? @ B L U D O T Contact us at service@bludot.com or... -
Page 18: Parts & Hardware
Parts & Hardware Pt. 1042b Pt. 1051 Pt. 2025 Pt. 1021 Pt. 4024 Pt. 9030 Pt. 9026 Wood Hook Narrow Top Tube Narrow Base Narrow Shelf Shelf Upright Garment Rack Upright Wide Base Wide Shelf Wide Top Tube Hanging Tube 1 8 | 8 4 4 . -
Page 19: Step 01
Step 01 AT TA C H N A R R O W B A S E T O S H E L F U P R I G H T S . Be sure to rest unit on a soft surface such as a rug or carpet. -
Page 20: At Ta C H T H E U P P E R B A R A N D S H E L F
Step 02 AT TA C H T H E U P P E R B A R A N D S H E L F. A) Slide the upper bar into the top of each upright. Loosely attach the provided PT. -
Page 21: At Ta C H T H E R E M A I N I N G S H E Lv E S
Step 03 AT TA C H T H E R E M A I N I N G S H E LV E S . Using the provided hardware, attach the three remaining shelves as shown. P T. 10 5 1 X 6 PT. -
Page 22: At Ta C H T H E W I D E B A S E T O T H E G A R M E N T R A C K U P R I G H T S
Step 04 AT TA C H T H E W I D E B A S E T O T H E G A R M E N T R A C K U P R I G H T S . Be sure to rest unit on a soft surface such PT. -
Page 23: G A N G U N I T S T O G E T H E R
Step 05 G A N G U N I T S T O G E T H E R . Stand both units upright. Gang the units together by linking the uprights as shown using the provided hardware. P T. 90 2 6 X 1 P T. - Page 24 Step 06 AT TA C H T H E W O O D H O O K S . Use the provided hardware to attach the wood hooks to the outer uprights as shown. Wo o d Ho o k x 2 PT.
-
Page 25: Step 07
Step 07 AT TA C H T H E T O P A N D H A N G I N G T U B E . Please have two people perform this step. A) Slot both tubes into the fixed upright and attach one of the bolts. -
Page 26: At Ta C H T H E W I D E S H E L F
Step 08 AT TA C H T H E W I D E S H E L F. Attach the wide shelf as shown using the provided hardware. PT. 10 5 1 x 2 PT. 9 03 0 x 1 2 6 | 8 4 4 . -
Page 27: L E V E L T H E W A R D R O B E S Y S T E M
Step 09 L E V E L T H E W A R D R O B E S Y S T E M . If necessary, level the bases by twisting the adjustable glides in the bottom of the wardrobe system. - Page 28 Additional Information C LEAN Clean with a slightly damp, soft cloth. To remove dirt and fingerprints, use a quality cleaner formulated for wood and metal furniture. Wipe completely dry with a soft cloth in the direction of the wood grain. B L U D O T D E S I G N &...
Need help?
Do you have a question about the Garden Party and is the answer not in the manual?
Questions and answers