Advertisement
Quick Links
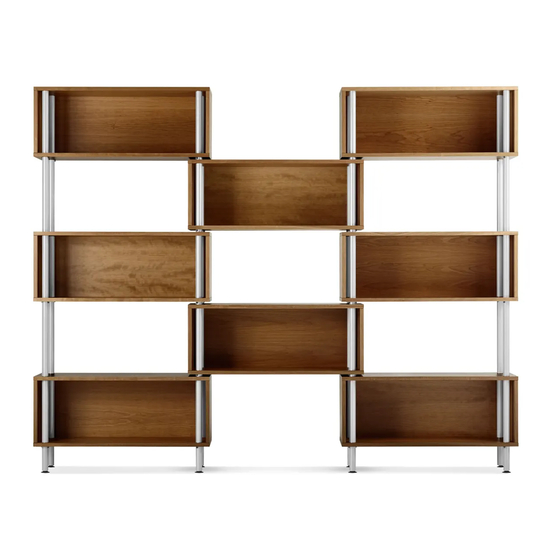
Chicago 8 Box
DESI GNED IN 19 97
AS SEM BLY N OT ES | R E V 00
S TA R T A B E T T E R C O L L E C T I O N .
Sometimes, good design is about what's not there. The Chicago series
takes advantage of negative space, creating smart, elegant storage.
N E E D A H A N D ?
Contact us at service@bludot.com or
844.425.8368 for assistance.
Advertisement

Related Manuals for BluDot Chicago 8 Box


Summary of Contents for BluDot Chicago 8 Box
- Page 1 S TA R T A B E T T E R C O L L E C T I O N . N E E D A H A N D ? Contact us at service@bludot.com or Sometimes, good design is about what’s not there. The Chicago series 844.425.8368 for assistance.
-
Page 2: Parts & Hardware
Parts & Hardware Pt. 8002 Pt. 5001 Pt. 1001 Pt. 8001 8041 Anti-tip Bracket Pt. 5005 Pt. 5002 Pt. 1217 Pt. 8041 8042 Anti-tip Strap Pt. 1218 Pt. 8042 3 Hole Post 5 Hole Post Back Panel Horizontal Panel Side Panel 1 | 8 4 4 . -
Page 3: How To Use The Cam Lock System
How to use the cam lock system Note direction of cam arrow. Turn cam clockwise 1/2 turn or until tight. Note direction of cam arrow. A S S E M B L Y N O T E S S E R V I C E @ B L U D O T . C O M | 2... - Page 4 Step 01 B E G I N A S S E M B L I N G C A S E . Attach side panels to horizontal panel as shown using the provided hardware. Be sure to align grooves on horizontal panel and side panels. Refer to page 2 on how to use the cam lock system.
- Page 5 Step 02 I N S E R T B A C K PA N E L . Insert back panel into grooves in case. Step 03 F I N I S H A S S E M B L I N G C A S E . Finish assembling the case as shown.
- Page 6 Step 04 A S S E M B L I N G T H E P O S T S . Assemble the posts as shown using the provided hardware. Repeat step 04 for remaining posts. 5 Hole Post 3 Hole Post PT.
- Page 7 Step 05 I N S TA L L I N G T H E P O S T S . Insert post as shown. Step 06 L E V E L T H E C A S E . Level the case as shown. Turn to level A S S E M B L Y N O T E S S E R V I C E @ B L U D O T .
- Page 8 Step 07 AT TA C H I N G T H E C A S E S . Attach the cases to the posts as shown using the provided hardware. PT. 8 00 1 X 4 P T. 10 01 X 8 7 | 8 4 4 .
- Page 9 Step 08 AT TA C H I N G T H E C A S E S . Attach the cases to the posts as shown using the provided hardware. PT. 80 0 1 X 8 PT. 1 0 01 X 1 6 A S S E M B L Y N O T E S S E R V I C E @ B L U D O T .
- Page 10 Step 09 AT TA C H I N G T H E C A S E S . Attach the cases to the posts as shown using the provided hardware. PT. 8 00 1 X 4 P T. 10 01 X 8 9 | 8 4 4 .
- Page 11 Step 10 AT TA C H I N G T H E C A S E S . Attach the cases to the posts as shown using the provided hardware. PT. 80 0 1 X 8 PT. 1 0 01 X 1 6 A S S E M B L Y N O T E S S E R V I C E @ B L U D O T .
- Page 12 Step 11 AT TA C H A N T I -T I P B R A C K E T T O T H E W A L L . Install anti-tip bracket to wall stud 1-inch below case top panel height. 1”...
- Page 13 Step 12 I N S TA L L A N T I -T I P B R A C K E T T O C A S E . Bracket must be installed to top panel of case. In order to prevent damage, it is recommended that 3/32”...
- Page 14 Step 13 S E C U R E T H E C A S E . Install and tighten the strap prior to using the product. 8042 Anti-tip Strap PT. 8 04 2 X 2 13 | 8 4 4 . 4 2 5 . 8 3 6 8 C H I C A G O 8 B O X...
-
Page 15: Additional Information
Additional Information C LEAN Clean with a slightly damp, soft cloth. To remove dirt and fingerprints, use a quality cleaner formulate for wood furniture. Wipe completely dry with a soft cloth in the direction of the wood grain. B L U D O T D E S I G N & M A N U F A C T U R I N G , I N C . D E S I G N E D I N M I N N E A P O L I S , M N... - Page 16 B L U D O T D E S I G N & M A N U F A C T U R I N G , I N C . D E S I G N E D I N M I N N E A P O L I S , M N...
Need help?
Do you have a question about the Chicago 8 Box and is the answer not in the manual?
Questions and answers