Table of Contents
Advertisement
Quick Links
Advertisement
Table of Contents

Related Manuals for Ergo quest 1.5


Summary of Contents for Ergo quest 1.5
- Page 1 OWNER'S MANUAL...
-
Page 2: Table Of Contents
table of contents Safety Precautions and Usage Statements ................1-3 Parts List . -
Page 3: Safety Precautions And Usage Statements
If the plug does not fit your outlet, contact a qualified electrician to install a Ergo adjustable bed bases are designed solely for in-home use. This base was suitable outlet. Unauthorized modification or failure to use a wall outlet or surge not designed as a hospital bed and is not designed to meet hospital standards. - Page 4 Normal operating use is defined as the following: All Ergo adjustable foundations, depending on make and model, are designed When operating a “paired” split base setup there may be a time latency up to -Adjustable foundation is to be operated with a mattress and load.
- Page 5 safety precautions and usage statements PRODUCT RATINGS: The lift motors are not designed to operate continuously for more than [2] minutes in an [18] minute time period or approximately 10% duty cycle. Attempting to circumvent or exceed this rating will shorten the life expectancy of the product and may void the warranty.
-
Page 6: Parts List
parts list Before discarding the packing materials - ensure all the parts are accounted for. All electronics and components that need to be installed are located in boxes under the base or attached to the frame. Wireless Remote Control (1) Mattress Retainer Bar (1) * Legs (6) Power Cord (1) -
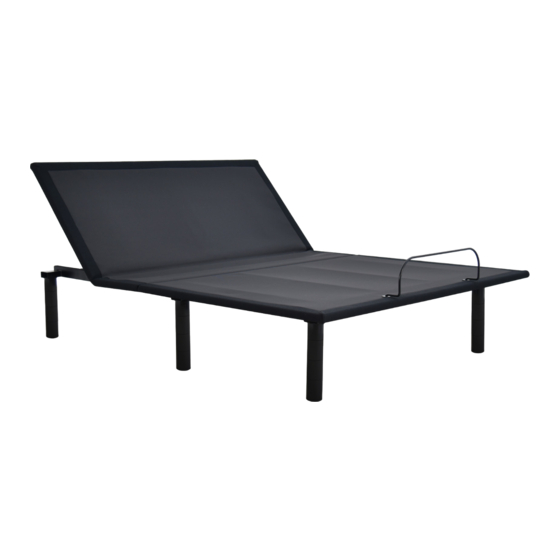
Page 7: Base And Remote Overview
base and remote overview Head Motor Control Box Lifts head section Lowers head section... -
Page 8: Quick Reference Guide
quick reference guide Not to scale. For illustration purposes only. Read all instructions before beginning installation. ELECTRONICS OVERVIEW Remote Emergency Battery Backup Strap Foot Motor Head Motor Control Power Cord Input Cord Power Supply If installing a split unit, see pages 10-11. -
Page 9: Installation Guide
installation guide Always use two people when setting up the base. With the help of an able-bodied assistant, place the carton on the floor with the arrows pointing downwards. Remove the binding straps and packing materials, making sure not to puncture the box with any sharp objects. - Page 10 installation guide Test remote functions & install mattress retainer bar. • Place each end of the mattress retainer bar into the inserts at the foot of the base until the retainer bar is secured in place. • Quickly test remote functions to verify proper setup and return the base to a flat position before placing the mattress on top.
-
Page 11: Pairing The Remote Control
pairing remote control The original remote that comes in the box is already paired to the adjustable base. No further action is required. In the event that the remote is not paired with the base, follow the steps below. Unplug the Power Cord from your power outlet. Wait 1 minute, then plug Test all remote functions. -
Page 12: Connecting Strap
connecting strap (not included) If a split setup is being installed, optional plastic connecting straps can be used to help secure the bases together. To purchase optional accessories, please call 1-844-534-3676. With the bases in their desired Re-tighten legs. Do not over tighten. Use the remaining strap and repeat location, slightly loosen both legs to on other end of the base. -
Page 13: Syncing Two Bases
syncing two bases (optional) A Sync Cord is included with the base. Not available on Queen size bases. The Sync Cord connects the two control boxes to a single remote for the synchronization of two bases. This process is most commonly used for syncing two connected TXL bases. Unplug bases from power source. -
Page 14: Headboard Brackets
headboard bracket installation guide (optional) Headboard Brackets are an optional accessory and are not included. A hex key is included with the accessory kit to complete installation. Measure the distance between the mounting holes on the Align the hole in the bracket to the brass sleeve into which the leg headboard and install the T-Bracket to accommodate the threads. -
Page 15: Emergency Battery Backup Strap
emergency battery backup strap For emergency use only, in case of a power outage. Batteries are not to be used for normal operation of the bed. Disconnect the Power Supply from the Input Cord. Connect the end of the Battery Backup Strap to the input cord that is attached to the control box. -
Page 16: Troubleshooting
troubleshooting If one or more functions on the bed base have stopped operating: • Check under the bed base to verify that the wired connections are secure and that there are no cords or bedding obstructing the movement of the base. •... -
Page 17: Notes
notes... - Page 18 Nationwide Customer Service ©2021 Ergomotion Inc Phone 1.844.534.3676 1.805.979.9399 Email info@ergomotion.com www.ergomotion.com Serial Number: 35013953...
Need help?
Do you have a question about the quest 1.5 and is the answer not in the manual?
Questions and answers