Advertisement
Purpose
This manual contains information about the solar energy components and their installation. Please make sure you read and fully understand this manual before purchasing and installing the panels to ensure that you use them correctly.
Any incorrect usage may result in severe injury to the user or others, damage to the product or loss of property.
If you have any questions, please do not hesitate to contact us for further clarification and explanation. When installing modules, installers should follow all safety precautions specified in this manual and any local regulations. Before installing solar photovoltaic systems, installers should be familiar with the mechanical and electrical requirements of such systems.
After reading this manual, keep it in a safe place for future reference on service and maintenance information. This document applies to the following solar module series: EF-SG-M100
Disclaimer
As the use of this manual as well as the conditions or methods for the installation, operation, use and maintenance of photovoltaic (PV) products may exceed the control of EcoFlow, EcoFlow assumes no responsibility for such nonstandard installations and operations, and expressly disclaims any loss, damage, and maintenance requirements arising therefrom or in any way related thereto.
EcoFlow shall not be liable for any infringement of third-party patents or other rights that may result from the adoption of the installation methods, accessories, etc. that are not provided by our company during installation and use. The product information and installation examples in this manual are provided based on EcoFlow's and our partners' relevant knowledge and experience and are considered to be reliable; however, the restrictions and recommendations in such information, including product specifications, do not constitute any express or implied warranty.
Before using the product, please read the User Manual and the disclaimer of liability for this product carefully. Once you use this product, it will be deemed that you have understood, acknowledged and accepted all the terms and contents of this document, and the user shall be responsible for their actions and all consequences arising therefrom. EcoFlow hereby disclaims any liability for any losses due to the user's failure to use the product according to the User Manual.
In compliance with laws and regulations, the company shall have the final right to interpret this document and all related documents for this product. Any update, revision or termination of the contents thereof, if necessary, shall be made without prior notice, and users may visit the official website of EcoFlow for the latest information on the product.
Installation Procedure and Precautions
Obtain information on any requirements and pre-approvals for the site, installation and inspection from the relevant authorities prior to installation.
When installing the product on the roof of a vehicle, ensure that the roof is protected against fire: The installation site should be free of flammable materials. The solar panel's positive and negative terminals should be fully disconnected before installation. Only use approved insulated tools for electrical installation.
Unpacking and Precautions
Carefully unpack the solar panel and ensure that all instructions on the package are followed. The contents are listed as follows:

Note:
- Do not step, walk, stand or jump on any module, as uneven stresses may impact the micro cracks on battery cell, and ultimately the module's reliability and user experience.
- Do not use a sharp tool to score, cut, slice, or slash the module, especially the back plate.
- Keep all electrical contacts and connectors clean and dry.
Pre-Installation Requirements
Ensure that modules comply with general system technical requirements and that other system components will not damage the modules mechanically or electrically.
Modules can be connected in series to increase voltage or in parallel to increase current. In a series connection, the positive terminal of one module is transferred to the negative terminal of the second module. In a parallel connection, the positive terminals of one module and the second module are connected, so are their negative terminals.
A series connection is shown in the diagram:

A parallel connection is shown in the diagram:

It is recommended that modules with the same electrical output be connected in the same series to prevent mismatching from creating a 1+1<2 effect;
Do not block the drain hole at the bottom of the module (refer to the diagram below).
Avoid shade, as even a small amount of shade will reduce power output; ensure that the sun will be able to shine on the module even on the shortest day of the year;
To generate the most electricity, the module should face directly south if it is in the Northern Hemisphere and face directly north if it is in the Southern Hemisphere. For details on the best elevation angle for the installation, refer to the standard PV installation guide of your locality or the installation angle requirements of a well-known solar installer or system integrator.
Installation Precautions
All the following installation methods are for reference only, and related installation accessories need to be purchased separately. Any system installer should ensure that the installation adheres to all specifications while working.
The module must be mounted using the mounting holes reserved in the frame of the solar module [12 holes, L*W: 11 × 7 mm (0.4 × 0.3 in)]. The most common installation method is to install the module using the four symmetrical holes close to the center of the frame.
As shown below:

Note:
- The holes at the center of each long edge are used for grounding.
- Modules should be securely mounted to withstand all expected loads, including wind and snow loads.
- The gap between modules should be 12.7 mm (0.5 in) or larger.
Each module has two labels that provide the following information:
NameplateSticker: Provides information on the product type, and the electrical parameters, weight, dimensions, etc., measured under standard test conditions.
SN Code Sticker: Each module has a unique serial number.
Note: Do not remove any labels from the solar panel; removal of any labels voids the product warranty policy from EcoFlow.
Bolt Installation
Installation requires the use of a special bolt kit (purchased separately), which includes the following items:
Four z-shaped brackets, four M6 hex bolts (with nuts), four M6 large washers, four M6 flat washers, four M6 spring washers, and eight hex self-drilling screws [5.5*38 mm (0.2*1.5 in)

- You must use the M6 stainless steel bolt, nut and washer, as well as the mounting hole on the rear side of the module's frame.
- Use suitable corrosion-resistant material for fastening, which should be made from stainless steel.
- Do not drill holes in or modify the module's frame as this will void the warranty.
- Each module must be securely mounted at four or more points in opposite directions.
- When installing on the roof or body of a vehicle, be sure to leave a gap between the solar panel and the roof or body to facilitate airflow and heat dissipation.
The steps are as follows:
- Use a manual glue gun to apply the structural adhesive to the corresponding area (the surface contacting with the frame) of the z-shaped bracket.

- Place the z-shaped bracket in the corresponding position and install the M6 hex bolt, M6 flat washer and M6 spring washer.

- Then place the large washer, and tighten the nut.

- Place the solar panel with the z-shaped bracket on the roof in the position for installation, and drill holes on the roof in the corresponding position of the hole on the pedestal of the z-shaped bracket.

- Clean the holes and apply adhesive (be sure to apply the structural adhesive around the hole).
- After matching the pedestal of the z-shaped bracket with the holes in the roof, install the hex self-drilling screw [5.5*38 mm (0.2*1.5 in), with plastic ring], leave them standing for ≥24 h, and wait for the structural adhesive to cure [ambient temperature ≤30°C (86°F), humidity ≤70% RH].
- After the structural adhesive has cured, remove the excessive adhesive on the pedestal and roof. Install more solar panels and connect them in series or parallel as necessary.


Commissioning and Troubleshooting
EcoFlow recommends that all commissioning and maintenance of the solar module system be carried out by qualified PV technicians!
Test connected modules before connecting them to the system; always test all electrical and electronic components of the system before commissioning the system, and always follow the instructions supplied together with each part and piece of equipment.
To test the electrical performance of the module, the module is generally exposed to sunlight and must not be connected to a load. Pay attention to your personal safety when taking these measurements.
Should abnormal power generation occur, troubleshoot the issue by following the steps below:
- Check all wiring to ensure that there are no open circuits or poor connections.
- Check the open circuit voltage of each module.
- Check the open circuit voltage with the module completely covered with opaque material; then remove the opaque material and measure the open circuit voltage at its terminals and compare.
If the voltage between the terminals differs by more than 5% from the nominal value at an irradiance of ≥700 W/m2 (65.0 W/ft2), this indicates a poor electrical connection.
Product Specifications
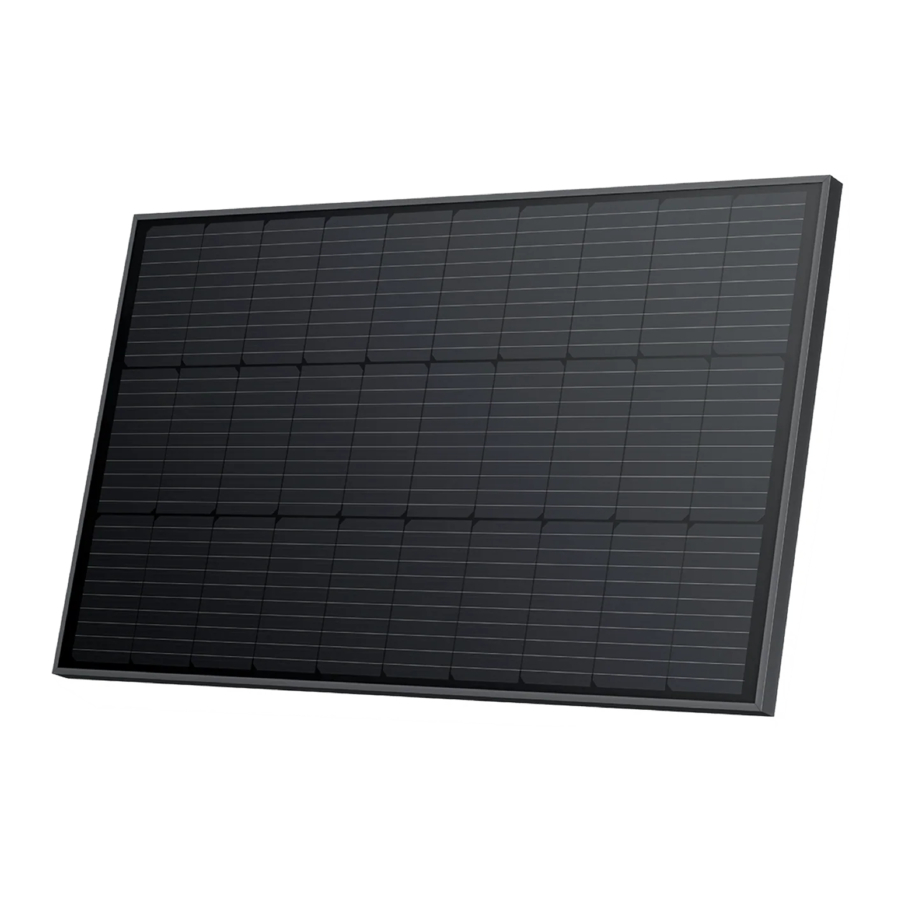
| 100W Rigid Solar Panel |
| Rated Power: 100 W (+/-5 W) |
| Open Circuit Voltage: 20.3 V |
| Short Circuit Current: 6.3 A |
| Maximum Operating Voltage: 17.1 V |
| Maximum Operating Current: 5.9 A |
| Temperature Coefficient of Rated Power: -0.39%/°C |
| Temperature Coefficient of Open Circuit Voltage: -0.33%/°C |
| Temperature Coefficient of Short Circuit Current: 0.06%/°C |
| Maximum System Voltage: 600 VDC (UL) |
| Maximum Fuse Current: 15 A |
| General |
| Solar Panel Weight: Approx. 6.2 kg (13.7 lbs) |
| Dimensions: 98*58.6*3 cm (38.6*23.1*1.2 in) |
| Testing and Certification |
 |
*Standard Test Conditions: 1,000 W/m2 (92.9 W/ft2), AM1.5, 25°C
Temperature Coefficient Specifications
Temperature Coefficient of Power -(0.39+/-0.02)%/k
Temperature Coefficient of Voltage -(0.33+/-0.03)%/k
Temperature Coefficient of Current +(0.06+/-0.015)%/k
FAQs
Why does the 100 W Solar Panel fail to deliver as much as stated when in actual use?
In most cases, it is normal for a solar panel to not deliver its full nominal power. Some of the reasons why this happens, as well as some suggestions for getting closer to the nominal power figure, are given below.
- Light Intensity. The amount of light shining on the panel will result in fluctuations to the power output. You are more likely to achieve nominal power output figures closer to those obtained under test conditions when using the product on a clear day during the midday sun, than when using the product in the morning or later in the afternoon. Weather conditions will also affect the amount of sunlight that shines on the panel. For example, you are much less likely to achieve the figures for nominal power in hazy, cloudy or rainy conditions.
- Surface Temperature. The temperature of the solar panel surface will also affect the amount of power generated. The lower the surface temperature of the panel, the more power will be produced. For example, solar panels generate more power when used during the winter than during the summer, and this is completely normal. Solar panels generally reach temperatures close to 60°C (140°F) during summer. This reduces nominal power by 10–15%, despite the higher levels of light shining on the panel.
- The Angle of the Sunlight. Under good lighting conditions, the solar panel is able to stay where light hits perpendicular to the surface to achieve better light performance. However, most solar panels installed on the roof of an RV can only be installed in a tiled configuration, which prevents the panel(s) from being installed at the optimal angle, and this difference will result in a power output loss of approximately 5%-15%.
- 4Panel Shading. The surface of the solar panel should not be shaded during use. Shading caused by shadows, foreign objects and glass can all greatly reduce power output.
Performance Issues caused by Malfunctioning Panels: If the panel still isn't generating power or its output remains far below expected nominal power figures after addressing the issues above, there may be an issue with the panel itself. Please contact Customer Support for assistance.
How much power can the 100 W Solar Panel generate under normal conditions?
This depends first and foremost on weather conditions. Generally speaking, on a clear day with no clouds in the sky, sunlight hitting the panel at a 90° angle usually generates 70 W–80 W of power in the 100 W panel (current light conditions are normally 800–900 W/m2 (74.3–83.6 W/ft2) with a panel temperature of 50°C (32°F) under test conditions. Nominal power ratings are based on 1,000 W/m2 (92.9 W/ft2) in AM1.5 conditions with a panel temperature of 25°C under test conditions. Power output figures close to nominal values were normally observed in the midday sun during the winter).
What are the usage temperature range and precautions for use for the 100 W Panel?
The operating temperature of the solar panel is -20°C to 85°C (-4°F to 185°F). Please read the product's manual carefully before use. Solar panels are made of monocrystalline silicon wafers. During installation and use, please do not slam the panels on the ground, step on them, strike them with foreign objects, or sit on their surface as such actions may cause the monocrystalline silicon wafers to crack, which will affect your use. Damage caused by human force is not covered by the free warranty.
Can I connect 100 W Solar Panels in series?
Yes, but this is not recommended. Please read the instructions in the User Manual carefully, paying particular attention to energy storage controller requirements and limitations on solar panel output, so as not to cause solar panels with different currents to be used in series without releasing their power and creating a 1+1<2 effect.
Can I connect 100 W Solar Panels in parallel?
Yes. Connecting panels in parallel increases power through doubling the current. The maximum number of 100 W panels allowed in a parallel connection depends on the controller and energy storage equipment of your recreational vehicle. Please ensure that the energy storage system used in your vehicle supports a higher input current, and you should use wires with a diameter suitable to the output current to securely connect the panels in parallel.
Do I need to clean the 100 W Solar Panel regularly?
Yes. There can be a lot of dust and foreign objects on the surface of the solar panel after the panel has been used outdoors for a long time, which block the light to a certain extent, reducing the power output. Regular cleaning can help keep the surface of the solar panel clean and free from obstructions and generate a higher power output.
Maintenance
We recommend that you carry out the following maintenance to ensure optimal performance of the module:
- Clean the glass surface of the module with water and a soft sponge or cloth when necessary. Stubborn dirt can be removed with mild detergent. Avoid using sharp and/or hard cleaning tools. It is recommended that you only clean in the morning and evening when the sun is weak [irradiance ≤200 W/m2 (18.6 W/ft2)].
- Inspect electrical and mechanical connections every six months to confirm that they are clean, secure and undamaged.
- Prevent leaves and other objects from covering the surface of the solar panel. Partially shading the solar panel will not only affect the efficiency of power generation, but may also cause excessive current at some places and burn out the components.
In case of any issues, always have a qualified expert investigate and follow the maintenance instructions for all components used in the system, such as brackets, charge regulators, inverters, batteries, etc.
General Safety Information
Solar photovoltaic systems must only be installed by qualified personnel with relevant professional skills and knowledge. All solar modules are equipped with a permanently connected junction box and 2.5 mm2 (0.004 in2) wires. Installers shall bear all risk of injury that may occur during installation, including, but not limited to, the risk of electric shock.
When exposed to direct sunlight, a single module may generate DC voltages greater than 24 V. Exposure to DC voltages of 24 V or higher is potentially dangerous. Arcing may occur when disconnecting wires that are connected to the PV components exposed to sunlight. Such arcing may cause burns or a fire. Please operate with special care, otherwise it may give rise to further issues. It is therefore important to protect yourself from electricity!
The solar modules convert solar energy into DC electricity, and they are designed for outdoor use. Modules can be mounted on top of a fixed outdoor object, and the system designer and installer shall be responsible for the compliance of the design of their supporting structure.
Do not attempt to disassemble the module, or remove any attached nameplates or components.
Do not apply paint, adhesives or substances that block the battery cell from light to the light-receiving surface of the module.
Do not expose the surface of the module to amplified sunlight that is artificially centralized.
When installing systems, please observe all local, regional and national laws and statutory regulations. When installing them on a vehicle or vessel, please observe relevant local and national laws and regulations.
Safety Precautions
When light shines on the light-receiving surface of the solar module, the solar module will generate DC electricity with a voltage of over 24 V. If modules are connected in series, the total voltage is equal to the sum of the voltage of each module. If modules are connected in parallel, the total current is equal to the sum of the current of each module.
When transporting and installing any mechanical and electrical components, please take care to keep children away from the system and installation site.
It is recommended that the light-receiving surface of the module be completely covered with opaque material during installation and that the positive and negative terminals be disconnected in order to prevent issues arising from power generation.
When installing or troubleshooting for a PV system, do not wear metal rings, straps, earrings, nose rings, lip rings or other metal devices, and only use insulated tools approved for electrical installation.
Please comply with safety instructions for all other components utilized in the system, including cables, connectors, controllers, charge regulators, inverters, batteries and other rechargeable batteries, etc.
Use only the relevant equipment, connectors, wiring and brackets applicable to the installation of this solar module system. Always use modules of the same type in a particular PV system. Bypass diodes have been integrated into the junction box for all modules.
For any single module or combination of more than one module connected in series or parallel, the cross-sectional area of the cable and the capacity of the connector must suit the maximum system short-circuit current, otherwise the cable and connector will overheat at high currents.
DC fuses must be appropriate for the module's overcurrent protection rating.
Under normal outdoor conditions, the currents and voltages generated by the module will be different from those listed in the data sheet, depending on the weather and ambient temperature. Data specified on the nameplate are expected values under standard test conditions (STC).

Documents / ResourcesDownload manual
Here you can download full pdf version of manual, it may contain additional safety instructions, warranty information, FCC rules, etc.
Advertisement


Need help?
Do you have a question about the 100 W Rigid Solar Panel and is the answer not in the manual?
Questions and answers