Advertisement
Quick Links
IMPORTANT: BEFORE STARTING TO ASSEMBLE THE BED - PLEASE READ THESE INSTRUCTIONS CAREFULLY.
Parts Identification
5
11
2
Parts Checklist
Ref.
Description
1
Top panel
2
Side panel
3
Base panel
4
Front rail
5
Back rail
6
Drawer front
210908
1
5
4
4
3
Qty
1
2
1
2
2
3
Page 1 of 9
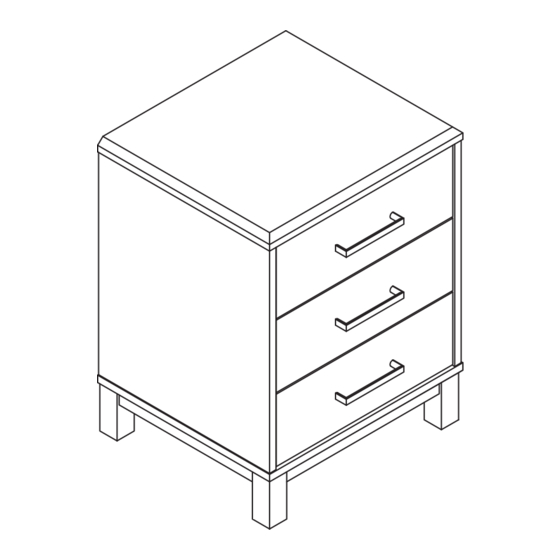
BROOKES
3 Drawer Bedside
PLEASE READ this sheet prior to assembly to familiarise
yourself with the various stages of construction. Carefully
open the pack supplied and check the contents against the
parts and fittings check list.
Do not destroy any of the packaging until you are certain
that you have all the necessary parts for the assembly.
Please ensure that the packaging is disposed of in
a safe environmentally friendly way.
CAUTION: There are small components used in the
construction of this unit. These loose items should be
e k
t p
a
w
a
f y
o r
m
o y
u
n
g
h c
the danger of choking.
9
7
2
9
7
9
7
Ref.
Description
7
Drawer LH side panel
8
Drawer RH side panel
9
Drawer back panel
10
Drawer base
11
Cabinet back panel
d l i
e r
n
d
r u
n i
g
s a
e s
m
b
, y l
o t
a
8
10
6
8
10
6
8
10
6
Qty
3
3
3
3
1
o v
d i
Advertisement

Subscribe to Our Youtube Channel
Related Manuals for Time4Sleep BROOKES


Summary of Contents for Time4Sleep BROOKES
- Page 1 BROOKES 3 Drawer Bedside PLEASE READ this sheet prior to assembly to familiarise yourself with the various stages of construction. Carefully open the pack supplied and check the contents against the parts and fittings check list. Do not destroy any of the packaging until you are certain that you have all the necessary parts for the assembly.
- Page 2 Bolts (M4x22mm) for handle Care & Maintenance Additional Tools Required In the unlikely even of missing or damaged parts, Please email hello@time4sleep.co.uk Please have this guide at hand requesting the code reference number shown, when requesting spare or replacement parts.
- Page 3 Bedside Assembly - Use Hardware Pack 'A' Stage Stage Page 3 of 9...
- Page 4 Stage Stage Page 4 of 9...
- Page 5 Stage Stage Page 5 of 9...
- Page 6 Stage Stage Page 6 of 9...
- Page 7 x3 Drawers to Assemble Stage x3 Drawers to Assemble Stage Page 7 of 9...
- Page 8 x3 Handles to Fit Stage Stage Page 8 of 9...
- Page 9 Stage To remove a drawer, press left & right levers down at the same time and slide the whole drawer out of the outer runners... Overall Dimensions (W x D x H mm) 450 x 400 x 590 Page 9 of 9...
Need help?
Do you have a question about the BROOKES and is the answer not in the manual?
Questions and answers