
Subscribe to Our Youtube Channel
Related Manuals for Starrett 749.1


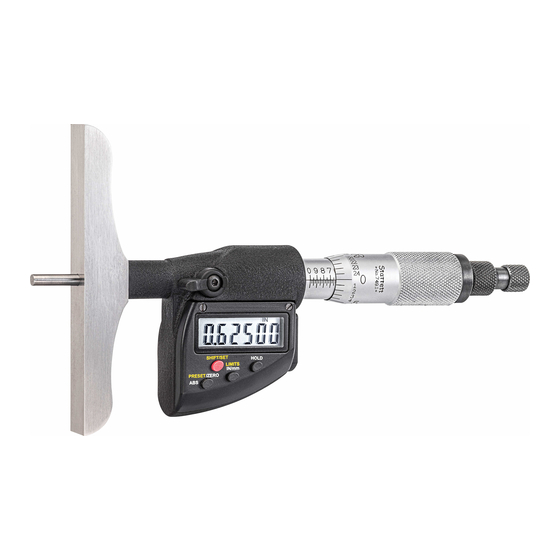
Summary of Contents for Starrett 749.1
- Page 1 The L. S. Starrett Company 6/8/2023 749.1 Electronic Depth Micrometer User Guide 749.1BZ-12RL The L.S. Starrett Company 121 Crescent Street Athol, MA 01331 https://www.starrett.com 749.1 User Guide Ver 1.0...
-
Page 2: Table Of Contents
The L. S. Starrett Company 6/8/2023 Table of Contents Section 1 General Information Page 1.0 Caution 1.1 Basic Operating Instructions 1.2 Components 1.3 Button Descriptions and Functions 1.4 Data Output and Connections Section 2 Functions 2.0 Setting Preset 2.1 Setting the Limits (Tolerance) Section 3 How to Read a Depth Micrometer 3.0 Depth Micrometer Head, English... -
Page 3: Section 1 General Information Page
The L. S. Starrett Company 6/8/2023 Section 1 General Information 1.0 Caution • Avoid extreme temperatures, direct sunlight or below freezing for extended periods. • Avoid dropping the Depth Micrometer. Avoid shocks to the Rod. Frequently clean the face using a dry cloth or a chamois. -
Page 4: Button Descriptions And Functions
The L. S. Starrett Company 6/8/2023 2/3/4 Fig.3 1.3 Button Descriptions and Functions The functions printed in yellow; LIMITS and PRESET, are used in conjunction with the SHIFT/SET button also printed in yellow. To enable these functions press the SHIFT/SET button first. The SET (S) icon will appear in the top left corner of the display, and then press the button for the required function. -
Page 5: Data Output And Connections
795.1 Smart Cables, or wirelessly by connecting to a PC using the Starrett DataSure® Advanced 4.0 Wireless Data Collection System. Each of these methods allows for analysis, data collection, and hard copy documentation as needed. -
Page 6: Section 2 Functions
The L. S. Starrett Company 6/8/2023 Section 2 Functions 2.0 Setting PRESET The Preset button allows you to program any reading into the display at any position of the spindle. It is used to establish the correct zero point of tools that exceed one inch or 25 mm range. -
Page 7: Setting The Limits (Tolerance)
The L. S. Starrett Company 6/8/2023 2.1 Setting the Limits (Tolerance) Select the units to be displayed. Push the SHIFT/SET button to get into the secondary button functions, an “S” will show on the top Left of the display, Fig.9. -
Page 8: Section 3 How To Read A Depth Micrometer
The L. S. Starrett Company 6/8/2023 Section 3 How to Read a Depth Micrometer 3.0 Depth Micrometer Head, English • The Depth Micrometer scale reads from right to left. • Fig.12B, The Reading line on the Sleeve is graduated to 25 thousandths (0.025"). Every fourth line which is longer than the others, designates a hundred thousandths. -
Page 9: Examples: Graduated In Thousandths Of An Inch (.001")
The L. S. Starrett Company 6/8/2023 3.1 Examples: Graduated in Thousandths of an Inch (.001") • The Depth Micrometer scale reads from right to left. The measurement is made by comparing what you can see with what you cannot. •... -
Page 10: Measuring Rod Basics
The L. S. Starrett Company 6/8/2023 3.2 MEASURING ROD BASICS With the use of different sized Measuring Rods, you can measure larger features, deeper holes and slots etc. Fig.14A, Shows a 1”-2” rod, notice at zero the rod is 1” past the base. The measurement starts at 1” and ends at 2 inches. -
Page 11: How To Adjust A Measuring Rod Nut
The L. S. Starrett Company 6/8/2023 3.4 HOW TO ADJUST A MEASURING ROD NUT Was the rod subject to extreme temperatures? Make sure to let the rod come back to room temperature and check it again be- fore making any adjustments. If the rod is from a different set it will be calibrated to the micrometer head in that set. Clean the area where the rod enters the tool and the bottom of the nut, look for debris that would interfere with the rod seating in the tool. -
Page 12: Battery Replacement
The L. S. Starrett Company 6/8/2023 Section 4 New battery, Startup Sequence 4.0 Battery Replacement • The micrometer comes with two CR2032 lithium (coin cell) batteries, not installed. The battery cover can be removed using a coin (quarter), or a large flat headed screwdriver, turn the cover counter clockwise to remove. -
Page 13: Startup Sequence And Calibration
The L. S. Starrett Company 6/8/2023 4.1 Startup Sequence and Calibration Each time you change the battery (Pg.12), the micrometer will go through a startup sequence. When the depth micrometer turns on, the display will go through a series of changes as shown in Figs.18-20. At the end of the sequence you will see “CAL”... -
Page 14: Section 5 Specifications And Accessories
The L. S. Starrett Company 6/8/2023 Section 5 Specifications and Accessories 5.0 Specifications Resolution: 0.00005" and 0.001mm. Accuracy (in) Mic head +/-.0001"; Rods +/-.0002" Accuracy (mm) Mic head +/-.003mm; Rods +/-.005mm Rod Range 0-12"/0-300MM RS232 Output 4800 BAUD, 8 data bits, no parity, 1 stop bit, and ASCII data Base Length 4"...
Need help?
Do you have a question about the 749.1 and is the answer not in the manual?
Questions and answers