Table of Contents
Advertisement
Available languages
Available languages
Quick Links
USER MANUAL
Window Type
Room Air Conditioner
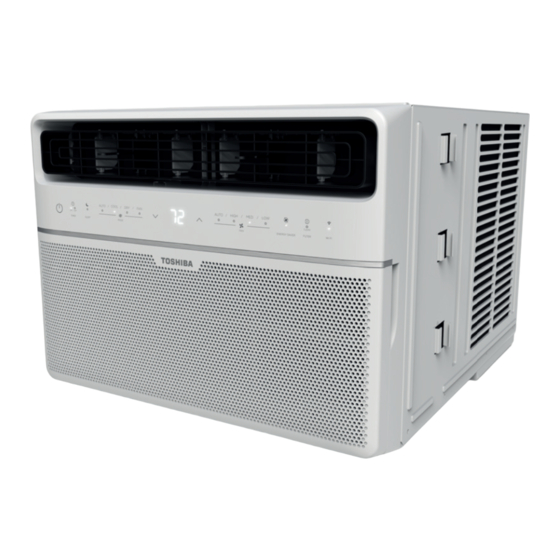
RAC-WK1823ESCWRU (18,000 BTU)
version B - 09 - 2022 (PREVIEW01)
e v
s r
o i
n
A
0 -
- 7
0 2
0 2
Safety Precautions
Saf
Operating Instructions
Op
Installation Instructions
Ins
Care and Cleaning
Troubleshooting Tips
Remote Control and App
Instructions
Warning notices: Before using this product,
please read this manual carefully and keep
it for future reference.
change without prior notice for product
improvement. Consult with your dealer or
the manufacturer for details.
www.toshiba-lifestyle.com
Advertisement
Table of Contents

Related Manuals for Toshiba RAC-WK1823ESCWR


Summary of Contents for Toshiba RAC-WK1823ESCWR
- Page 1 Warning notices: Before using this product, please read this manual carefully and keep it for future reference. change without prior notice for product improvement. Consult with your dealer or the manufacturer for details. version B - 09 - 2022 (PREVIEW01) www.toshiba-lifestyle.com...
-
Page 2: Read This Manual
Read This Manual Inside you’ll nd many helpful hints on how to use and maintain your air conditioner properly. Just a little preventive care on your part can save you a great deal of time and money over the life of your air conditioner. - Page 3 To prevent injury to the user or other people and property damage, the instructions shown here must be followed. Incorrect operation due to ignoring of instructions may cause harm or damage. The level of risk is shown by the following indications. This symbol indicates a hazardous situation which, if not avoided, WARNING could result in death or serious injury.
- Page 4 WARNING • Do not damage or use an alternate power cord. re and electric shock. If the power cord is damaged, it must be replaced by the manufacturer or an authorized service ed person in order to avoid a hazard. ow straight into persons to avoid possible health hazard.
- Page 5 CAUTION This could injure the pet or harm the plant. • Hold the plug by the head of the power plug when taking it out. Otherwise, it may cause electric shock and damage. • Ensure that the installation is properly secured to prevent the product from potentially falling. •...
- Page 6 • Keep ventilation openings clear of obstruction. • Unit is only to be serviced by a Toshiba authorized servicer, please call Customer Service at 1-855-204-5313 for support. • Flammable refrigerant R32 is used within air conditioner. Please follow the instructions carefully to handle, install, clean, and service the air conditioner to avoid damage or hazard.
- Page 7 The power supply cord contains a current measuring device that detects damage to the Plug in & press RESET power cord. Test your power supply cord as follows: RESET 1. Plug in the air conditioner. 2. The power supply cord will have TWO TEST buttons on the plug head.
- Page 8 RAC-WK18 Models High Pitched Sound High efficiency compressors may Sound of Rushing Air have a high pitched sound during Trickling Sound In front of the unit, you cooling cycle. Droplets of water may hear the sound of hitting condenser rushing air being moved during normal by the fan.
-
Page 9: Air Direction
NOTICE and then on again, or when changing from cool to fan and back to cool. This prevents damage from occurring to the compressor. To begin operating the air conditioner, follow these steps: Set the temperature to the coldest setting. Set the control to HIGH COOL. - Page 10 Before you begin, thoroughly familiarize yourself with the control panel as shown below and all its functions, then follow the symbol for the functions you desire. The unit can be controlled by the unit control alone or with the remote. Connect Indicator Light Power (Smart models only)
- Page 11 The indicator light adjacent will be illuminated and The selected time will register in 5 seconds, remain on once the mode is selected. and the system will automatically revert back to display the previous temperature setting or and back on via the power room temperature when the unit is on.
- Page 12 WARNING Read these instructions completely and carefully. Window Sash Seal • IMPORTANT - Save these instructions. Safety Lock and • IMPORTANT - Observe all governing 3/4” (or 1/2” ) Long codes and ordinances. Hex Head Screw We recommend that two people install Foam Gasket Top Rail this product.
-
Page 13: Phillips Screwdriver
1. Check window opening size - the mounting parts furnished with this air conditioner are made to install in a wooden sill double- hung window. The standard parts are for window dimensions listed above. Open sash to a minimum of 19” (483 mm). See Fig. D. SASH 2. - Page 14 lter. (See Fig. 1). Front Panel B. Lift front grille upwards and place to one side. Front Grille C. Locate the four front screws and remove. These screws will be needed to re-install the front panel (see Fig. 2). D. Push metal cabinet side to release plastic tabs on each side of front panel (see Fig.
- Page 15 Add two foam inserts to holes in top of cabinet where shipping screws were removed from (see Fig. 6). Your unit may come with internal packaging. This packaging Shipping must be removed prior to installing the air conditioner back Packaging into the cabinet.
- Page 16 A. Open window and mark center of window sill as shown (Fig. 11). rmly seated over the window sill as shown. Bring window down Sill temporarily behind top rail to hold cabinet in place (Fig. 12). C. Shift cabinet left or right as needed to line up center of cabinet on center line marked on sill.
- Page 17 B. Assemble sill angle bracket to support brackets 1/2” Long Screws Left at the marked position (Fig. 14A). Hand tighten and Locknuts only so adjustments can be made later. Locknut Right Sill Angle Bracket Flathead Bolt 2 Each Required For Each Support Bracket About 1 to 1...
- Page 18 D. Use a 3/32” drill bit to drill a starter hole through the middle hole of the top rail into the window sash frame. Drive one 3/4” (or 1/2”) HEX-HEAD locking screw through the 3/4” (or 1/2” ) hole just drilled as shown (Fig. 17A). long Hex-head screw Extend the accordion panels out against the...
- Page 19 A. Lift air conditioner and carefully slide into cabinet leaving 6” protruding. nned coils. rmly seated towards rear of cabinet. D. Installation of front is the reverse of removal outlined in Section 1. In order to minimize air leaks and ensure optimal insulation, it is necessary to install the included accordion panel insulation to the side curtain.
- Page 20 In order to minimize air leaks between the room air conditioner and the window opening, trim the weather stripping to the the protective backing and plug any gaps if needed (Fig. 23). Check your storm windows – if your storm window frame does not allow for the clearance required, correct it by either SASH...
- Page 21 CAUTION Clean your air conditioner occasionally to keep it looking new. Be sure to unplug the unit before cleaning to prevent shock or re hazards. Models RAC-WK18 lter should be checked at least once a month to lter can build up and cause an accumulation of frost on the cooling coils.
- Page 22 Before calling for service, review this list. It may save you time and expense. This list includes common occurrences that are not the result of defective workmanship or materials in this appliance. Problem Solution rmly into wall outlet. Circuit breaker tripped. Reset circuit breaker. Air conditioner , press the RESET button.
- Page 23 Problem Solution Air conditioner lter. Outside temperature extremely hot. Set FAN speed to a higher setting to bring rapidly. air past cooling coils more frequently. Check for potential obstructions blocking the outdoor intake/exhaust. Clear any obstructions. Air movement sound. This is normal. If too loud, set to a slower FAN setting. Noise when unit is Window vibration - poor installation.
-
Page 24: Handling The Remote Control
REMOTE CONTROL AND APP INSTRUCTIONS Handling the Remote Control Location of the remote control Use the remote control within a distance of 26.2 ft (8 meters) from the air conditioner, pointing it towards the receiver. Reception is c med by a beep. NOTICE •... -
Page 25: Function Buttons
REMOTE CONTROL AND APP INSTRUCTIONS cations RG57J4(B)/BGCEU1 Rated voltage 3.0V (Dry batteries R03/LR03x2) Signal receiving range 26 ft. (approx. 8 m) Environment 23°F ~ 140°F (-5°C ~ 60°C) Function Buttons Before you begin using your new air conditioner, make sure to familiarize yourself with its remote control. -
Page 26: Inserting And Replacing Batteries
Handling the Remote Control NOT SURE WHAT A FUNCTION DOES? Refer to the Operating Instructions section of this manual for a detailed description of the functions available using the remote. NOTICE Button designs on your unit may di er slightly from the example shown. If the unit does not have a specic function, using that function’s button on the remote control will have no e ect. - Page 27 Remote LED Screen Indicators Transmission Indicator Lights up when remote sends signal to unit MODE display ON/OFF display Displays the current Appears when the remote is enabled and can send a signal to the unit. mode, including: If you would like to turn the remote off without affecting the unit, point the remote away from the unit and press the ON/OFF button.
-
Page 28: Basic Functions
Basic Functions SETTING THE DESIRED TEMPERATURE The operating temperature range for this unit is 62°F-86°F (17-30°C). You can increase or decrease the set temperature in 1°F or 1°C increments. Changing the Mode 1. To change the operating mode, press the MODE button until the desired mode appears on the remote’s display. -
Page 29: Timer Functions
Timer Functions Your air conditioning unit has two timer-related functions: TIMER ON - sets the amount of time after which the unit will automatically turn on. TIMER ON TIMER ON TIMER OFF - sets the amount of time after which the unit will automatically turn o . - Page 30 Timer Functions (cont.) 3. Wait 2 seconds, then the TIMER OFF function will be activated. The digital display on your remote control will then return to the temperature display. Timer on NOTICE Continue When setting the TIMER ON or TIMER OFF functions, up to 10 to press hours, the time will increase in 30 minute increments with each TIMER ON...
-
Page 31: How To Use The Advanced Functions
How to Use the Advanced Functions SLEEP Function The SLEEP function is used to decrease energy use while you sleep (and don’t need the same temperature settings to stay comfortable). Note: The SLEEP function is not available in FAN or DRY mode. ECO button Press this button to activate the SHORTCUT Function... -
Page 32: Declaration Of Conformity
OS may or may not be supported until a new version is c mobile phone or problems in your network may prevent the system from working and Toshiba will not be responsible for any problems that could be caused by incompatibility or network issues. -
Page 33: System Overview
DOWNLOAD AND INSTALL THE APP Scan to download app. • You can also go to Google Play or App Store and search for Toshiba NA AC. For more information, please refer to Toshiba Lifestyle website: www.toshiba-lifestyle.com NOTICE All the images in this manual are for reference only, your product and app may look slightly di erent. -
Page 34: Create Your Account
CREATE YOUR ACCOUNT • Make sure your smartphone is connected to your wireless router and your wireless router has a working 2.4GHz internet connection. • It is recommended to activate your account immediately to be able to recover your password by email. 6.1 Press “Sign Up”. - Page 35 ADDITIONAL APP AND SMART HOME FUNCTIONS For additional instructions regarding the features of the app and Smart Home skill capabilities, scan the QR code below. Declaration of conformity CONTAINS FCC ID: 2ADQOMDNA21 CONTAINS IC : 12575A-MDNA21 This device complies with Part 15 of the FCC Rules and it contains licence-exempt transmitter(s)/receiver(s) that comply with Innovation, Science and Economic Development Canada’s licence-exempt RSS(s).
-
Page 36: Supplier's Declaration Of Conformity
If you think batteries might have been swallowed or placed inside any part of the body, seek immediate medical attention. Supplier's Declaration of Conformity 47 CFR § 2.1077 Compliance Information Unique Identifier: TOSHIBA brand, RG57J4(B)/BGCEU1 Responsible Party U.S. Contact Information Midea America Corporation 300 Kimball Dr... -
Page 37: Instrucciones De Operación
Consulte con su distribuidor o fabricante para obtener más detalles. versión B - 09 - 2022 (PREVIEW01) ó i www.toshiba-lifestyle.com... - Page 38 Lea este Manual En su interior encontrará muchos consejos útiles sobre como usar y mantener su acondicionador de aire correctamente. Unos pocos cuidados por su parte pueden ahorrar una gran cantidad de tiempo y dinero, alargando la vida útil de su acondicionador de aire. Encontrará muchas respuestas a los problemas más comunes en el cuadro de solución de problemas –...
- Page 39 Para evitar daños al usuario u otras personas y a la propiedad, las instrucciones que se muestran aquí deben ser seguidas. Las operaciones incorrectas por la ignora de las instrucciones podría causar perjuicios cado por las siguientes indicaciones. Este símbolo indica una situación peligrosa que, si no evitada, podría ADVERTENCIA causar la muerte o lesiones graves.
- Page 40 ADVERTENCIA que la unidad. Puede causar fallas y descarga eléctrica. • No dañe ni utilice un cable de alimentación alternativo. Puede causar incendio y descarga eléctrica. Si el cable de alimentación está dañado, debe ser reemplazado por el fabricante o un centro de cada para evitar un peligro.
- Page 41 PRECAUCIÓN • Limpie solo con un paño suave. No utilice detergentes fuertes que contengan cera o diluyentes, ya que puede dañar el producto. lados podrían causar lesiones. • No limpie el acondicionador de aire con agua. • El agua puede entrar en la unidad y degradar el aislamiento que podría conducir a una descarga eléctrica.
- Page 42 Mantenga las aberturas de ventilación libres de obstrucciones. • La unidad solo debe ser atendida por un centro de asistencia autorizada Toshiba, llame al Servicio al Cliente al 1-855-204-5313 para obtener asistencia técnica. amable R32 se usa dentro del acondicionador de aire. Siga las instrucciones cuidadosamente para manejar, instalar, limpiar y reparar el acondicionador de aire para evitar daños o peligros.
- Page 43 El cable de energía contiene un dispositivo de medición que detecta daños en el proprio cable. Enchufe y pulse el botón RESET Pruebelo de la siguiente manera: 1. Enchufe el acondicionador de aire. RESET 2. El cable de energía tendrá DOS botones en el cabezal del enchufe.
- Page 44 RAC-WK18 Models Sonido Agudo Compresores de alto rendimiento pueden presentar un sonido agudo Sonido de Corriente Sonido de Goteo durante el ciclo de enfriamiento. del Aire Las gotas de agua que caen sobre el Delante de la unidad, es condensador durante posible que escuche el la normal operación sonido de corriente de aire...
-
Page 45: Dirección Del Aire
AVISO Por favor, espere siempre por 3 minutos entre apagado y encendido de la unidad, y cuando cambie de modo frío a ventilador y de vuelta. Esto evitará que el compresor se sobrecaliente. Para comenzar a operar el acondicionador de aire, siga estos pasos: guración más fría. - Page 46 Antes de comenzar, familiarícese completamente con el panel de control como se muestra a continuación y todas sus funciones, luego siga el símbolo de las funciones que desee. La unidad se puede controlar solo con el control de la unidad, con el control remoto o con la aplicación (algunos modelos). Luz Indicadora de conexión Botón Power (Solo modelos Smart)
- Page 47 Cuando se opera en modo Automático: El tiempo seleccionado se registrará en 5 segundos, y el sistema revertirá automáticamente para mostrar Al ajustar el acondicionador de aire al modo AUTO, guración de la temperatura anterior o la seleccionará automáticamente el enfriamiento o el temperatura ambiente cuando la unidad está...
- Page 48 ADVERTENCIA Lea estas instrucciones completa y Sello de banda de ventana cuidadosamente. Cerradura de seguridad • IMPORTANTE - Guarde estas y tornillo lago de instrucciones. cabeza Hexagonal 3/4” (o 1/2” ) • IMPORTANTE - Observe todos los códigos y ordenanzas que rigen. Junta de espuma Carril superior Recomendamos que dos personas instalen...
- Page 49 1. Cheque el tamaño de la abertura de la ventana - las piezas de montaje amuebladas con este acondicionador de aire están hechas para instalar en una ventana con un alféizar doble de madera. Las piezas estándar son para dimensiones de ventana enumeradas Banda de SASH anteriormente.
- Page 50 ltro. (Véase la Fig. 1). Front Panel Panel frontal B. Levante la rejilla delantera hacia arriba y colóquela a un lado. Front Grille Rejilla delantera C. Localice los cuatro tornillos delanteros y retirelos. Estos tornillos serán necesarios para volver a instalar el panel frontal (véase la Fig.
- Page 51 cios de la parte superior del gabinete donde se quitaron los tornillos de envío (véase la Fig. 6). Su unidad puede venir con un empaque interior. Este empaque Empaque Shipping debe retirarse antes de instalar de vuelta el acondicionador de interior Packaging aire en el gabinete.
- Page 52 A. Abra la ventana y marque el centro del alféizar de la ventana, como se muestra (Fig. 11). B. Coloque el gabinete en la ventana con la parte inferior rmemente asentada sobre el alféizar como se muestra. Baje la ventana temporalmente por detrás del carril superior para Sill Taburete mantener el gabinete en su lugar (Fig.
- Page 53 B. Posicione el soporte angular del alféizar 1/2” Long Screws Tornillos largos Left Izquierda para apoyar los soportes de ventana en la 1/2” y contratuerca and Locknuts posición marcada (Fig. 14A). Apriete a mano nales se Locknut Contratuerca puedan hacer más tarde. Escuadra Right Sill Angle...
- Page 54 D. Utilice una broca de 3/32” para perforar y crear un ori cio guía centrado en el carril superior y en el marco de la ventana. Conduzca un tornillo de cabeza hexagonal Tornillos largos 3/4” (or 1/2” ) de 3/4” (o 1/2”) a través del ori cio que acaba cabeza hex.
- Page 55 A. Levante el acondicionador de aire y deslice cuidadosamente en el gabinete dejando 6” sobresaliendo. B. NO presione ni aplique presión a los controles o a las aletas de los serpentines. rmemente asentado hacia la parte trasera del gabinete. D. La instalación del frente es el reverso de la eliminación descrito en la Sección 1. n de minimizar las fugas de aire y garantizar un aislamiento óptimo, es necesario instalar el aislamiento del panel de acordeón conectado en la cortina lateral.
- Page 56 n de minimizar las fugas de aire entre el aire acondicionado de la habitación y la abertura de la ventana, recorte la banda adesiva a la longitud adecuada, despegue el respaldo protector y enchufe cualquier hueco si es necesario (Fig. 23). Asegúrese de que las ventanas de tormenta –...
- Page 57 PRECAUCIÓN Limpie su acondicionador de aire de vez en cuando para mantenerlo con un aspecto nuevo. Asegúrese de desenchufar la unidad antes de limpiarla para evitar descargas eléctricas o incendios. Modelos RAC-WK18 ltro de aire deberá revisarse cuando menos una car si es necesario limpiarlo.
- Page 58 Antes de llamar al servicio técnico, revise esta lista. Puede ahorrarle una gran cantidad de tiempo y dinero. Esta lista incluye ocurrencias comunes que no son consecuencia de un trabajo o materiales defectuosos en el equipo. Problema Solución rmemente el enchufe en la toma de pared.
- Page 59 Problema Solución ltro. Consulte la sección Cuidado y Limpieza. Para descongelar, establezca el modo FAN ONLY. Acondicionador de gurada demasiado alta, ajuste la temperatura a una aire enfriándose, guración más baja. pero el ambiente Rejillas direccionales de aire colocadas incorrectamente. Pivotee las rejillas hasta obtener está...
-
Page 60: Manejo Del Control Remoto
INSTRUCCIONES DEL CONTROL REMOTO Y DEL APP Manejo del Control Remoto Ubicación del control remoto Utilice el control remoto a distancia a una distancia de 8 metros del acondicionador de aire, apuntando hacia el receptor. La recepción se rma con un pitido. PRECAUCIÓN •... -
Page 61: Funcionamiento De Los Botones
INSTRUCCIONES DEL CONTROL REMOTO Y DEL APP caciones del Control Remoto Model RG57J4(B)/BGCEU1 Voltaje nominal 3.0V (Dry batteries R03/LR03x2) Faja de recepción de señal 26 ft. (aprox. 8 m) Ambiente 23°F ~ 140°F (-5°C ~ 60°C) Funcionamiento de los Botones Antes de empezar a utilizar el nuevo acondicionador de aire, asegúrese de familiarizarse con su control remoto. -
Page 62: Eliminación De Baterías
¿NO ESTÁ SEGURO DE ALGUNA FUNCIONALIDAD? Consulte la sección Instrucciones de Funcionamiento de este manual para obtener una descripción detallada de las funciones disponibles en el uso del control remoto. Los diseños de los botones de su unidad pueden diferir ligeramente del ejemplo enseñado. tón de esa función en el control remoto no tendrá... - Page 63 Indicadores de la pantalla de LEDs del Control Remoto Indicador de Transmisión Enciende cuando el control remoto envía una señal a la unidad Indicador de ON/OFF Aparece cuando el control remoto está habilitado y puede enviar una señal a la unidad. Si desea apagar el control remoto sin afectar la unidad, apunte el control remoto lejos de la unidad y presione el botón ON / OFF.
-
Page 64: Funciones Básicas
Funciones Básicas AJUSTANDO LA TEMPERATURA DESEADA El alcanze de la c de 62°F a 86°F (17°C - 30°C). Se puede aumentar o disminuir la temperatura ajustada en incrementos de 1°F o 1°C. Cambiando el Modo 1. Para cambiar el modo de funcionamiento, pulse el botón MODE hasta que aparezca el modo deseado en la pantalla del control remoto. - Page 65 Su acondicionador de aire tiene dos funciones relacionadas con el temporizador: TIMER ON - c del la hora después de la cual la unidad se encenderá automáticamente. TIMER ON TIMER ON TIMER OFF - c del la hora después de la cual la unidad se apagará...
- Page 66 Funciones del Timer (cont.) 3. Espere 2 segundos y se activará la función TIMER OFF. El indicador digital del control remoto volverá al indicador de temperatura. Timer on AVISO Continúe presionando gurar las funciones TIMER ON o TIMER OFF, hasta 10 horas, TIMER ON o el tiempo aumentará...
- Page 67 Cómo utilizar las funciones avanzadas Función SLEEP La función SLEEP es usada para ahorar energía mientras del sueño (y no necesita los ajustes de temperatura para mantenerse cómodo). Nota: La función SLEEP no está disponible en modo FAN o DRY Botón ECO Pulse este botón para activar el modo de ahorro de energía.
-
Page 68: Declaración De Conformidad
Toshiba no será responsable de ningún problema que pueda ser causado por incompatibilidad o problemas de red. -
Page 69: Visión General Del Sistema
Código QR de Apple Escanear para descargar la aplicación. • También puede ir a Google Play o App Store y buscar Toshiba NA AC. Para obtener más información, consulte la página web de Toshiba Lifestyle: www.toshiba-lifestyle.com AVISO Todas las imágenes de este manual son solo para referencia, su producto y aplicación pueden tener un aspecto ligeramente diferente. - Page 70 CREA TU CUENTA • Asegúrese de que su Smartphone esté conectado a su router inalámbrico y que su router inalámbrico tenga una conexión a Internet de 2,4 GHz. • Se recomienda activar su cuenta inmediatamente para poder recuperar su contraseña por correo electrónico. 6.1 Pulse “Registrarse”.
- Page 71 FUNCIONES ADICIONALES DE LA APLICACIÓN Y SMART HOME Para obtener instrucciones adicionales sobre las características de la aplicación y las capacidades del sistema Smart Home, escanee el código QR a continuación Declaración de conformidad CONTIENE FCC ID: 2ADQOMDNA21 CONTIENE IC: 12575A-MDNA21 Este dispositivo cumple con la Parte 15 de las Reglas FCC y contiene transmisores/ receptores libres de licencia que cumplen con los RSS de Innovación, Ciencia y Desarrollo Económico de Canadá...
- Page 72 Si sospecha que alguien ingirió la batería o que la colocó dentro de alguna parte del cuerpo, busque atención médica de inmediato. Declaración de conformidad del proveedor 47 CFR § 2.1077 Información sobre el cumplimiento Identificador único:TOSHIBA brand, RG57J4(B)/BGCEU1 Parte responsable Información de contacto de los Estados Unidos Midea America Corporation 300 Kimball Dr...
Need help?
Do you have a question about the RAC-WK1823ESCWR and is the answer not in the manual?
Questions and answers