Toa VS-900MF Software Setup Manual
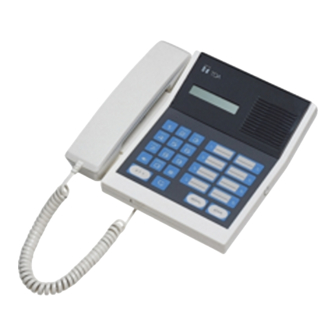
Voice security system
Hide thumbs
Also See for VS-900MF:
- Installation manual (57 pages) ,
- Application note (2 pages) ,
- Specifications (1 page)
Table of Contents
Advertisement
Quick Links
Download this manual
See also:
Installation Manual
Advertisement
Table of Contents

Subscribe to Our Youtube Channel
Related Manuals for Toa VS-900MF


Summary of Contents for Toa VS-900MF
- Page 1 SETUP SOFTWARE MANUAL VOICE SECURITY SYSTEM VS-900 Please follow the instructions in this manual to obtain the optimum results from this unit. We also recommend that you keep this manual handy for future reference.
-
Page 2: Table Of Contents
TABLE OF CONTENTS 1. DESCRIPTION 1.1. System Requirements ... 4 1.2. Installation... 4 1.3. Start and Exit ... 4 1.4. Uninstallation (Removal) ... 4 2. PROGRAM EXECUTION AND TERMINATION 2.1. Program Execution 2.1.1. Entering the password ... 5 2.1.2. Changing the password ... 6 2.1.3. - Page 3 7. DATA SETTING RANGES AND INITIAL VALUES 7.1. System Setting ... 46 7.2. Line Setting ... 46 7.3. Function Settings ... 48 7.4. Other Settings ... 49 7.5. VS-900DI Setting ... 49 8. MESSAGES 8.1. Confirmation Messages ... 50 8.2. Setting Error Messages ... 50...
-
Page 4: Description
1. DESCRIPTION The PC program (VS900.EXE) described in this manual is software intended for performing the VS-900 system setting. 1.1. System Requirements Microsoft ® Windows NT ® Workstation 4.0 Service Pack 5, Windows 2000, XP or Vista* CPU: Pentium ® II, 200 MHz or more Memory: 64 MByte or more Hard disk: Free space of 50 Mbyte or more... -
Page 5: Program Execution And Termination
2. PROGRAM EXECUTION AND TERMINATION 2.1. Program Execution Start the VS900.exec program. The following password screen will be displayed if a password has been registered. Enter the password. If the password is correct, the settings file will be read and the main screen displayed. -
Page 6: Changing The Password
2.1.2. Changing the password To change the password, press the [New password Change] button. The following screen will then be displayed. Old Password Enter the current password. New Password Enter the new password. New Password (confirmation) Enter the new password again. [OK] Button Saves the entered password, if correct. -
Page 7: Main Screen
2.1.3. Main screen When a password has been registered, the following screen is displayed if the correct password is entered. If no password has been registered, the following screen is displayed instead of the Password screen. Notes • The [Log Data] button lights up in red when pressed. •... -
Page 8: Storing Data And Reading Data Files
3. STORING DATA AND READING DATA FILES 3.1. Data Storage ([Save As] menu) To save entered data to disk, choose [Save As] from the [File] menu on the main screen. The following screen will then be displayed: Filename Enter the filename to save data to. [Save] Button Saves data to disk. -
Page 9: Opening Data Files
3.3. Opening Data Files To open files stored on disk, choose [Open] from the [File] menu. The following screen will then be displayed. Filename Designate the name of the file to open. [Open] Button Reads the file from disk. [Cancel] Button Cancels current operation and returns the display to the main screen. -
Page 10: Printing
4. PRINTING 4.1. Printing To print setting data, choose [Print] from the [File] menu on the main screen. The following screen will then be displayed: Printer Name Set the name of the printer to use. [OK] Button Prints all setting data. (However, Direct Select Dial settings are not printed.) [Cancel] Button Cancels current operation and returns the display to the main screen. -
Page 11: Help
5. HELP 5.1. Version Information To display information on the VS900's version, choose [VS900 Version Information] from the [Help] menu on the main screen. The following screen will then be displayed: [OK] Button Returns the display to the main screen. -
Page 12: Data Setting
6. DATA SETTING 6.1. System Setting 6.1.1. System Setting This menu is used for all system settings. Pressing the [System] button on the main screen displays the following screen: Current Time Indicates the current time (hour/minute/second). Number of Exchanges [No. of Exchanges:] Designates the number of exchanges to be used in the entire system (1 –... - Page 13 [Print] Button Prints currently edited data. Note that the currently edited data are not yet stored. [Upload] Button Displays the confirmation message. Pressing the [OK] button changes the exchange settings and stores any changes. When the [Cancel] button is pressed, the currently edited data is not transmitted to the computer.
-
Page 14: Line Setting
6.2. Line Setting 6.2.1. Station setting [Master station/telephone setting] To perform the master station/telephone setting, press the [Stations] button. The following screen will then be displayed. Exchange Designation Exchange Number Selects individual exchange numbers (No. 1-up to the total number of exchanges, or ALL). Master Station/Telephone Setting (table) Note Four stations are always displayed per exchange. - Page 15 Emergency Paging [Emergency Paging] Sets whether or not each station is permitted access to Emergency paging. Outside Line Call Forwarding Receiving Telephone Number [C/O Call Forwarding] Sets the receiving telephone number to which telephone calls are automatically rerouted. (Up to 20 digits) Note Enter a hyphen ( - ) when using a pause in the telephone number.
- Page 16 [Substation setting] To perform the substation setting, press the [Stations] button on the main screen, and then the [Substation] button. The following screen will then be displayed. Exchange Designation Exchange Number Selects the exchange number. (No.1-up to the total number of exchanges, or ALL) Substation Setting (table) Note Sixty-four stations are always displayed per exchange.
- Page 17 Called Station Number [Called Station] Sets the called master station/telephone number. Called Station Name [Called Name] Sets the called master station/telephone name. Call Priority [Call Priority] Selects the call priority level: Normal or Emergency. Notes • Inoperative stations can be invalidated by pressing the [Del] key while the corresponding line is selected. •...
-
Page 18: Outside Line Setting
6.2.2. Outside line setting To perform the outside line setting, press the [C/O Trunks] button. The following screen will then be displayed. Exchange Designation Exchange number Selects the exchange number. (No. 1-up to the total number of exchanges.) Outside Line Connection Time-Out Outside Line Connection Time-Out [C/O Time-Out (1 –... - Page 19 Receiving Station [Rcv Station] When using the Direct-In line service, set a receiving station group consisting of a representative station [Rep] and 1 to 3 member stations. To set the stations, designate both the exchange and line numbers for each master station (telephone). The station number and its name will then be displayed for the set master station (telephone).
-
Page 20: Function Setting
6.3. Function Setting 6.3.1. Group Call setting To perform the Group Call setting, press the [Group Call] button on the main screen. The following screen will then be displayed. Exchange Designation Exchange Number Sets the exchange number to use. (No. 1-up to the total number of exchanges) Master Station/Telephone line Number Selects the line number (No. - Page 21 [Delete ALL] Button Displays the confirmation message. Pressing the [OK] button deletes and stores all of the above master station/telephone settings. The depression of the [Delete ALL] button can be canceled by pressing the [CANCEL] button. [Print] Button Prints currently edited data. Note that the currently edited data is not yet stored. [Upload] Button Displays the confirmation message.
-
Page 22: Call Forwarding/Time-Out Setting
6.3.2. Call Forwarding/Time-Out settings Pressing the [Forwarding/Time-Out] button on the main screen displays the following screen: Exchange Designation Exchange Number Selects the exchange number. (No. 1-up to the total number of exchanges) Function Setting Call Forwarding [Call Forwarding] Enable/Disables the Call Forwarding function. Checking off the box makes this function available. Time-Based Call Forwarding [Time-Based Call Forwarding] Enables/Disables the Time-Based call forwarding function by its start and end times. - Page 23 Conversation Time-Out [Conversation Time-Out] Enables/Disables the station conversation time limiter. If the box is checked off, conversations are automatically terminated when the time limit is reached. Time Limit [Time Limit (10 – 990s)] Sets the conversation time limit (10 – 990 seconds). [Print] Button Prints currently edited data.
-
Page 24: Scan Monitor Setting
6.3.3. Scan Monitor setting To set the scan monitor group, press the [Scan Monitor] button on the main screen. The following screen will then be displayed. Exchange Designation Exchange Number Selects the exchange number (No. 1-up to the total number of exchanges). Master Station Line Number Selects the line number (1 –... - Page 25 Substation Name [Name] Sets the substation name. Note The contents of a selected line can be deleted with the [Del] key. [Delete ALL] Button Displays the confirmation message. Pressing the [OK] button deletes and stores all of the above substation settings. If the [CANCEL] button is pressed, the depression of the [Delete ALL] button is canceled.
-
Page 26: Paging Setting
6.3.4. Paging setting [Paging setting] To perform the paging setting, press the [Paging] button on the main screen. The following screen will then be displayed. Exchange Designation Exchange Number Selects the exchange number (No. 1-up to the total number of exchanges). Zone Designation Zone Number Digit [Zone Digit (1 or 2 digits):] Selects the length of the digit to be used to label the paging zone numbers (1 –... - Page 27 Substation Name [Name] Displays the substation's name. Zone Up to 19 total paging zones can be created. V: Already registered within the indicated paging zone. –: Not yet registered to the indicated paging zone. X: Cannot be registered to any paging zone. Remote Sub-stations assigned an "Emergency"...
- Page 28 [Public address equipment setting] To perform the public address equipment setting, first press the [Paging] button on the main screen, and then the [Public Address System] tab. The following screen will then be displayed. Exchange Designation Exchange Number Selects the exchange number (No. 1-up to the total number of exchanges or select ALL). Equipment Designation (table) Note Nineteen paging zones represents the system maximum total number of paging zones.
- Page 29 [Print] Button Prints currently edited data. Note that the currently edited data is not yet stored. [Upload] Button Displays the confirmation message. Pressing the [OK] button changes the exchange settings and stores any changes. When the [Cancel] button is pressed, the currently edited data is not transmitted to the computer.
- Page 30 [External Source Distribution] To perform the external source distribution setting, first press the [Paging] button on the main screen, and then the [External Source Distribution] tab. The following screen will then be displayed. Exchange Designation Exchange Number Selects the exchange number (No. 1-up to the total number of exchanges). Equipment Designation (table) Note Nineteen paging zones represents the system maximum total number of paging zones.
- Page 31 [Print] Button Prints currently edited data. Note that the currently edited data is not yet stored. [Upload] Button Displays the confirmation message. Pressing the [OK] button changes the exchange settings and stores any changes. When the [Cancel] button is pressed, the currently edited data is not transmitted to the computer.
-
Page 32: Emergency Conference Setting
6.3.5. Emergency Conference setting Pressing the [Emergency Conference] button on the main screen displays the following screen. Set the Emergency Conference station group on this screen. Exchange Designation Exchange Number Selects the exchange number (No. 1-up to the total number of exchanges). Master Station (Telephone) Line Number Selects the line number of the master station (telephone) (1 –... - Page 33 [Delete ALL] key Displays the confirmation message. Pressing the [OK] button deletes and stores all of the above master station/telephone settings. The depression of the [Delete ALL] key is canceled by pressing the [CANCEL] key. [Print] Button Prints currently edited data. Note that the currently edited data is not yet stored. [Upload] Button Displays the confirmation message.
-
Page 34: Direct Select Setting
6.3.6. Direct Select setting To perform the Direct Select setting, press the [Direct Select] button on the main screen. The following screen will then be displayed. This determines how the VS-900DI and VS-910DI Direct Select cards react. Exchange Designation Exchange Number Selects the exchange number (No. -
Page 35: Maintenance/Control Functions Setting
6.4. Maintenance/Control Functions Setting 6.4.1. Remote Dialing To perform the Remote Dialing Setting, press the [Remote Dialing] button on the main screen. The following screen will then be displayed. Remotely Controlled Station Designation Exchange Number [Exchange] Selects the exchange number (No. 1-up to the total number of exchanges). Master station line Number [Master Station No.] Selects the equipment number (1 –... -
Page 36: Log Data
6.4.2. Log Data Pressing the [Log Data] button on the main screen displays the following screen. Perform settings for the requested exchange to send log data. The log data is stored in files, and received data is displayed. Request for Log Data Pull down the exchange number box to select the exchange number. - Page 37 [Close] Button Exits the log data screen. Shown below are log data display examples.
-
Page 38: Communication Monitoring
6.4.3. Communication Monitoring Pressing the [Communication Monitoring] button on the main screen displays the following screen. Perform settings for the requested exchange to send communication monitoring data. The monitoring data is stored in files, and received data is displayed. Request for Communication Monitoring data Pull down the exchange number box to select the exchange number. - Page 39 Communication Monitoring data display Displays the most recent 1000 monitoring data. [Print] Button Prints communication monitoring data displayed on the screen. [Close] Button Exits the communication monitoring data screen. Shown below are communication monitoring data display examples.
-
Page 40: Upload/Download
Displays the confirmation message. Pressing the [OK] button changes the exchange settings. When the [Cancel] button is pressed, the setting data is not transmitted to the computer. [Exit] Button Returns the display to the main screen. Note: Data Upload will update the VS-900MF system clock to match the PC clock setting. - Page 41 [Data Download] VS-900MF to PC or VS-900DI to PC To perform the setting of the exchange from which setting data are received, press the [Upload/Download] button on the main screen, and then the [Data Download] button. The following screen will then be displayed.
-
Page 42: Printout
6.4.5. Printout To perform the setting of the exchange the setting data of which is printed, press the [Printout] button. The following screen will then be displayed. Selection of [Designated Xch] displays the following screen: All Exchanges Prints setting data of all exchanges. Designated Exchanges Exchange number Prints setting data of the designated exchange. -
Page 43: Pc Port Setting
6.4.6. PC Port Setting To perform the maintenance setting, press the [PC Port] button on the main screen. The following screen will then be displayed. The following screen assumes that the communication connection method is set for "RS-232C." The following screen assumes that the communication connection method is set for "Modem." PC/exchange communication connection setting Connection Method Selects the method of connection to the exchange (RS-232C or Modem). -
Page 44: Vs-900Di Settings
Password Change [New Password] Button Displays the Password Change screen to permit the set password to be changed. (Refer to 1.1.2. on p. [Overwrite] Button Saves set data. [Close] Button Cancels current operation and returns the display to the main screen. Data input is abandoned. However, a warning message is displayed when changes are made. - Page 45 Dial Designation (table) Note One rhousand and twenty-four switches are always displayed per exchange. Dial Data [Dial] Sets the number (1 – 16 digits) to dial. Name [Name] Sets the master or substation name. Door Lock (Switch No.) [Door Lock (Switch No.)] Sets the control number (switch number) for the door lock remote operation.
-
Page 46: Data Setting Ranges And Initial Values
7. DATA SETTING RANGES AND INITIAL VALUES 7.1. System Setting Function Number of exchanges Station Number Digit Tie-Line Connections System Setting Exchange Station Number assignment 7.2. Line Setting Subject Station Number Station Name Access to Outgoing Calls Emergency Paging "Outside Line Calls Forwarding"... - Page 47 Subject Item Station Number Station Name Called Station Exchange Number Substation Called Station Line Number Called Station Number Called Station Name Call Priority Outside Line Connection Time-Out Outside Line Name Outgoing Call Access Number Direct-In Dialing Direct-In Line Receiving Station Outside Line (Rep/Member) Exchange Number...
-
Page 48: Function Settings
7.3. Function Settings Function Member Station Exchange Number Member Station Line Number Group Call Member Station Station Number Member Station Station Name Call Forwarding Time-Based Call Forwarding Time-Based Call Forwarding Start Time Time-Based Call Forwarding End Time Busy Call Forwarding No-Answer Call Call Forwarding... -
Page 49: Other Settings
Function Item Member Station Exchange Number Member Station Line Number Emergency Conference Member Station Station Number Member Station Station Name Control Output Mode Direct Select 7.4. Other Settings Function Item Remote Remote Dialing Dialing Log Data Log Data Communication Communication Monitoring Monitoring Data Upload... -
Page 50: Messages
8. MESSAGES 8.1. Confirmation Messages Display Message [Text changed. Exit?] [Will delete all list data. OK?] [Set file not saved. Exit?] [Reading log data. Will stop reading.] [Reading communication data. Will stop reading.] 8.2. Setting Error Messages Message [Incorrect first station No.] [Duplicated first station No.] [Incorrect first station No. - Page 51 Message [Incorrect station No. digit length (B) for exchange A] [Station No. (B) for Exchange A exceeds station No. limits.] [Incorrect name] [Incorrect Auto C/O Xfer sta] [Dialing incorrect exchange- equipment No. (A-B)] [Incorrect master equipment No.] [Invalid master equipment No.
- Page 52 Message [Not registered.] [Incorrect dial number] [Incorrect zone No. digit length] [Incorrect paging time-out] [Failed to transmit.] [Failed to open the device.] [Communications time-out] [Log Data File could not be opened.] [Communication Monitoring File could not be opened.] [Log Data File could not be written.] [Communication Monitoring File could not be written.]...
Need help?
Do you have a question about the VS-900MF and is the answer not in the manual?
Questions and answers