
Related Manuals for Nos 02125NOS


Summary of Contents for Nos 02125NOS
- Page 1 2011-2014 Mustang 5.0 / Boss 302 Kit Kit Number 02125NOS 2011-2014 Mustang 5.0 / Boss 302 Plate Kit Kit Number 13125NOS OWNER’S MANUAL P/N 199R11239...
- Page 2 NOS nitrous oxide is legal for use in most states when used in accordance with state and local traffic laws. NOS does not recommend or condone the use of its products in illegal racing activities.
-
Page 3: Table Of Contents
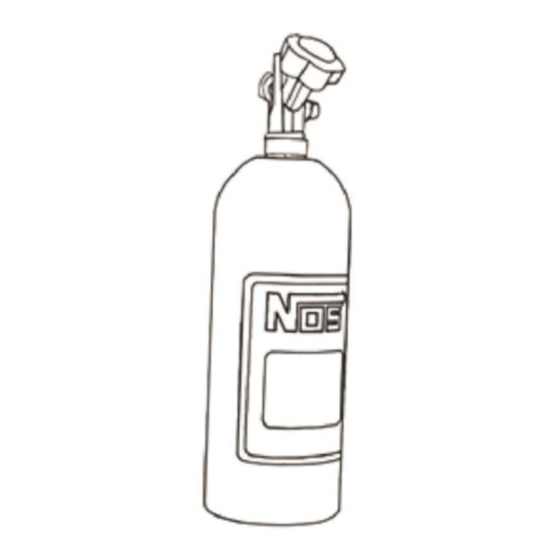
Please note that the NOS bottle label has changed to a two-part assembly. The first label is already located on the bottle. Upon filling your bottle with nitrous oxide, apply the (second) material information label in the area indicated in the picture to the right. -
Page 4: What Is Nitrous Oxide
1.1 General Information Kit Number 02125NOS was engineered to be a clean, simple installation on the Ford, 2011-2014 Mustang with a 5.0L Coyote V8 engine. Power output can be increase from 75 to 150 Rear Wheel Horse Power (RWHP) with the supplied jetting. The system can support up to 250 RWHP with optional jetting, but be aware that an increase over 150 RWHP will require an upgrade to the OEM fuel system in the form of an increased capacity fuel pump or a dedicated, stand-alone, fuel system. -
Page 5: System Requirements
1.3 Kit Components Before beginning the installation of your NOS kit, compare the components in your kit with those listed in Table 1. If any components are missing, please contact NOS Technical Support at 1-866-464-6553. - Page 6 Figure 1 Kit Number 02125NOS Component Identification -Parts Shown are not to scale-...
-
Page 7: Chapter 2 Kit Installation
2.2 Bottle Orientation Bottle placement is critical to the performance of your NOS nitrous system. It is important to understand how the bottle valve and siphon tube are assembled to properly orient the bottle in your vehicle and ensure that it picks up liquid nitrous while undergoing acceleration. -
Page 8: Solenoid Fittings And Bracket Mounting
Locate the bottle assembly in the desired mounting location, ensuring that the location will provide easy access to the bottle valve, hose connection, bracket clamp bolts to facilitate bottle changing and through hole of the blow-down tube. Use the assembled bottle/bracket unit as a pattern to mark for drilling the holes. Drill four 11/32” holes in the mounting surface for the bottle bracket bolts. - Page 9 Install the nitrous plate and throttle body to the intake using one of the new, longer throttle body screws in the hole shown in Figure 8. Do not tighten completely. Figure 7 Figure 8 Install the solenoid bracket and solenoids assembly you built in section 2.4 to the outside diameter of the throttle body with the three remaining, longer throttle body screws as shown in Figure 9.
-
Page 10: Fuel And Nitrous Supply Connection
Disconnect the ground cable from the battery. Install the NOS arming switch in the vehicle’s interior, within easy reach of the driver, and route the provided red and black wires from the switch to the power distribution box on passenger’s side of the engine bay. - Page 11 Connect the red relay wire to the white wire (same wire as described in step 4 above) between the master arming switch (“Load”) and the 2-stage mini controller using one of the provided Posi-Tap connectors (see assembly diagram on page 11). This tap can be installed close to the Mini 2-Stage Controller in the engine bay.
-
Page 12: Preparing For Operation
Figure 13 Electric Wiring Diagram 2.8 Preparing for Operation Install a fully charged nitrous bottle. The pressure gauge should read 900-1000 psi at operating temperature/pressure. Slowly open the nitrous bottle valve while listening and looking for any leaks at the bottle fittings as well as the fittings on the solenoids in the engine compartment. -
Page 13: Programming The Mini 2-Stage Progressive Controller
Turn the ignition power to the ON position, but do not start the car. Turn the Master Enable switch to the ON position. The red LED should be on now. Connect the hand held programmer to the USB cable and program the unit to the recommended base settings shown in section 2.8.1. -
Page 14: Chapter 3 Tuning
NOTE: The user must continue through the setup for stage 1 and stage 2 until they see END. If the power is shut off, or the system reset in any way, the changes will not be saved. Chapter 3 Tuning Table 2 Tuning Suggestions for NOS Kit Number 02125NOS Configuration O Jetting... -
Page 15: Chapter 4 Determining Optimum System Performance
Chapter 4 Determining Optimum System Performance The jetting combinations included in your 02125NOS kit are intended to generate power gains of 100-150 HP. These combinations are designed to be used with 950 psi of nitrous bottle pressure and 60 psi of flowing fuel pressure. Spark plug inspection and/or the use of a wide-band O sensor can determine optimum system performance. -
Page 16: Chapter 6 Routine Maintenance
You should periodically (after every 20-30 pounds of nitrous usage) examine the seal in the nitrous solenoid plunger. The seals used in NOS nitrous solenoid plungers are designed to work at pressures up to 1100 psi. Exposing the plunger to excessive pressure (whether the vehicle is sitting or in-use) can result in the seal in the plunger swelling or in extreme cases disintegrating. - Page 17 Remove the retaining nut from the nitrous solenoid. Remove the coil and housing from the nitrous solenoid base. Unscrew the stem from the nitrous solenoid base. Do this by double nutting the stem, or by using a solenoid stem removal tool. Do not use pliers on the solenoid stem.
-
Page 18: Appendix A Troubleshooting Guide
Appendix A Troubleshooting Guide The troubleshooting chart on the following pages should help determine and rectify most problems with your installed NOS system. If you still need assistance determining or fixing problems, call NOS Technical Support Department at 1-866-464-6553. PROBLEM... -
Page 19: Nitrous Oxide Accessories
Nitrous Oxide Accessories NOS systems are calibrated for optimum performance with a bottle pressure of 950 psi. The pressure will change with temperature. Heater kits are thermostatically controlled to keep the bottle near 85° F to provide correct pressure. Bottle Heater (P/N 14164NOS) is available for 10 &... - Page 20 NOS Technical Support Toll-Free Phone: 1-866-464-6553 Phone: 1-270-781-9741 For online help, please check the Tech Service section of our website: www.holley.com For refill information: 1-800-99-REFILL (1-800-997-3345) 199R11239 Date: 3-8-17...
Need help?
Do you have a question about the 02125NOS and is the answer not in the manual?
Questions and answers