Advertisement
Quick Links
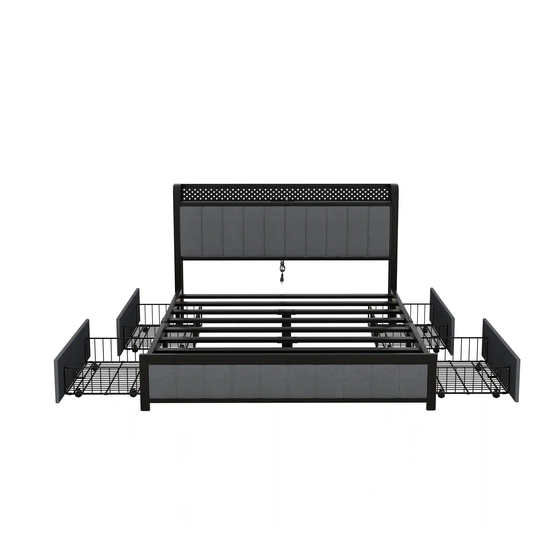
ASSEMBLY INSTRUCTION
W1580113787 / W1580113790 / W1580113791
TIPS
1. This bed fit standard queen mattress 80" L x 60" W.
2. Always use the recommended size mattresses or mattress supports, or both, to help prevent the
likelihood of entrapment or falls.
3. Do not allow horseplay on or under the bed and prohibit jumping on the bed.
4. Do not use substitute part. Contact the manufacture or dealer for replacement part.
7
5L
9
23
6
8
22
3
10
5R
11
1
4
12
13
16
13
12
12
17
4
13
13
15
16
16
12
24
11
17
17
11
15
16
16
4
18
17
11
19
14
16
2
4
Page 1 of 13
Advertisement

Subscribe to Our Youtube Channel
Related Manuals for BED BATH & Beyond W1580113787


Summary of Contents for BED BATH & Beyond W1580113787
- Page 1 ASSEMBLY INSTRUCTION W1580113787 / W1580113790 / W1580113791 TIPS 1. This bed fit standard queen mattress 80" L x 60" W. 2. Always use the recommended size mattresses or mattress supports, or both, to help prevent the likelihood of entrapment or falls.
-
Page 2: Part List
Part List Headborad x1 Footboard x1 Panel x1 Panels x4 Headboard Leg x1 Headboard Leg x1 Decorative Iron Plate x1 Frame x1 Frame x1 Frame x1 Frame x1 Side Rails X4 Rail x4 Rail x4 Frame x1 Side Net x4 Drawers Side Net x8 Drawers Bottom Net x4 Page 2 of 13... -
Page 3: Hardware List
Part List Support Leg x2 Support Leg x2 Remote Control X1 USB Cable X1 LED Light X1 Socket X1 Caster x16 Hardware List Bolts(M6X10mm) X34 Bolts(M6X30mm) X8 Bolts(M6X55mm) X12 Nut(M6) X8 Spanner X1 Allen Key X1 Screws (M4X16mm) X20 Screws (M3X12mm) X12 Clasp X44 Page 3 of 13... - Page 4 Step1 Attention: Do not tighten the screws before completing the entire installation.If you have any difficulty with the installation process, please feel free to contact us. Bolt(M6X55mm) X8 Note the installation direction Step2 Bolt(M6X10mm) X6 Page 4 of 13...
- Page 5 Step3 Screws (M3X12mm) Assembly Tools Required(Not Included) Step4 Screws(M4X16mm) Front view Back view Assembly Tools Required(Not Included) Page 5 of 13...
- Page 6 Step5 WRONG RIGHT ✔ Screws (M3X12mm) X2 ✘ Assembly Tools Required(Not Included) Step6 Ensure that the four wires are flush RIGHT WRONG ✔ ✘ Page 6 of 13...
- Page 7 Step7 Tear the tape from the back of the LED light Paste on top of the baffle in turn The USB cable goes through the hole Step8 Bolt(M6X30mm) X1 Bolt(M6X55mm) X1 Nut(M6) X1 Page 7 of 13...
- Page 8 Step9 Bolt(M6X30mm) X3 Bolt(M6X55mm) X1 Nut(M6) X3 Step10 Bolt(M6X10mm) X4 Page 8 of 13...
- Page 9 Step11 Bolt(M6X55mm) X1 Nut(M6) X1 Step12 Bolt(M6X30mm) X2 Bolt(M6X55mm) X1 Nut(M6) X3 Page 9 of 13...
- Page 10 Step13 Bolt(M6X10mm) X4 Step14 Screws(M4X16mm) Front view Back view Page 10 of 13 Assembly Tools Required(Not Included)
- Page 11 Step15 Bolt(M6X30mm) X2 Step16 Bolts(M6X10mm) X5 Clasp X11 Page 11 of 13...
- Page 12 Step17 Step18 Page 12 of 13...
- Page 13 Step19 ✘ ✔ WRONG RIGHT Remote control does not contain batteries, please buy your own a CR2025 button battery installed into the remote control Page 13 of 13...
Need help?
Do you have a question about the W1580113787 and is the answer not in the manual?
Questions and answers