
Related Manuals for B.A. International BA604E


Summary of Contents for B.A. International BA604E
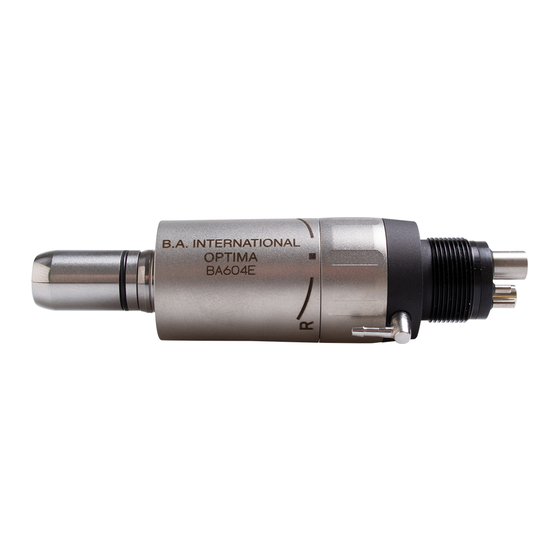
- Page 1 BA O PTIMA Operation Manual for: • BA604E • BA602E BA640065 BA640085 OM-MK153E 000 Made in Japan Please read this operation manual carefully before use, and file for future reference...
-
Page 4: User And Indications For Use
Class Degree of Risk 1. User and Indications for Use Hazard that could result in serious injury or WARNING damage to the device if the safety instructions are User: Qualified Professionals (Dentist / Dental hygienist) not correctly followed. Indications for Use: Hazard that could result in light or moderate injury The air motor is intended to drive a dental handpiece or contra-angle CAUTION or damage to the device if the safety instructions... -
Page 5: Accessory List
Operation Manual. 3. Accessory List • D o not allow any impact on to the product. Do not drop the Part Name Quantity product. Lubrication Oil • O perators and all others in the area must wear eye protection and a mask when operating this motor. 4. Setting of Air & Water Supply Pressure • S hould the product function abnormally, cease operation immediately and contact your Authorized B.A. International Dealer. Measure the supply pressure at the handpiece / hose connection point • D o not use high acid water or sterilizing solutions to wipe, immerse and set the pressure to the value specified on the specification table. or clean the product. (Fig. 1) • T he products are delivered in a non-sterile condition and must be For Multi Gauge information refer to Option Parts List. autoclaved prior to use. • P erform regular function and maintenance checks. WARNING • I f the product is not used for a long period check it is functioning correctly before using on a patient. -
Page 6: Check Before Treatment
5. Connection & Disconnection of the Handpiece 7. Water and Chip Air Supply to the Handpiece 5-1 Connection 1) Insert the Spray Tube Attachment into the Spray Tube Nozzle. 1) Connect the handpiece direct to the motor. (Fig. 2) (Fig. 3) 2) Make sure the handpiece is firmly connected to the motor. 2) Trim the tube to the desired length. 3) Insert the other end of the Spray Tube Attachment into the nozzle 5-2 Disconnection clamp on the Contra Angle or Straight handpiece. Hold the motor and the handpiece separately and disconnect with 8. Forward / Reverse Rotation care. 1) Forward Rotation : Turn the FWD/REV Change Ring to “F”. (Fig. 4) CAUTION 2) Reverse Rotation : Turn the FWD/REV Change Ring to “R”. (Fig. 5) 3) When the FWD/REV Change Ring is positioned at the middle of “F” • D isconnect the handpiece only after the motor has completely and “R” , the drive air is interrupted and the motor does not rotate. -
Page 7: Post-Use Maintenance
9-2 Cleaning 9. Post-use Maintenance Manual Cleaning (External Surface) After each patient maintain the product as follows. 1) Remove dirt and debris on the motor surface using a brush under running water (at 38°C or less). Do not use a wire brush. WARNING 2) Wipe off the moisture on the surface using absorbent cloth. • I mmediately after a treatment, the handpiece should be Automatic Cleaning (External and Internal Surfaces) cleaned, lubricated and sterilized. Failure to properly maintain Use a thermo-disinfector in accordance with ISO 15883 (EN ISO 15883). the handpiece may lead to overheating, causing burn injuries or Refer to the thermo-disinfector manual. product failure. CAUTION CAUTION • A fter washing with thermo-disinfector and prior to lubrication, • D o not use the following fluids to wipe, immerse or clean the dry the product until all internal moisture is thoroughly removed. product; strong/super acid water, strong acid/alkaline chemicals, Thermo-disinfector moisture remaining inside the product could chlorine-containing solutions, solvents such as benzine or thinner. reduce the effect of lubrication and could cause corrosion inside of the product. 9-1 Preparation 1) Wear a eye protection, a mask and gloves to avoid infection. 2) Disconnect the handpiece from the motor. 3) Remove the motor from the hose. - Page 8 9-3 Disinfection CAUTION Manual Disinfection (External Surface) Wipe the surface with cloth soaked in disinfectant solution such as • H old the spray can upright. alcohol. • B e sure to hold the handpiece firmly to prevent slipping out of hand by the spray pressure when lubricating. Automatic Disinfection (External and Internal Surfaces) Lubrication Oil Use a thermo-disinfector in accordance with ISO 15883 (EN ISO 15883). 1) Remove the motor from the hose. Refer to the thermo-disinfector manual. 2) Apply 1-2 drops of lubrication oil into the Drive Air Port shown in the Fig. 8. 9-4 Lubrication 3) Connect the motor to the hose. Operate the motor for about 10 seconds. BA ULTIMATE SPRAY Apply BA ULTIMATE SPRAY every time after each use and/or before 9-5 Sterilization autoclaving. Sterilize the product by autoclave sterilization. After each patient 1) Remove the motor from the hose. sterilize as noted below. 2) Mount the arrow-head spray nozzle tip into the spray can port. 1) Insert into an autoclave pouch. Seal the pouch. (Fig. 7) 2) Autoclavable under the conditions below. 3) Insert the Spray Nozzle into the Drive Air Port of the motor. Hold the Autoclave for more than 15min. at 132°C, or 3min. at 134°C. motor and spray for approximately 2-3 seconds. Apply lubricant 3) The handpiece should remain in the autoclave pouch until required until it expels from the exhaust air part for at least 2 seconds. (Fig.8) for use.
-
Page 9: Periodical Maintenance Checks
CAUTION NOTICE • D o not autoclave the product with other instruments even when it • B .A. International recommends Class B sterilizers as stated in EN is in a pouch. This is to prevent possible discoloration and damage 13060. to the product from chemical residue on other instruments. 10. Periodical Maintenance Checks • D o not heat or cool the product too quickly. Rapid change in temperature could cause damage to the product. Perform periodical maintenance checks every three months, referring • T o avoid product failure, do not use a sterilizer whose temperature to the check sheet below. If any abnormalities are found, contact your exceeds 138°C during use including the dry cycle. The chamber Authorized B.A. International Dealer. temperature of some type of sterilizers may exceed 138°C. Points to check Details Contact the sterilizer manufacturer for detailed information. Rotation Rotate the motor and check for abnormalities • K eep the product in suitable atmospheric pressure, temperature, such as abnormal rotation, vibration, noise, and humidity, ventilation, and sunlight. The air should be free from... -
Page 10: Warranty
Conforms to CE European Directive of “Medical equipment 13. Option parts List directive 93/42/EEC.” Model Order Code Compatible Product Manufacturer. BA Multigauge for BA08010030 BA604E Authorized representative in the European community. Midwest connections Borden to Midwest TST790 BA602E + BA Multigauge Consult operation instructions. Adaptor 12. Warranty 14. Disposing product B.A. International products are warranted against manufacturing In order to avoid the health risks of operators handling the disposal of errors and defects in materials. B.A. International reserves the right to... -
Page 11: Service And Repair
15. Service and Repair Important This airmotor is a result of precision engineering and cannot be dismantled/repaired by the third party. For service and repair, always send it to either BA International Ltd. or an accredited BA certified service centre without dismantling it. -
Page 12: Specifications
16. Specifications Model BA604E BA602E Hose Connection Type ISO 9168 Type 2 (Midwest 4 hole) ISO 9168 Type 1 (Borden 2 hole) Handpiece Connection Type E Type ISO 3964 Max. Rotation Speed 19,800 - 24,200min (0.25MPa) 22,500 - 27,500min (0.25MPa) Breakdown Torque 1.5N·cm and more (0.25MPa) Drive Air Pressure 0.20 - 0.25MPa (2.0 - 2.5kgf/cm Air Consumption <66NL/min (0.25MPa) Water Pressure 0.10 - 0.25MPa (1.0 - 2.5kgf/cm Chip Air Pressure 0.15 - 0.25MPa (1.5 - 2.5kgf/cm – Coolant Water Supply 50mL/min and more (0.20MPa) Coolant Air Supply 1.5NL/min and more (0.20MPa) – Water Spray Type External Spray Use Environment Temperature: 10-35°C (No Condensation), Humidity: 30-75% Transportation and Store Environment Temperature: -10-50°C, Humidity: 10-85%, Atmospheric Pressure: 500-1,060hPa... - Page 14 KLASSE Ausmaß und Schwere der Gefährdung oder Schädigung 1. Benutzer und Verwendungszweck Risiko, das zu schweren Verletzungen oder ACHTUNG Schäden am Gerät führen kann, wenn die Benutzer: Qualifiziertes Fachpersonal (Zahnarzt/Dentalhygieniker) Sicherheitshinweise nicht beachtet werden. Anwendungshinweise: Ein mögliches Risiko, das zu leichten bis mittleren VORSICHT Personen- oder Sachschäden führen kann, wenn Der Luf tmotor ist für den A ntrieb eines dentalen Hand- oder...
- Page 15 nehmen Sie keine Änderungen am Mechanismus vor, es sei denn, Patienten anwenden. dies wird von B.A. International in diesem Handbuch empfohlen. • E s wird empfohlen, ein Reservegerät für den Fall eines Ausfalls • S chützen Sie das Produkt vor Stößen. Lassen Sie das Produkt während einer Operation verfügbar zu haben. nicht fallen. • B ediener und alle anderen Personen in der Umgebung müssen 3.Zubehörteile-Liste während der Benutzung dieses Motors Augenschutz und Maske Bezeichnung der Teile Anzahl tragen. • S ollte das Produkt nicht einwandfrei funktionieren, stellen Sie Schmieröl den Einsatz sofort ein und nehmen Sie Kontakt mit Ihrem B.A. International-Fachhändler auf. 4. Einstellung des Luft- & Wasserdrucks • B enutzen Sie kein Wasser mit hohem Säuregehalt oder Messen Sie den Versorgungsdruck am Handstück / Schlauchanschluss Sterilisationslösungen zum Abwischen, Eintauchen oder Reinigen und stellen Sie den Druck entsprechend den Angaben in der Tabelle ein. des Produkts. Legen Sie das Produkt nicht in solche ein. (Abb. 1) • D ie Produkte werden im unsterilen Zustand ausgeliefert und Für Informationen zu Multi Gauge siehe Stückliste.
- Page 16 ACHTUNG VORSICHT • Ü berschreiten Sie nicht den in der Tabelle genannten optimalen • E ntfernen Sie das Handstück erst, wenn der Motor vollständig zum Druck. Stillstand gekommen ist. 6. Überprüfung vor der Behandlung VORSICHT Schließen Sie das Handstück an den Motor an und überprüfen Sie • B enutzen Sie keine durch Staub, Feuchtigkeit und Öl verunreinigte den Motor auf Vibrationen, Geräusche und Überhitzung. Wenn Sie Luft. irgendwelche Abweichungen feststellen, dürfen Sie den Motor nicht benutzen und müssen Kontakt mit Ihrem B.A. International-Fachhändler 5.
- Page 17 8. Vorwärts-/Rückwärtsrotation folglich zu Verbrennungen oder Fehlfunktionen des Geräts kommen. 1) Vorwärtsrotation: Drehen Sie den Verstellring VORWÄRTS/ RÜCKWÄRTS auf "F". (Abb. 4) VORSICHT 2) Rückwärtsrotation: Drehen Sie den Verstellring VORWÄRTS/ RÜCKWÄRTS auf "R". (Abb. 5) • V erwenden Sie zum Abwischen, Eintauchen oder Reinigen des 3) Wenn der Verstellring VORWÄRTS/RÜCKWÄRTS zwischen "F" und Produkts nicht die folgenden Flüssigkeiten: Wasser mit hohem "R" steht, ist die Luftzufuhr unterbrochen und der Motor läuft nicht. Säuregehalt, starke Säure/alkalische Chemikalien, chlorhaltige (Abb. 6) Lösungen, Lösungsmittel wie Benzin oder Verdünnungsmittel. * F : Vorwärtsrotation R : Rückwärtsrotation 9-1 Vorbereitende Schritte 9. Wartung nach der Behandlung 1) Um Infektionen zu vermeiden, tragen Sie einen Augenschutz, eine Maske und Handschuhe. Führen Sie nach jedem Patienten die folgende Wartung des Produkts durch. 2) Trennen Sie das Handstück vom Motor. 3) Entfernen Sie den Motor vom Schlauch. ACHTUNG 9-2 Reinigung • D er Motor sollte unmittelbar nach einer Behandlung gereinigt, Manuelle Reinigung (Außenfläche) geschmiert und sterilisiert werden. Wenn der Motor nicht...
- Page 18 1) Reinigen Sie die Außenfläche des Motor mit einer Bürste unter 9-3 Desinfektion laufendem Wasser (max. 38°C) von Schmutz und Ablagerungen. Manuelle Desinfektion (Außenfläche) Benutzen Sie KEINE Drahtbürste. Wischen Sie mit einem in Desinfektionslösung, wie z.B. Alkohol, 2) Trocknen Sie die Außenfläche mit einem saugfähigen Tuch. getränkten Tuch über die Oberfläche. Automatische Reinigung (Außen- und Innenflächen) Automatische Desinfektion (Außen- und Innenflächen) Verwenden Sie einen mit ISO 15883 (EN ISO 15883) konformen Verwenden Sie einen mit ISO 15883 (EN ISO 15883) konformen Thermodesinfektor. Thermodesinfektor. Beachten Sie die Bedienungsanleitung des Thermodesinfektors. Beachten Sie die Bedienungsanleitung des Thermodesinfektors. 9-4 Schmierung VORSICHT BA ULTIMATE SPRAY • L assen Sie das Produkt nach der Reinigung mittels Führen Sie nach jeder Benutzung und/oder vor der Autoklavierung Thermodesinfektor und vor der Schmierung trocknen, bis die eine Ölpflege mit BA ULTIMATE SPRAY durch. gesamte Feuchtigkeit im Inneren entwichen ist. Feuchtigkeit des 1) Entfernen Sie den Motor vom Schlauch. Thermodesinfektors im Inneren des Produkts kann die Wirkung 2) Montieren Sie die Öl-Sprühdüse (Spannzange; blau REF:Z020201) der Schmierung verringern und Korrosion im Inneren des Produkts auf der Spraydose. (Abb. 7) verursachen.
- Page 19 von etwa 2-3 Sekunden. Tragen Sie Schmiermittel auf, bis es 9-5 Sterilisation mindestens 2 Sekunden lang aus dem Abluftteil austritt. (Abb. 8) Sterilisieren Sie das Produkt im Autoklaven. Führen Sie nach jedem Patienten die Sterilisation wie folgt durch. VORSICHT 1) Legen Sie das Gerät in einen Sterilisations-Beutel. Versiegeln Sie diesen. • H alten Sie die Dose aufrecht. 2) Autoklavierbar unter den unten genannten Bedingungen. • S tellen Sie beim Auftragen von Spray sicher, dass Sie den Motor Autoklavierbar für mehr als 15Min. bei 132°C, oder 3Min. bei festhalten, um zu verhindern, dass der Motor bei der Schmierung 134°C. aufgrund des Spray-Drucks herausrutscht. 3) Das Produkt sollte bis zum Gebrauch im Sterilisations Beutel verbleiben.
-
Page 20: Regelmäßige Wartungsprüfungen
• U m Fehlfunktionen des Produkts zu vermeiden, verwenden HINWEIS Sie keinen Sterilisator, dessen Temperatur, einschließlich dem Trocknungszyklus, 138°C überschreitet. Die Temperatur in der • B .A. International empfiehlt Klasse B-Sterilisation nach EN 13060. Kammer mancher Sterilisatoren kann 138°C überschreiten. Detaillierte Informationen erhalten Sie vom Hersteller des 10. Regelmäßige Wartungsprüfungen Sterilisators. Führen Sie alle drei Monate Wartungsprüfungen durch, siehe dazu • L agern Sie das Produkt unter geeigneten Verhältnissen die im Folgenden aufgeführten Kontrollpunkte. Wenn Sie irgendeine hinsichtlich Luftdruck, Temperatur, Luftfeuchtigkeit, Belüftung Auf fälligkeit feststellen, nehmen Sie Kontak t mit Ihrem B. A . und Sonneneinstrahlung. Die Luft darf nicht staub-, salz- oder International-Fachhändler auf. -
Page 21: Garantie
Dieses Produkt kann bei bis zu max.135 °C. autoklaviert werden. Produktion des Modells erhältlich. 13. Stückliste Dieses Produkt kann mit einem Thermodesinfektor gereinigt und desinfiziert werden. Modell Bestellnummer kompatibel mit folgendem/n Produkt/en Die EU-Richtlinie 93/42/EEC wurde bei der Entwicklung und BA Multigauge für BA08010030 BA604E Herstellung dieses medizinischen Gerätes angewendet. Midwest-Anschlüsse Borden an TST790 BA602E + BA Multigauge Hersteller. Midwest-Adapter Autorisierter Repräsentant in der Europäischen Gemeinschaft. 14. Entsorgung des Produkts Siehe Betriebshandbuch. Zur Vermeidung von Risiken der Gesundheit des Benutzers bei der 12. -
Page 22: Wartung Und Reparatur
15. Wartung und Reparatur Wichtig Dieser Luftmotor ist das Ergebnis genauer Präzisionstechnik und kann von Dritten nicht zerlegt oder repariert werden. Senden Sie ihn zur Wartung und Reparatur immer an BA International Ltd. oder ein akkreditiertes, von BA zertifiziertes Service-Center, ohne ihn zu zerlegen. -
Page 23: Technische Daten
16. Technische Daten Modell BA604E BA602E Schlauchanschluss ISO 9168 Typ 2 (Midwest 4-Loch) ISO 9168 Typ 1 (Borden 2-Loch) Handstückanschluss E Type ISO 3964 Max. Drehzahl 19.800 - 24.200min (0,25MPa) 22.500 - 27.500min (0,25MPa) Bruchdrehmoment 1.5N·cm und mehr (0,25MPa) Antriebsluftdruck 0,20 - 0,25MPa (2,0 - 2,5kgf/cm Luftverbrauch <66NL/min (0,25MPa) Wasserdruck 0,10 - 0,25MPa (1,0 - 2,5kgf/cm Luftdruck 0,15 - 0,25MPa (1,5 - 2,5kgf/cm – Kühlwasserzufuhr 50mL/min und mehr (0,20MPa) Kühlluftzufuhr 1,5NL/min und mehr (0,20MPa) – Wassersprühtyp Externes Sprühen Benutzungsumgebung Temperatur: 10-35°C (Keine Kondensation), Feuchte: 30-75% Transport und Lagerort Temperatur: -10-50°C, Feuchte: 10-85%, Atmosphärischer Druck: 500-1,060hPa... -
Page 24: Précautions À Prendre Lors De La Manipulation Et Du Fonctionnement
Classification Niveau de danger ou danger et gravité 1. Utilisateur et finalité d'utilisation Le non-respect des instructions de sécurité risque AVERTISSEMENT de provoquer des blessures graves ou Utilisateur : professionnels qualifiés (dentiste/hygiéniste dentaire) d’endommager l’appareil. Indications d’utilisation : Le non-respect des instructions de sécurité risque ATTENTION Le moteur pneumatique est destiné à entraîner une pièce à main de provoquer des blessures légères ou d'endommager l’appareil. -
Page 25: Liste Des Accessoires
mécanisme, sauf si B.A. International vous le recommande dans opération chirurgicale. ce mode d’emploi. • V eillez à ce que le produit ne soit soumis à aucun impact. Ne faites 3. Liste des accessoires pas tomber le produit. Nom de la pièce Quantité • L es utilisateurs et toutes les autres personnes présentes dans la Huile de lubrification pièce doivent porter des lunettes de protection et un masque lors de l'utilisation de ce moteur. 4. Réglage de la pression d'alimentation en air & en eau • S i le produit ne fonctionne pas correctement, arrêtez immédiatement de l’utiliser et contactez votre distributeur B.A. Mesurez la pression d'alimentation à l'endroit de connexion de la pièce à International agréé. main/du cordon et réglez la pression à la valeur spécifiée dans le tableau • N ’essuyez pas, ne nettoyez pas ou n’immergez pas le produit dans de spécification. (Fig. 1) de l’eau fortement acide ou des solutions de stérilisation. -
Page 26: Vérification Avant Utilisation
6. Vérification avant utilisation ATTENTION Connectez la pièce à main au moteur et vérifiez si le moteur présente • N 'utilisez pas d'air contaminé par de la poussière, de l'humidité ou des vibrations, du bruit ou une surchauffe. En cas d’anomalies, n'utilisez de l'huile. pas le moteur et contactez votre revendeur B.A. International agréé. 5. Connexion & déconnexion de la pièce à main 7. Alimentation en eau et en air pour la pièce à main 1) Insérez l'accessoire du tube du spray dans l'embout du tube du spray. (Fig. 3) 5-1 Connexion 2) Ajustez la longueur du tube. 1) Connectez la pièce à main directement au moteur. (Fig. 2) 3) Insérez l'autre extrémité de l'accessoire du tube du spray dans la 2) A ssurez-vous que la pièce à main est fermement connectée au moteur. - Page 27 * F : Rotation horaire 9-1 Préparation R : Rotation anti-horaire 1) Portez une protection oculaire, un masque et des gants pour éviter toute infection. 9. Entretien après usage 2) Déconnectez l'instrument du moteur. Après chaque patient, procédez à l'entretien du produit comme suit. 3) Retirez le moteur du tuyau. AVERTISSEMENT 9-2 Nettoyage Nettoyage manuel (surface externe) • I mmédiatement après utilisation, nettoyez, lubrifiez et stérilisez le 1) Retirez la saleté et les débris de la surface de l'instrument à l'aide produit. Un entretien incorrect de l'instrument peut entraîner une d'une brosse, sous l'eau courante (à 38°C ou moins). N'utilisez surchauffe et des brûlures ou une défaillance du produit. PAS de brosse métallique. 2) Essuyez l'humidité sur la surface à l'aide d'un chiffon absorbant. ATTENTION Nettoyage automatique (surfaces externe et interne) • N 'utilisez pas les fluides suivants pour essuyer, immerger ou Utilisez un thermodésinfecteur conformément à la norme ISO 15883 nettoyer le produit : de l'eau forte/très acide, des produits (EN ISO 15883). chimiques acides/alcalins forts, des solutions contenant du chlore, Reportez-vous au manuel du thermodésinfecteur. des solvants tels que du benzène ou un diluant.
- Page 28 9-4 Lubrification ATTENTION BA ULTIMATE SPRAY Appliquez BA ULTIMATE SPRAY après chaque utilisation et/ou avant • A près lavage en thermodésinfecteur et avant lubrification, séchez l’autoclave. le produit jusqu'à ce que toute l'humidité interne ait été enlevée. 1) Retirez le moteur du tuyau. Si de l'humidité du thermodésinfecteur demeure à l'intérieur 2) Montez l’embout de lubrification à tête biseautée sur le raccord de du produit, l'effet de la lubrification pourrait être réduit et de la la bombe d'aérosol. (Fig. 7) corrosion pourrait attaquer l'intérieur du produit. 3) Insérez l'embout de spray dans le port d'arrivée d'air du moteur. 9-3 Désinfection Tenez le moteur et pulvérisez pendant environ 2-3 secondes. Désinfection manuelle (surface externe) Vaporisez du lubrifiant jusqu’à ce qu’il en ressorte de la pièce de Essuyez la surface à l'aide d'un chiffon imbibé d'une solution l'air d'échappement pendant au moins 2 secondes. (Fig. 8) désinfectante telle que de l'alcool. ATTENTION Désinfection automatique (surfaces externe et interne) • T enez le spray à la verticale. Utilisez un thermodésinfecteur conformément à la norme ISO 15883 • P endant la lubrification, veillez à tenir fermement l'instrument (EN ISO 15883).
- Page 29 Huile lubrifiante ATTENTION 1) Retirez le moteur du tuyau. 2) Appliquez 1 ou 2 gouttes d'huile lubrifiante dans le port d'arrivée • N e stérilisez pas le produit en autoclave avec d'autres instruments, d'air illustré à la Fig. 8. même s'il se trouve dans un sachet. Il pourrait en résulter une 3) Connectez le moteur au tuyau. Faites fonctionner le moteur décoloration et des dommages au produit en raison de résidus pendant environ 10 secondes. chimiques sur d'autres instruments. • N e chauffez et ne refroidissez pas le produit trop rapidement. 9-5 Stérilisation Une fluctuation rapide de la température pourrait endommager le Stérilisez le produit en autoclave. Après chaque patient, stérilisez produit. comme indiqué ci-dessous. • P our éviter une défaillance du produit, n'utilisez pas un stérilisateur 1) Insérez l'instrument dans un sachet pour autoclave. Scellez le dont la température dépasse 138°C pendant l'utilisation, y compris sachet.
-
Page 30: Contrôles D'entretien Périodique
10. Contrôles d'entretien périodique • N e touchez pas le produit immédiatement après qu'il soit passé en autoclave, puisqu'il peut être extrêmement chaud et qu'il doit Procédez aux contrôles d'entretien périodique tous les trois mois, en demeurer stérile. se basant sur la fiche ci-dessous. Si des anomalies sont identifiées, • L a stérilisation en autoclave est recommandée pour ce produit. La contactez votre revendeur B.A. International agréé. validité d'autres méthodes de stérilisation n'est pas confirmée. Points à vérifier Détails Rotation Faites pivoter le moteur et vérifiez l'absence REMARQUE d'anomalies, notamment rotation, vibration, bruit et surchauffe atypiques. • B .A. International recommande des stérilisateurs de classe B, comme spécifié par la norme EN 13060. -
Page 31: Mise Au Rebut Du Produit
15. Services et réparations pièces de rechange sont disponibles pendant sept ans après l'arrêt de production du modèle. Important 13. Liste des pièces en option Ce moteur pneumatique est le fruit d’un travail d’ingénierie de précision. Il ne peut pas être démonté/réparé par une tierce partie. Pour toute Modèle Référence Produit compatible opération de services et de réparation, veuillez envoyer la pièce à BA BA Multigauge pour BA08010030 BA604E International Ltd. ou à un centre de services BA agréé. les raccords Midwest Adaptateur de Borden TST790 BA602E + BA Multigauge au Midwest... -
Page 32: Spécifications
16. Spécifications Modèle BA604E BA602E Type de connexion de tuyau ISO 9168 Type 2 (Midwest 4 trous) ISO 9168 Type 1 (Borden 2 trous) Type de connexion pièce à main Type E ISO 3964 Vitesse de rotation max. 19.800 - 24.200min (0,25MPa) 22.500 - 27.500min (0,25MPa) Panne couple 1,5N·cm et plus (0,25MPa) Pression d’air 0,20 - 0,25MPa (2,0 - 2,5kgf/cm Consommation d’air <66NL/min (0,25MPa) Pression hydraulique 0,10 - 0,25MPa (1,0 - 2,5kgf/cm Pression pneumatique 0,15 - 0,25MPa (1,5 - 2,5kgf/cm – Consommation d’eau de refroidissement 50mL/min et plus (0,20MPa) Consommation d’air de refroidissement 1,5NL/min et plus (0,20MPa) – Type de spray à eau Spray externe Environnement d’utilisation Température: 10-35°C (sans condensation), Humidité: 30-75% Stockage et transport Environnement Température: -10-50°C, Humidité: 10-85%, Pression atmosphérique: 500-1.060hPa... - Page 34 Clasificación Grado de peligro y gravedad 1. Usuario y Indicaciones de uso En caso de que no se respeten las instrucciones de ADVERTENCIA seguridad, existe el peligro de poder provocar Usuario: Profesionales cualificados (Dentista/higienista dental) serios daños personales o daños al dispositivo. Indicaciones de uso: En caso de que no se respeten las instrucciones de El motor de aire tiene la finalidad de accionar una pieza de mano de PRECAUCIÓN seguridad, existe el peligro de poder provocar pequeños...
-
Page 35: Lista De Accesorios
excepto cuando así lo recomiende B.A. International en este recomienda tener a mano una unidad de repuesto por si ocurriera manual de operaciones. una avería durante la cirugía. • E vite que el producto sufra cualquier impacto. No deje caer el producto. 3. Lista de accesorios • L os especialistas y demás personal de la zona deben llevar Nombre de la pieza Cantidad protectores oculares y máscara cuando trabajen con este motor. Aceite lubricante • E n caso de que este producto funcione de forma anormal, detenga inmediatamente su funcionamiento y póngase en contacto con su 4. Ajuste de la presión de suministro de aire y agua distribuidor B.A. International autorizado. • N o utilice agua muy ácida o soluciones esterilizantes para limpiar, Mida la presión de suministro en el punto de conexión de la pieza sumergir o limpiar el producto. - Page 36 ADVERTENCIA PRECAUCIÓN • N o supere la presión óptima especificada en la tabla de • D esconecte la pieza de mano únicamente después de que el especificaciones. motor haya parado de rotar por completo. 6. Verificación antes de tratamiento PRECAUCIÓN Conecte la pieza de mano al motor y compruebe las vibraciones del • N o utilice aire contaminado por polvo, humedad o aceite. motor, el ruido y el sobrecalentamiento. Si se produjera alguna anomalía, 5. Conexión y desconexión de la pieza de mano deje de utilizar el motor y póngase en contacto con su distribuidor B.A. International autorizado. 5-1 Conexión 7. Suministro de agua y aire de pulverización de la 1) Conecte la pieza de mano directa al motor. (Fig. 2) pieza de mano 2) A segúrese de que la pieza de mano está firmemente conectada al...
- Page 37 8. Rotación hacia delante/hacia atrás PRECAUCIÓN 1) Rotación hacia delante: Gire el anillo de cambio FWD/REV hasta “F”. • N o utilice los siguientes líquidos para limpiar, sumergir ni lavar el (Fig. 4) producto: ácido nítrico/agua muy ácida, productos químicos ácidos/ 2) Rotación hacia atrás: Gire el anillo de cambio FWD/REV hasta “R”.(Fig. 5) alcalinos fuertes, soluciones que contengan cloro ni disolventes 3) Cuando el anillo de cambio FWD/REV esté situado en el medio de “F” y “R”, como bencina o diluyente. la conducción de aire se interrumpirá y el motor no rotará. (Fig. 6) * F : Rotación hacia delante 9-1 Preparación R : Rotación hacia atrás 1) Lleve protectores oculares, una máscara y guantes para evitar infecciones. 9. Mantenimiento posterior al uso 2) Desconecte la pieza de mano del motor. Después de cada paciente, realice el mantenimiento del producto de la 3) Retire el motor del tubo. siguiente manera. 9-2 Limpieza ADVERTENCIA Limpieza manual (superficie externa) 1) Retire la suciedad y los restos de la superficie del motor con un • I nmediatamente después del tratamiento se deberá limpiar, lubricar cepillo y agua corriente (a 38°C o menos). NO utilice un cepillo de...
- Page 38 Limpieza automática (superficies interna y externa) Desinfección automática (superficies interna y externa) Utilice un termo-desinfectante que cumpla el estándar ISO 15883 Utilice un termo-desinfectante que cumpla el estándar ISO 15883 (EN ISO 15883). (EN ISO 15883). Consulte el manual de termo-desinfectante. Consulte el manual del termo-desinfectante. 9-4 Lubricación PRECAUCIÓN BA ULTIMATE SPRAY • D espués de lavar con termo-desinfectante y antes de la Aplique BA ULTIMATE SPRAY después de cada uso y/o antes de la lubricación, seque el producto hasta que toda lahumedad interior limpieza con autoclave. haya desaparecido por completo. La humedad del termo- 1) Retire el motor del tubo. desinfectante que queda dentrodel producto podría reducir el 2) Monte la boquilla de pulverización del cabezal en flecha en el efecto de lubricación yocasionar corrosión en el interior de este conducto de la botella del pulverizador. (Fig. 7) producto. 3) Inserte la boquilla de pulverizador en el conducto de conducción de aire del motor. Sostenga el motor y el pulverizador durante 2-3 9-3 Desinfección segundos. Aplique lubricante hasta que sobresalga de la pieza de Desinfección manual (superficie externa) salida de aire durante al menos dos segundos. (Fig. 8) Limpie la superficie con un trapo empapado en una...
- Page 39 2) Esterilice con autoclave bajo las condiciones siguientes. PRECAUCIÓN Autoclave más de 15minutos a 132°C, o 3minutos a 134°C. 3) El motor debe permanecer en el estuche de autoclave hasta que se • M antenga la botella del pulverizador hacia arriba. necesite para su uso. • A l aplicar el pulverizador, asegúrese de sostener el motor con firmeza para evitar que ésta se desliza de la mano por la presión de la pulverización. PRECAUCIÓN • N o esterilice el producto en autoclave con otros instrumentos, Aceite lubricante incluso si están en el estuche. Esto es para prevenir una posible 1) Retire el motor del tubo. decoloración y un daño del producto por residuos químicos en 2) Aplique 1-2 gotas de aceite de lubricación en el puerto de otros instrumentos. conducción de aire tal y como se muestra en la fig. 8. • N o caliente ni enfríe el producto demasiado rápidamente. Un 3) Conecte el motor al tubo. Ponga en funcionamiento el motor cambio rápido de temperatura puede provocar daños en el durante unos 10 segundos.
-
Page 40: Comprobaciones Periódicas De Mantenimiento
10. Comprobaciones periódicas de mantenimiento • M antenga el producto a una presión atmosférica, temperatura, humedad, ventilación y luz solar adecuadas. El aire debe estar Realice comprobaciones de mantenimiento periódicas cada tres meses libre de polvo, sal y azufre. de acuerdo con la hoja de verificación de abajo. En caso de encontrar • N o toque el producto inmediatamente después de la esterilización alguna anomalía, póngase en contacto con su distribuidor autorizado B.A. con autoclave, ya que estará muy caliente y debe permanecer International. estéril. Puntos a comprobar Detalles • P ara este producto se recomienda esterilización con autoclave. No Rotación Gire el motor y compruebe si hay anomalías, está confirmada la validez de otros métodos de esterilización. como rotación, vibración, ruido anormal o sobrecalentamiento. -
Page 41: Lista De Piezas Opcionales
15. Reparación y Servicio Técnico fines previstos, o si ha sido manipulada por personal no calificado o se le han instalado piezas que no son de B.A. International. Las piezas Importante de repuesto están disponibles durante los siete años posteriores a la Este motor de aire es el resultado de una ingeniería de precisión y no interrupción en la venta del modelo. puede ser desmontado/reparado por terceras partes. Para su reparación 13. Lista de piezas opcionales enviarlo siempre, sin haberlo desmontado previamente, o bien a BA International Ltd. o bien a un servicio técnico certificado y acreditado Modelo Código del pedido Producto compatible por BA. Multigalga BA para BA08010030 BA604E conexiones Midwest Adaptador Borden a TST790 BA602E + Multigalga BA Midwest... -
Page 42: Características Técnicas
16. Características técnicas Modelo BA604E BA602E Tipo de conexión de tubo ISO 9168 tipo 2 (Midwest 4 orificios) ISO 9168 tipo 1 (Borden 2 orificios) Tipo de conexión de pieza de mano Tipo E ISO 3964 Velocidad de rotación máxima 19.800 - 24.200min (0,25MPa) 22.500 - 27.500min (0,25MPa) Falta de torque 1,5N·cm y más (0,25MPa) Presión de la conducción de aire 0,20 - 0,25MPa (2,0 - 2,5kgf/cm Consumo de aire <66NL/min (0,25MPa) Presión del agua 0,10 - 0,25MPa (1,0 - 2,5kgf/cm Presión de aire de pulverización 0,15 - 0,25MPa (1,5 - 2,5kgf/cm – Suministro de agua refrigerante 50mL/min y más (0,20MPa) Suministro de aire refrigerante 1,5NL/min y más (0,20MPa) – Tipo de pulverizador de agua Pulverización externa Entorno de uso temperatura: 10-35°C (sin condensación), humedad: 30-75% Entorno de transporte y almacenamiento temperatura: -10-50°C, humedad: 10-85%, presión atmosférica: 500-1.060hPa... -
Page 44: Utente E Destinazione D'uso
Classificazione Grado di rischio 1. Utente e destinazione d'uso Illustra i casi in cui, se le istruzioni di sicurezza non AVVERTENZA vengono seguite, possono verificarsi gravi lesioni Utente: professionisti qualificati (dentista / igienista dentale) alle persone o danni al dispositivo. Indicazioni per l’uso: Illustra i casi in cui, se le istruzioni di sicurezza non ATTENZIONE Il motore ad aria è destinato a pilotare un manipolo odontoiatrico o un vengono seguite, possono verificarsi lievi o... -
Page 45: Lista Degli Accessori
• N on tentare di smontare il prodotto o di manometterne il raccomanda di tenere un prodotto di ricambio a portata di mano in meccanismo. Seguire sempre le raccomandazioni di B.A. caso di guasto durante l’utilizzo. International contenute nel presente manuale d’uso. 3. Lista degli accessori • E vitare che il prodotto subisca urti di sorta. Non far cadere il prodotto. Denominazione Quantità • L 'operatore e qualunque altra persona presente nell’area di lavoro Olio lubrificante devono indossare dispositivi di protezione per gli occhi e una maschera durante l’utilizzo del presente motore. 4. Impostazione della pressione di alimentazione • I n caso di funzionamento anomalo del prodotto, sospenderne di aria ed acqua immediatamente l’uso e contattare il distributore autorizzato B.A. Misurare la pressione di alimentazione sul punto di collegamento tra International. il manipolo e il tubo e impostare la pressione al valore indicato nella • N on asciugare, pulire o immergere il prodotto in acqua altamente tabella delle specifiche tecniche (Fig. 1). - Page 46 motore e contattare il distributore B.A. International autorizzato. ATTENZIONE 7. Alimentazione di acqua e soffio d’aria al manipolo • N on usare aria contaminata da polvere, umidità e olio. 1) Inserire l'innesto del tubo spray nel beccuccio del tubo spray. (Fig. 3) 5. Collegamento e rimozione del manipolo 2) Tagliare il tubo alla lunghezza desiderata. 3) Inserire l'altra estremità dell'innesto del tubo spray nel morsetto del 5-1 Collegamento beccuccio sul contrangolo o manipolo diritto. 1) Collegare il manipolo direttamente al motore. (Fig. 2) 8. Rotazione in avanti/rotazione inversa 2) Assicurarsi che il manipolo sia saldamente collegato al motore. 1) Rotazione in avanti: ruotare la ghiera di regolazione FWD/REV su “F”. 5-2 Rimozione (Fig. 4) Afferrare separatamente il motore e il manipolo ed estrarli in linea 2) Rotazione inversa: ruotare la ghiera di regolazione FWD/REV su “R”. (Fig. 5) retta. 3) Quando la ghiera di regolazione FWD/REV è posizionata fra “F” ed “R”, ATTENZIONE l’alimentazione dell'aria primaria viene bloccata e il motore non gira (Fig. 6).
-
Page 47: Manutenzione Dopo L'uso
9-1 Preparazione 9. Manutenzione dopo l'uso 1) Indossare dispositivi di protezione degli occhi, una maschera e dei Al termine del trattamento di ogni paziente, sottoporre il prodotto ai seguenti guanti per evitare infezioni. interventi di manutenzione. 2) Scollegare il manipolo dal motore. 3) Estrarre il motore dal tubo. AVVERTENZA 9-2 Pulizia • S ubito dopo un trattamento, pulire, lubrificare e sterilizzare il Pulizia manuale (superficie esterna) manipolo. Un intervento di manutenzione non corretto del manipolo 1) Rimuovere sporcizia e impurità dalla superficie del motore con una potrebbe provocare surriscaldamento, con conseguenti ustioni o spazzola e acqua corrente (a 38°C o meno). Non utilizzare una guasti del prodotto. spazzola metallica. 2) Rimuovere l'umidità dalla superficie con un panno assorbente. ATTENZIONE Pulizia automatica (superfici esterna e interna) • N on utilizzare i seguenti liquidi per pulire o immergere il prodotto; Utilizzare un termodisinfettore conforme a ISO 15883 (EN ISO 15883). acqua altamente acidificata, prodotti chimici acidi/alcalini forti, Consultare il manuale del termodisinfettore. soluzioni contenenti cloro, solventi come benzene o diluenti. - Page 48 9-4 Lubrificazione ATTENZIONE BA ULTIMATE SPRAY Erogare BA ULTIMATE SPRAY dopo ogni utilizzo e/o prima della • D opo aver lavato il prodotto in un termodisinfettore e prima della sua sterilizzazione in autoclave. lubrificazione, asciugarlo accuratamente per rimuovere qualsiasi 1) Estrarre il motore dal tubo. liquido al suo interno. L'eventuale presenza di liquidi dovuti a 2) Inserire la punta a freccia del beccuccio spray nel condotto della disinfezione termica rimasti all'interno del prodotto potrebbe ridurre bomboletta spray. (Fig. 7) l'efficacia della lubrificazione causando corrosione all'interno del 3) Inserire il beccuccio spray nell'ingresso dell'alimentazione dell'aria prodotto. primaria. Tenere il manipolo e nebulizzare per circa 2-3 secondi. Erogare il lubrificante per almeno 2 secondi fino a quando non 9-3 Disinfezione fuoriesce dalla parte dell'aria di ritorno. (Fig. 8) Disinfezione manuale (superficie esterna) Pulire la superficie con un panno imbevuto di una soluzione ATTENZIONE disinfettante, come l'alcool. • D urante la nebulizzazione, assicurarsi di sorreggere saldamente Disinfezione automatica (superfici esterna e interna) il motore per evitare che sfugga di mano a causa della pressione Utilizzare un termodisinfettore conforme a ISO 15883 (EN ISO 15883).
- Page 49 Olio lubrificante ATTENZIONE 1) Estrarre il motore dal tubo. 2) Applicare 1-2 gocce di olio lubrificante sull'ingresso • N on sterilizzare in autoclave il prodotto con altri strumenti anche dell'alimentazione dell'aria primaria raffigurato in Fig. 8. se si trova all'interno di una busta, onde evitare possibili alterazioni 3) Collegare il motore al tubo. Far ruotare il motore per circa 10 cromatiche e danni al prodotto dovuti a residui chimici presenti su secondi. altri strumenti. • N on riscaldare né raffreddare il prodotto troppo velocemente. 9-5 Sterilizzazione Rapidi sbalzi di temperatura potrebbero causare danni al prodotto. Sterilizzare il prodotto mediante sterilizzazione in autoclave. Al • P er evitare danni al prodotto, non utilizzare uno sterilizzatore termine del trattamento di ogni paziente, sterilizzare come indicato di con temperatura superiore a 138°C durante l'uso, compreso il seguito. ciclo di asciugatura. La temperatura della camera di alcuni tipi 1) Inserire in una busta da autoclave. Sigillare la busta. di sterilizzatore potrebbe superare i 138°C. Per informazioni 2) Eseguire la sterilizzazione in autoclave rispettando le seguenti dettagliate, contattare il produttore dello sterilizzatore.
-
Page 50: Controlli Di Manutenzione Periodici
• P er questo prodotto si consiglia la sterilizzazione in autoclave. Non 11. Simboli viene confermata l'efficacia di altri metodi di sterilizzazione. Sterilizzabile in autoclave fino a 135°C max. Questo prodotto può essere lavato con Disinfezione Termica. AVVISO Marchio di Conformità alla Direttiva Europea dei "Dispositivi • B .A. International consiglia sterilizzatori di Classe B specificati Medicali direttiva 93/42/EEC". nella norma EN13060. Produttore. 10. Controlli di manutenzione periodici Rappresentante autorizzato nella comunità europea. Eseguire controlli di manutenzione periodici ogni tre mesi facendo Vedere il Manuale Istruzioni. riferimento alla scheda di controllo riportata di seguito. Contattare il distributore B.A. International autorizzato in caso di anomalie. Elementi da controllare Dettagli Rotazione Azionare il motore e verificare l’assenza di anomalie di rotazione, vibrazione, rumore e surriscaldamento. -
Page 51: Garanzia
13. Elenco dei pezzi opzionali Importante Questo motore ad aria è il frutto di tecniche di ingegneria di precisione Modello Codice d’ordine Prodotto compatibile e non può essere smontato/riparato da terze parti. Per richieste di BA Multigauge per BA08010030 BA604E assistenza e riparazione contattare sempre BA International Ltd. o un collegamenti Midwest centro di assistenza autorizzato e accreditato BA. Adattatore da Borden TST790 BA602E + BA Multigauge a Midwest... -
Page 52: Specifiche Tecniche
16. Specifiche tecniche Modello BA604E BA602E Tipo di collegamento del tubo ISO 9168 Tipo 2 (Midwest 4 vie) ISO 9168 Tipo 1 (Borden 2 vie) Tipo di connessione del manipolo Tipo E ISO 3964 Velocità di rotazione max. 19.800 - 24.200rpm (0,25MPa) 22.500 - 27.500rpm (0,25MPa) Punto di rottura del torque 1,5N·cm e oltre (0,25MPa) Pressione aria primaria 0,20 - 0,25MPa (2,0 - 2,5kgf/cm Consumo d’aria <66NL/min (0,25MPa) Pressione dell’acqua 0,10 - 0,25MPa (1,0 - 2,5kgf/cm Pressione dell’aria per nebulizzare 0,15 - 0,25MPa (1,5 - 2,5kgf/cm – Alimentazione dell'acqua refrigerante 50mL/min e oltre (0,20MPa) Alimentazione dell'aria refrigerante 1,5NL/min e oltre (0,20MPa) – Tipo di getto d'acqua Spray Esterno Ambiente di utilizzo Temperatura: 10-35°C (nessuna condensa), Umidità: 30-75% Ambiente di trasporto e stoccaggio Temperatura: -10-50°C, Umidità: 10-85%, Pressione atmosferica: 500-1.060hPa... - Page 53 Distributed by: B.A. INTERNATIONAL LTD. 700 Shimohinata, Kanuma Elly-Beinhorn-Strasse 8 Unit 9, Kingsthorpe Business Centre, Tochigi 322-8666 65760 Eschborn Studland Road, Kingsthorpe, Japan Germany Northampton, NN2 6NE U.K. Tel: +44 1604 777 700 2019.04.04 00 N...
Need help?
Do you have a question about the BA604E and is the answer not in the manual?
Questions and answers