
Subscribe to Our Youtube Channel
Related Manuals for Grundig GKNM17822X


Summary of Contents for Grundig GKNM17822X
- Page 1 Buzdolabı Kullanma Kılavuzu Refrigerator User Manual GKNM 17821 X-GKNM17822X TR / EN 58 5868 0000/AE...
- Page 3 içindekiler a la ı Buzdolabı ız 3. Kurulum Ku ulum ..11 a la ın a a lanma ı ..12 a lan ı ı ....12 azı lı a a u u n a ılma ı ........13 ullanım ......14 ulla ı ı K u l ......18 umu alı...
- Page 4 bu ıla uzu o u u l n v z al l l ml n n n m almanızı ullanma an n ullanma ılavuzunun amamını u un v a vu u a na ı la a a la ın a a ına m n z al n ılavuzu a v ulla...
- Page 5 a la ı a alanma a a ma a an al ı a a v nl al ma la ı alma a ı al ma la a u ulmama ı al n a an a amın an ı a a ı ulla ı...
- Page 6 Ku ulum a ım m zl v l ml ı a ın a n uzun ullanılma a a a z n n ı a ın n n z n v a a a ulunan v a la ın ulun u u u u u a a ı...
- Page 7 an ın v a a lama l u u n n a ının a anı ı anı ı v anı ı az a la ı ı uz la ın a a lama ın ıvı lu a la ma ın a anın z u ı...
- Page 8 a ınız a u a va a a ınız a mu la a u a man ullanınız lu un an m n l n z a ıla an a ım alınız ı a n m n a a ma ınız umla ın a ı...
- Page 9 1.4. ı ı a ıl a ı a anlı ı a a ın an a ımlanan ı ala ın K n n m l l n za a lı v a a lı ma n m l n u un u ml v ullanıla l n l a a v malz m l...
- Page 10 2. Buzdolabı ız Yumurtalık *Mavi ışık/Vitamin Koruma Teknolojisi *Kapı rafları *Ayarlanabilir cam raflar *Kayar ve döner saklama kapları *Şişe rafı Ayarlanabilir ayaklar *Hareketli gövde rafı Dondurucu bölme çekmeceleri *Kahvaltılık bölmesi/ Sebzelik Soğutucu bölme Sebzelik Dondurucu bölme u ullanım ılavuzun a n n zl u um lma a l...
- Page 11 3. Kurulum u an ı ı ına ma uz ı a ma ın v ulun u ma ın u ulu do u n n n v ml alı a lm u un n n u ulumu la ımı lmalı ı uva a a a ın ullanıma azı...
- Page 12 a la ı a a la a ı a l unun u ulum an lmalı ı z u u a a a a la ını a a v a uz la ınız l a a la ın a a ın a uza ma a l lu v a a l uz ullanma ınız ı...
- Page 13 azı lı ı a n u u u a la azla a a uz a a u u n av a ıl a ı l n a a ı a n ala a n n l a a u azın ı...
- Page 14 n u u u lm anı n n ı a ava a ı ı l lm m l K u u u an l n n m n mum ı a ıla a ı ala l nm l ulla ı uz la ınızı...
- Page 15 ulla ı ı Gösterge panelleri, ürününüzün modeline göre değişiklik gösterebilir. Gösterge panelindeki işitsel ve görsel fonksiyonlar ürünü kullanmanıza yardımcı olur. Soğutucu bölme ayar butonu Hızlı soğut fonksiyonu göster- Dondurucu bölme ayar butonu gesi Hata durumu göstergesi Hızlı soğut fonksiyonu butonu Tuş...
- Page 16 o u u u b l a a la a la ınızı naz ullan ı ınız zamanla u u u ı a lı a a ını la a al ılana a v u zamanla a a manızı a la a ıl ı ın a a a u lu u ma u u u...
- Page 17 a a u u nu a o u u u b l ı a lı a a ı ı ı a l m z u u u n a a la ı ınız ı a lı ı la ınızın n a a u lu ızlı...
- Page 18 ızlı do du ızlı nu a an ma cold pack cold pack foodstuffs ı a foodstuffs ı a o u l Bu z ll o u u u ava analın a u- lunan la ınızın ula ın lu ma ını n- u u alı...
- Page 19 a ı ı a al ılı b l o u a Bu z ll o u u u Bu z ll o am a a lama a ı ı lm l av ı ı l a ınla ılan z l l ullanın a lanan m v v n u ma...
- Page 20 a la a u u u a la a abı Bu z ll o Bu z ll o Ka a a ı a ı a la ınızın avan zla ı v a u ula ı ullanım a m n a ı...
- Page 21 bz l Bu z ll o z ll z v m v l n n m anla ı l al ın a u ulma a v ı ala ın a a uzun almala ı a lanma a ı a ul ı ana a a lı...
- Page 22 a ı Bu z ll o anu l a a ı uz la ı a m n n la a ullanıla lm n a la an u ulama ı a a a ın a n a a la ınıza manu l a a ını...
- Page 23 Bu z ll o lm mu a aza ını an ı a ınız a ın an ı a a a lm mu a aza ının u a aza ı a a a a lm l z ll l ulla a a lanma ı...
- Page 24 u ı a ı u ı a ı ı o u u doldu ul a ı Bu z ll o l u ma azn a ı u ına ı la ınızın a ı ını a - a ının azn n n a a ını ma an u a ula ma a a a- a a a...
- Page 25 m z v una u ı ın a m v ullanın u u a na lı azlı unun a a al ll u ına ı la a ı ı l u ma ın ullanıma u un lma an u ına ı lunu a a la ıvı...
- Page 26 u ına ı ullanılı n amla an u amlama a a ını ma a ı a ın Ku u v n u u m zl...
- Page 27 ı ala ınızı n u u u a ma an n do du ul a ı n Kla am ala ı ala ın al a ı la ı n u u u una lm n u u u a la ını l la ını...
- Page 28 Dondurucu Soğutucu Bölmesi Bölmesi Açıklamalar Ayarı Ayarı u n mal av l n a a ı u a a la am ı a lı ı n z ı a zaman a n u ma ullanın ızlı zaman n n z n numuna amın ı...
- Page 29 ıdala ı dı la a la ba ı ınla ma lam a ı la a l n u u u alı n u ma lam a ullanılma a ı u lam a a lı l l l un a a la ı ı...
- Page 30 6 Ba ı z nl m zl nm o ula ı al n ullanım m n n z n uz la ınızı n la a m zl m ullanılmama a ı n a u un a lan ı ını lma an a lama a v m zl nm m a lı...
- Page 31 7. Sorun giderme a ı ma an n unu a ma zaman v a a a ın an u a ı ı a lana l a alı a a malz m ulanımına a lı lma an l n azı z ll l n n z lma a l Buzdolabı...
- Page 32 Buzdolabı o ı a da o uzu alı ı o n n a a la l uzun alı ı a ı a lı ı la l ı a amla a a a uzun alı ma ı n mal n a ılmı ulmu la l n a ıl ı...
- Page 33 o u u u a da do du u uda ı a lı u u u ı a lı ı a a lanmı la l u u u ı a lı a a ının n u u u ı a lı ı va ı...
- Page 34 o u o z nl m zl a ılmamı ı ılı u v a na lı u la z nl la a m zl azı a la a a a l m malz m l u a a l a ma an a a a a l m malz m ullanın...
- Page 35 azı a ızala a a ı a al ma la a l n a ılmala ı a ı la v nl unu a a ma an a a v nl lma an ullanıma n n a ullanı ıla a a ın an am K n m l m n a ınız...
- Page 36 Kanallarımız: * Web Adresimiz: www.grundig.com.tr * Çağrı Merkezimiz: 0850 210 0 888 * e-posta Adresimiz: (Sabit telefonlardan veya cep telefonlarından - musteri.hizmetleri@grundig.com alan kodu çevirmeden arayın*) * Sosyal Medya Hesaplarımız: * Diğer Numaramız https://www.instagram.com/grundigturkiye/ 0216 585 8 888 https://www.facebook.com/grundig.tr/ - Çağrı Merkezimiz haftanın 7 günü 24 saat hizmet https://www.youtube.com/user/TurkiyeGrundig...
- Page 37 Hizmet talebinin değerlendirilmesi Müșteri Bașvurusu Web sitesi Yetkili Servis musteri.hizmetleri Yetkili Satıcı Faks 0850 210 0 888 @grundig.com Çağrı merkezi 0216 423 23 53 Bașvuru kaydı Bașvuru Konusu Müșteri Adı, Soyadı Müșteri Telefonu Müșteri Adresi Hizmet talebinin alınması - Hizmet talebi analizi - Hizmet hakkında müșterinin bilgilendirilmesi...
- Page 38 Uygun Kullanım ve Garanti ile İlgili Dikkat Edilmesi Gereken Hususlar; Bu kılavuzu okumadan ürününüzü çalıştırmayınız. Așağıda belirtilen sorunların giderilmesi ücret karșılığında yapılır. Bu durumlar için garanti șartları uygulanmaz; 1 ) Kullanım hatalarından kaynaklanan hasar ve arızalar, 2) Malın tüketiciye tesliminden sonraki yükleme, boșaltma, tașıma vb. sırasında olușan hasar ve arızalar, 3) Malın kullanıldığı...
- Page 39 Arçelik A.Ș. Grundig Arçelik A.Ș. Karaağaç Caddesi No:2-6, Cinsi: Adresi: Buzdolabı 34445, Sütlüce / İSTANBUL Modeli: GKNM 17821 X-GKNM17822X Telefonu: Bandrol ve Seri No: (0-216) 585 8 888 Faks: Garanti Süresi: (0-216) 423 23 53 3 YIL Azami Tamir Süresi: www.grundig.com.tr...
-
Page 40: Table Of Contents
Contents 1. Safety and environment 6 Maintenance and cleaning instructions 6.1 Avoiding bad odours .....26 2. Your Refrigerator 6.2 Protecting the plastic 3 Installation surfaces ........27 3.1 Appropriate installation 7. Troubleshooting location .........9 3.2 Adjusting the feet ....10 3.3 Electrical connection ....10 4 Preparation 4.1 Things to be done for energy saving ..........11... - Page 41 Please read this manual first! Dear Customer, We hope that your product, which has been produced in modern plants and checked under the most meticulous quality control procedures, will provide you an effective service For this, we recommend you to carefully read the entire manual of your product before using it and keep it at hand for future references.
-
Page 42: Safety And Environment
Safety and environment instructions This section provides the safety instructions necessary to prevent the risk of injury and material damage. Failure to observe these instructions will invalidate all types of product warranty. Intended use WARNING: Keep ventilation openings, in the appliance enclosure or in the built-instructure, clear of obstruction. - Page 43 responsible for their safety. Children should not be allowed to play with this device. • In case of malfunction, unplug the device. • After unplugging, wait at least 5 minutes before plugging in again. • Unplug the product when not in use. • Do not touch the plug with wet hands! Do not pull the cable to plug off, always hold the plug.
- Page 44 • Plug the product into an earthed socket. Earthing must be done by a qualified electrician. • If the product has LED type lighting, contact the authorised service for replacing or in case of any problem. • Do not touch frozen food with wet hands! It may adhere to your hands! • Do not place liquids in bottles and cans into the freezer compartment.
- Page 45 1.1.1 HC warning If the product comprises a cooling system using R600a gas, take care to avoid damaging the cooling system and its pipe while using and moving the product. This gas is flammable. If the cooling system is damaged, keep the product away from sources of fire and ventilate the room immediately.
- Page 46 • The manufacturer assumes no responsibility for any damage due to misuse or mishandling. • Original spare parts will be provided for 10 years, following the product purchasing date. 1.3. Child safety • Keep packaging materials out of children’s reach. • Do not allow the children to play with the product.
-
Page 47: Your Refrigerator
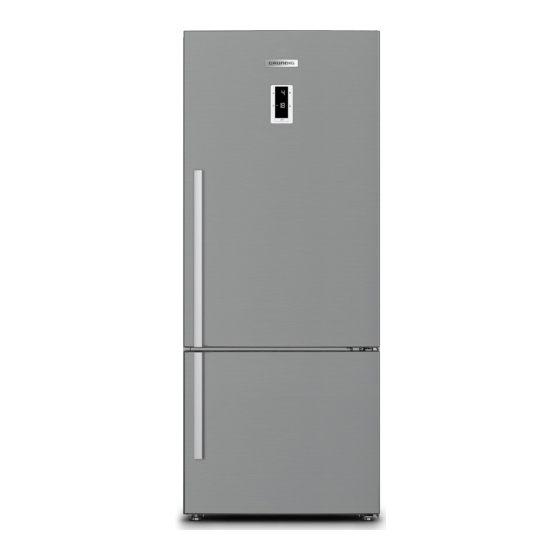
2. Your Refrigerator Egg holder *Blue light/Vitamin Care Technology *Door shelves *Adjustable glass shelves *Sliding and Rotary storage *Bottle shelf containers *Movable body shelf Adjustable legs Freezer compartment drawers Fridge compartment *Snack compartment/Crisper Freezer compartment Crisper * optional Figures in this user manual are schematic and may not match the product exactly. -
Page 48: Installation
3 Installation hobs, heater cores and stoves and at least 5 cm away from electrical ovens. 3.1 Appropriate installation • Product must not be subjected to direct sun light and kept in humid location places. Contact an Authorized Service for • Your product requires adequate air the installation of the product. In circulation to function efficiently. -
Page 49: Adjusting The Feet
3.2 Adjusting the feet 3.3 Electrical connection WARNING: If the product stands unbalanced Do not make after installation, adjust the feet connections via extension on the front by rotating them to the cables or multi-plugs. right or left. WARNING: Damaged power cable must be replaced by the Authorized Service Agent. -
Page 50: Preparation
4 Preparation energy consumption values declared on the power data plate of your refrigerator 4.1 Things to be done for are measured and tested by energy saving removing the icematic. Do not remove the shelves inside Connecting the product the freezer compartment to electric energy saving and on the door of freezer systems is risky as it may... -
Page 51: Initial Use
• Food contact with the In some models, the temperature sensor in the instrument panel freezer compartment may automatically turns off 5 increase energy consumption of minutes after the door has the appliance. Thus any contact closed. It will be reactivated with the sensor(s) must be when the door has opened avoided. -
Page 52: Operating The Product
5 Operating the product 5.1 Indicator panel Indicator panels may vary according to the product model. Audio – visual functions on the indicator panel helps you in using your product.Indicator panels may vary depending on your product’s model. Indicator panel aids in using your refrigerator with its audio and visual functions. - Page 53 1. Fridge Compartment Setting 4. Key Lock Indicator Button Use this function if you do not This function allows you to make want your refrigerator temperature the fridge compartment temperature setting changed. Press Fridge setting. Press this button to set compartment setting button and the temperature of the fridge Freezer compartment setting button...
- Page 54 energy saving function is activated, If you do not cancel it, Quick Fridge all symbols on the display other than will cancel itself automatically energy saving symbol will turn off. after 4 hours or when the fridge When the Energy Saving function is compartment reaches to the required activated, if any button is pressed or temperature.
-
Page 55: Odour Filter
15. Quick Freeze Indicator This icon flashes in an animated style when the Quick Freeze function is active. cold pack cold pack foodstuffs foodstuffs 5.2 Odour filter * OPTIONAL Odour filter in the air duct of the fridge compartment prevents the build-up of unpleasant odours in the refrigerator. -
Page 56: Snack Compartments
5.4 Snack compartments 5.6 Blue light/ Vitamin Care Technology Use these compartments for your food which you want to store at a *May not be available in all models temperature a few degrees below the For the blue light, fridge compartment. Fruits and vegetables stored in You can place the food the crispers that are illuminated... -
Page 57: Rotary Storage Container
5.7Rotary storage container 5.8 Ice making (in some models) Fill iceboxes with water and place them as seen in the picture into Sliding body shelf can be moved the ice shelf at the ceiling which is to left or right in order to allow you partially opened when the top drawer place the tall bottles, jars or boxes to of the freezer is pulled out. -
Page 58: Movable Body Shelf
If more than 10 kg will be loaded, 5.9 Movable Body shelf: then it should be used as a fixed *optional shelf like others. In this case, if it is required to adjust the shelf height, Manually movable body shelf is an first empty the food stuff, adjust it as option enabling the usage of interior per your height requirement and then... -
Page 59: Herbbox/Herbfresh
5.10 HerbBox/HerbFresh 5.11 Humidity Controlled Crisper Remove the film container from HerbBox/HerbFresh+ Take the film out of the bag and put (FreSHelf) it into the film container as shown in *optional the image. Seal the container again and replace Humidity controlled crisper feature it into HerbBox/HerbFresh+ unit. -
Page 60: Using The Water Dispenser
5.12 Using the water dispenser 5.13 Filling the water dispenser's tank *optional Water tank filling reservoir is It is normal for the first located inside the door rack. few glasses of water taken 1. Open the cover of the tank. from the dispenser to be 2. -
Page 61: Drip Tray
5.14 Cleaning the water tank 1. Remove the water filling reservoir inside the door rack. 2. Remove the door rack by holding from both sides. 3. Grab the water tank from both si- des and remove it with an angle of 45°C. -
Page 62: Freezing Fresh Food
• 5.16 Freezing fresh food Label each pack of food by adding the date before freezing. • In order to preserve the quality You may distinguish the of the food, it shall be frozen freshness of each food pack in as quickly as possible when this way when you open your it is placed in the freezer freezer each time. -
Page 63: Recommendations For Preserving The Frozen Food
Freezer Fridge Compartment compartment Remarks Setting Setting -18°C 4°C This is the normal recommended setting. These settings are recommended when the -20,-22 or -24°C 4°C ambient temperature exceeds 30°C. Use when you wish to freeze your food in a short Quick Freeze 4°C time. Your product will return to its previous... -
Page 64: Door Open Warning
Door shelves Small and of fridge packaged food compartment or beverage Vegetables and Crisper fruits Delicatessen (breakfast food, Fresh zone meat products compartment that shall be consumed in a short time) 5.20 Door open warning (This feature is optional) Door open warning is given to user both visually and acoustically. -
Page 65: 6.1 Maintenance And Cleaning
Check regularly that the door gas- • 6 Maintenance kets are clean. If not, clean them. and cleaning To remove door and body shelves, • remove all of its contents. Cleaning your fridge at regular in- Remove the door shelves by pul- •... -
Page 66: Surfaces
6.2 Protecting the plas- tic surfaces Do not put liquid oils or oil-cooked meals in your refrigerator in un- sealed containers as they dama- ge the plastic surfaces of the refri- gerator. If oil is spilled or smeared onto the plastic surfaces, clean and rinse the relevant part of the surfa- ce at once with warm water. - Page 67 7. Troubleshooting Check this list before contacting the service. Doing so will save you time and money. This list includes frequent complaints that are not related to faulty workmanship or materials. Certain features mentioned herein may not apply to your product. The refrigerator is not working.
- Page 68 The product may have been recently plugged in or a new food item is placed • inside. >>> The product will take longer to reach the set temperature when recently plugged in or a new food item is placed inside. This is normal. Large quantities of hot food may have been recently placed into the product.
- Page 69 Any items placed on the product may cause noise. >>> Remove any items pla- • ced on the product. The product is making noise of liquid flowing, spraying etc. The product’s operating principles involve liquid and gas flows. >>> This is nor- •...
- Page 70 For your own safety, please unplug product prior to carrying out any repair. Grundig may not be held responsible for safety issues that may arise because of repairs or attempts not carried out in accordance with instructions specified at user manuals or located at https://www.grundig.com.tr/destek/ and performed on parts other than parts contained at current list of parts accessed from https://www.grundig.com.tr/destek/.
- Page 71 Notes ......................................................................................................................................................................................................................................................................................................................................................................................................................................................................................................................................................................................................................................................................................................................................................................................................................................................................................................................................................................................................................................................................................................................................................................................................................................................................................................
- Page 72 Notes ......................................................................................................................................................................................................................................................................................................................................................................................................................................................................................................................................................................................................................................................................................................................................................................................................................................................................................................................................................................................................................................................................................................................................................................................................................................................................................................
Need help?
Do you have a question about the GKNM17822X and is the answer not in the manual?
Questions and answers