Table of Contents
Advertisement
Available languages
Available languages
Quick Links
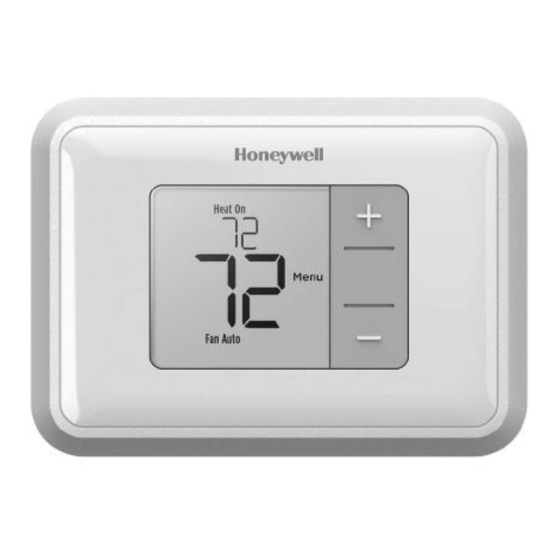
RTH5160 Series
Non-Programmable
Thermostat
Quick Installation Guide
Included in your box
Screws and
anchors
UWP™
Mounting
System
(UWP)
Tools you will need
Phillips screwdriver
Small flat head screwdriver
Pencil
Level
Tools you may need
Wire stripper
Needle-nose pliers
RTH5160
Thermostat
Quick Install Guide
Drill and
drill bit (7/32 in)
Advertisement
Table of Contents

Related Manuals for Honeywell Home RTH5160D


Summary of Contents for Honeywell Home RTH5160D
- Page 1 RTH5160 Series Non-Programmable Thermostat Quick Installation Guide Included in your box Screws and anchors RTH5160 Thermostat UWP™ Mounting System (UWP) Quick Install Guide Tools you will need Tools you may need Phillips screwdriver Wire stripper Small flat head screwdriver Drill and Pencil Needle-nose pliers drill bit (7/32 in)
-
Page 2: Removing Your Old Thermostat
Quick Installation Guide Removing your old thermostat Turn power OFF. To protect yourself and your equipment, turn off the power at the breaker box or the switch that controls your heating/cooling system. Switch Breaker box Check that your system is off. Change the temperature on your old thermostat to be above room temperature in heat mode or below... - Page 3 RTH5160 Series Take a picture of how your wiring looks right now. Be sure to include the letters next to the terminals where the wires are inserted. This will be a helpful reference when wiring your new thermostat. Tip: If the color of your wires has faded or if 2 terminals have the same wire color, use the wire labels provided in the package to label...
- Page 4 Quick Installation Guide Disconnect the wires and remove the old wall plate. Use a screwdriver to release wires from terminals. Then, use a wire label to identify each wire as it’s disconnected. The letter on the wire label should match the letter on the terminal. Tip: To prevent wires from falling back into the wall, wrap the wires around a pencil.
- Page 5 RTH5160 Series Insert the wall anchors. It is recommended that you use the wall anchors included in the box to mount your thermostat. You can use the UWP to mark where you want to place the wall anchors. a) Level the wall plate. b) Mark the location of the wall anchors using a pencil.
- Page 6 Quick Installation Guide Connect remaining wires. Depress the tabs to put the wires into the inner holes of the corresponding terminals on the UWP (one wire per terminal) until it is firmly in place. Gently tug on the wires to verify they are secure.
- Page 7 RTH5160 Series Install batteries. Insert two AA alkaline batteries in the back of the thermostat as shown. Attach your thermostat. Align the thermostat onto the UWP and firmly snap it into place. Turn your power ON. Turn on the power at the breaker box or switch that controls the heating/ cooling system.
-
Page 8: System Setup
Quick Installation Guide System Setup Now that you have installed your thermostat, please follow the steps below to setup your system and personalize your thermostat. Select System Setup options. Press Edit (-) to change values or select from available options. Then press Next (+) to save changes and advance to the next System Setup number. -
Page 9: System Setup Options
RTH5160 Series System Setup options System Setup Number and Description Options (factory default in bold) 0 = Fahrenheit 125 = Temperature Indication Scale 1 = Celsius 1 = Conventional Forced Air Heat 2 = Heat Pump 3 = Radiant Heat (Boiler) 200 = Heating System Type 5 = None (Cool Only) Note: This option selects the basic system type your thermostat will... -
Page 10: Fan Operation Settings
Quick Installation Guide System operation settings Press Menu, and then press the Mode (+) button to cycle to the next available System mode. Cycle through the modes until the required System mode is displayed, and then press Done. NOTE: Available System modes vary by model and system settings. -
Page 11: Wiring-Heat Pump
RTH5160 Series Wiring—conventional systems Alternate wiring (conventional systems) If labels do not match terminals, connect wires as shown below (see notes, below). NOTES: 1. If you must connect both R and Rc wires, set the R Slider Tab to the down position (2 wires). -
Page 12: Battery Replacement
Quick Installation Guide Alternate wiring (for heat pumps only) NOTES: 1. Keep R Slider Tab in the up position (1 wire). 2. If your old thermostat had both V and VR wires, stop now and contact a qualified contractor for help. 3. -
Page 13: Alerts Screen
RTH5160 Series Alerts screen You will see the alert icon and the alert number on the screen. Press Next (+) to see additional alerts, if any. Then press Done to go back to the home screen. NOTE: If the alert is a critical alert, you may not be able to access the home screen and should call a HVAC professional. -
Page 14: Troubleshooting
Quick Installation Guide Troubleshooting If you have difficulty with your thermostat, please try the following suggestions. Most problems can be corrected quickly and easily. Display is blank Make sure fresh AA alkaline batteries are properly installed (see page 7). Cannot change system Check System Setup Option 220 to make sure the options are setting to Cool set to either 1 or 2 (see page 9). - Page 15 RTH5160 Series 1-year limited warranty Honeywell warrants this product, excluding battery, to be free from defects in the workmanship or materials, under normal use and service, for a period of one (1) year from the date of purchase by the consumer. If at any time during the warranty period the product is determined to be defective or malfunctions, Honeywell shall repair or replace it (at Honeywell’s option).
-
Page 16: Customer Assistance
CAUTION: ELECTRICAL HAZARD Can cause electrical shock or equipment damage. Disconnect power before beginning installation. CAUTION: MERCURY NOTICE If this product is replacing a control that contains mercury in a sealed tube, do not place the old control in the trash. Contact your local waste management authority for instructions regarding recycling and proper disposal. -
Page 17: Guide D'installation Rapide
Série RTH5160 Thermostat non programmable Guide d’installation rapide Inclus dans cette boîte Vis et ancres Thermostat RTH5160 Système de montage UWP™ (UWP) Guide d’installation rapide Outils requis Outils pouvant être requis Tournevis cruciforme Dénudeur de fils Petit tournevis plat Perceuse et Crayon Pince à... - Page 18 Guide d’installation rapide Retrait de l’ancien thermostat Coupez l’électricité. Pour vous protéger ainsi que MARCHE pour protéger votre équipement, ARRÊT coupez l’alimentation au niveau du disjoncteur ou de l’interrupteur ARRÊT contrôlant le système de chauffage/ refroidissement. Interrupteur Disjoncteur Assurez-vous que votre système MARCHE est désactivé.
- Page 19 Série RTH5160 Prenez une photo du câblage existant. Assurez-vous que les lettres adjacentes aux bornes de branchement des fils sont sur la photo. Cette référence vous sera utile lorsque vous procéderez au câblage de votre nouveau thermostat. Conseil : Si la couleur des fils s’est estompée ou si deux bornes ont des fils de même couleur, utilisez les étiquettes de fil fournies dans...
- Page 20 Guide d’installation rapide Débranchez les fils et retirez l’ancienne plaque murale. Utilisez un tournevis pour dégager les fils des bornes. Utilisez ensuite une étiquette de fil pour identifier chaque fil au fur et à mesure qu’il est débranché. La lettre sur l’étiquette du fil doit correspondre à la lettre de la borne. Conseil : Pour éviter que les fils ne tombent derrière le mur, enroulez-les autour d’un crayon.
- Page 21 Série RTH5160 Insérez les ancres murales. Il est recommandé d’utiliser les ancres murales fournies dans la boîte pour monter le thermostat. Vous pouvez utiliser le système de montage UWP pour marquer l’emplacement des ancres murales. a) Mettez la plaque murale de niveau.
- Page 22 Guide d’installation rapide Branchez les fils restants. Appuyez sur les languettes pour insérer les fils dans les orifices de leurs bornes correspondantes sur le système UWP (un fil par borne) jusqu’à ce qu’ils soient fermement placés. Tirez délicatement sur les fils pour vérifier qu’ils sont bien placés.
- Page 23 Série RTH5160 Installez les piles. Insérez deux piles alcalines AA à l’arrière du thermostat comme illustré. Attachez le thermostat. Alignez le thermostat sur le système UWP et emboîtez-le fermement. Rétablissez l’alimentation. Rétablissez l’alimentation au niveau Arrêt du disjoncteur ou de l’interrupteur Arrêt contrôlant le système de chauffage/ refroidissement.
-
Page 24: Configuration Du Système
Guide d’installation rapide Configuration du système Une fois le thermostat installé, veuillez suivre les étapes ci-dessous pour configurer votre système et régler votre thermostat. Sélectionnez les options de configuration du système. Appuyez sur Edit (-) (modifier) pour régler les valeurs ou sélectionner l’une des options possibles. - Page 25 Série RTH5160 Options de configuration du système Numéro de configuration du système et Options (réglage d’usine en gras) description 0 = Fahrenheit 125 = Échelle d’indication de température 1 = Celsius 1 = Chauffage à air pulsé conventionnel 2 = Thermopompe 3 = Chauffage rayonnant (Chaudière) 200 = Type de système de chauffage 5 = Aucun (refroidissement uniquement)
- Page 26 Guide d’installation rapide Réglages pour le fonctionnement du système Appuyez sur le bouton Menu, puis sur le bouton Mode (+) pour passer au prochain mode du système accessible. Parcourez les modes jusqu’à ce que vous tombiez sur le mode du système voulu, puis appuyez sur Done (terminé).
- Page 27 Série RTH5160 Câblage—Systèmes conventionnels Câblage alternatif (systèmes conventionnels) Si les étiquettes ne correspondent pas aux bornes, connectez les fils comme illustré ci-dessous (voir les remarques ci-dessous). REMARQUES : 1. Si vous devez connecter les câbles R et Rc, réglez le curseur R sur la position basse (2 fils).
-
Page 28: Remplacement Des Piles
Guide d’installation rapide Câblage alternatif (pour les thermopompes uniquement) REMARQUES : 1. Conservez le curseur R en position haute (1 fil). 2. Si l’ancien thermostat est muni de fils V et VR, s’arrêter immédiatement et contacter un installateur qualifié pour obtenir de l’aide. 3. - Page 29 Série RTH5160 Écran d’alerte Vous verrez l’icône et le numéro d’alerte à l’écran. Appuyez sur Next (+) (suivant) pour voir d’autres alertes, s’il y a lieu. Puis, appuyez sur Done (terminé) pour revenir à l’écran d’accueil. REMARQUE : Si l’alerte est critique, il est possible que vous ne puissiez pas accéder à...
-
Page 30: Dépannage
Guide d’installation rapide Dépannage En cas de difficultés avec le thermostat, essayer les suggestions suivantes. La plupart des problèmes peuvent être réglés rapidement et facilement. Rien n’apparaît à l’écran Assurez-vous que des piles alcalines AA bien chargées sont cor- rectement installées (consultez la page 7. Impossible de changer Consultez l’option de configuration du système 220 pour vous le réglage du système à... -
Page 31: Garantie Limitée De 1 An
Série RTH5160 Garantie limitée de 1 an Honeywell garantit ce produit, à l’exception des piles, contre tout défaut de pièce ou de main-d’œuvre, durant une période d’un (1) an à partir de la date d’achat par le consommateur si le produit est utilisé et entretenu convenablement. En cas de défectuosité... -
Page 32: Service À La Clientèle
MISE EN GARDE : RISQUE DE CHOC ÉLECTRIQUE Peut provoquer des chocs électriques ou endommager le matériel. Coupez l’alimentation électrique avant de commencer l’installation. MISE EN GARDE : AVIS RELATIF AU MERCURE Si ce produit remplace un régulateur contenant du mercure dans un tube scellé, ne mettez pas l’ancien régulateur à...
Need help?
Do you have a question about the RTH5160D and is the answer not in the manual?
Questions and answers