Honeywell Home Smart Series User Manual
Hide thumbs
Also See for Smart Series:
- User manual (76 pages) ,
- User manual (92 pages) ,
- User manual (28 pages)
Table of Contents
Advertisement
Advertisement
Table of Contents

Related Manuals for Honeywell Home Smart Series


Summary of Contents for Honeywell Home Smart Series
- Page 1 Programmable RTH6500WF Thermostat Smart Series User Guide HOLD Read and save these instructions. M37771 In the box you will find • Thermostat • Wallplate (attached to thermostat) • Screws and anchors • Quick Start Guide • Thermostat ID Card • Wire labels •...
- Page 2 Welcome Congratulations on your purchase of a Smart programmable thermostat. When registered to Total Connect Comfort, you can remotely monitor and control the heating and cooling system in your home or business—you can stay connected to your comfort system wherever you go. Total Connect Comfort is the perfect solution if you travel frequently, own a vacation home, a business or manage an Investment...
-
Page 3: Table Of Contents
Table of contents About your new thermostat Unregistering thermostat Disconnecting Wi-Fi Controls and Home screen Special features quick reference Setting functions and options Preset energy-saving schedules Appendices Installation Frequently asked questions Installing your thermostat Troubleshooting Connecting to your Wi-Fi network Operation Setting the clock Setting the fan... -
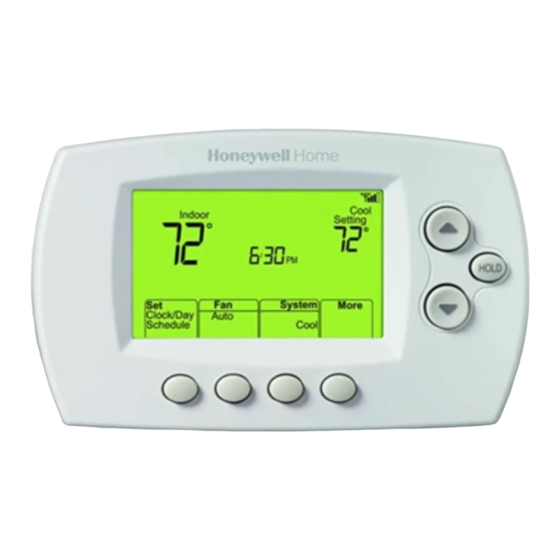
Page 4: Controls And Home Screen
Controls and home screen quick reference Once your thermostat is installed, it will display the home screen. Portions of this display will change depending on how you are viewing it. Set up messages Wi-Fi status describe steps in the Temperature Wi-Fi set up process HOLD adjustment buttons... -
Page 5: Installing Your Thermostat
Setting up your thermostat Setting up your programmable thermostat is easy. It is preprogrammed and ready to go as soon as it is installed and registered. Install your thermostat. Connect your home Wi-Fi network. Register online for remote access. Before you begin, you may want to watch a brief installation video. - Page 6 Installing your thermostat 2 Remove old thermostat faceplate If you have an older thermostat with and leave wires connected. a sealed mercury tube, turn to page ii for proper disposal instructions. 2a Take a picture of the wire connections for later reference. 2b If no wire is connected to a terminal labeled C or no C terminal exists on the old thermostat, view...
- Page 7 Installing your thermostat 6 Mount wallplate for thermostat. Wallplate Mount your new wallplate using screws and anchors included with the thermostat. If necessary: Drill 3/16-in holes for drywall. Drill 7/32-in holes for plaster. Note: You may be able to use your existing wall anchors.
- Page 8 Installing your thermostat Wiring (heat pump system only) Labels don’t match? See alternate wiring key on pages 7. 7B Wire thermostat to your heat pump. a Starting with the C Wire, match the sticky tag on the wire to the terminal labels.
- Page 9 Installing your thermostat Alternate wiring (heat pump system only) Use this if your wire labels don’t match the terminal labels. Note: You must have E AUX a C wire or equivalent. See page 6. G O/B R RC AUX/E HEAT PUMP MCR33886 Alternate wiring key (heat pump system only) Do not use K terminal.
- Page 10 Installing your thermostat 8 Insert quick reference card. Quick Fold quick reference card reference along score lines, and slide card it into the slot on the back of the thermostat. MCR33916 Back of thermostat MCR33858 9 Attach thermostat to wallplate. Align the thermostat to the wallplate and then snap into place.
- Page 11 Installing your thermostat 11 Set clock to current day and time. 11a Press to set clock. HOLD 11b Press Day. 11c Press to select the day of week. MCR33908 11d Press Done to save. (Press and hold a button to quickly change a setting.) HOLD MCR33909...
-
Page 12: Connecting To Your Wi-Fi Network
Connecting to your Wi-Fi network To complete this process, you must have a wireless device connected to your home wireless network. Any of these device types will work: • Tablet (recommended) • Laptop (recommended) • Smartphone If you get stuck... at any point in this procedure, restart the thermostat by removing the thermostat from the wallplate, wait for 10 seconds, and snap it back onto the wallplate. - Page 13 Connecting to your Wi-Fi network Note: If your Wi-Fi network does not appear in the list on the Thermostat Wi-Fi Setup page: • Try performing a network rescan by pressing the Rescan button. This is helpful in areas with a lot of networks. •...
-
Page 14: Setting The Fan
Setting the time and day Clock/Day/Schedule, then press 1 Press to set clock. Day, then press 2 Press to select HOLD the day of week. Done 3 Press to save. Note: If the Set Clock/Day/Schedule option is not displayed, press Done. Note: If the display flashes Set Clock, the thermostat will follow your settings for the... -
Page 15: Adjusting Program Schedules
Adjusting program schedules Clock/Day/Schedule, then Schedule. 1 Press 2 Press to set your Monday (Mon) Wake time, then press Next. 3 Press to set the temperature for this period, then press Next. 4 Set time and temperature for the next time period (Leave). - Page 16 Unregistering thermostat If you remove the thermostat from your Total Connect Comfort website account (for example, you’re moving and leaving the thermostat behind), the thermostat will display Register at Total Connect until it is re-registered. M33876 Disconnecting Wi-Fi Replacing your router If you disconnect the thermostat from your Wi-Fi network: 1 Enter system setup (see page 18).
-
Page 17: Smart Response Technology
Smart Response Technology This feature allows the thermostat to “learn” how long the heating/cooling system takes to reach programmed temperature settings, so the temperature is reached at the time you set. For example: Set the Wake time to 6:00 am, M33881 and the temperature to 70°. -
Page 18: Setting Functions And Options
Setting functions and options You can change options for a number of system functions. Available functions depend on the type of system you have. The functions, along with available options, are described on pages 18–19. This thermostat is pre-set for a single-stage heating/cooling system. Setting function 1 for a heat pump will adjust the default settings. - Page 19 System setup Function Settings & Options Gas or oil furnace: Standard gas/oil furnace (less than 90% Heating Cycle efficiency). Rate Electric furnace: Electric heating systems. Heating Cycle Hot water or high-efficiency furnace: Hot water system or gas furnace Rate Stage 2 (more than 90% efficiency).
-
Page 20: Frequently Asked Questions
Frequently asked questions Q Will my thermostat still work if I lose my Wi-Fi connection? Q: A Yes, the thermostat will operate your heating and/or cooling system with or without Wi-Fi. Q How do I find the password to my router? Q: A Contact the manufacturer of the router or check the router documentation. - Page 21 Troubleshooting Lost Signal If the no-Wi-Fi indicator displays in place of the Wi-Fi strength indicator in the upper right hand corner of the home screen: • Check another device to be sure Wi-Fi is working in your home; if not, call your Internet Service Provider.
- Page 22 Troubleshooting If you have difficulty with your thermostat, please try the following suggestions. Most problems can be corrected quickly and easily. Display is • Check circuit breaker and reset if necessary. • Make sure power switch at heating and cooling system is on. blank •...
- Page 23 Glossary C wire The “C” or common wire brings 24 VAC power to the thermostat from the heating/cooling system. Some older mechanical or battery operated thermostats may not have this wire connection. It is necessary for establishing a Wi-Fi connection to your home network. Heat Pump heating/cooling system Heat pumps are used to heat and cool a home.
- Page 24 Electrical Ratings Terminal Voltage (50/60Hz) Running Current W Heating 20-30 Vac 0.02-1.0 A (Powerpile) 750 mV DC 100 mA DC W2 (Aux/E) Heating 20-30 Vac 0.02-1.0 A Y Cooling 20-30 Vac 0.02-1.0 A Y2 Cooling 20-30 Vac 0.02-1.0 A G Fan 20-30 Vac 0.02-0.5 A O/B Changeover...
Need help?
Do you have a question about the Smart Series and is the answer not in the manual?
Questions and answers