Table of Contents
Advertisement
Available languages
Available languages
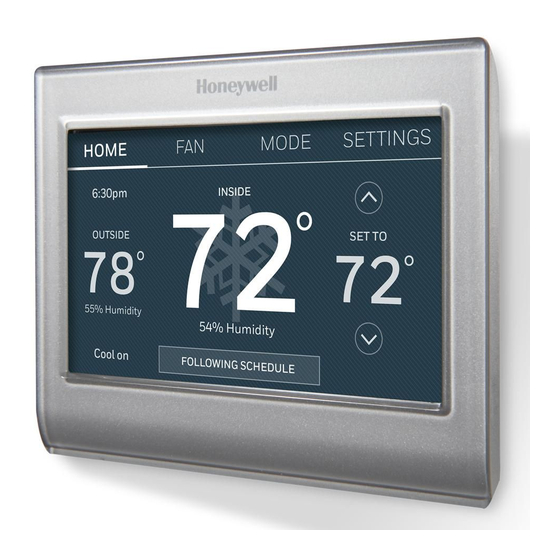
Color Touchscreen
Programmable
Thermostat
User Guide
Read and save these
instructions.
For help please visit
honeywellhome.com
Find rebates: HoneywellHome.com/Rebates
In the box you will find
• Thermostat
• Wallplate
• Screws and anchors
• Quick Start Guide
Features of your thermostat
With your new thermostat, you can:
• Connect to the Internet to monitor and control your heating/cooling system.
• View and change your heating/cooling system settings.
• View and set temperature and schedules.
• Receive alerts via email and get automatic upgrades.
• View outdoor temperature and humidity (requires Wi-Fi set up and registration).
RTH9585WF1004
RTH9585WF1012
Smart Series
• Thermostat ID Card
• Wire labels
• User Guide
• C-wire adapter and C-wire addendum
72
M37768
Advertisement
Chapters
Table of Contents

Related Manuals for Honeywell Home RTH9585WF1004


Summary of Contents for Honeywell Home RTH9585WF1004
- Page 1 Color Touchscreen RTH9585WF1004 Programmable Thermostat RTH9585WF1012 Smart Series User Guide Read and save these instructions. For help please visit honeywellhome.com M37768 Find rebates: HoneywellHome.com/Rebates In the box you will find • Thermostat • Thermostat ID Card • Wallplate • Wire labels •...
- Page 2 Welcome Congratulations on your purchase of a color touchscreen programmable thermostat. When registered to Total Connect Comfort, you can remotely monitor and control the heating and cooling system in your home or business—you can stay connected to your comfort system wherever you go.
-
Page 3: Table Of Contents
Table of contents About your new thermostat Setting holiday schedule–business... 21 Setting holiday override–business ... 22 Home screen quick reference ....1 Initiating occupancy mode–business .. 22 Business screen quick reference ..2 Customizing screen color ...... 23 Installation Setting preferences ........23 Installing your thermostat ...... -
Page 4: Business Screen Quick Reference
Quick reference: business use FAN. Select fan mode. MODE. Select system mode (heat, cool, auto, HOME. Touch to em heat). display Home screen. SETTINGS. Touch to Current time. display options. Start here to set a program Outdoor conditions. schedule. Outdoor temperature Thermostat location. -
Page 5: Installing Your Thermostat
Installing your thermostat You might need the following tools to install this thermostat: • No. 2 Phillips screwdriver • Drill and bits (3/16” for drywall, 7/32” for plaster) (optional) • Pen • Hammer (optional) • Pencil • Electrical tape (optional) •... - Page 6 Installing your thermostat 3 Label the wires. Use the supplied sticky tags to label each wire as you Sticky tag disconnect it. Label wires according to the old thermostat terminal designations, not by wire color. Blank tags Note: If no tag matches a terminal designation, write the appropriate letter on a blank sticky tag.
- Page 7 Installing your thermostat Important! This thermostat requires a C, or common, wire for power. The C, or common, wire brings 24 VAC power to the thermostat. If you are replacing an existing thermostat, it might not have a C wire connected to it. Many older mechanical or battery operated thermostats do not require a C wire.
- Page 8 Installing your thermostat Wiring (Conventional System Important! continued) Check the box for each wire you connect. You will need c In the image on the right, check the this information in Step 9. box next to each connection. You will use this checklist in Step 9.
- Page 9 Installing your thermostat Wiring (Heat Pump System continued) Important! Check the box for each wire c In the image on the right, check the you connect. You will need box next to each connection. You will this information in Step 9. use this checklist in Step 9.
- Page 10 Installing your thermostat Alternate wiring (Heat Pump System) Use this if your wire labels don’t match the terminal labels. Note: You must have a C wire or equivalent. See page 5. MCR36752 Alternate wiring key (Heat Pump System) If you have both an R and Rc wire, unplug the jumper loop by pulling on the wire loop.
- Page 11 Installing your thermostat 8 Switch heating/cooling system ON. Important! 8a Verify that the C wire is connected at the thermostat and at the heating/cooling system. 8b Make sure the heating/cooling system door is firmly secured. 8c Switch power back ON for your heating/cooling system at the Circuit Heating/...
-
Page 12: Connecting To Your Wi-Fi Network
Installing your thermostat 9e Select your system type and touch Next. The system type determines other selections for completing initial setup. Use the checklist from Step 6A-d when making selections. 9f Touch Next after making selections on each screen. Next 9g Touch Done on the last screen. - Page 13 Connecting to your Wi-Fi network 2b Using the keyboard, touch the characters that spell out your home network password. 2c Touch Done. The thermostat displays “Connecting to your network. Please wait...” then shows a “Connection Successful” screen. Done 2d Touch OK to display the registration information screen.
- Page 14 Disconnecting your Wi-Fi network 1 Touch SETTINGS. SETTINGS 2 Select Wi-Fi Setup. Wi-Fi Setup 3 Touch Disconnect from Network. The thermostat will display a question to confirm your selection. 4 Touch Yes to confirm that you want to disconnect from the network. The thermostat will display the Wi-Fi Setup screen.
-
Page 15: Registering Your Thermostat Online
Registering your thermostat online To view and set your thermostat remotely, you must have a Total Connect Comfort account. Use the following steps. 1 Open the Total Connect Comfort web site. Go to mytotalconnectcomfort.com View the Thermostat Registration video at honeywellhome.com/wifi-thermostat M31570 2 Login or create an account. - Page 16 Registering your thermostat online 3 Register your thermostat. Thermostat ID Card Use the MAC ID and CRC ID to register After you are logged in to your this product at mytotalconnectcomfort.com Carte d’identification de thermostat Total Connect Comfort account, Utilisez l’identification MAC et l’identification CRC pour enregistrer ce produit à...
-
Page 17: Setting The Time/Date
Setting the time/date 1 Touch the current time. The screen displays Set Time/Set Date. 12:12 am 2 Touch Set Time or Set Date. 3 Touch p or q until the proper time/date is displayed. 4 Touch Done to save or Cancel to ignore changes. -
Page 18: Selecting System Mode
Setting system mode 1 Touch MODE to display system settings. MODE 2 Touch desired option: Heat: Thermostat controls only the heating system. Done Cool: Thermostat controls only the cooling system. Off: Heating/cooling systems are off. Automatic: Thermostat selects heating or cooling as needed depending on the indoor temperature. -
Page 19: Adjusting Program Schedules
Adjusting program schedules 1 Touch SETTINGS. SETTINGS 2 Select Create/Edit Schedule. • Touch View/Edit to view the full schedule and make a quick Create Edit Schedule adjustment. • Touch Guide Me to create a schedule by answering simple questions. • Touch I’ll do it myself to manually create a program schedule. -
Page 20: Overriding Schedules-Home
Overriding schedules: home use 1 Touch p or q to adjust the temperature (right side of screen) and the Hold Until time. The schedule will resume when the Hold Until time expires. PERMANENT 2 Touch Permanent to keep the same temperature until you change it or resume the program schedule. -
Page 21: Viewing Equipment Status
Viewing equipment status 1 Touch SETTINGS. SETTINGS 2 Select Equipment Status. 3 Touch p or q to view the status of all the equipment your thermostat is controlling. Depending on how your thermostat was installed, the Equipment Status screen can report data about the following systems: Equipment Status •... -
Page 22: Setting Holiday/Event Schedules- Business
Setting holiday/event schedules: business use This feature helps you conserve energy SETTINGS when the workplace is unoccupied for special events and holidays. Holiday / Event Scheduler 1 Touch SETTINGS. 2 Select Holiday/Event Scheduler. 3 Select the item you want to schedule. Custom events •... -
Page 23: Setting Holiday Schedule-Business
Setting custom events: business use 6 Select Specific Date or Month/Weekday. • For Specific Date, you are prompted to select the start date, settings, end date, and frequency for the event. • For Month/Weekday, you are Next prompted to select the month, day of the week, week of the month, settings, length of event, and frequency of the event. -
Page 24: Setting Holiday Override-Business
Setting holiday override: business use This feature lets you customize SETTINGS temperature settings to be maintained from now until a specified date. The Holiday Mode thermostat resumes normal scheduling on the date you select. 1 Touch SETTINGS. 2 Select Holiday Mode to display temperatures while you are away on holiday. -
Page 25: Customizing Screen Color
Customizing screen color You can customize your thermostat SETTINGS display to match your décor. 1 Touch SETTINGS. Color Themes 2 Touch Color Themes. 3 Select the name of a color to use a predefined background, or select Custom to define you own background color and text. -
Page 26: Cleaning The Thermostat Screen
Cleaning the thermostat screen When you select the Clean Screen SETTINGS option, the screen is locked so you don’t accidentally change settings while you Clean Screen clean. 1 Touch SETTINGS. 2 Select Clean Screen. A prompt asks if you want to clean the screen for 30 seconds. -
Page 27: Software Updates
Software updates The Wi-Fi app periodically issues updates to the software for this thermostat. The updates occur automatically through your Wi-Fi connection. All your settings are saved, so you will not need to make any changes after the update occurs. Updates occur in the early morning. -
Page 28: Pre-Occupancy Purge
Pre-occupancy purge This business use feature turns on the fan 1 to 3 hours before each “occupied” time period, to provide a comfortable work environment when you arrive. Compressor protection The thermostat keeps the compressor off for a few minutes before restarting, to prevent equipment damage. - Page 29 Setting advanced preferences You can change options for a number of SETTINGS system functions. Although many options, such as language and temperature Preferences indication settings are the same for all setups, others depend on the type of system you have. 1 Touch SETTINGS.
-
Page 30: Setting Advanced Preferences
Setting advanced preferences Advanced Preferences Options (concluded) Screen Title Settings and Options (Options vary depending on setup.) Select No to begin recovery on schedule or Yes to ramp up Early Recovery for Heating* temperature early. Select No to begin recovery on schedule or Yes to ramp down Early Recovery for Cooling* temperature early. - Page 31 Changing system setup Note: Touch the orange Help button on any screen for more information. System Setup Options (SETTINGS > System Setup) Screen Title Settings and Options (Options vary depending on setup.) Language English/Français/Español. Thermostat Home/Business (Thermostat is used in a residential (default) or installed in commercial setting).
-
Page 32: Frequently Asked Questions
Frequently asked questions Q Will my thermostat still work if I lose my Wi-Fi connection? : A Yes, the thermostat will operate your heating and/or cooling system with or without Wi-Fi. Q How do I find the password to my router? : A Contact the manufacturer of the router or check the router documentation. -
Page 33: Getting Help And Responding To Alerts
Getting help and responding to alerts Your thermostat offers two types of assistance, if these assistance options do not answer your questions, review the FAQs (page 30) and troubleshooting Help tips (page 32). On screen help Most displays include an orange Help button. -
Page 34: Troubleshooting
Troubleshooting If you have difficulty with your thermostat, please try the following suggestions. Most problems can be corrected quickly and easily. Display is • Check circuit breaker and reset if necessary. blank • Make sure power switch at heating and cooling system is on. •... - Page 35 Glossary C wire The “C” or common wire brings 24 VAC power to the thermostat from the heating/cooling system. Some mechanical or battery operated thermostats may not have this wire connection. It is necessary for establishing a Wi-Fi connection to your home network. Heat Pump heating/cooling system Heat pumps are used to heat and cool a home.
-
Page 36: Limited Warranty
1-year limited warranty Resideo warrants this product to be free from defects in workmanship or materials, under normal use and service, for a period of one (1) year from the date of first purchase by the original purchaser. If at any time during the warranty period the product is determined to be defective due to workmanship or materials, Resideo shall repair or replace it (at Resideo’s option). - Page 37 69-2715EF—07...
- Page 38 © 2020 Resideo Technologies, Inc. All rights reserved. The Honeywell Home trademark is used under license from Honeywell International, Inc. This product is manufactured by Resideo Technologies, Inc. and its affiliates. Todos los derechos reservados. La marca comercial Honeywell Home se utiliza bajo licencia de Honeywell International, Inc.
- Page 39 Termostato con RTH9585WF1004 pantalla táctil a color, RTH9585WF1012 programable Serie inteligente Guía del usuario Lea y guarde estas instrucciones. Para obtener ayuda, visite honeywellhome.com M37768 24 V ~ 60 Hz, 1.0 A Buscar rebajas: HoneywellHome.com/Rebates En la caja, encontrará lo siguiente: •...
- Page 40 Bienvenido Felicitaciones por la compra del termostato inteligente con pantalla táctil a color. Cuando se registre en Total Connect Comfort, puede supervisar y controlar de manera remota el sistema de calefacción y refrigeración de su hogar o empresa; puede permanecer conectado a su sistema de confort dondequiera que vaya.
-
Page 41: Referencia Rápida: Uso Doméstico
Índice Acerca de su nuevo termostato Configuración de la programación de días festivos: empresarial ......21 Referencia rápida: uso doméstico....1 Configuración de la anulación Referencia rápida: uso empresarial ....2 de días festivos: uso empresarial ....22 Instalación Inicio de la modalidad de ocupación: empresarial .............. -
Page 42: Referencia Rápida: Uso Empresarial
Referencia rápida: uso empresarial VENTILADOR. MODO. Seleccione Seleccione una la modalidad del modalidad para el sistema (calefacción, ventilador. refrigeración, automático, calefacción HOGAR. Presione para de emergencia visualizar la pantalla de activada). inicio. AJUSTES. Presione Fecha y hora para visualizar las actuales. -
Page 43: Instalación Del Termostato
Instalación del termostato Es posible que necesite las siguientes herramientas para instalar el termostato: • Destornillador Phillips n.° 2 • Taladro y brocas (3/16 in [4.8 mm] en paneles de yeso, 7/32 in [5.6 mm] en • Bolígrafo yeso) (opcional) •... - Page 44 Instalación del termostato 3 Etiquete los cables. Utilice las etiquetas adhesivas suministradas para identificar cada Etiqueta cable a medida que los desconecta. adhesiva Etiquete los cables conforme a las designaciones de los terminales del termostato existente, no según el Etiquetas color de los cables.
- Page 45 Instalación del termostato ¡Importante! Este termostato requiere un cable de alimentación C o común. El cable de alimentación C, o común, alimenta al termostato con una potencia de 24 V AC. Si está reemplazando un termostato previo, tal vez no haya un cable C conectado a aquel.
- Page 46 Instalación del termostato Cableado (sistema convencional - ¡Importante! continuación) Marque la casilla por cada cable que conecte. c En la imagen de la derecha, revise Necesitará esta información la casilla próxima a cada conexión. en el paso 9. Utilizará esta lista de comprobación en el paso 9.
- Page 47 Instalación del termostato Cableado (sistema de bomba de calor - ¡Importante! continuación) Marque la casilla por cada cable que conecte. c En la imagen de la derecha, revise Necesitará esta información la casilla próxima a cada conexión. en el paso 9. Utilizará...
- Page 48 Instalación del termostato Cableado alternativo (sistema de bomba de calor) Utilícelo si las etiquetas de los cables no coinciden con las etiquetas de los terminales. Nota: Debe tener un cable C o uno equivalente. Consulte la página 5. MSCR34542 Clave para cableado alternativo (sistema de bomba de calor) Si tiene el cable R y el cable Rc, desenchufe el circuito del puente;...
- Page 49 Instalación del termostato 8 ENCIENDA el sistema de calefacción/refrigeración. ¡Importante! 8a Compruebe que el cable C esté conectado al termostato y al sistema de calefacción/ refrigeración. 8b Verifique que la puerta del sistema de calefacción/ Interruptor de Caja de refrigeración esté fija. M31544 energía del interruptores...
-
Page 50: Conexión De La Red Wifi
Instalación del termostato 9e Seleccione el tipo de sistema y toque Siguiente. El tipo de sistema determina otras opciones para finalizar el proceso de configuración inicial. Utilice la lista de comprobación del paso 6A-d cuando haga uso de las opciones. 9f Toque Siguiente después de hacer uso Siguiente de las opciones de cada pantalla. - Page 51 Conexión de la red WiFi 2b Use el teclado para introducir la contraseña de su red doméstica. 2c Toque Terminado. El termostato muestra el mensaje “Conectándose a su red. Espere...” y, luego, aparece la pantalla “Conexión satisfactoria.” Terminado 2d Toque OK para visualizar la pantalla de información de registro.
- Page 52 Desconexión de la red WiFi 1 Toque AJUSTES. AJUSTES 2 Seleccione Configuración WiFi. Con guración Wi-Fi 3 Toque Desconectar de la red. El termostato mostrará una pregunta para confirmar su selección. 4 Toque Sí para confirmar que desea desconectarse de la red. El termostato mostrará...
-
Page 53: Registro Del Termostato En Línea
Registro del termostato en línea Para ver y configurar el termostato de manera remota, debe tener una cuenta en Total Connect Comfort. Siga los siguientes pasos. 1 Abra el sitio web Total Connect Comfort. Vaya a mytotalconnectcomfort.com Mire el video Registro del termostato honeywellhome.com/wifi-thermostat M31570 2 Inicie sesión o cree una cuenta. - Page 54 Registro del termostato en línea 3 Registre su termostato. Thermostat ID Card Use the MAC ID and CRC ID to register Después de que haya iniciado sesión this product at mytotalconnectcomfort.com Carte d’identification de thermostat en su cuenta Total Connect Comfort, Utilisez l’identification MAC et l’identification CRC pour enregistrer ce produit à...
-
Page 55: Configuración De La Hora Y La Fecha
Configuración de la hora y la fecha 1 Toque la hora actual. La pantalla muestra Configurar hora/Configurar fecha. 6:30 pm 2 Toque Configurar hora o Configurar fecha. 3 Toque s o t hasta que aparezcan la hora y la fecha correctas. 4 Toque Terminado para guardar o Cancelar para ignorar los cambios. -
Page 56: Configuración De La Modalidad Del Sistema
Configuración de la modalidad del sistema 1 Toque MODO para mostrar las MODO configuraciones del sistema. 2 Toque la opción deseada: Terminado Calefacción: El termostato controla solamente el sistema de calefacción. Refrigeración: El termostato controla solamente el sistema de refrigeración. Apagado: Se apagan los sistemas de calefacción/refrigeración. -
Page 57: Ajuste De Los Cronogramas Del Programa
Ajuste de los cronogramas del programa 1 Toque AJUSTES. AJUSTES 2 Seleccione Crear/editar horario. • Toque Ver/editar para ver la Crear Editar horario programación completa y realizar ajustes rápidos. • Toque Guíame para crear una programación respondiendo preguntas simples. • Toque Lo haré yo mismo para crear de forma manual un cronograma del programa. -
Page 58: Anulación De Las Programaciones: Doméstico
Anulación de las programaciones: uso doméstico 1 Toque s o t para configurar la temperatura (lado derecho de la pantalla) y la hora indicada en Sostener Hasta. La programación se reanudará cuando finalice el tiempo de “Sostener Hasta”. PERMANENTE 2 Toque PERMANENTE para mantener la misma temperatura hasta que la cambie o reinicie el cronograma del programa. -
Page 59: Visualización Del Estado Del Equipo
Visualización del estado del equipo 1 Toque AJUSTES. AJUSTES 2 Seleccione Estatus del equipo. 3 Toque s o t para ver el estado de Estatus del equipo todos los equipos que controla su termostato. Según la manera en que se instaló su termostato, la pantalla de estado del equipo puede generar información sobre los siguientes sistemas:... -
Page 60: Configurar Programación De Días Festivos/ Eventos: Comercial
Configurar programación de días festivos/eventos: uso comercial Esta función contribuye a conservar energía AJUSTES cuando el lugar de trabajo está desocupado durante eventos especiales o días festivos. Programador de vacaiones / eventos 1 Toque AJUSTES. 2 Seleccione Programador de vacaciones/eventos. 3 Seleccione el ítem que desea programar. -
Page 61: Configuración De La Programación De Días Festivos: Empresarial
Configuración de eventos personalizados: uso empresarial 5 Seleccione Desocupado or Ocupado. 6 Seleccione Fecha específica o Mes/Día de la semana. • Para la opción Fecha específica, debe seleccionar la fecha de inicio, las configuraciones, la fecha de Siguiente finalización y la frecuencia del evento. -
Page 62: Configuración De La Anulación De Días Festivos: Uso Empresarial
Configuración de la anulación de días festivos: uso empresarial Esta función le permite personalizar AJUSTES configuraciones de temperaturas para mantenerlas desde ahora hasta una fecha específica. El termostato reanuda la programación normal en la Modalidad de día fest ivo fecha que usted seleccione. 1 Toque AJUSTES. -
Page 63: Cómo Personalizar El Color De La Pantalla
Cómo personalizar el color de la pantalla Puede personalizar la pantalla del termostato AJUSTES para adaptarla a su decoración. 1 Toque AJUSTES. Temas de color 2 Toque Temas de color. 3 Elija el nombre de un color para usar en un fondo predeterminado o seleccione Personalizar para definir su propio color de fondo y texto. -
Page 64: Limpieza De La Pantalla Del Termostato
Limpieza de la pantalla del termostato Cuando selecciona la opción Limpiar AJUSTES pantalla, esta se bloquea para que no cambie accidentalmente la configuración mientras Limpiar pantalla limpia. 1 Toque AJUSTES. 2 Seleccione Limpiar pantalla. Una instrucción le pregunta si desea limpiar la pantalla durante 30 segundos. -
Page 65: Actualizaciones De Software
Actualizaciones del software La aplicación de Wi-Fi solicita actualizaciones periódicamente al software para este termostato. Las actualizaciones efectúan automáticamente a través de su conexión WiFi. Todas sus configuraciones permanecen guardadas, de modo que no necesita hacer cambios después de que ocurra la actualización. -
Page 66: Purga Previa A La Ocupación
Purga previa a la ocupación Esta función de uso empresarial enciende el ventilador de 1 a 3 horas antes del período “ocupado”, para brindar un ambiente de trabajo confortable cuando usted llegue. Protección del compresor El termostato conserva el compresor apagado durante unos minutos antes de volver a arrancar, para evitar daños al equipo. -
Page 67: Configuración De Preferencias Avanzadas
Configuración de preferencias avanzadas Puede cambiar las opciones en diversas funciones AJUSTES del sistema. Si bien muchas de las opciones, como las configuraciones que indican el idioma Preferencias y la temperatura, son las mismas para todas configuraciones, existen otras que dependen del tipo de sistema que posea. -
Page 68: Cambio De La Configuración Del Sistema
Configuración de preferencias avanzadas Opciones de preferencias avanzadas (finalización) Título de la pantalla Configuraciones y opciones (Las opciones varían según la configuración) Recuperación temprana Seleccione No para comenzar la recuperación según la para calefacción* programación o Sí para aumentar la temperatura antes. Recuperación temprana Seleccione No para comenzar la recuperación según la para refrigeración*... - Page 69 Cambio de la configuración del sistema Note: Para obtener más información, toque el botón anaranjado de ayuda que se encuentra en cualquier pantalla. Opciones de la configuración del sistema (AJUSTES > Configuración del sistema ) Título de la pantalla Configuraciones y opciones (Las opciones varían según la configuración) Idioma...
-
Page 70: Preguntas Frecuentes
Preguntas frecuentes : P ¿Mi termostato seguirá funcionando si pierdo la conexión WiFi? : R Sí, el termostato pondrá en funcionamiento el sistema de calefacción o refrigeración con o sin conexión WiFi. : P ¿Cómo encuentro la contraseña de mi enrutador? : R Comuníquese con el fabricante del enrutador o revise la documentación del enrutador. -
Page 71: Cómo Obtener Ayuda Y Reaccionar Ante Las Alertas
Cómo obtener ayuda y reaccionar ante las alertas Su termostato proporciona dos tipos de asistencia. En caso de que estas opciones de asistencia no aclaren sus dudas, consulte las preguntas más frecuentes (página 30) y los Ayuda consejos sobre la localización y solución de problemas (página 32). -
Page 72: Localización Y Solución De Problemas
Localización y solución de problemas Si tiene dificultades con el termostato, intente seguir las sugerencias que se indican a continuación. La mayoría de los problemas se pueden solucionar de manera fácil y rápida. La pantalla está en • Revise el interruptor de circuito y, si es necesario, reinícielo. blanco •... - Page 73 Rangos eléctricos Terminal Voltaje (50 Hz/ 60 Hz) Max. valoración de la corriente W-O/B 20 V - 30 V CA 1,0 A W2 (Aux/E) 20 V - 30 V CA 1,0 A Y Refrigeración 20 V - 30 V CA 1,0 A Y2 Refrigeración 20 V - 30 V CA...
- Page 74 Información reguladora Declaración de conformidad con las regulaciones FCC • Conecte el equipo a un tomacorriente en un circuito (Sección 15.19) (solo en los EE. UU.) diferente a aquel en el que está conectado el receptor. Este dispositivo cumple con la Sección 15 de las •...
-
Page 75: Poliza De Garantia
POLIZA DE GARANTIA IMPORTADO EN MEXICO POR: Instromet Mexicana S. de R.L. de C.V. Avenida Insurgentes 2453, Piso 6, Tizapan, Alvaro Obregon, Ciudad de Mexico, CP 01090 Telefono: 01 (55) 800 00423 Instromet Mexicana S. de R.L. de C.V. garantiza que éste producto está libre de defectos en su mano de obra y materiales contra cualquier defecto de fabricación y funcionamiento, bajo uso normal, por el término de 2 años a partir de la fecha de la compra por el consumidor. - Page 76 © 2020 Resideo Technologies, Inc. All rights reserved. The Honeywell Home trademark is used under license from Honeywell International, Inc. This product is manufactured by Resideo Technologies, Inc. and its affiliates. Todos los derechos reservados. La marca comercial Honeywell Home se utiliza bajo licencia de Honeywell International, Inc.
Need help?
Do you have a question about the RTH9585WF1004 and is the answer not in the manual?
Questions and answers