Table of Contents
Advertisement
Quick Links
Instruction Manual
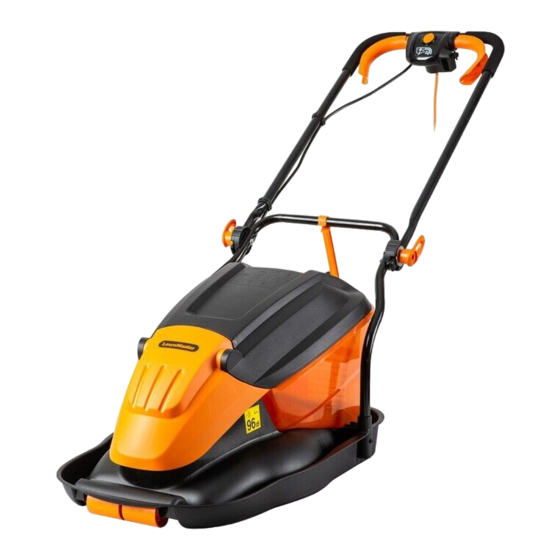
LawnMaster 36cm 1800W Electric Hover Mower MEH1836
Original Instructions
WARNING:
Read all safety instructions carefully before assembling and operating
this machine. Ensure the machine has been assembled correctly and safely. Keep the
instructions safe and pass them on to any subsequent user so that the information is always
available.
Advertisement
Table of Contents

Subscribe to Our Youtube Channel
Related Manuals for LawnMaster MEH1836


Summary of Contents for LawnMaster MEH1836
- Page 1 Instruction Manual LawnMaster 36cm 1800W Electric Hover Mower MEH1836 Original Instructions WARNING: Read all safety instructions carefully before assembling and operating this machine. Ensure the machine has been assembled correctly and safely. Keep the instructions safe and pass them on to any subsequent user so that the information is always...
-
Page 4: Table Of Contents
TABLE OF CONTENTS Section Page Symbols Safety Information 6-13 In the Box Assembly Operation 15-18 Maintenance 19-20 Troubleshooting 21-22 Technical Data Recycling and Disposal... -
Page 5: Symbols
SYMBOLS The following warning symbols appear throughout this manual and indicate the appropriate safety measures you should take when operating and maintaining the appliance. SYMBOL DESIGNATION/EXPLANATION Caution! Take extra care, beware of hazards. Read instruction manual. Do not expose the equipment to rain or leave outdoors. Do not work in the rain and do not cut wet grass. -
Page 6: Safety Information
SAFETY INFORMATION IMPORTANT Read all safety regulations and instructions and keep in a safe place for future use. Important! When using equipment, the following safety precautions must be followed to avoid injuries and damage: ■ Read all operating instructions carefully and comply with them. - Page 7 SAFETY INFORMATION ■ While operating the machine always wear substantial footwear and long trousers. Do not operate the machine when barefoot or wearing open toed sandals. Avoid wearing clothing that is loose fitting or that has hanging cords or ties. ■...
- Page 8 SAFETY INFORMATION ■ Stop the blade(s) if the machine has to be tilted for transportation when crossing surfaces other than grass, and when transporting the machine to and from the area to be used. ■ Never operate the machine with defective guards or shields, or without safety devices, for example deflectors and/or grass collector, in place.
- Page 9 SAFETY INFORMATION − Replace or repair any damaged parts, − Check for and tighten any loose parts. ■ Keep all nuts, bolts and screws tight to be sure the machine is in safe working condition. ■ Check the grass collector frequently for wear or deterioration.
- Page 10 SAFETY INFORMATION ■ Switch off the equipment and disconnect the plug from the socket if the power cable is damaged. If the supply cord is damaged, it must be replaced by a special cord or assembly available from the manufacturer or its service agent.
- Page 11 SAFETY INFORMATION ■ Do not work with equipment that is damaged, incomplete, or has been modified without the authorisation of the manufacturer. Do not use the equipment with damaged safety devices or screens or with missing safety equipment such as deflection and/or grass collection devices. ■...
- Page 12 SAFETY INFORMATION WARNING The double insulated system is intended to protect the user from shock resulting from a break in the tool’s internal insulation. Observe all normal safety precautions to avoid electrical shock. NOTE: Servicing of a product with double insulation requires extreme care and knowledge of the system and should be performed only by a qualified technician.
-
Page 13: In The Box
SAFETY INFORMATION WARNING Keep the extension cord clear of the working area. Position the cord so that it will not get caught on other obstructions while you are working. Failure to do so can result in serious personal injury. Intended Use This hover lawnmower is designed for domestic use only: ■... -
Page 14: Assembly
ASSEMBLY Assembly Preparation ■ Carefully remove all contents from the product packaging. ■ Ensure you have all the accessories and tool(s) needed for assembly and operation. This also includes suitable personal protective equipment. WARNING If any parts are damaged or missing do not operate this product until the parts are replaced. Failure to pay attention to this warning could result in serious personal injury. -
Page 15: Operation
OPERATION WARNING Do not allow familiarity with this type of product to make you careless. Always pay attention when operating this product, not doing so can result in serious injury. WARNING Always wear safety goggles or safety glasses with side shields when operating this product. Failure to do so could result in objects being thrown into your eyes, resulting in possible serious injury. - Page 16 OPERATION To set the cutting height: ■ Remove the blade bolt, and blade as described in Blade Maintenance. ■ For a lower cut, add spacers to a maximum of 3. ■ Refit the blade as described in Blade Maintenance. ■ The hover height and therefore cutting height of the lawnmower is approximate. Spacers provide the following approximate cutting heights.
- Page 17 OPERATION Starting/Stopping the Mower (See Figs. 10-11) ■ Make a loop in the power cord and hang the loop onto the cable strain-relief hook (Fig. 10). ■ Connect the machine to a suitable power supply. ■ Before switching the mower on, make sure that the working area is free from debris and foreign objects.
- Page 18 OPERATION ■ Double check that the blade is properly installed. ■ Always hold the product by its handles. Keep the handle dry to ensure safe support. ■ Ensure that the air vents are always unobstructed and clear. Clean them if necessary with a soft brush.
-
Page 19: Maintenance
MAINTENANCE WARNING If a part becomes worn or damaged, use recommended manufacturers replacement parts. Use of any other parts may create a hazard or cause product damage. WARNING Switch off the equipment before all maintenance and cleaning work, disconnect the plug and wait until the blade stops. - Page 20 MAINTENANCE ■ Reattach the impeller, spacer, blade and blade bolt. Ensure they are located correctly. ■ Tighten down clockwise by hand. Hold the blade firmly and tighten the blade bolt with the spanner provided. NOTE: Renew your metal blade after 50 hours mowing or 2 years whichever is the sooner- regardless of condition.
-
Page 21: Troubleshooting
TROUBLESHOOTING WARNING Only perform the steps described within these instructions! All further inspection, maintenance and repair work must be performed by a qualified specialist. Gloves and appropriate protective clothing must be worn when performing these instructions. Always turn off the machine and disconnect the plug and wait until the blade stops before making any adjustment. -
Page 22: Technical Data
TROUBLESHOOTING Cut long grass down in stages The mowing conditions are not by gradually lowering the height optimal. Poor collection performance. of cut. Wait for wet grass to dry. Mow in lines up and down the Mowing pattern is incorrect. lawn. - Page 24 Fig.1 Fig.2 Fig.3 Fig.4 Fig.5 Fig.6 Fig.7 Fig.8...
- Page 25 Fig.9 Fig.10 Fig.11 ② ③ ④ ① Fig.12 Fig.13 Fig.14 Fig.15...
- Page 27 MEH1836 Suzhou Cleva Electric Appliance Co., Ltd. No.8 Ting Rong Street Suzhou Industrial Park, Suzhou Jiangsu Province, China www.cleva-europe.com Made in P.R.C...
Need help?
Do you have a question about the MEH1836 and is the answer not in the manual?
Questions and answers