Table of Contents
Advertisement
Quick Links
Advertisement
Table of Contents

Summary of Contents for 3DConnexion SpaceMouse Pro
- Page 1 Manual 3Dconnexion SpaceMouse Pro ® Driver Version: 3DxWare 10.8.15 and higher...
-
Page 2: Table Of Contents
QuickStart Guide ........................3 Desktop Setup ....................................3 Hand Position ....................................3 Installation ......................................3 Feature Guide ........................... 4 3Dconnexion SpaceMouse Pro ................................4 3Dconnexion Settings ........................ 6 Advanced Settings ..................................... 7 Application Specific Advanced Settings .............................. 7 Buttons ......................................9 Assigning Quick Macros to buttons .............................. -
Page 3: Quickstart Guide
Desktop Setup Place the SpaceMouse Pro on the opposite side of the keyboard to your standard mouse. One hand engages the 3D mouse to position your model: rotating, panning and zooming. The other hand uses the standard mouse to select, create and edit. -
Page 4: Feature Guide
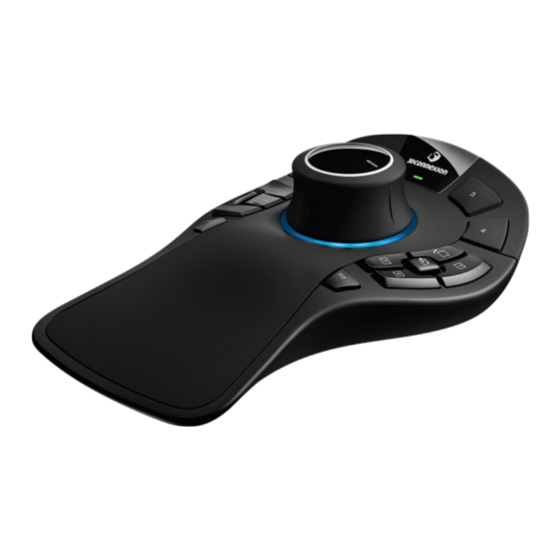
For many applications, you can adjust this behaviour in the Advanced Settings of your SpaceMouse Pro. Menu Button The Menu Button allows for fast and easy customization of your 3Dconnexion devices. Pressing it will take you directly to the 3Dconnexion Settings. Select the device you want to configure in the flyout window and customize it. - Page 5 The SpaceMouse Pro Wireless offers an On-Screen Display (OSD) that shows you the current assignment of the 3Dconnexion buttons. To display the OSD of your SpaceMouse Pro, press and hold any of the 3Dconnexion Buttons. It will be displayed as long as you keep the button pressed.
-
Page 6: 3Dconnexion Settings
This slider sets the overall speed for your device. In other words, it changes the amount of force or torque that needs to be applied to the SpaceMouse cap to move an object, scene, or image. If multiple 3Dconnexion devices are connected, you can select the desired product to configure by clicking on the flyout button at the top left of the panel. -
Page 7: Advanced Settings
Use the slider to set the speed for each of the 6-Dimensions-of-Freedom individually. To reverse the direction of a movement, check the Reverse box for that movement. Application Specific Advanced Settings Some applications feature additional SpaceMouse settings. For those applications you have additional options available in the Advanced Settings Panel: 3Dconnexion SpaceMouse Pro | 7... - Page 8 Show on Motion will visualize the Rotation Center only during movement. Hide will disable the Rotation Center visualization. Other Options The applications below feature special options. More information can be found in the 3Dconnexion FAQ: Autodesk 3ds Max, Autodesk Maya, Solid Edge, SOLIDWORKS 3Dconnexion SpaceMouse Pro | 8...
-
Page 9: Buttons
Any setting change is relevant to this application only. Press and hold a 3Dconnexion Button to get the button assignment for the current app displayed on the OSD. To disable this function, check Disable On-Screen Display. -
Page 10: Assigning Commands Using The Flyout Window
Creating Macros and Radial Menus To create a new macro or radial menu, first click on the > arrow on the right of the key field, then expand the Macro/Radial Menu category and click on New Macro/New Radial Menu. 3Dconnexion SpaceMouse Pro | 10... - Page 11 The sequence of your macro is editable by dragging the single steps into the right order or deleting steps that are not needed. When you are done editing your macro, click save to automatically assign the new macro to the button from where you opened the panel. 3Dconnexion SpaceMouse Pro | 11...
- Page 12 When creating a new radial menu as a second step you have the option to choose between a four and an eight-section layout. Assign commands or macros to the different sections and save your radial menu. Your new radial menu will be automatically assigned to the button from where you opened the panel. 3Dconnexion SpaceMouse Pro | 12...
-
Page 13: 3Dconnexion Home
3Dconnexion Home Once you have successfully installed the latest 3Dconnexion driver, 3Dconnexion Home gives you access to various 3Dconnexion apps: Trainer: Learn how to quickly use the 3Dconnexion SpaceMouse. Manual: Here you can find the manuals for all 3Dconnexion products. -
Page 14: Technical Specifications
Weight: 665 g / 1.47 lb / 23.46 oz Supported Operating Systems Microsoft Windows, macOS, Linux More information Supported Software More information Package Contents 3Dconnexion SpaceMouse Pro Part Numbers Packaging unit numbers (on packaging): 3DX-700040 Part number (on device): 3DX-600043 3Dconnexion SpaceMouse Pro | 14... -
Page 15: Safety, Compliance And Warranty Information
Safety, Compliance and Warranty Information Manufacturer 3Dconnexion GmbH Clarita-Bernhard-Straße 18 81249 Munich Germany Certifications and Registrations CE, UKCA, EAC, FCC, KC, RCM, BSMI, WEEE, RoHS-EU, RoHS-CN More information Warranty 3-years limited hardware warranty Support 3dconnexion.com/support 3Dconnexion SpaceMouse Pro | 15...


Need help?
Do you have a question about the SpaceMouse Pro and is the answer not in the manual?
Questions and answers