Table of Contents
Advertisement
Advertisement
Table of Contents

Related Manuals for Electrolux EOK86030X


Summary of Contents for Electrolux EOK86030X
- Page 1 user manual Electric built-in oven EOK86030...
-
Page 2: Table Of Contents
2 electrolux Share more of our thinking at www.electrolux.com Contents Safety instructions Description of the Appliance Before using for the first time Oven Operation Using the Oven Usage, Tables and Tips Cleaning and care What to do if … Safety instructions... - Page 3 • Do not get anything caught between the door and the door frame. • Always keep the door seal, the door seal surfaces and the interior clean. Lack of cleanliness in the appliance can lead to dangerous situations. electrolux 3...
- Page 4 4 electrolux • Do not store any flammable materials in- side the oven. These could ignite when the oven is switched on. How to avoid damage to the appliance • Do not line the oven with aluminium foil and do not place a baking tray or saucepan etc.
-
Page 5: Description Of The Appliance
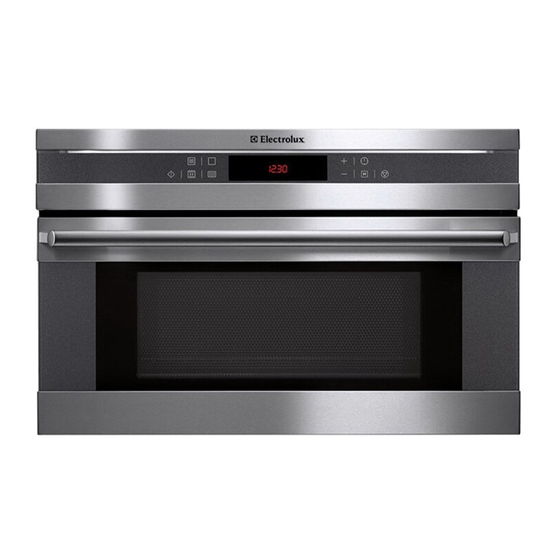
2 minutes, but the light bar remains on. To switch the light bar off, switch the ap- pliance on using the Start switch it off again using the Stop ton (press twice). button and electrolux 5 but-... - Page 6 6 electrolux Control Panel Oven display Function buttons Oven Oven Features...
-
Page 7: Before Using For The First Time
2. Using the button, set the current time. Baking tray For cakes and biscuits. auto- After about 5 seconds, the flashing stops and the clock displays the time of day set. The appliance is now ready to use. electrolux 7... - Page 8 8 electrolux The time can only be modified, if the child safety device is deactivated, none of the clock functions Countdown Cook time or End time oven functions are set. Cleaning for the first time Before you use the oven for the first time, you should clean it thoroughly.
- Page 9 • If the oven door is opened during opera- tion, the function stops. After closing the door continue with the Start the Start 120 seconds, the appliance switches off. electrolux 9 button. If button is not pressed within...
- Page 10 10 electrolux • The oven light is switched on as long as an oven function is started or the oven door is open. The oven light goes off after 10 minutes when the door is open and the appliance switched off.
- Page 11 – at 100 Watt to 600 Watt 0 to 59 mi- nutes. 4. When the Start time set begins to count down. The sym- bol for Cook time electrolux 11 button set the desired button is pressed, the lights up.
- Page 12 12 electrolux – While the time counts down, the power can be changed using the Microwave button. – While the time counts down, using the Clock Functions cooking time can be increased or reduced. When the time has elapsed, an acoustic sig- nal sounds for 2 minutes.
- Page 13 To turn off the acoustic signal: Press any but- ton. Information on power settings The overview indicates at which power set- ting certain processes can be performed. The powers given are guidelines. electrolux 13 buttons the button, the microwave power can button once, button. button twice...
- Page 14 14 electrolux Microwave power 1,000 Watt 900 Watt 800 Watt 700 Watt 600 Watt 500 Watt 400 Watt 300 Watt 200 Watt 100 Watt Inserting the Oven Shelf and the Baking Tray Shelf runner safety and anti-tip device As a shelf runner safety device, all insertable...
- Page 15 After the Keep Warm function has ended, the signal sounds for 2 minutes. The microwave switches itself off. The symbol for Cook time flashes and the display for the clock ap- pears. button, the electrolux 15 button is pressed, the and “min” light up. flashes.
- Page 16 16 electrolux To turn off the acoustic signal: Press any but- ton. Memory Function The Memory Function can be used to save one setting which is used very frequently. 1. Set oven function, temperature and, if necessary, the clock functions Cook time...
- Page 17 • The time set for Cook time time lected function starts. Countdown 1. Press the Clock Functions peatedly until the symbol for Countdown flashes. electrolux 17 begins to count and End begins to count down after the se- button re-...
- Page 18 18 electrolux 2. Using the buttons, set the de- sired countdown (max. 99.00 minutes). After about 5 seconds the display shows the time remaining. The symbol for Countdown lights up. When the time set has elapsed, an acoustic signal sounds for 2 minutes. “0.00” lights up...
- Page 19 “0.00” is displayed and the symbol for Cook time flashes. To turn off the acoustic signal: Press any but- ton. electrolux 19 button, set the desired button is pressed, the lights up. button, the current time can be...
- Page 20 20 electrolux End time 1. Select oven function and temperature us- ing the button. 2. Press the Clock Functions peatedly until the symbol for End time flashes. 3. Using the button, set the desired switch-off time. The symbols for End time light up.
- Page 21 Stop must not be selected. 2. Press Recipes same time until SAFE appears in the dis- play. electrolux 21 button. Residual heat at the same time until the display goes button. at the same time until the display button.
-
Page 22: Usage, Tables And Tips
22 electrolux The child safety device is now activated. Deactivating the child safety device 1. If necessary, switch off appliance using the Stop button. 2. Press Recipes same time until SAFE goes out in the dis- play. The child safety device is now deactivated and the appliance is again ready for use. - Page 23 Baking on one oven level Convection with ring heating element Oven level Temperature 160-170 150-170 160-180 170-190 150-170 electrolux 23 Time Hrs: Mins. °C 0:50-1:10 1:10-1:30 0:25-0:40 0:10-0:25 0:20-0:25...
- Page 24 24 electrolux Type of baking Covered apple tart Apple pie (2 tins Ø 20cm, diagonally off set) Savoury flan (e. g. quiche lorraine) Cheesecake Cakes/pastries/breads on baking trays Plaited bread/bread crown Christmas stollen Bread (rye bread) Cream puffs/éclairs Swiss roll...
- Page 25 2 / 4 2 / 4 2 / 4 2 / 4 Possible cause Convection with ring heating element Oven level Temperature °C 180-200 180-200 electrolux 25 Tempera- Time Hrs: ture in °C Mins. 160-180 0:15-0:35 0:20-0:60 160-180 0:25-0:40 80-100...
- Page 26 26 electrolux Dish Vegetables au gratin Gratinated baguettes Sweet bakes Fish bakes Stuffed vegetables 1) Preheat oven Table Frozen Ready Meals Table Food to be Oven function: cooked Frozen pizza Convection with ring heating ele- ment Convection grilling Chips (300-600 g)
- Page 27 • For grilling, use both the oven shelf and the tray together. with maximum • The grilling times are guidelines. • Grilling is particularly suitable for flat pieces of meat or fish. electrolux 27 Temperature Time Hours: °C Mins. 180-200...
- Page 28 28 electrolux Food to be grilled Rissoles Pork fillet Sausages Fillet steaks, veal steaks Toast Toast with topping 1) Use the grill shelf without a tray Fanned grilling Oven function: Fanned grilling Type of dish Chicken (900-1,000g) Stuffed rolled pork roast...
- Page 29 100°C. (See ta- ble.) Temperature Cooking time until in°C simmering in mins. 160-170 35-45 160-170 35-45 160-170 35-45 160-170 50-60 160-170 50-60 electrolux 29 Time in hours (guideline) 8-12 8-12 9-13 Continue to cook at 100°C in mins. 10-15 10-15 5-10...
- Page 30 30 electrolux Preserve Mixed pickles Kohlrabi, peas, asparagus 1) The times and temperatures for making preserves are for guidance only. 2) Leave standing in oven when switched off Microwave Information about operation General • After switching off the appliance, let the food stand for a few minutes (see Micro- wave Tables: Standing Time).
- Page 31 (Watts) time time (Mins.) (Mins.) 10-12 10-15 5-10 10-15 10-15 10-15 10-15 electrolux 31 Oven Grill Cooking Comments Turn halfway through cooking Turn halfway through cooking time, remove defrosted parts Turn halfway through cooking time, remove defrosted parts Turn halfway through...
- Page 32 32 electrolux Dish Size (g) Chicken 1000 Chicken breast 100-200 Chicken thighs 100-200 Duck 2000 Fish Fish generally Fish fillets Sausage Sliced sausage Dairy products Quark Butter Cheese Cream Cakes/Pastries/Bread Yeast dough 1 piece Cheesecake 1 piece Cake (gateau) 1 piece Dry cake (e.
- Page 33 Cooking Microwave Power Cook Standing (Watts) time time (Mins.) (Mins.) 8-10 electrolux 33 Comments Turn halfway through Turn halfway through Turn halfway through Defrost covered, stir halfway through Defrost covered, stir halfway through Stir halfway through Stir halfway through Stir halfway through...
- Page 34 34 electrolux Dish Size (g) Vegetables, short cook- ing time, fresh Vegetables, short cook- ing time, frozen Vegetables, long cooking time, fresh Vegetables, long cooking time, frozen Boiled potatoes 800 g + 600 ml Rice 300 g + 600 ml 1) Cook all vegetables with a cover on the container.
- Page 35 Next time select a lower power and a longer time. Stir liquids, e. g. soup, halfway through. The quality and function of microwave appli- ances are tested by test institutes using spe- cial dishes. electrolux 35 Oven Time Comments level mins.
- Page 36 36 electrolux Dish Power (Watts) func- Egg custard (12.3.1) Sponge mix (12.3.2) Cooking meat loaf (12.3.3) Potato gratin (12.3.4) Cake (12.3.5) Grilled chicken 1,200 g (12.3.6) Defrosting mince (13.3.) Defrosting raspberries (B. 2.1) Programmes The appliance has 12 programmed func-...
- Page 37 (special accessory). Halfway through the roasting time turn the chicken. After the first acoustic signal, check how the meat is cooking. If necessary, leave it to cook electrolux 37 Time ac- Keep cording Warm to pre-...
-
Page 38: Cleaning And Care
38 electrolux for the remaining roasting time until the sec- ond acoustic signal (approx. 10 min.) sounds. Setting Oven lev- Cleaning and care Warning! For cleaning, the appliance must be switched off and cooled down. Warning! For safety reasons, do not... - Page 39 See Safety Cut-out Check fuse If the fuses trip several times, please call a qualified electri- cian Close the oven door Clean door seals and door seal sur- faces Press the Start button. Replace oven light bulb electrolux 39 Remedy...
-
Page 40: Electrical Connection
40 electrolux Problem ”d” is lit in the display and Test mode is switched on the oven is not heating up Fan not operating If you are unable to remedy the problem by following the above suggestions, please contact your dealer or the Cus- tomer Care Department. - Page 41 • The site must provide a connection to the electrical supply by means of a socket that is accessible and outside the coordination space. • Anti-shock protection must be provided by the installation. • The built-in unit must meet the stability re- quirements of DIN 68930. electrolux 41...
- Page 42 42 electrolux...
- Page 43 43...
- Page 44 44 electrolux H05VV-F H05RR-F min.1,60m alternativ...
- Page 45 45...
-
Page 46: Disposal
Guarantee/Customer Service GREAT BRITAIN & IRELAND Standard guarantee conditions We, Electrolux, undertake that if within 12 months of the date of the purchase this Elec- trolux appliance or any part thereof is proved to be defective by reason only of faulty work- The packaging material is environmen- tally-friendly and recyclable. -
Page 47: European Guarantee
• The appliance has not been serviced, maintained, repaired, taken apart or tam- pered with by any person not authorised by us. • Electrolux Service Force Centre must un- dertake all service work under this guar- antee • Any appliance or defective part replaced shall become the Company's property. -
Page 48: Service
48 electrolux • The appliance guarantee is for the same period and to the same extent for labour and parts as exists in your new country of residence for this particular model or range of appliances. • The appliance guarantee is personal to the original purchaser of the appliance and cannot be transferred to another user. - Page 49 49...
- Page 50 50 electrolux...
- Page 51 51...
- Page 52 To buy accessories, consumables and spare parts at our online shop please visit: www.electrolux.co.uk 315919213-B-1108...