Table of Contents
Advertisement
Available languages
Available languages
Quick Links
Advertisement
Table of Contents

Subscribe to Our Youtube Channel
Related Manuals for EuroLite LED PIX-12


Summary of Contents for EuroLite LED PIX-12
- Page 2 2/44 00106934, Version 1.0...
-
Page 3: Table Of Contents
Control Board DMX-CONTROLLED OPERATION ..........................32 DMX-Mode DMX protocol EUROLITE IR-7 remote control CLEANING AND MAINTENANCE ........................... 41 Replacing the fuse TECHNICAL SPECIFICATIONS ............................41 Diese Bedienungsanleitung gilt für die Artikelnummer / This user manual is valid for the article number:... -
Page 4: Einführung
- sich die letzte Version der Anleitung im Internet herunter laden EINFÜHRUNG Wir freuen uns, dass Sie sich für eine EUROLITE LED PIX-12 HCL Leiste entschieden haben. Wenn Sie nachfolgende Hinweise beachten, sind wir sicher, dass Sie lange Zeit Freude an Ihrem Kauf haben werden. - Page 5 Bitte überprüfen Sie vor der ersten Inbetriebnahme, ob kein offensichtlicher Transportschaden vorliegt. Sollten Sie Schäden an der Netzleitung oder am Gehäuse entdecken, nehmen Sie das Gerät nicht in Betrieb und setzen sich bitte mit Ihrem Fachhändler in Verbindung. Der Aufbau entspricht der Schutzklasse I. Der Netzstecker darf nur an eine Schutzkontakt-Steckdose angeschlossen werden, deren Spannung und Frequenz mit dem Typenschild des Gerätes genau übereinstimmt.
-
Page 6: Bestimmungsgemäße Verwendung
BESTIMMUNGSGEMÄßE VERWENDUNG Bei diesem Gerät handelt es sich um einen Effektstrahler, mit dem sich dekorative Lichteffekte erzeugen lassen. Dieses Produkt ist für den Anschluss an 100-240 V, 50/60 Hz Wechselspannung zugelassen und wurde ausschließlich zur Verwendung in Innenräumen konzipiert. Dieses Gerät ist für professionelle Anwendungen, z. B. auf Bühnen, in Diskotheken, Theatern etc. vorgesehen. -
Page 7: Gerätebeschreibung
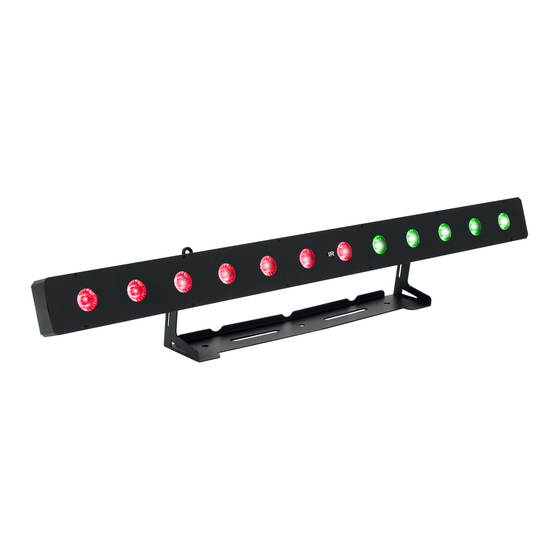
Mikrofonempfindlichkeit über Control Board einstellbar • Komfortable Adressierung und Einstellung über Control-Board mit vier Bedientasten und LED- • Anzeige Zusätzliche Steuermöglichkeit über EUROLITE IR-7 Fernsteuerung, im Lieferumfang enthalten • Funktionen: statische Farben, RGBAWUV-Farbmischung, Farbtemperatur-Einstellungen, interne • Programme, Dimmer und Strobe-Einstellungen, Master/Slave Ausgestattet mit 12 x 10-W-HCL-LED in den Farben rot, grün, blau, amber, weiß... -
Page 8: Installation
POWER IN POWER OUT DMX OUT (4) Feststellhebel (5) DMX Eingang (6) DMX Ausgang (7) LED Display mit Bedienungstasten (8) Mikrofon (9) Spannungsversorgungseingang (10) Sicherungshalter (11) Power out (12) Fangsicherung INSTALLATION Das Gerät kann sowohl hängend als auch stehend installiert werden. Überkopfmontage LEBENSGEFAHR! Bei der Installation sind insbesondere die Bestimmungen der BGV C1 und EN 60598-2-17 zu... - Page 9 WICHTIG! ÜBERKOPFMONTAGE ERFORDERT EIN HOHES MASS AN ERFAHRUNG. Dies beinhaltet (aber beschränkt sich nicht allein auf) Berechnungen zur Definition der Tragfähigkeit, verwendetes Installationsmaterial und regelmäßige Sicherheitsinspektionen des verwendeten Materials und des Gerätes. Versuchen Sie niemals, die Installation selbst vorzunehmen, wenn Sie nicht über eine solche Qualifikation verfügen, sondern beauftragen Sie einen professionellen Installateur.
-
Page 10: Dmx512-Ansteuerung
DMX512-Ansteuerung Achten Sie darauf, dass die Adern der Datenleitung an keiner Stelle miteinander in Kontakt treten. Die Geräte werden ansonsten nicht bzw. nicht korrekt funktionieren. Beachten Sie, dass die Startadresse abhängig vom verwendeten Controller ist. Unbedingt Bedienungsanleitung des verwendeten Controllers beachten. Gerät 3 Gerät 2 Gerät 1... -
Page 11: Master/Slave-Betrieb
Master/Slave-Betrieb Im Master/Slave-Betrieb lassen sich mehrere Geräte synchronisieren, die dann von einem Mastergerät gesteuert werden. An der Rückseite des Gerätes befindet sich eine XLR-Einbaubuchse und ein XLR-Einbaustecker, über die sich mehrere Geräte miteinander verbinden lassen. Wählen Sie das Gerät aus, das zur Steuerung der Effekte dienen soll. Dieses Gerät arbeitet dann als Master-Gerät und steuert alle weiteren Slave-Geräte, die über ein DMX-Kabel mit dem Master-Gerät verbunden werden. -
Page 12: Bedienung
BEDIENUNG Wenn Sie das Gerät an die Spannungsversorgung angeschlossen haben, nimmt die LED PIX-12 HCL Leiste den Betrieb auf. Das Display leuchtet auf und Sie können die gewünschten Einstellungen mit den Tasten MODE, ENTER, UP und DOWN auswählen. Das Gerät hat zwei Betriebsarten. Es kann entweder im Standalone-Modus über das Control Board und die EUROLITE IR-7 Fernbedienung oder im DMX-gesteuerten Modus über einen handelsüblichen DMX-Controller... - Page 13 Display Programm Funktion Auswählen des DMX-Kanal-Modus Einstellen der DMX-Startadresse d 001-d 509 4-Kanal DMX Modus d 001-d 507 6-Kanal DMX Modus 16CH d 001-d 497 16-Kanal DMX Modus 36CH d 001-d 477 36-Kanal DMX Modus 74CH d 001-d 439 74-Kanal DMX Modus C01 –...
-
Page 14: Dmx-Gesteuerter Betrieb
Geräte auf eine Adresse definiert, arbeiten sie synchron. Ansteuerung Nachdem Sie die Startadresse definiert haben, können Sie die LED PIX-12 HCL Leiste über Ihren Controller ansteuern. Die LEDs des Gerätes sind in jeweils 12 Pixels aufgeteilt, die mit dem folgenden DMX-Protokoll individuell gesteuert werden können. -
Page 15: Dmx-Protokoll
DMX-Protokoll 4-Kanal-Modus Kanal: Wert: Funktion: 000 - 255 Dimmer 000 - 255 Farbvoreinstellungen * 000 - 255 Pixel-Kombinationen (mit CH2) * 000 - 009 Keine Funktion 010 - 119 Auto-Modus über DMX, mit zunehmender Geschwindigkeit Musikgesteuerter Modus über DMX, mit zunehmender 120 - 255 Geschwindigkeit * = Bitte siehe Anhang nach DMX Protokoll... - Page 16 36-Kanal-Modus Kanal: Wert: Funktion: 000 - 255 000 - 255 Grün 000 - 255 Blau Pixel 1 + 2 000 - 255 Weiß 000 - 255 Amber 000 - 255 000 - 255 000 - 255 Grün 000 - 255 Blau Pixel 3 + 4 000 - 255...
- Page 17 74-Kanal-Modus Kanal: Wert: Funktion: 000 - 255 Dimmer 000 - 009 Keine Funktion 010 - 255 Strobeeffekt mit zunehmender Geschwindigkeit 000 - 255 000 - 255 Grün 000 - 255 Blau Pixel 1 000 - 255 Weiß 000 - 255 Amber 000 - 255 000 - 255...
- Page 18 000 - 255 000 - 255 Grün Pixel 7 000 - 255 Blau 000 - 255 Weiß 000 - 255 Amber 000 - 255 000 - 255 000 - 255 Grün 000 - 255 Blau Pixel 8 000 - 255 Weiß...
- Page 19 4-Kanal-Modus Kanal 2: Farbvoreinstellungen Kanal 3: Pixel-Kombinationen Keine Funktion 10-19 20-29 Grün 30-39 Blau 40-49 Weiß 50-59 Amber 60-69 70-79 Rot + Grün 80~89 Rot + Blau 90-99 Rot + Weiß 100-109 Rot + Amber 110~119 Rot + UV 120-129 Grün + Blau 130-139 Grün + Weiß...
- Page 20 124-129 Pixel 1+2+3+4+5+6+7+8 130-135 Pixel 1+2+3+4+5+6+7+8+9 136-141 Pixel 1+2+3+4+5+6+7+8+9+10 142-147 Pixel 1+2+3+4+5+6+7+8+9+10+11 148-153 Pixel 1+2+3+4+5+6+7+8+9+10+11+12 154-159 Pixel 12 160-165 Pixel 11+12 166-171 Pixel 10+11+12 172-177 Pixel 9+10+11+12 178-183 Pixel 8+9+10+11+12 184-189 Pixel 7+8+9+10+11+12 190-195 Pixel 6+7+8+9+10+11+12 196-201 Pixel 5+6+7+8+9+10+11+12 202-207 Pixel 4+5+6+7+8+9+10+11+12 208-213 Pixel 3+4+5+6+7+8+9+10+11+12...
-
Page 21: Fernbedienung Eurolite
Fernbedienung EUROLITE IR-7 Das Gerät muss für die Ansteuerung per Fernbedienung aktiviert werden. Unter Menüpunkt InFr, drücken Sie die ENTER-Taste zur Aktivierungs-Bestätigung. Halten Sie beim Betätigen einer Taste die Fernbedienung immer in Richtung des Sensors auf der Gerätevorderseite. Zwischen der Fernbedienung und dem Sensor muss Sichtverbindung bestehen. -
Page 22: Reinigung Und Wartung
REINIGUNG UND WARTUNG LEBENSGEFAHR! Vor Wartungsarbeiten unbedingt allpolig vom Netz trennen! Das Gerät sollte regelmäßig von Verunreinigungen wie Staub usw. gereinigt werden. Verwenden Sie zur Reinigung ein fusselfreies, angefeuchtetes Tuch. Auf keinen Fall Alkohol oder irgendwelche Lösungsmittel zur Reinigung verwenden! Im Geräteinneren befinden sich außer der Sicherung keine zu wartenden Teile. -
Page 23: Technische Daten
Gewicht: 5 kg Zubehör: Best.-Nr. EUROLITE TPC-10 Klammer, silber 59006856 EUROLITE Sicherungsseil A 4x1000mm bis 15kg silber 58010320 EUROLITE DMX Kabel XLR 3pol 3m schwarz 3022785H PSSO DMX Kabel XLR 3pol 3m schwarz Neutrik 30227810 SOMMER CABLE DMX Kabel XLR 3pol 3m schwarz Hicon... -
Page 24: Introduction
- download the latest version of the user manual from the Internet INTRODUCTION Thank you for having chosen a EUROLITE LED PIX-12 HCL Bar. If you follow the instructions given in this manual, we are sure that you will enjoy this device for a long period of time. -
Page 25: Operating Determinations
This device falls under protection-class I. The power plug must only be plugged into a protection class I outlet. The voltage and frequency must exactly be the same as stated on the device. Wrong voltages or power outlets can lead to the destruction of the device and to mortal electrical shock. Always plug in the power plug last. - Page 26 This device must never be operated or stockpiled in surroundings where splash water, rain, moisture or fog may harm the device. Moisture or very high humidity can reduce the insulation and lead to mortal electrical shocks. When using smoke machines, make sure that the device is never exposed to the direct smoke jet and is installed in a distance of 0.5 meters between smoke machine and device.
-
Page 27: Description Of The Device
• Comfortable addressing and setting via control board with LED display and four operating buttons • Additional controlling possibility via the EUROLITE IR-7 remote control, included in delivery • Functions: Static colors, RGBAWUV color blend, color temperature settings, internal programs, •... -
Page 28: Installation
POWER IN POWER OUT DMX OUT (4) Fixation lever (5) DMX in (6) DMX out (7) LED display with operating buttons (8) Microphone (9) Power supply (10) Fuse holder (11) Power out (12) Attachment eyelet INSTALLATION The device can be installed on the ground or on the wall or ceiling. Overhead rigging DANGER TO LIFE! Please consider the EN 60598-2-17and the respective national standards during the installation! -
Page 29: Dmx512 Control
IMPORTANT! OVERHEAD RIGGING REQUIRES EXTENSIVE EXPERIENCE, including (but not limited to) calculating working load limits, installation material being used, and periodic safety inspection of all installation material and the device. If you lack these qualifications, do not attempt the installation yourself, but instead use a professional structural rigger. -
Page 30: Master/Slave Operation
Device 3 Device 2 Device 1 Starting address 9 Starting address 5 Starting address 1 POWER IN POWER OUT POWER IN POWER OUT POWER IN POWER OUT DMX OUT DMX OUT DMX OUT 120 Ohms DMX-512 Controller Only use a DMX cable and 3-pin XLR plugs and connectors in order to connect the controller with the fixture or one fixture with another. -
Page 31: Connection With The Mains
Lighting effects must not be connected to dimming-packs. OPERATION After you connected the device to the mains, the EUROLITE LED PIX-12 HCL Bar starts running. The display lights up and you can choose the desired mode via the buttons MODE, ENTER, UP and DOWN. - Page 32 Display Program Description Setting DMX channel mode DMX address setting d 001-d 509 4-Channel DMX Mode d 001-d 507 6-Channel DMX Mode 16CH d 001-d 497 16-Channel DMX Mode 36CH d 001-d 477 36-Channel DMX Mode d 001-d 439 74-Channel DMX Mode 74CH C01 –...
-
Page 33: Dmx-Controlled Operation
If several devices are addressed similarly, they will work synchronically. Controlling After having addressed the LED PIX-12 HCL Bar, you may now start operating it via your lighting controller. The LEDs of the device are separated into 12 pixels on the main panel, which can be individually controlled with the following DMX-protocol. -
Page 34: Dmx Protocol
DMX protocol 4 channel mode Channel: Value: Function: 000 - 255 Dimmer 000 - 255 Color presets * 000 - 255 Pixel combinations (with CH2) * 000 - 009 No function 010 - 119 Auto mode via DMX with increasing speed 120 - 255 Sound mode via DMX with increasing speed * = Please see graphic after DMX protocol... - Page 35 36 channel mode Channel: Value: Function: 000 - 255 000 - 255 Green 000 - 255 Blue Pixel 1 + 2 000 - 255 White 000 - 255 Amber 000 - 255 000 - 255 000 - 255 Green 000 - 255 Blue Pixel 3 + 4 000 - 255...
- Page 36 74 channel mode Channel: Value: Function: 000 - 255 Dimmer 000 - 009 No function 010 - 255 Strobe with increasing speed 000 - 255 000 - 255 Green 000 - 255 Blue Pixel 1 000 - 255 White 000 - 255 Amber 000 - 255 000 - 255...
- Page 37 000 - 255 000 - 255 Green Pixel 7 000 - 255 Blue 000 - 255 White 000 - 255 Amber 000 - 255 000 - 255 000 - 255 Green 000 - 255 Blue Pixel 8 000 - 255 White 000 - 255 Amber...
- Page 38 ( * ) 4 channel mode Channel 2: Color presets Channel 3: Pixel combinations No function 10-19 20-29 Green 30-39 Blue 40-49 White 50-59 Amber 60-69 70-79 Red + Green 80~89 Red + Blue 90-99 Red + White 100-109 Red + Amber 110~119 Red + UV 120-129...
- Page 39 124-129 Pixel 1+2+3+4+5+6+7+8 130-135 Pixel 1+2+3+4+5+6+7+8+9 136-141 Pixel 1+2+3+4+5+6+7+8+9+10 142-147 Pixel 1+2+3+4+5+6+7+8+9+10+11 148-153 Pixel 1+2+3+4+5+6+7+8+9+10+11+12 154-159 Pixel 12 160-165 Pixel 11+12 166-171 Pixel 10+11+12 172-177 Pixel 9+10+11+12 178-183 Pixel 8+9+10+11+12 184-189 Pixel 7+8+9+10+11+12 190-195 Pixel 6+7+8+9+10+11+12 196-201 Pixel 5+6+7+8+9+10+11+12 202-207 Pixel 4+5+6+7+8+9+10+11+12 208-213 Pixel 3+4+5+6+7+8+9+10+11+12...
-
Page 40: Eurolite Ir-7 Remote Control
EUROLITE IR-7 remote control The device must be activated for remote control. For this, under menu item InFr, press the ENTER button to confirm activation. When actuating a button, always hold the remote control in the direction of the sensor. There must be visual connection between the remote control and the sensor. -
Page 41: Cleaning And Maintenance
CLEANING AND MAINTENANCE DANGER TO LIFE! Disconnect from mains before starting maintenance operation! We recommend a frequent cleaning of the device. Please use a soft lint-free and moistened cloth. Never use alcohol or solvents! There are no serviceable parts inside the device except for the fuse. Maintenance and service operations are only to be carried out by authorized dealers. - Page 42 Accessories: EUROLITE TPC-10 Coupler, silver No. 59006856 EUROLITE Safety bond A 4x1000mm up to 15kg silver No. 58010320 EUROLITE DMX cable XLR 3pin 3m black No. 3022785H PSSO DMX cable XLR 3pin 3m black Neutrik No. 30227810 SOMMER CABLE DMX cable XLR 3pin 3m black Hicon No.
- Page 44 Eurolite is a brand of Steinigke Showtechnic GmbH Andreas-Bauer-Str. 5 97297 Waldbüttelbrunn Germany D00106934 Version 1.0 Publ. 28/03/2017...
Need help?
Do you have a question about the LED PIX-12 and is the answer not in the manual?
Questions and answers