Table of Contents
Advertisement
Available languages
Available languages
Quick Links
Advertisement
Chapters
Table of Contents

Subscribe to Our Youtube Channel
Related Manuals for Candy CDG6MB


Summary of Contents for Candy CDG6MB
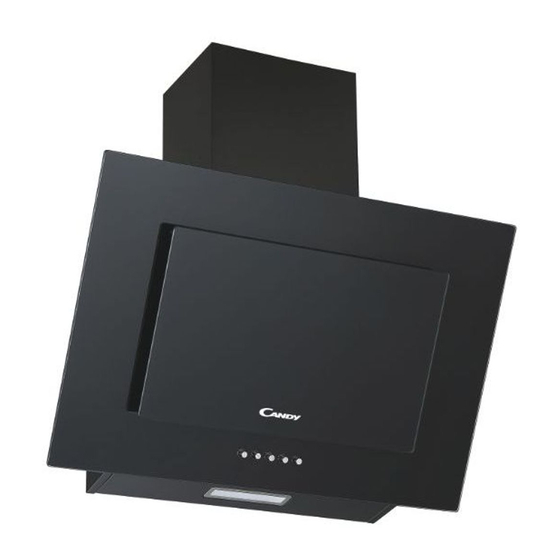
- Page 1 CDG6MB Cooker Hood Instruction Manual ...
-
Page 2: Table Of Contents
Content 1…………………………………..………………………………Safetyinstructions 2…………………………………..………………………………Installation 3…………………………………..………………………………Startusingyourcookerhood 4…………………………………..………………………………Troubleshooting 5…………………………………..………………………………Maintenanceandcleaning 6…………………………………..………………………………Environmentprotection ... -
Page 3: SafetyInstructions
SAFETY INSTRUCTIONS hismanualexplainstheproperinstallationanduseofyourcookerhood, pleasereaditcarefullybeforeusingevenifyouarefamiliarwiththeproduct. Themanualshouldbekeptinasafeplaceforfuturereference. Nevertodo: Alwaystodo: o not try to use the cooker hood mportant! Always switch off the ● ● without the grease filters or if the filters electricity supply at the mains during are excessively greasy! installation and maintenance such as light bulb replacement. - Page 4 Alwaystodo: Alwaystodo: lways put lids on pots and pans aution: The appliance and its ● ● when cooking on a gas cooker. accessible parts can become hot during operation. Be careful to avoid hen in extraction mode, air in the ●...
-
Page 5: Installation
INSTALLATION (VENT OUTSIDE) MOUNTING OF THE V-FLAP(not supplied) If the cooker hood does not have an assembled V-flap 1, you should mount the half- parts to its body. The images only show an example of how to mount the V-flap, because the outlet may vary according to different models and configurations. To mount the V-flap 1 you should: •... - Page 6 3. After decide the cooker hood height, measure the position of the holes for hanging hood,inside chimney bracket ,outside chimney bracket and safety holes. Drill 8 φ8 holes and insert wall plugs into the holes. Fix the inside chimney bracket on the wall with 2pcs ST4 x 40mm screws.Screw 2pcs ST4 x 8mm screws in the hole for hanging the hood body and the screws installed should leave for 3-5mm out of the wall to hang the hood.The fixed position of the inside chimney bracket is the...
- Page 7 6. Install the outside chimney bracket onto the outside chimney with 2pcs ST4*8mm screws, here should be sure the inside chimney can be flexed freely.See Pic 5. 7. Fix the cooker hood with 2pcs ST4*30mm safety screws. Note: The two safety vents are positioned on the back housing, with a diameter of 6mm.Put the two chimneys onto the cooker hood, fix the outside chimney on the wall with 2pcs ST4*40mm screws and lead the expansion pipe to the outside.
- Page 8 HINTS FOR EXHAUST DUCT INSTALLATION The following rules must be strictly followed to obtain optimal air extraction: • Keep exhaust duct short and straight • Do not reduce the size or restrict the exhaust duct • When using the flexible duct always install the duct pulled taut to minimize pressure loss.
-
Page 9: StartUsingYourCookerHood
Start Using Your Cooker Hood Push button 1. Push the stop button, and the motor will stop. 2. Push the low button, and the motor will run at low speed. 3. Push the middle button, and the motor will run at mid speed. 4. Push the high button, and the motor will run at high speed. 5. -
Page 10: MaintenanceAndCleaning
MAINTENANCE AND CLEANING Caution: • Before maintenance or cleaning is carried out, the cooker hood should be disconnected from the mains power supply. Ensure that the cooker hood is switched off at the wall socket. • External surfaces are susceptible to scratches and abrasions, so please follow the cleaning instructions to ensure the best possible result is achieved without damage. - Page 11 INSTALLING GREASE MESH FILTERS • To install filters for the following four steps: - Angle the filter into the slots at the back of the hood. - Push the button on the handle of the filter. - Release the handle once the filter fits into a resting position. - Repeat to install all filters.
- Page 12 BULB REPLACEMENT Important : The bulb must be replaced by the manufacturer, its service agent or similarly qualified persons. Always switch off the electricity supply before carrying out any operations on the appliance. When handling bulb, make sure it has completely cooled down before any direct contact with hands.
-
Page 13: EnvironmentProtection
ENVIRONMENTAL PROTECTION: This product is marked with the symbol on the selective sorting of waste electronic equipment. This means that this product must not be disposed of with household waste but must be supported by a system of selective collection in accordance with Directive 2012/19/EU. - Page 14 CDG6MB Απορροφητήρας Εγχειρίδιο οδηγιών χρήσης...
- Page 15 Περιεχόμενα ΟΔΗΓΙΕΣ ΑΣΦΑΛΕΙΑΣ ....................3 ΤΟΠΟΘΕΤΗΣΗ (ΕΞΩΤΕΡΙΚΟΣ ΕΞΑΕΡΙΣΜΟΣ) .............. 5 ΑΡΧΙΣΤΕ ΝΑ ΧΡΗΣΙΜΟΠΟΙΕΙΤΕ ΤΟΝ ΑΠΟΡΡΟΦΗΤΗΡΑ ΣΑΣ ........9 ΑΝΤΙΜΕΤΩΠΙΣΗ ΠΡΟΒΛΗΜΑΤΩΝ ................. 9 ΣΥΝΤΗΡΗΣΗ ΚΑΙ ΚΑΘΑΡΙΣΜΟΣ .................. 10 ΠΡΟΣΤΑΣΙΑ ΤΟΥ ΠΕΡΙΒΑΛΛΟΝΤΟΣ: ................13...
-
Page 16: Οδηγιεσ Ασφαλειασ
ΟΔΗΓΙΕΣ ΑΣΦΑΛΕΙΑΣ Αυτό το εγχειρίδιο εξηγεί την σωστή εγκατάσταση και χρήση του απορροφητήρα σας, διαβάστε το προσεκτικά πριν τον χρησιμοποιήσετε ακόμη και αν είστε εξοικειωμένοι με το προϊόν. Το εγχειρίδιο πρέπει να φυλάσσεται το σε ένα ασφαλές μέρος για μελλοντική αναφορά. Ποτέ... - Page 17 Πάντα να το κάνετε αυτό: Πάντα να το κάνετε αυτό: Σιγουρευτείτε ότι οι αγωγοί δεν Αυτή η συσκευή μπορεί να ● ● έχουν γωνίες πιο κλειστές από 90 χρησιμοποιηθεί από παιδιά ηλικίας 8 μοίρες γιατί αυτό θα μειώσει την ετών ή μεγαλύτερα και από άτομα με αποδοτικότητα...
-
Page 18: Τοποθετηση (Εξωτερικοσ Εξαερισμοσ)
Πάντα να το κάνετε αυτό: Πάντα να το κάνετε αυτό: Καθαρίζετε περιοδικά την συσκευή Όταν λειτουργούν ταυτόχρονα ο ● ● σας ακολουθώντας την μέθοδο που απορροφητήρας και οι συσκευές αναφέρεται στο κεφάλαιο που τροφοδοτούνται με ενέργεια ΣΥΝΤΗΡΗΣΗ. εκτός από την ηλεκτρική ενέργεια, η Για... - Page 19 ΕΓΚΑΤΑΣΤΑΣΗ Εάν έχετε μία έξοδο προς το εξωτερικό, ο απορροφητήρας σας μπορεί να συνδεθεί σύμφωνα με την εικόνα που ακολουθεί μέσω μίας διόδου απαγωγής (εύκαμπτος σωλήνας εμαγιέ ή αλουμινίου, ή από πυρίμαχο υλικό με μία εσωτερική διάμετρο 150mm) 1. Πριν από την εγκατάσταση, απενεργοποιήστε την μονάδα. 2.
- Page 20 4. Τοποθετήστε το v-flap (δεν περιλαμβάνεται) και τον σωλήνα προέκτασης (δεν περιλαμβάνεται) επάνω στον απορροφητήρα. Στηρίξτε τον σωλήνα προέκτασης επάνω στην έξοδο με ένα δεματικό. Παρακαλώ σημειώστε: Ο σωλήνας προέκτασης και το v-flap δεν περιλαμβάνονται στο προϊόν. Δείτε την Εικ 3. 5.
- Page 21 Ο εγκαταστάτης πρέπει να εξασφαλίσει ότι έχει γίνει η σωστή ηλεκτρική σύνδεση και ότι είναι σύμφωνη με το ηλεκτρικό διάγραμμα. Το καλώδιο δεν πρέπει να τσακίζει ή να συμπιέζεται. Ελέγχετε τακτικά το φις και το καλώδιο τροφοδοσίας για τυχόν ζημιές. Εάν...
-
Page 22: Αρχιστε Να Χρησιμοποιειτε Τον Απορροφητηρα Σασ
ΠΡΟΕΙΔΟΠΟΙΗΣΗ: Για λόγους ασφαλείας, χρησιμοποιήστε μόνο το ίδιο μέγεθος βιδών στήριξης ή στερέωσης που συνιστάται σε αυτό το εγχειρίδιο οδηγιών χρήσης. Η αποτυχία τοποθέτησης των βιδών ή της συσκευής συγκράτησης σύμφωνα με αυτές τις οδηγίες μπορεί να έχει σαν αποτέλεσμα την ηλεκτροπληξία. -
Page 23: Συντηρηση Και Καθαρισμοσ
Βλάβη Πιθανή αιτία Λύση Η απόσταση μεταξύ του Ανεπαρκής απορροφητήρα και των Τοποθετήστε ξανά τον απορροφητήρα αναρρόφηση αναθυμιάσεων είναι πολύ στην σωστή απόσταση. μεγάλη Ο απορροφητήρας Η βίδα στήριξης δεν είναι αρκετά Σφίξτε την βίδα για το κρέμασμα και γέρνει σφιγμένη... - Page 24 ΦΙΛΤΡΑ ΠΛΕΓΜΑΤΟΣ ΛΙΠΟΥΣ Τα φίλτρα πλέγματος μπορούν να καθαριστούν με το χέρι. Μουλιάστε τα για περίπου 3 λεπτά σε νερό με ένα ήπιο καθαριστικό και μετά βουρτσίστε τα ελαφρά με μία μαλακή βούρτσα. Μην ασκείτε υπερβολική πίεση, αποφύγετε την πρόκληση ζημιάς σε αυτά. (Αφήστε τα να στεγνώσουν...
- Page 25 ΑΝΤΙΚΑΤΑΣΤΑΣΗ ΛΑΜΠΤΗΡΑ Ο λαμπτήρας πρέπει να αντικατασταθεί από τον κατασκευαστή, τον εξουσιοδοτημένο επισκευαστή του ή από άτομα με παρόμοια τεχνική κατάρτιση. Να απενεργοποιείτε πάντα την παροχή ηλεκτρικού ρεύματος πριν εκτελέσετε οποιαδήποτε εργασία στην συσκευή. Όταν χειρίζεστε ένα λαμπτήρα, βεβαιωθείτε ότι...
-
Page 26: Προστασια Του Περιβαλλοντοσ
Εικ. 1 Εικ. 2 Εικ. 3 Εικ. 4 Εικ. 5 ΠΡΟΣΤΑΣΙΑ ΤΟΥ ΠΕΡΙΒΑΛΛΟΝΤΟΣ: Αυτό το προϊόν φέρει το σύμβολο για την επιλεκτική διαλογή του άχρηστου ηλεκτρονικού εξοπλισμού. Αυτό σημαίνει ότι αυτό το προϊόν δεν πρέπει να απορρίπτεται μαζί με τα οικιακά απορρίμματα αλλά πρέπει...
Need help?
Do you have a question about the CDG6MB and is the answer not in the manual?
Questions and answers