Table of Contents
Advertisement
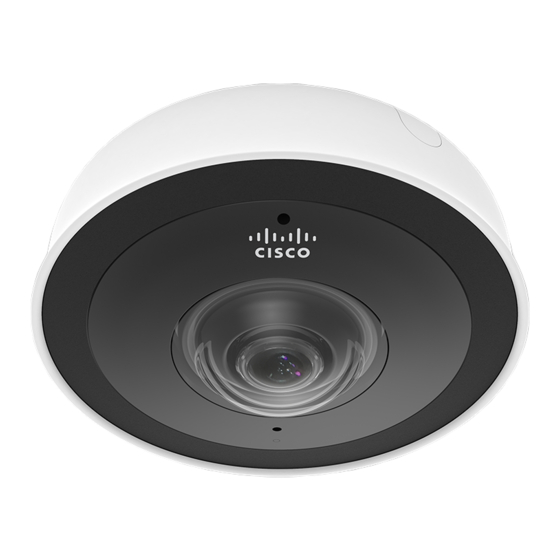
MV32 Installation Guide
MV32 Overview
The Cisco Meraki MV32 is a network fisheye camera that is exceptionally simple to deploy and configure due to its
integration into the Meraki Dashboard and the use of cloud augmented edge storage. The MV family eliminates complex
and costly servers and video recorders required by traditional solutions which removes the limitations typically placed on
video surveillance deployments.
Before mounting to any surface, ensure you have read through the
placement guidelines
below to ensure best field of
view.
Package Contents
In addition to the MV camera, the following are provided:
1
Advertisement
Table of Contents

Related Manuals for Cisco Meraki MV32


Summary of Contents for Cisco Meraki MV32
- Page 1 MV32 Overview The Cisco Meraki MV32 is a network fisheye camera that is exceptionally simple to deploy and configure due to its integration into the Meraki Dashboard and the use of cloud augmented edge storage. The MV family eliminates complex and costly servers and video recorders required by traditional solutions which removes the limitations typically placed on video surveillance deployments.
- Page 2 From top-left to bottom-right: • 1 x MV32 • 1 x base mount wall template • 1 x base mount plate • 1 x T6 Torx key • 3 x wall screws • 3 x wall anchors...
-
Page 3: Powering The Mv32
Note: Power over Ethernet supports a maximum cable length of 300 ft (100 m). Placement Guidelines The Meraki MV32 is a fisheye camera boasting a full 360 degree field-of-view of the area underneath the camera. The resulting camera image provides an expansive view of its nearby surroundings. This becomes extremely useful when you want to capture an overview of your entire scene and can take the place of multiple cameras. -
Page 4: General Guidelines
2. What distance from the camera’s center is this level of detail required? 3. Are there any restrictions around mounting cameras to walls and/or ceilings? We recommend utilizing the fisheye camera to detect an event of interest, and a fixed lens or varifocal camera to identify key details for further action. - Page 5 • 10 to 20 feet: At this distance, object and person identification is still possible, however some details will be lost.
- Page 6 • 20 to 40 feet: At this distance, details will be lost and identification of objects or people will become difficult. Smaller objects may become invisible. If identification is needed at these distances, consider supplementing your camera design with additional cameras.
- Page 7 Understanding the amount of detail required at a specific radius extending from your fisheye camera will allow proper planning and design of your security camera system. Frequently Asked Questions Can I mount the MV32 on the wall? If placed on a wall, half of the camera’s field of view will face the perpendicular ceiling. This does not properly use of the 360-degree field of view of this camera.
- Page 8 Furthermore, the camera’s computer vision analytics function on training algorithms based on a top-down view of its surroundings. Orientations differing from this model will limit the performance of the camera’s analytics. Therefore, it is not recommended to install the MV32 perpendicular to the ground. What happens if I place the camera on a surface higher than the recommended 10-14 ft? Mounting the MV32 higher than the recommended maximum height of 14 feet will result in decreased image quality of the surrounding area and impact the performance of the built-in people detection analytics.
-
Page 9: Pre-Install Preparation
Pre-Install Preparation You should complete the following steps before going on-site to perform an installation: Configure Your Network in Dashboard The following is a brief overview only of the steps required to add an MV32 to your network. For detailed instructions about creating, configuring and managing Meraki Camera networks, refer to the online documentation (https://documentation.meraki.com/MV). -
Page 10: Mounting Instructions
1. First route the Ethernet cable through the ceiling surface or ceiling tile hole. Position the mounting template such that the "Meraki MV32" text is aligned with your desired image orientation. This could mean orienting the image to align North-to-South or with objects of interest within the field of view. - Page 11 It is important that care is taken during this step! The image sensor on the fisheye camera is fixed. Once physical installation is complete, the image can only be rotated by 180 degrees in software and no other adjustments can be made. Note: Never attempt to open the camera dome to adjust the lens rotation.
- Page 12 2. Connect PoE cable to camera. For cables that will exit out the side of the camera, remove the mouse hole cover before routing the cable.
- Page 13 3. Slide camera over top of mount plate and rotate onto mount plate hooks.
- Page 14 4. Remove the protective cover to expose the dome, security screw hole, status LED, and microphone.
- Page 15 5. Secure Torx safety screw with provided Torx key.
- Page 16 5. Observe the status LED on the left side of the camera lens assembly and ensure the camera is connected via Ethernet (solid green) or WiFi (solid blue). A MV must first be provisioned over a wired Ethernet connection before it can be deployed wirelessly.
- Page 17 The various status conditions of a MV are indicated by the following colors and patterns: • Rainbow (solid, rotating through colors) - MV is booting up. • Flashing Blue - MV is searching for WiFi network(s). • Flashing Green - MV is upgrading or initializing for the first time. •...
Need help?
Do you have a question about the Meraki MV32 and is the answer not in the manual?
Questions and answers